If you’ve followed along on this series, we’ve finished work on the kirtle, outer gown, and foresleeves. Now, it’s time to indulge in all things dramatic and sparkly and wonderful: the plaquette. The plaquette is a stiffened panel that attaches to the front of the gown to hide the center front lacing of the gown while creating the smooth front characteristic of a Henrician gown.
The plaquette has a rounded shape on top and a pointed shape at the bottom and the sides should line up near the side seams of the gown bodice. It requires stiffening lengthwise to hold its general shape but needs to be moldable or soft widthwise to hug around the front body. Ideally, the kirtle and outer gown are providing all of the body shaping. So though the plaquette is stiffened, it’s for decorative purposes in the end.
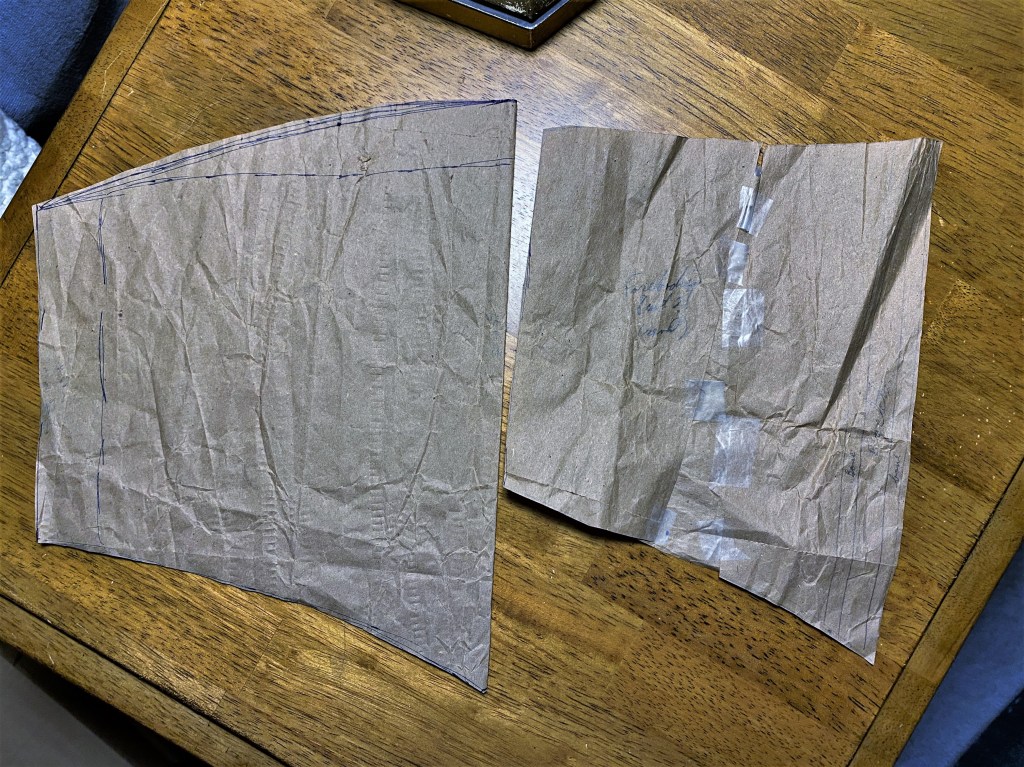
The plaquette pattern is based on the bodice panels with the addition of 1″ at the center front, curved to either side to match the original side lengths. Additionally, the bottom is extended 1″ in order to overlap with the forebodies panels and elongate the torso.
It can be simple and smooth, elegantly embroidered, or heavy as heck with diamonds and rubies. I opted for a blend of all three. Because why not be extra?
In my mind’s eye of design, I initially wished to create the plaquette with embroidery with details of seed pearls and beading. Yet, the lace and embroidered pieces that were available to me at my local stores were far too modern for the design I wanted. I thought about teaching myself to embroider or commission a panel of embroidered material specifically, but I’d already far and above blown the project budget on the sheer yardage required gown. I couldn’t justify buying MORE material, no matter how much I wanted to indulge the desire for gorgeous fabric. Instead, I would use items I had in my stash for the project already.
You see, when I get an idea for a project, I turn into a crow. If I see something in passing that is even remotely related to the project on sale, clearance, or just THE perfect color, I buy it and stash it away in one of the many many baskets that take residence around my all-in-one living room/dining room/sewing room/guest room (basically the only room in the apartment besides my bedroom). Once the basket contains most or all of the inspirational materials I need, I start. Often this means I have more inspiration items than I need or use, but it leads to a wonderfully sorted creative process.
To build the plaquette from these materials, I start by deciding on the fashion fabric and structural layers. In all, I used four layers: the outer/front layer from blue velvet remaining from the outer gown construction, thin white muslin interlining, coutile, and blue linen for the lining.

Now, a bit of explaining on the layers. I didn’t come to this arrangement naturally, nor does it seem necessary in hindsight. To start, I actually had a layer of buckram in the middle at one point too. I attempted to use that layer to provide the structure necessary to give the smooth shape and hold up the gems I planned to add. However, on the trial run of the layers (baste stitched together), the buckram buckled and folded weirdly with any movement. It was…too stiff. So I eliminated it and planned to add a few bones to the plaquette to support instead.
Since I planned to add boning to the center (essentially acting as a busk) and following the top curved seam, I added the layer of coutil which would give me a base to add twill tape boning channels while preventing any stretching of the plaquette overall. We’ll come back to this thought.
The muslin layer is added for a lining structure for the thin weave and delicate silk velvet to be mounted on while I added trim, embroidery, beading, or whatever creative embellishments I landed on. I baste these two layers together first and can begin the embellishment process.
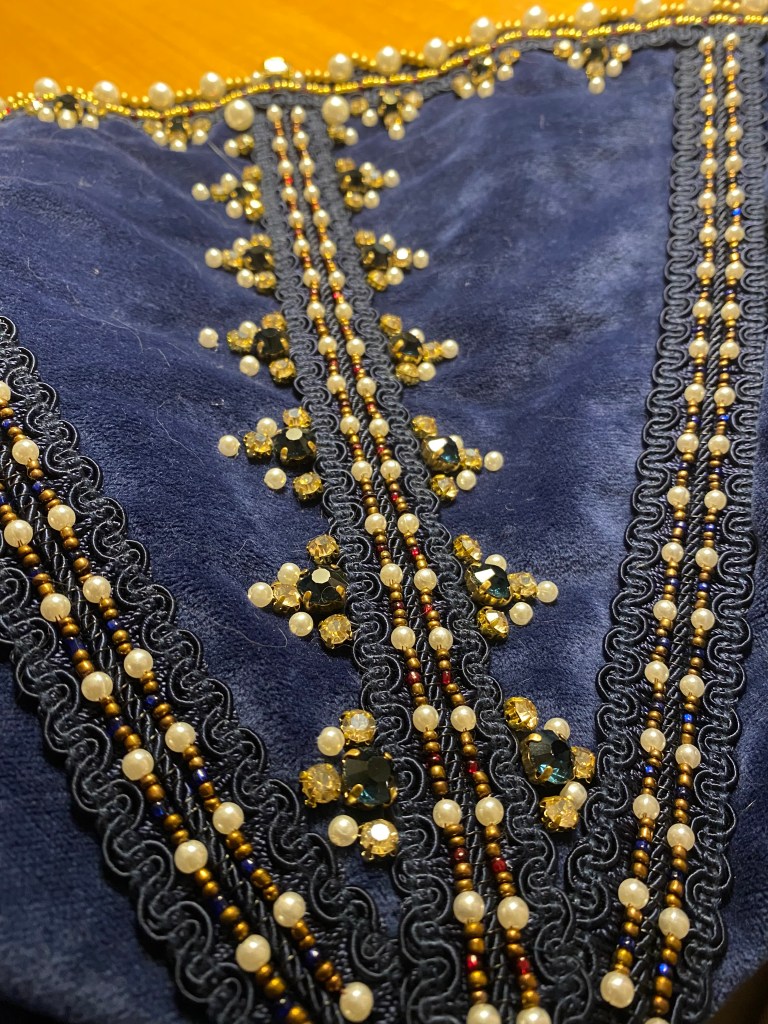
The first item I pull from my stash basket is a navy trim I purchased on clearance from Joann’s. I thought to use it to create geometric style lines to meld with the diamond patterns on the outer gown. I fiddled around with it for a while, pining in places, holing it up to myself in the mirror, and adjusting until I was happy with the effect. In the end, the shape creates a triangle or v-shape mimicking the point on the plaquette as well as the diamond effects.
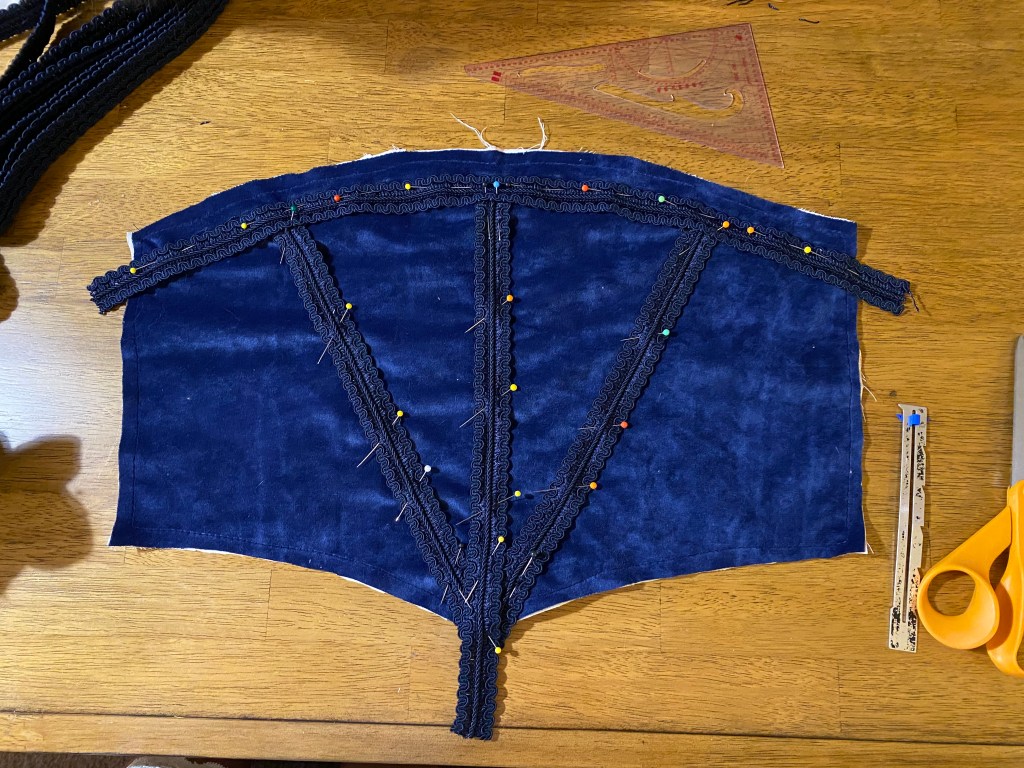
Finally, was the most fun part of adding beads on beads on beads and gems and more gems! Unfortunately, I don’t have a lot of photos of the beading process since I was so excited and playing with it as I went that I just kept stitching and didn’t record any. Looking back though, my process started by sorting through the beads I had available and having any that coordinated nearby, then testing how certain patterns of beads would look in sequence. I took a sequence that I liked from the seed beads and couch stitched them in parallel along the center raised section of the trim.


And of course, I want crazy using gems to my heart’s content. Again, this was a process of trying patterns to see what I liked and what I had enough glass gems for to have a cohesive pattern.

Before moving on beyond the beading, I’d like to take a moment to appreciate the backside of the panel because I find it simply fascinating

Embellishments aside, it was time to add the structural layers and finish the piece. I placed my coutile on top of the finished beaded panel and traced the lines of the trim/beadwork under which I would add boning channels.
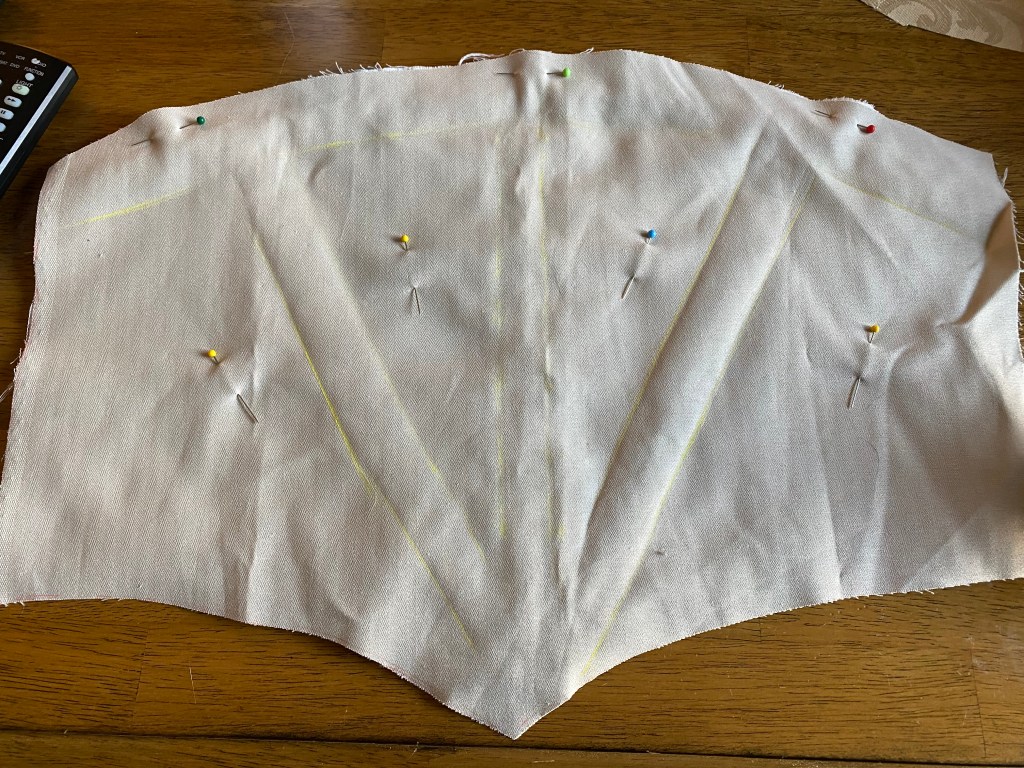
Tracing the trim locations, marked with yellow tailors chalk 
3/8″ twill tape is used to create 1/4″ boning channels.
[what boning made it to the final garment]
The lining and coutile layers are basted together for stability. With all layers finished, the lining layer and outer layer are stacked with right sides together and are stitched, turned outward, pressed, and slip-stitched closed for a final finish.

Basting the lining to the coutile 
Interior of the basted coutile 
all layers stitched with right sides together 
After turning the stitched layers and prior to slip stitching the top seam.
The last step is to create a way for the plaquette to attach to the gown bodice. Historically, this was achieved with the use of straight pins that a lady’s maid would have used in dressing a noblewoman. But, it’s just me, and I like convenience. So I use a strong home decor thread to whip stitch one side of the plaquette to the gown and add hook and eyes to the other side. This was a tad of a process since my initial placement of the plaquette was not tight enough across the gown front and caused the hooks to, well, unhook when I moved. But the second time was too far apart and forced me to pull the gown front panels together when hooking. Third time was the charm and achieved the right tension. So don’t worry if it takes a bit of finagling to get it right.

Marking the hook locations the back of the plaquette. I placed these about 1″ apart 
The hooks in place. Be sure you have hooks at the very top and bottom so there is no gaping. The chalk line for final placement of the eyes is visible on the main gown. 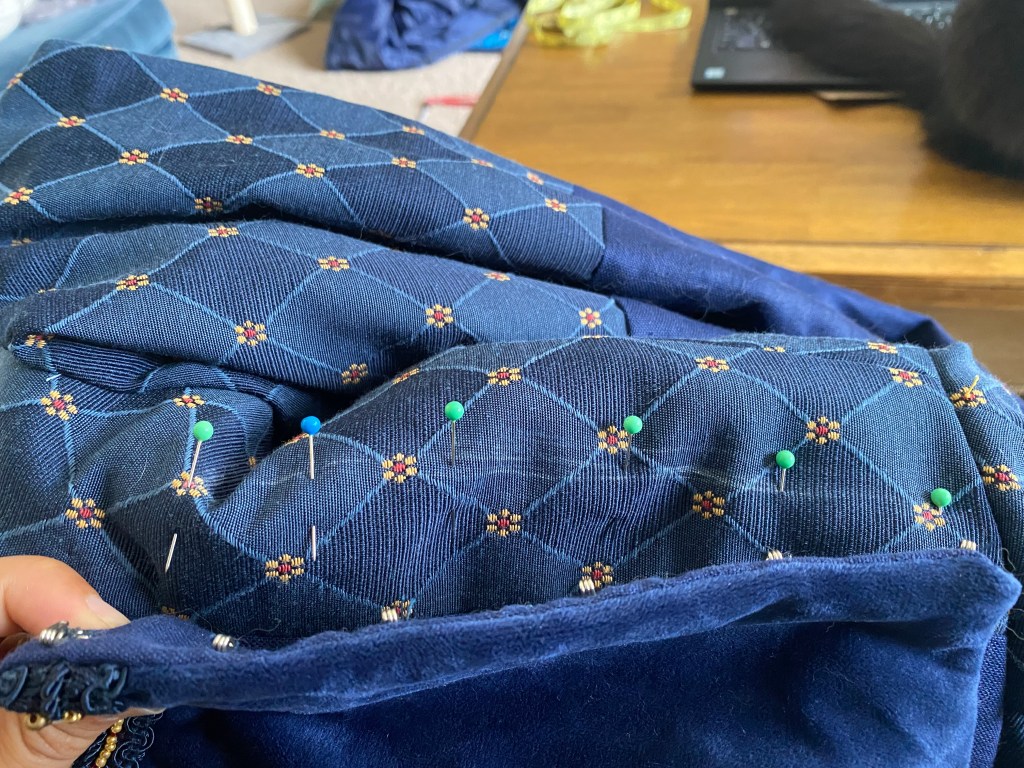
I used pins to mark the locations to place the eyes based on the final hook locations.
There it is, the completed plaquette. And I adore it. Aside from the laughable weight of the outer gown, it’s my favorite part of the gown.

Crazy to believe, but we’re nearly complete with this project. Only one more item to build and she’ll be complete
Keep following along to see the building of the:
French Hood
And return back to the: