The Goose Girl: Shift, Chemise, Smock….thing

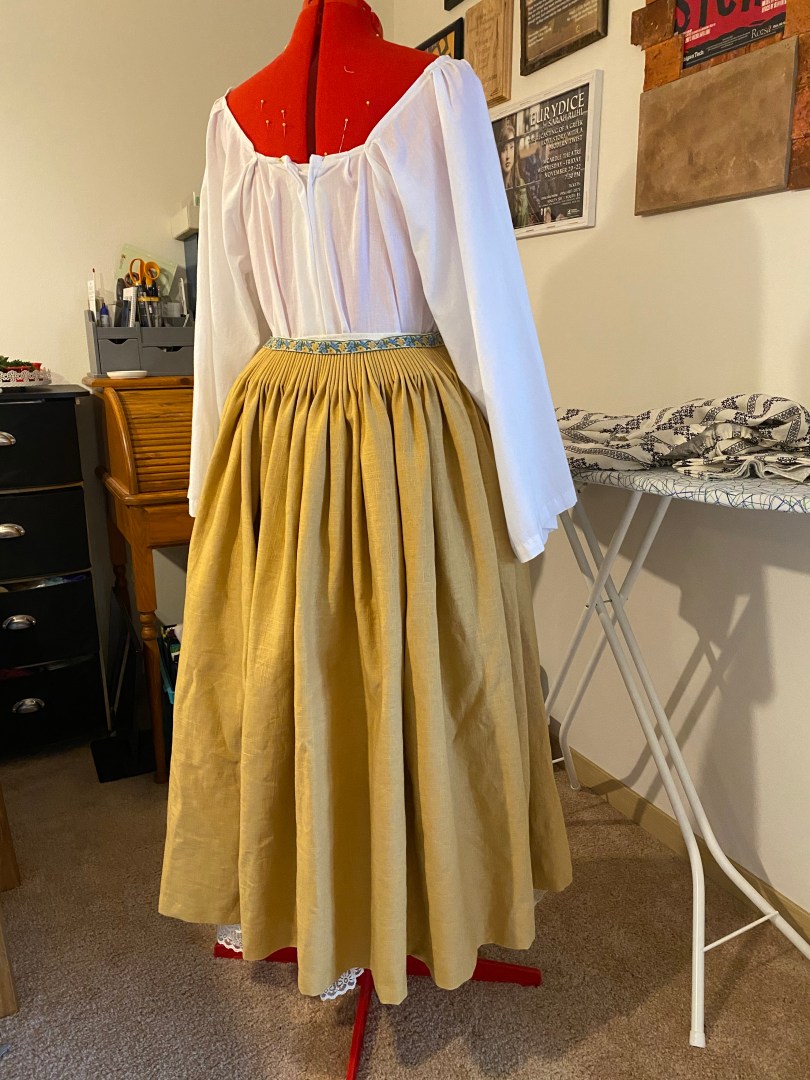
With only a few elements left, it was time to turn to the shift. Or chemise? Or smock? One of those. 

I had left this piece to last since I had not yet decided if I would be stitching the garment entirely by hand or partially by machine.  Timing would be key in this decision. 

Some background. 

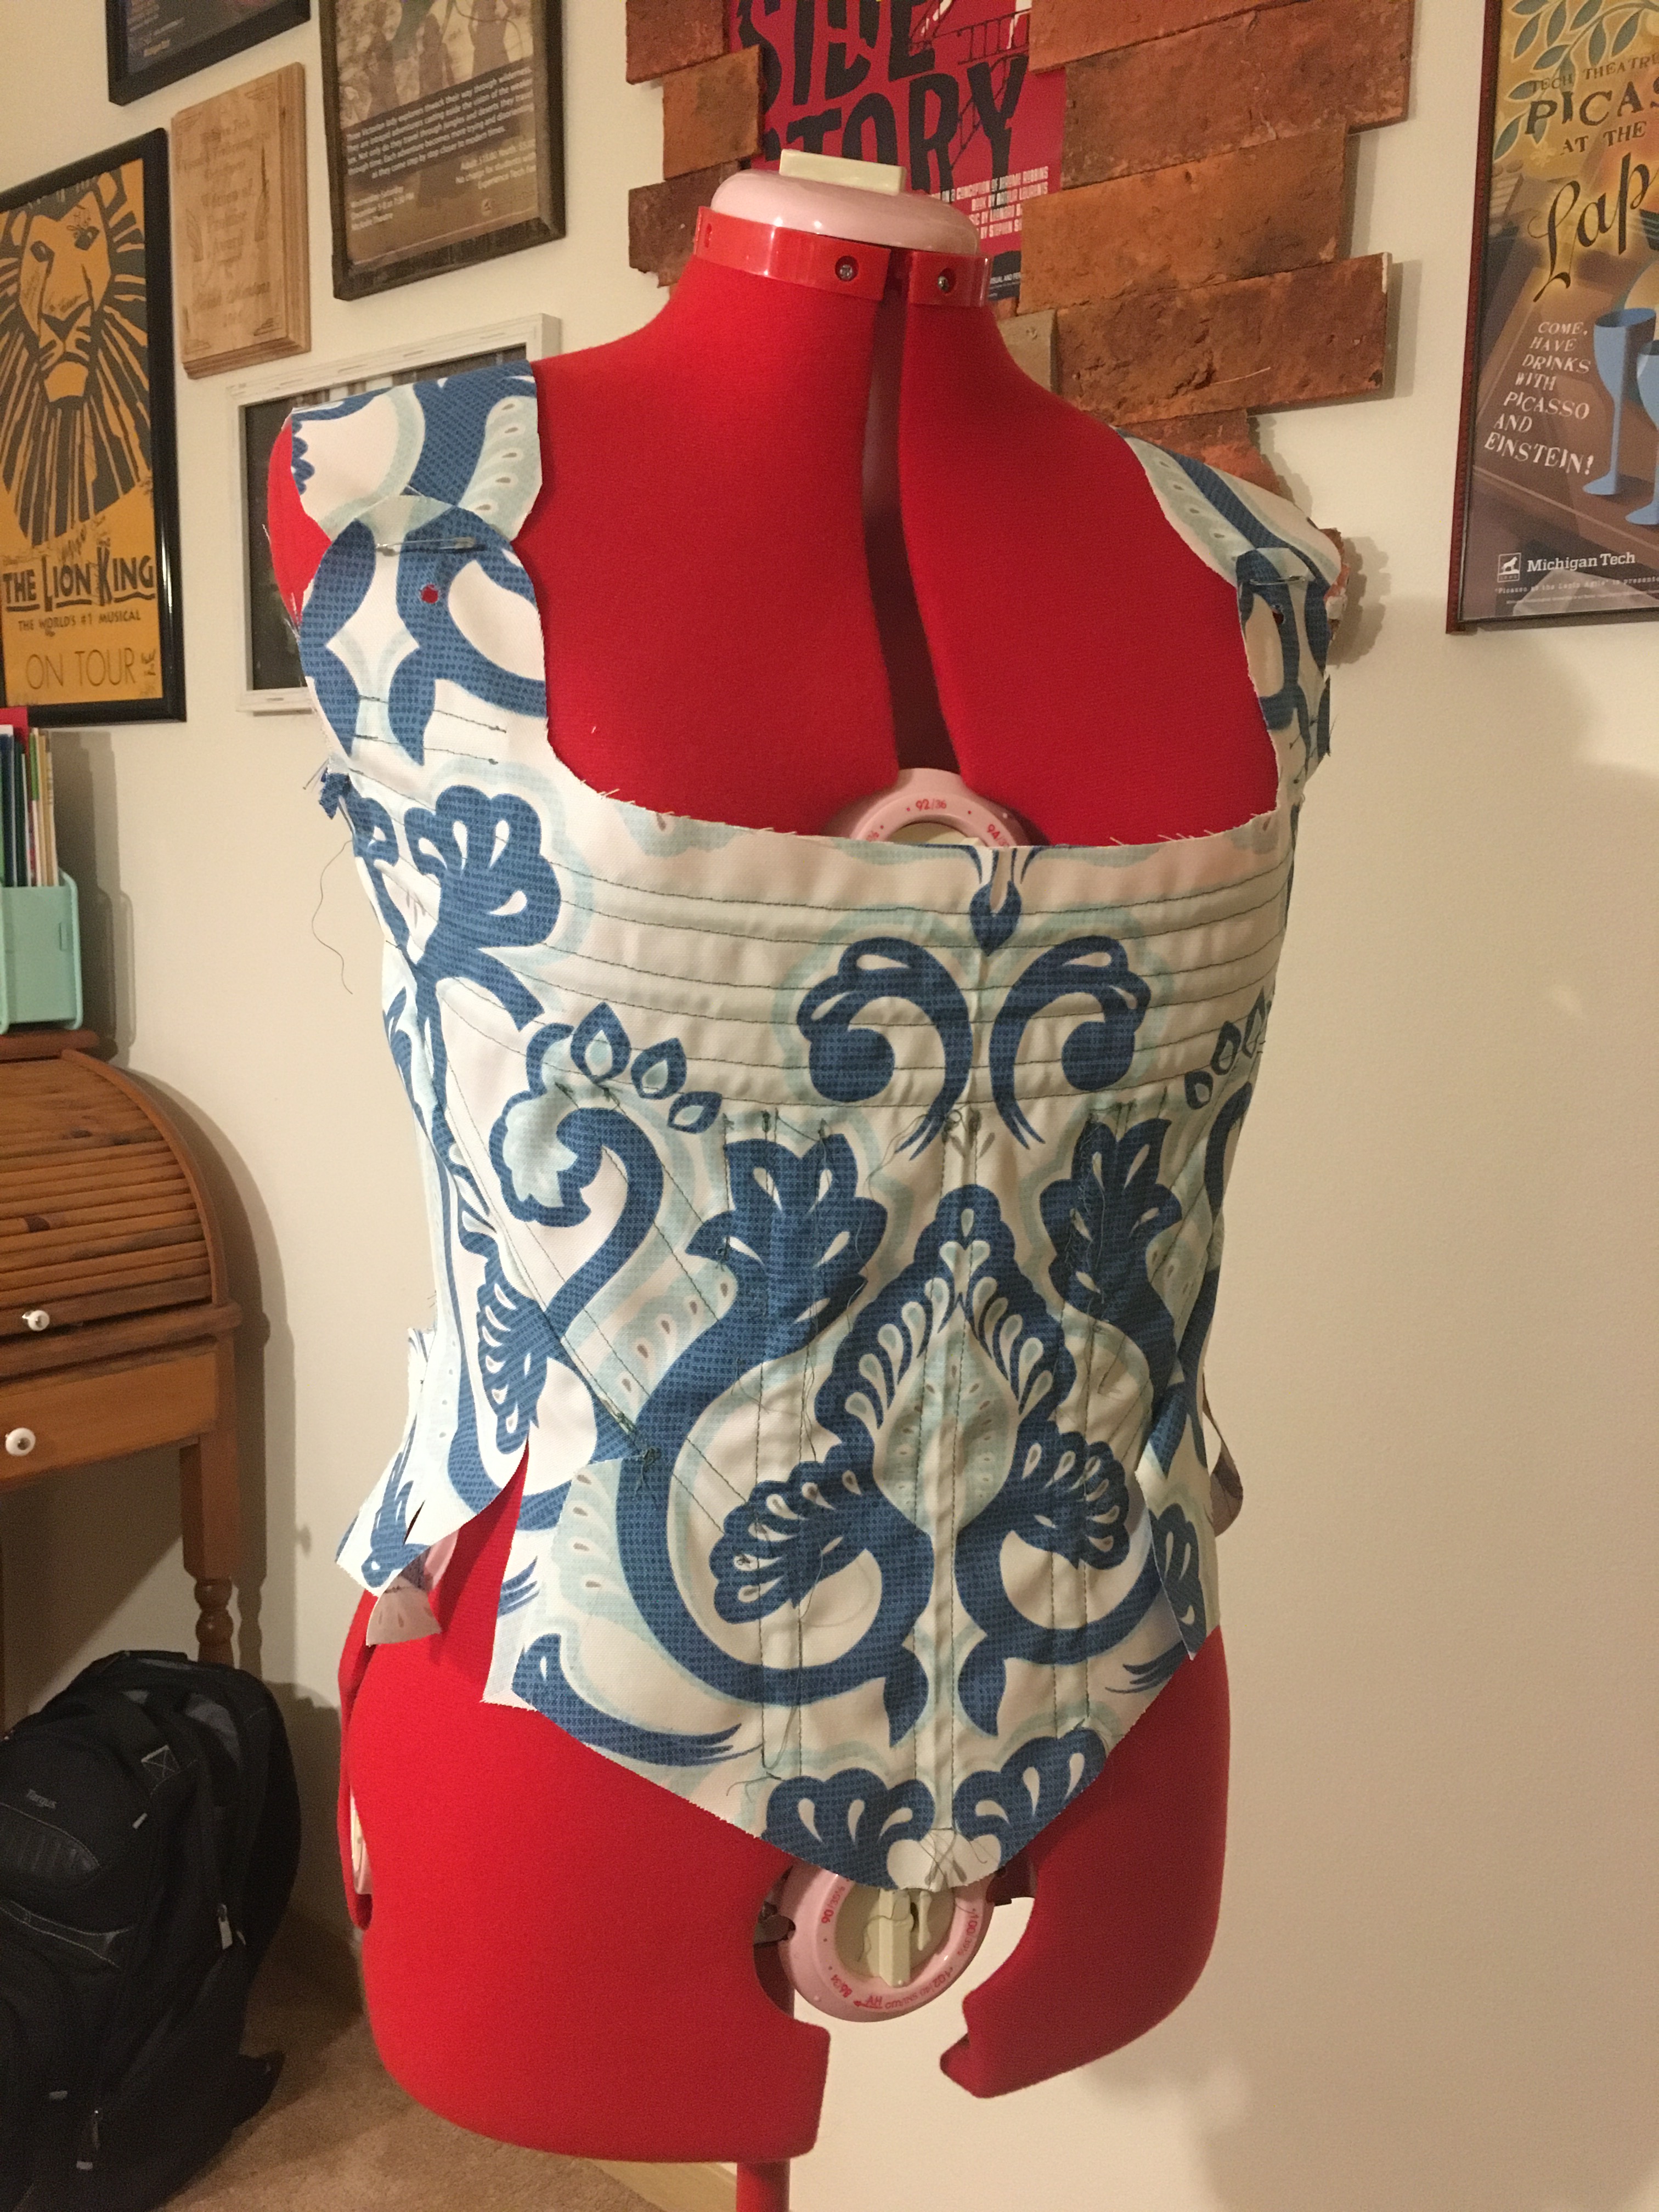
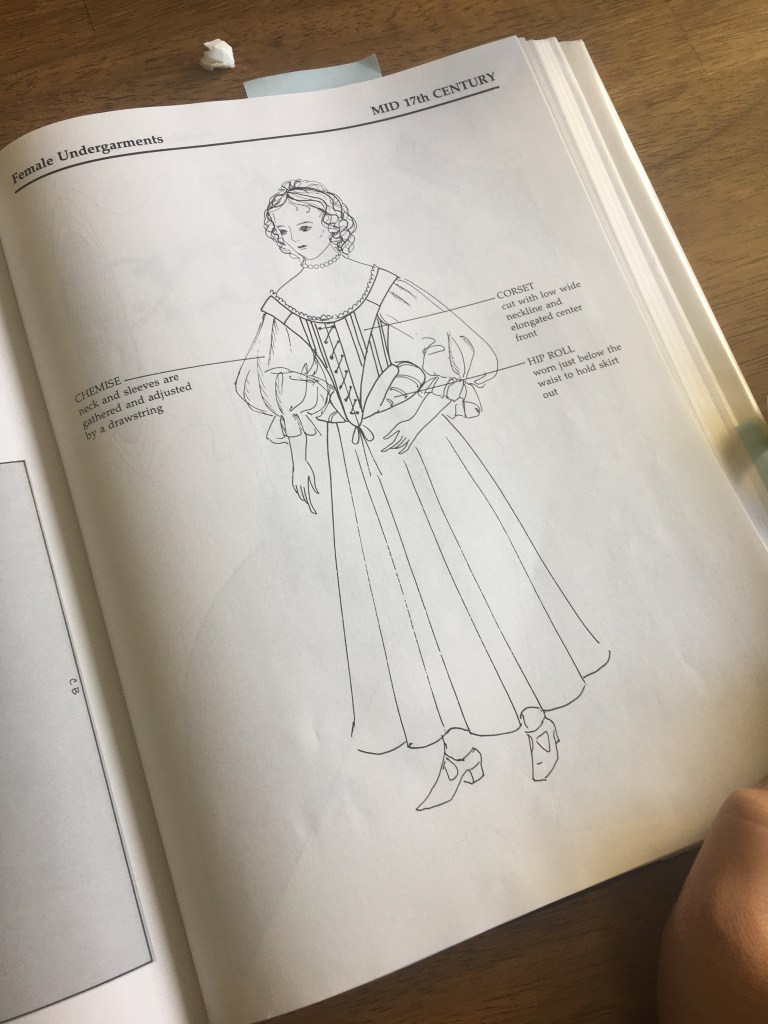
Unlike all the silly period movies out there, one would never wear stays or a corset directly against the skin. Structured garments made from expensive material would need a layer of protection from the oils of the skin and general wear and tear so they would last longer and not need to be washed often.  Historically, linen was worn against the skin in the form of a smock, shift, chemise, or shirt. Based on my selected time period for the garment (17th century), a chemise would have been the popular term, so that is what we’ll use henceforth. 

In regards to our source material (The Goose Girl by Shannon Hale), Izi’s undergarments are mentioned only once when she is riding a horse and playfully chats with another character, Geric, about him possibly seeing her ankle as her “shift” rode up. Since I am taking liberties with the design, the shift in my mind is more tied to the combination of the petticoat and chemise rather than a full length shift that would have been worn if I had selected a medieval tunic design concept. 
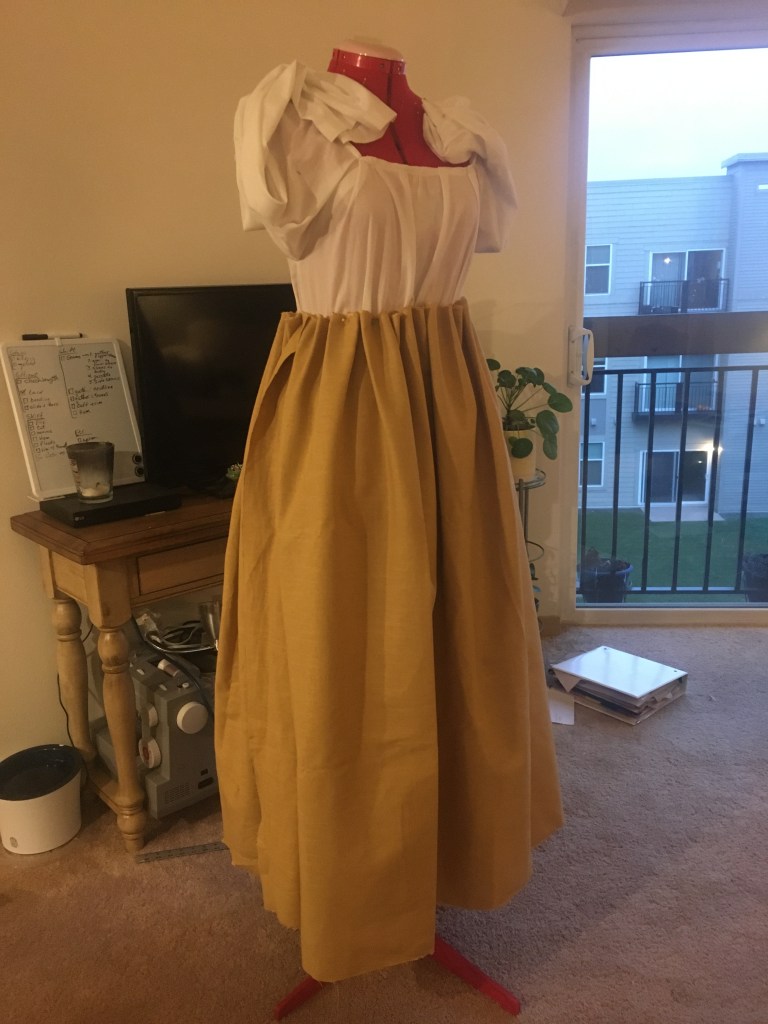
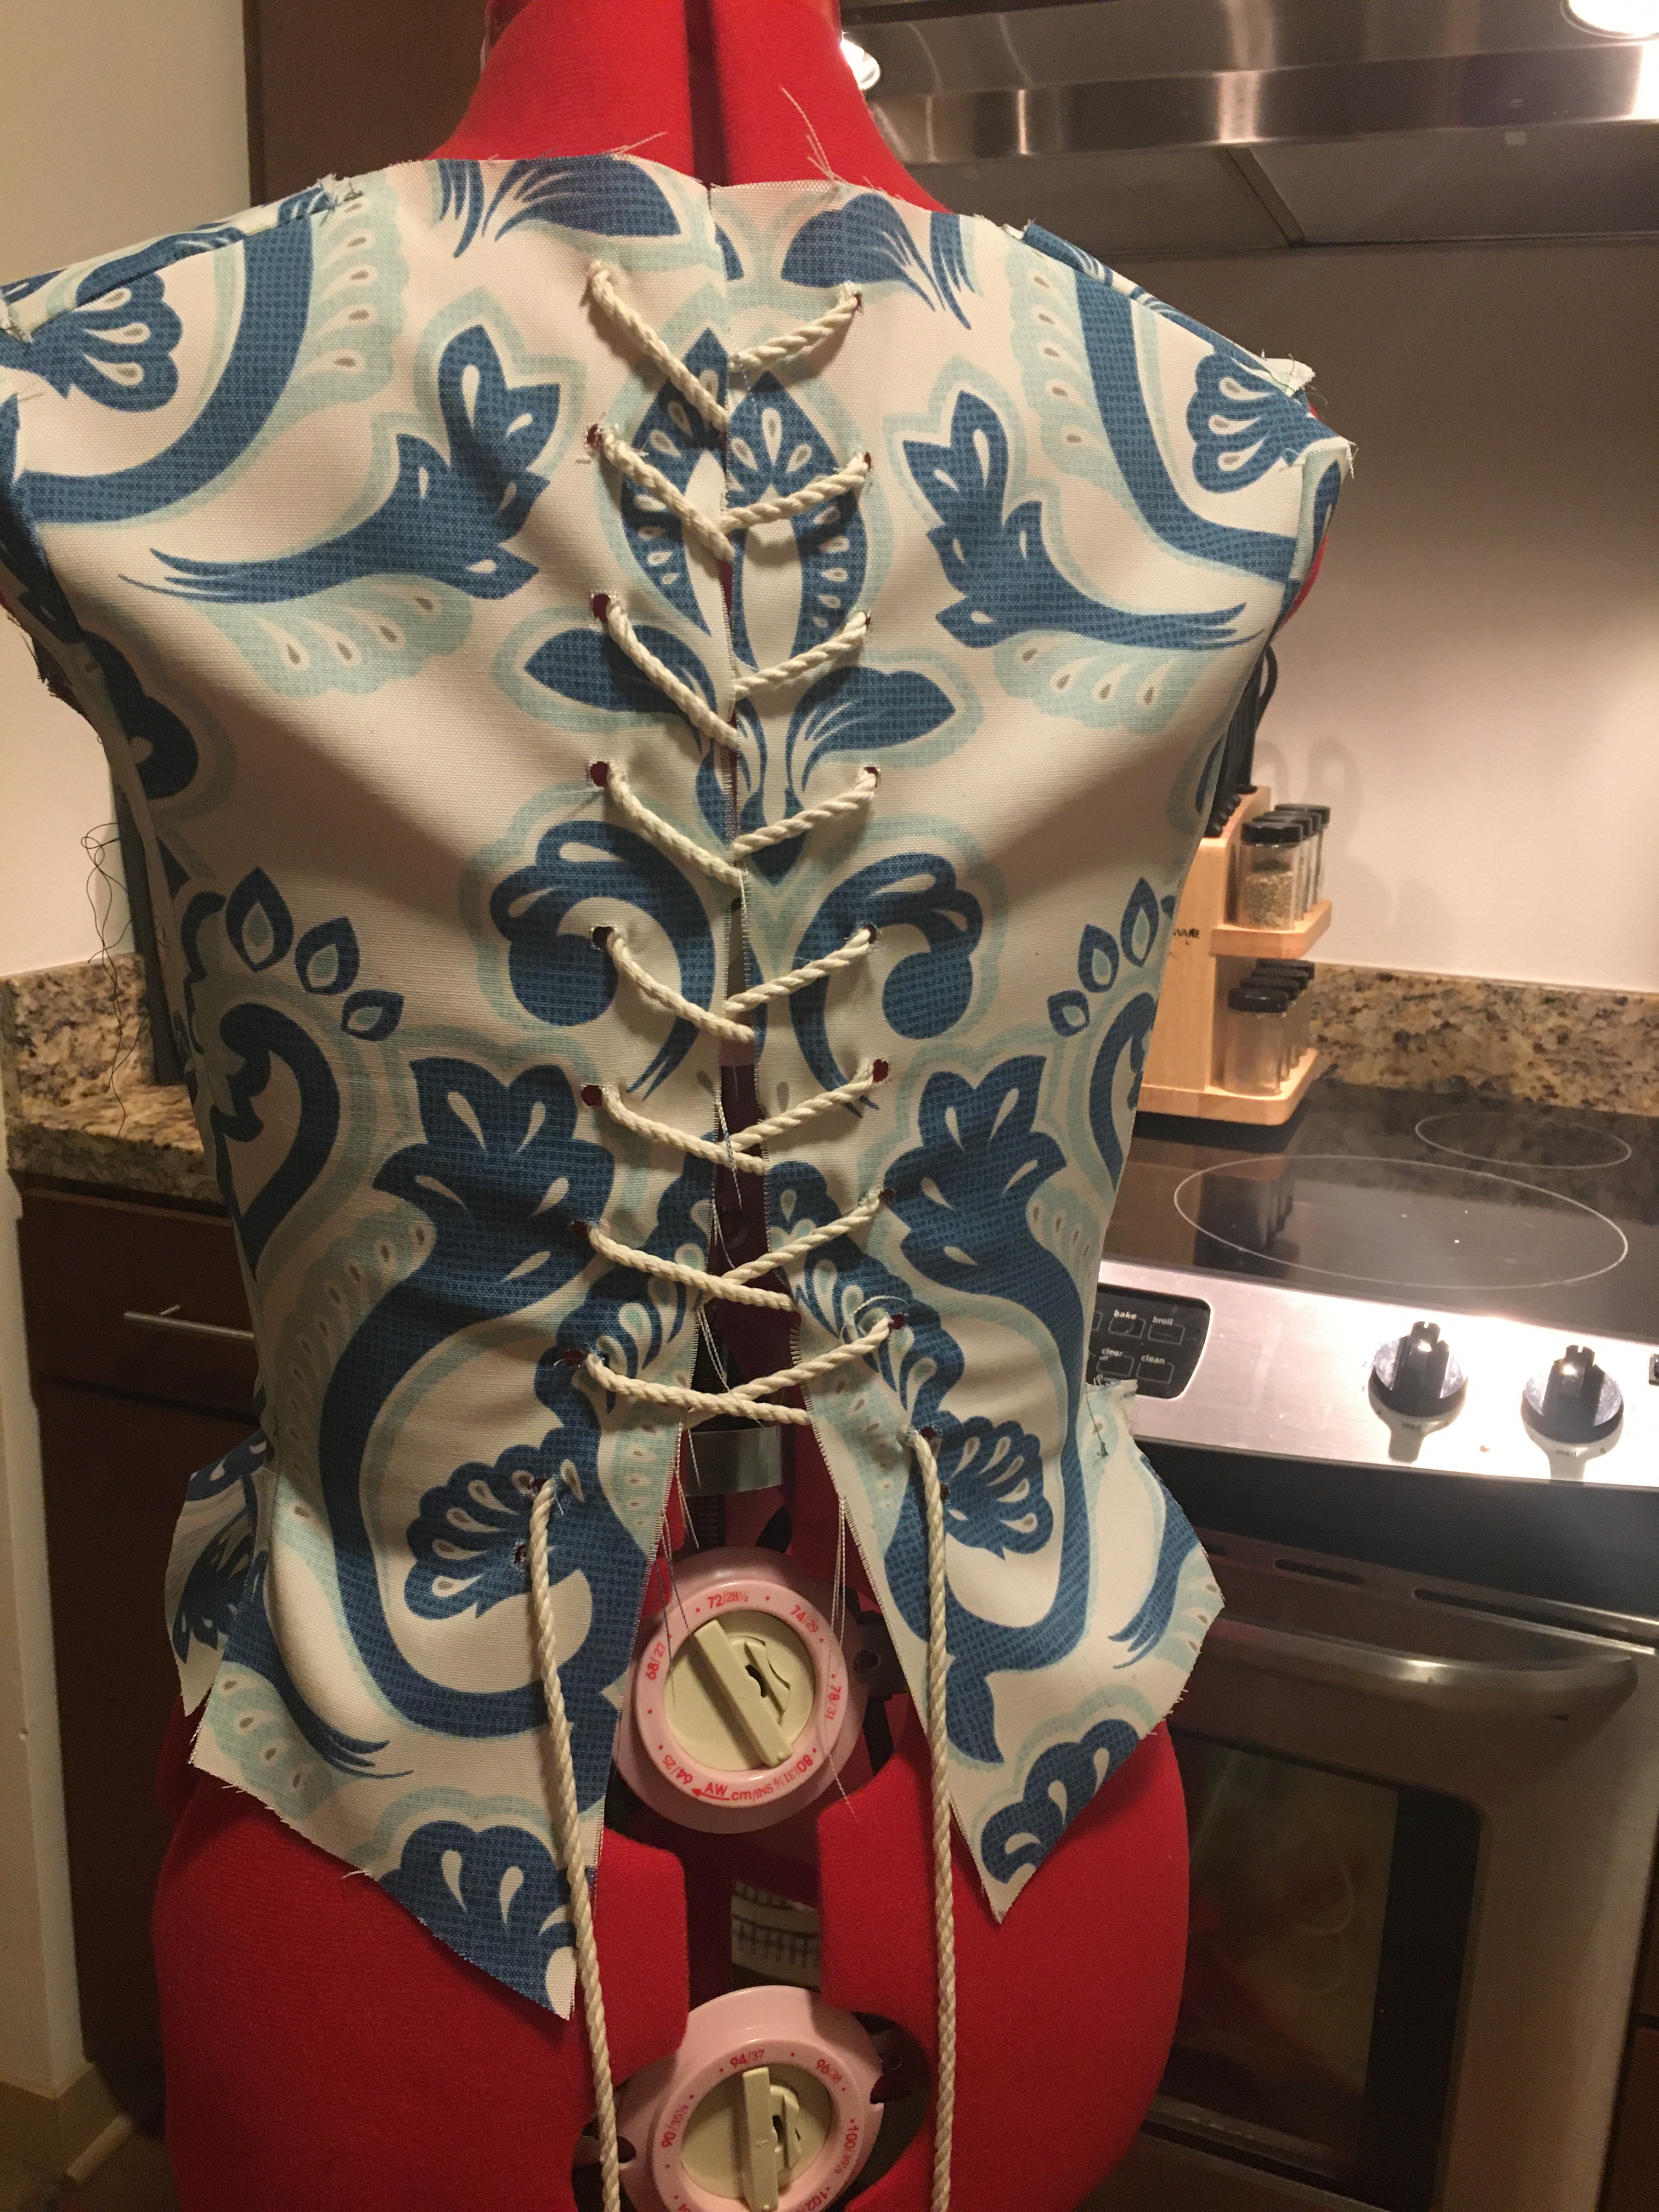
The Mock Up

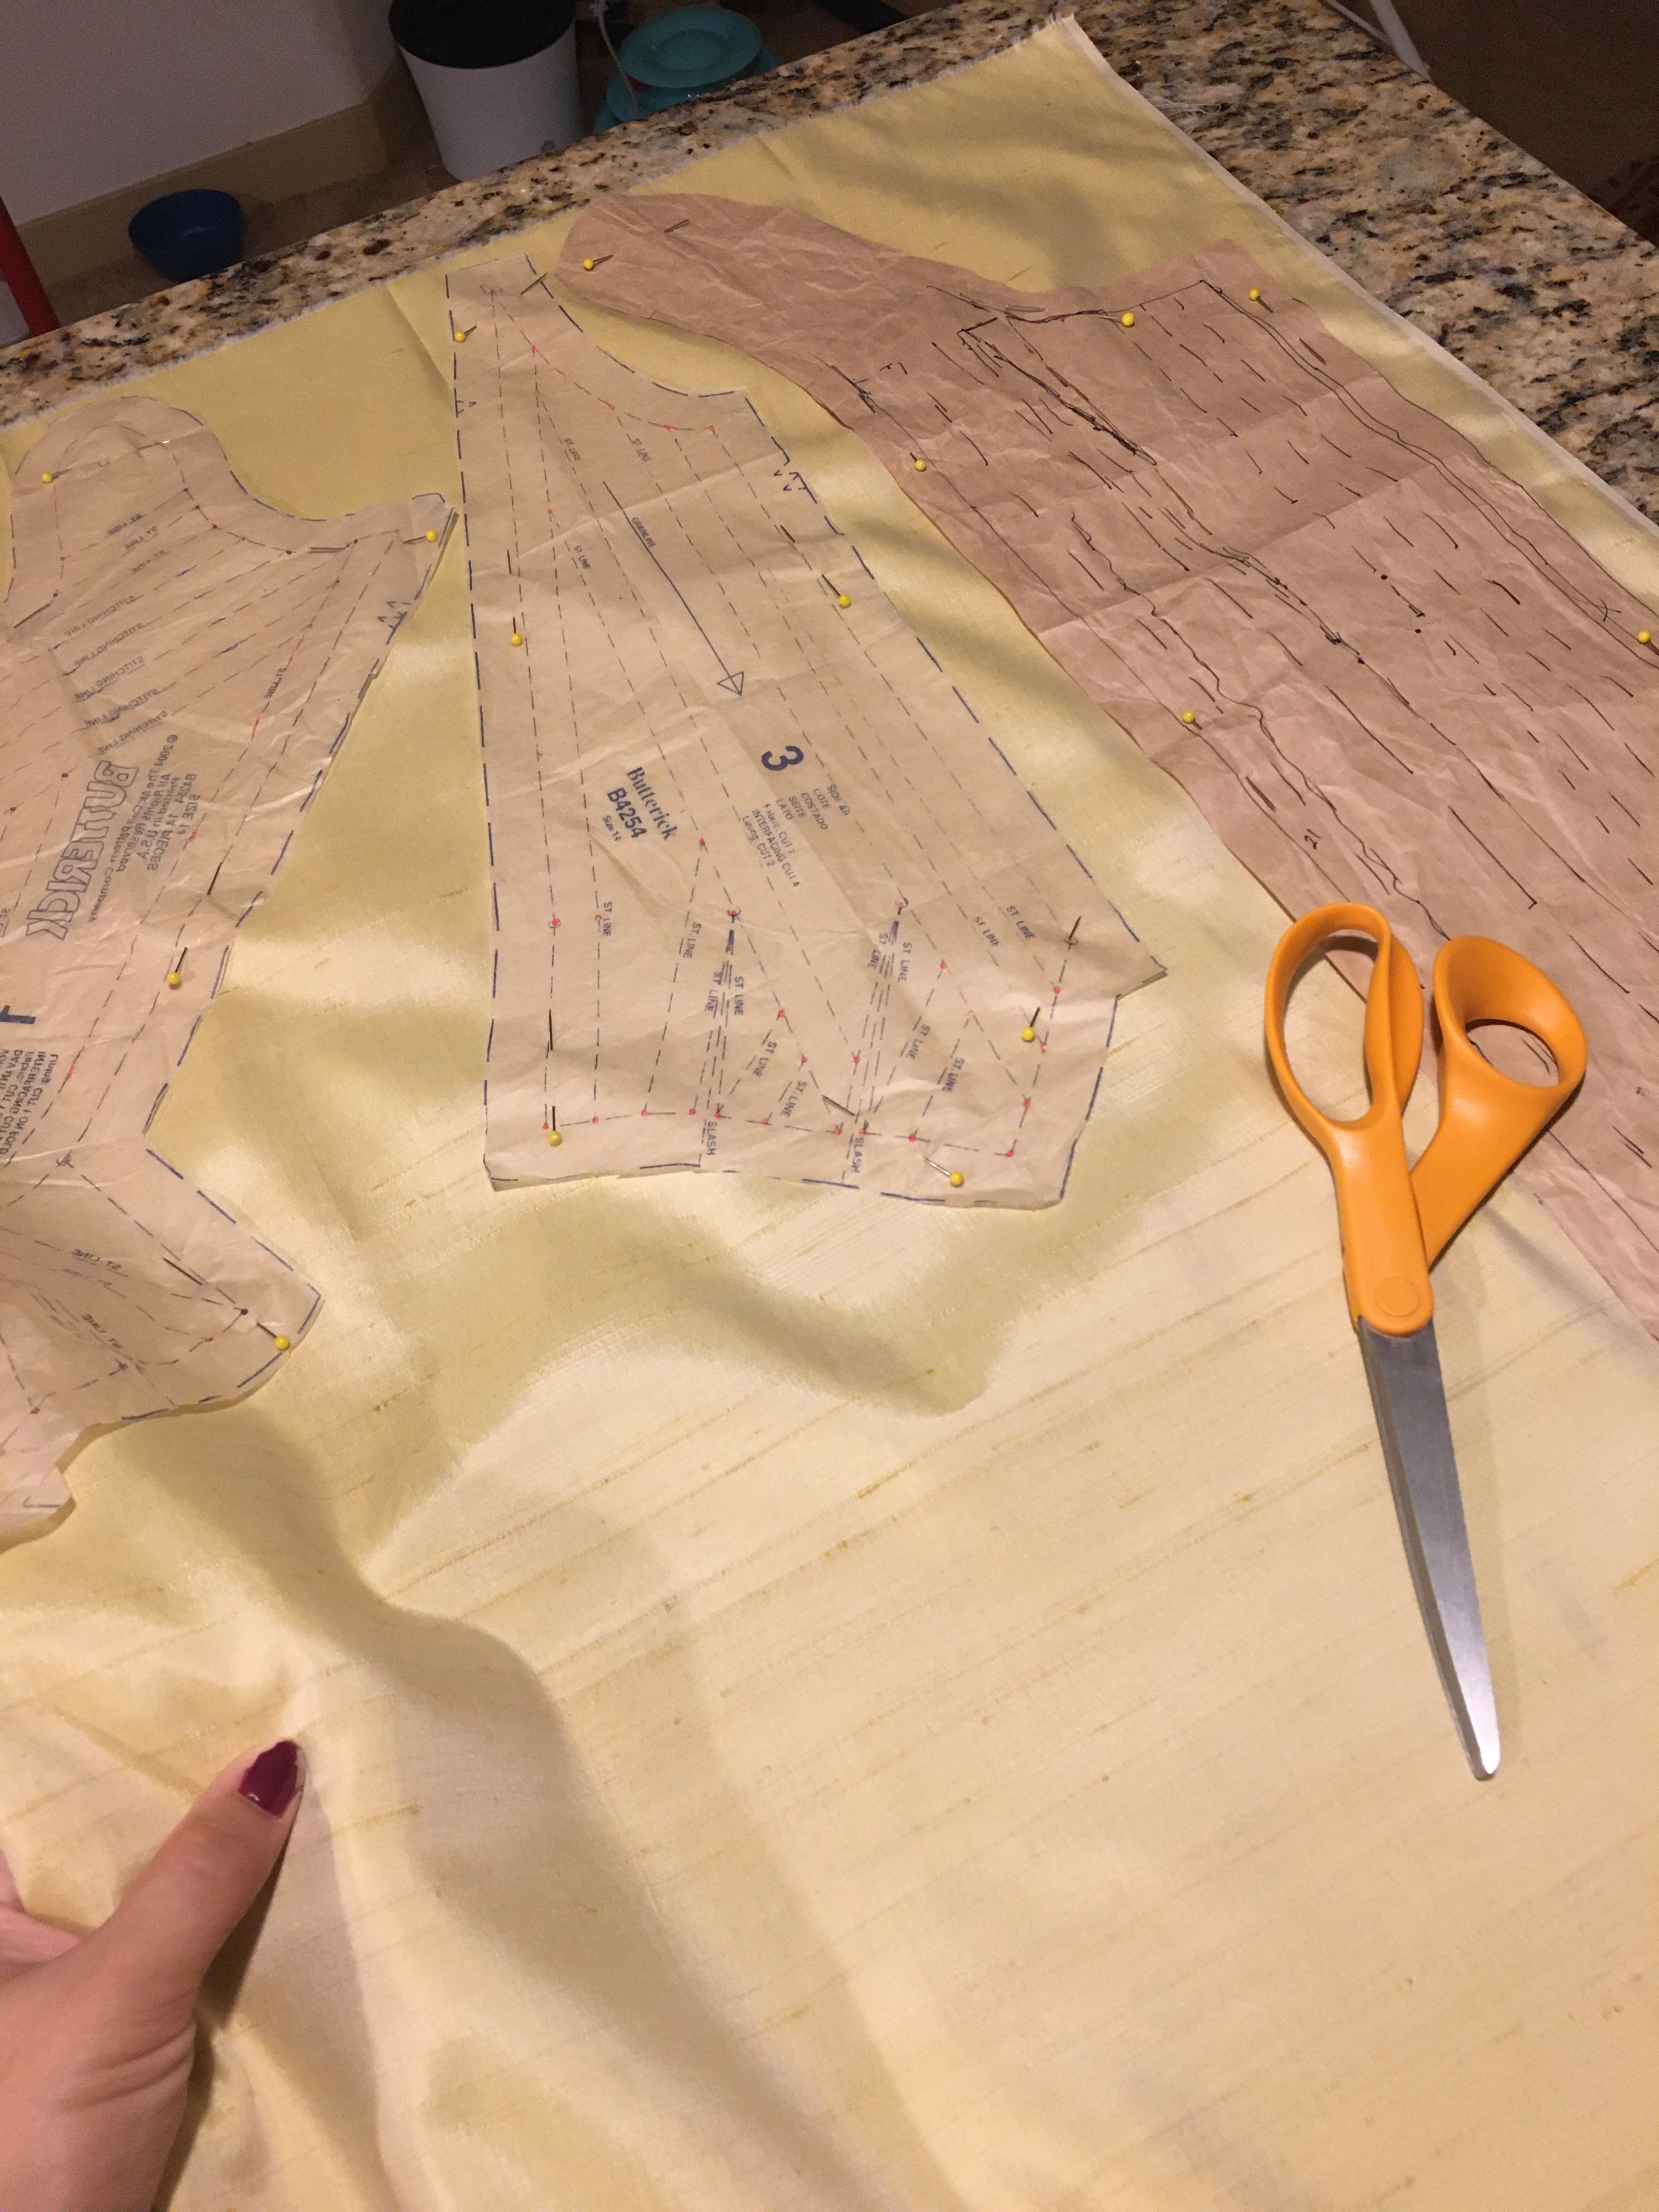
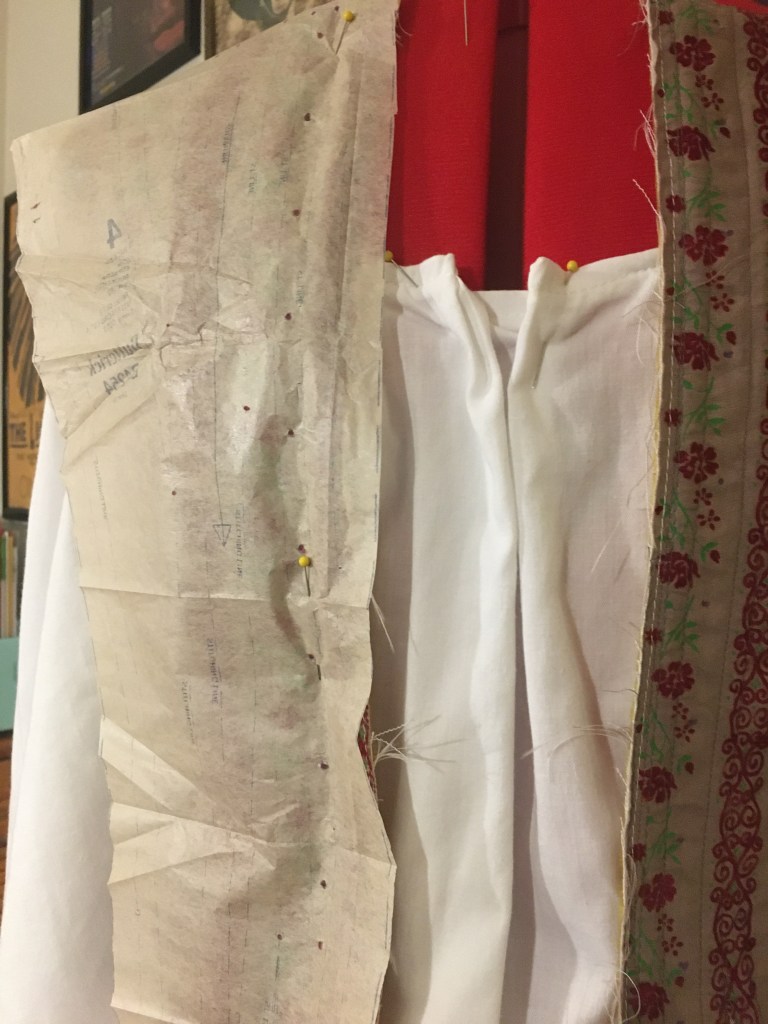
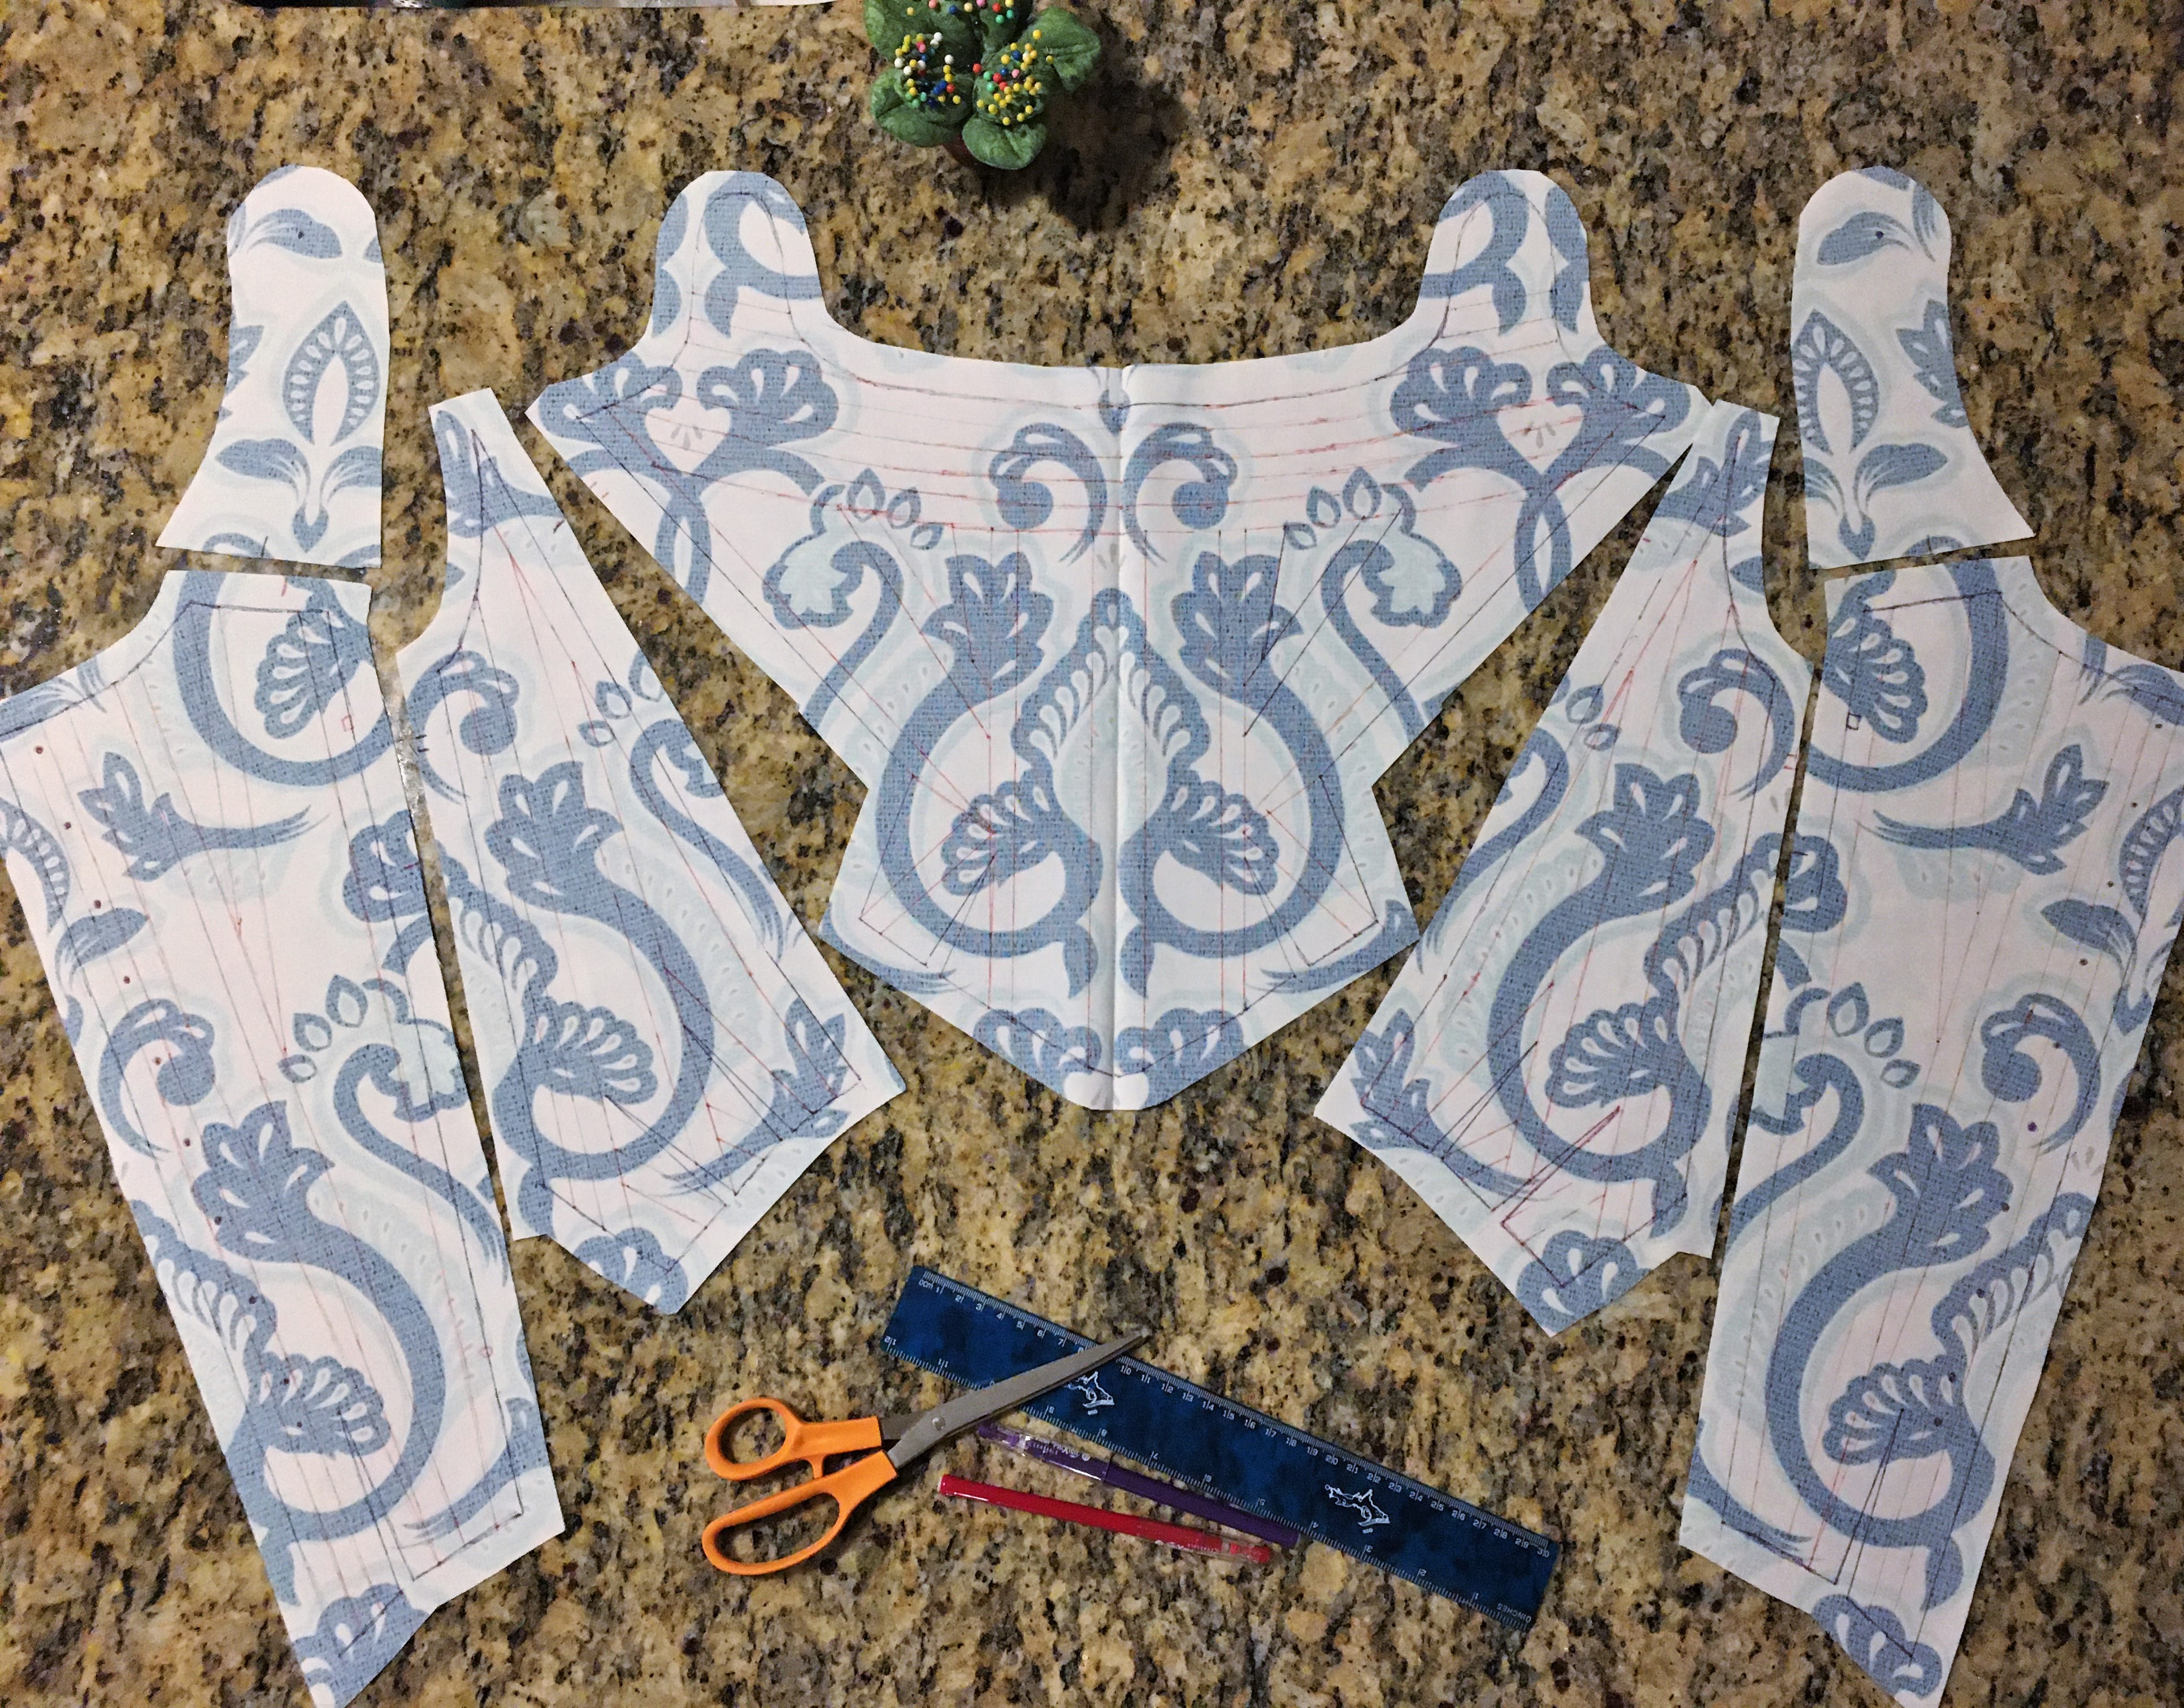
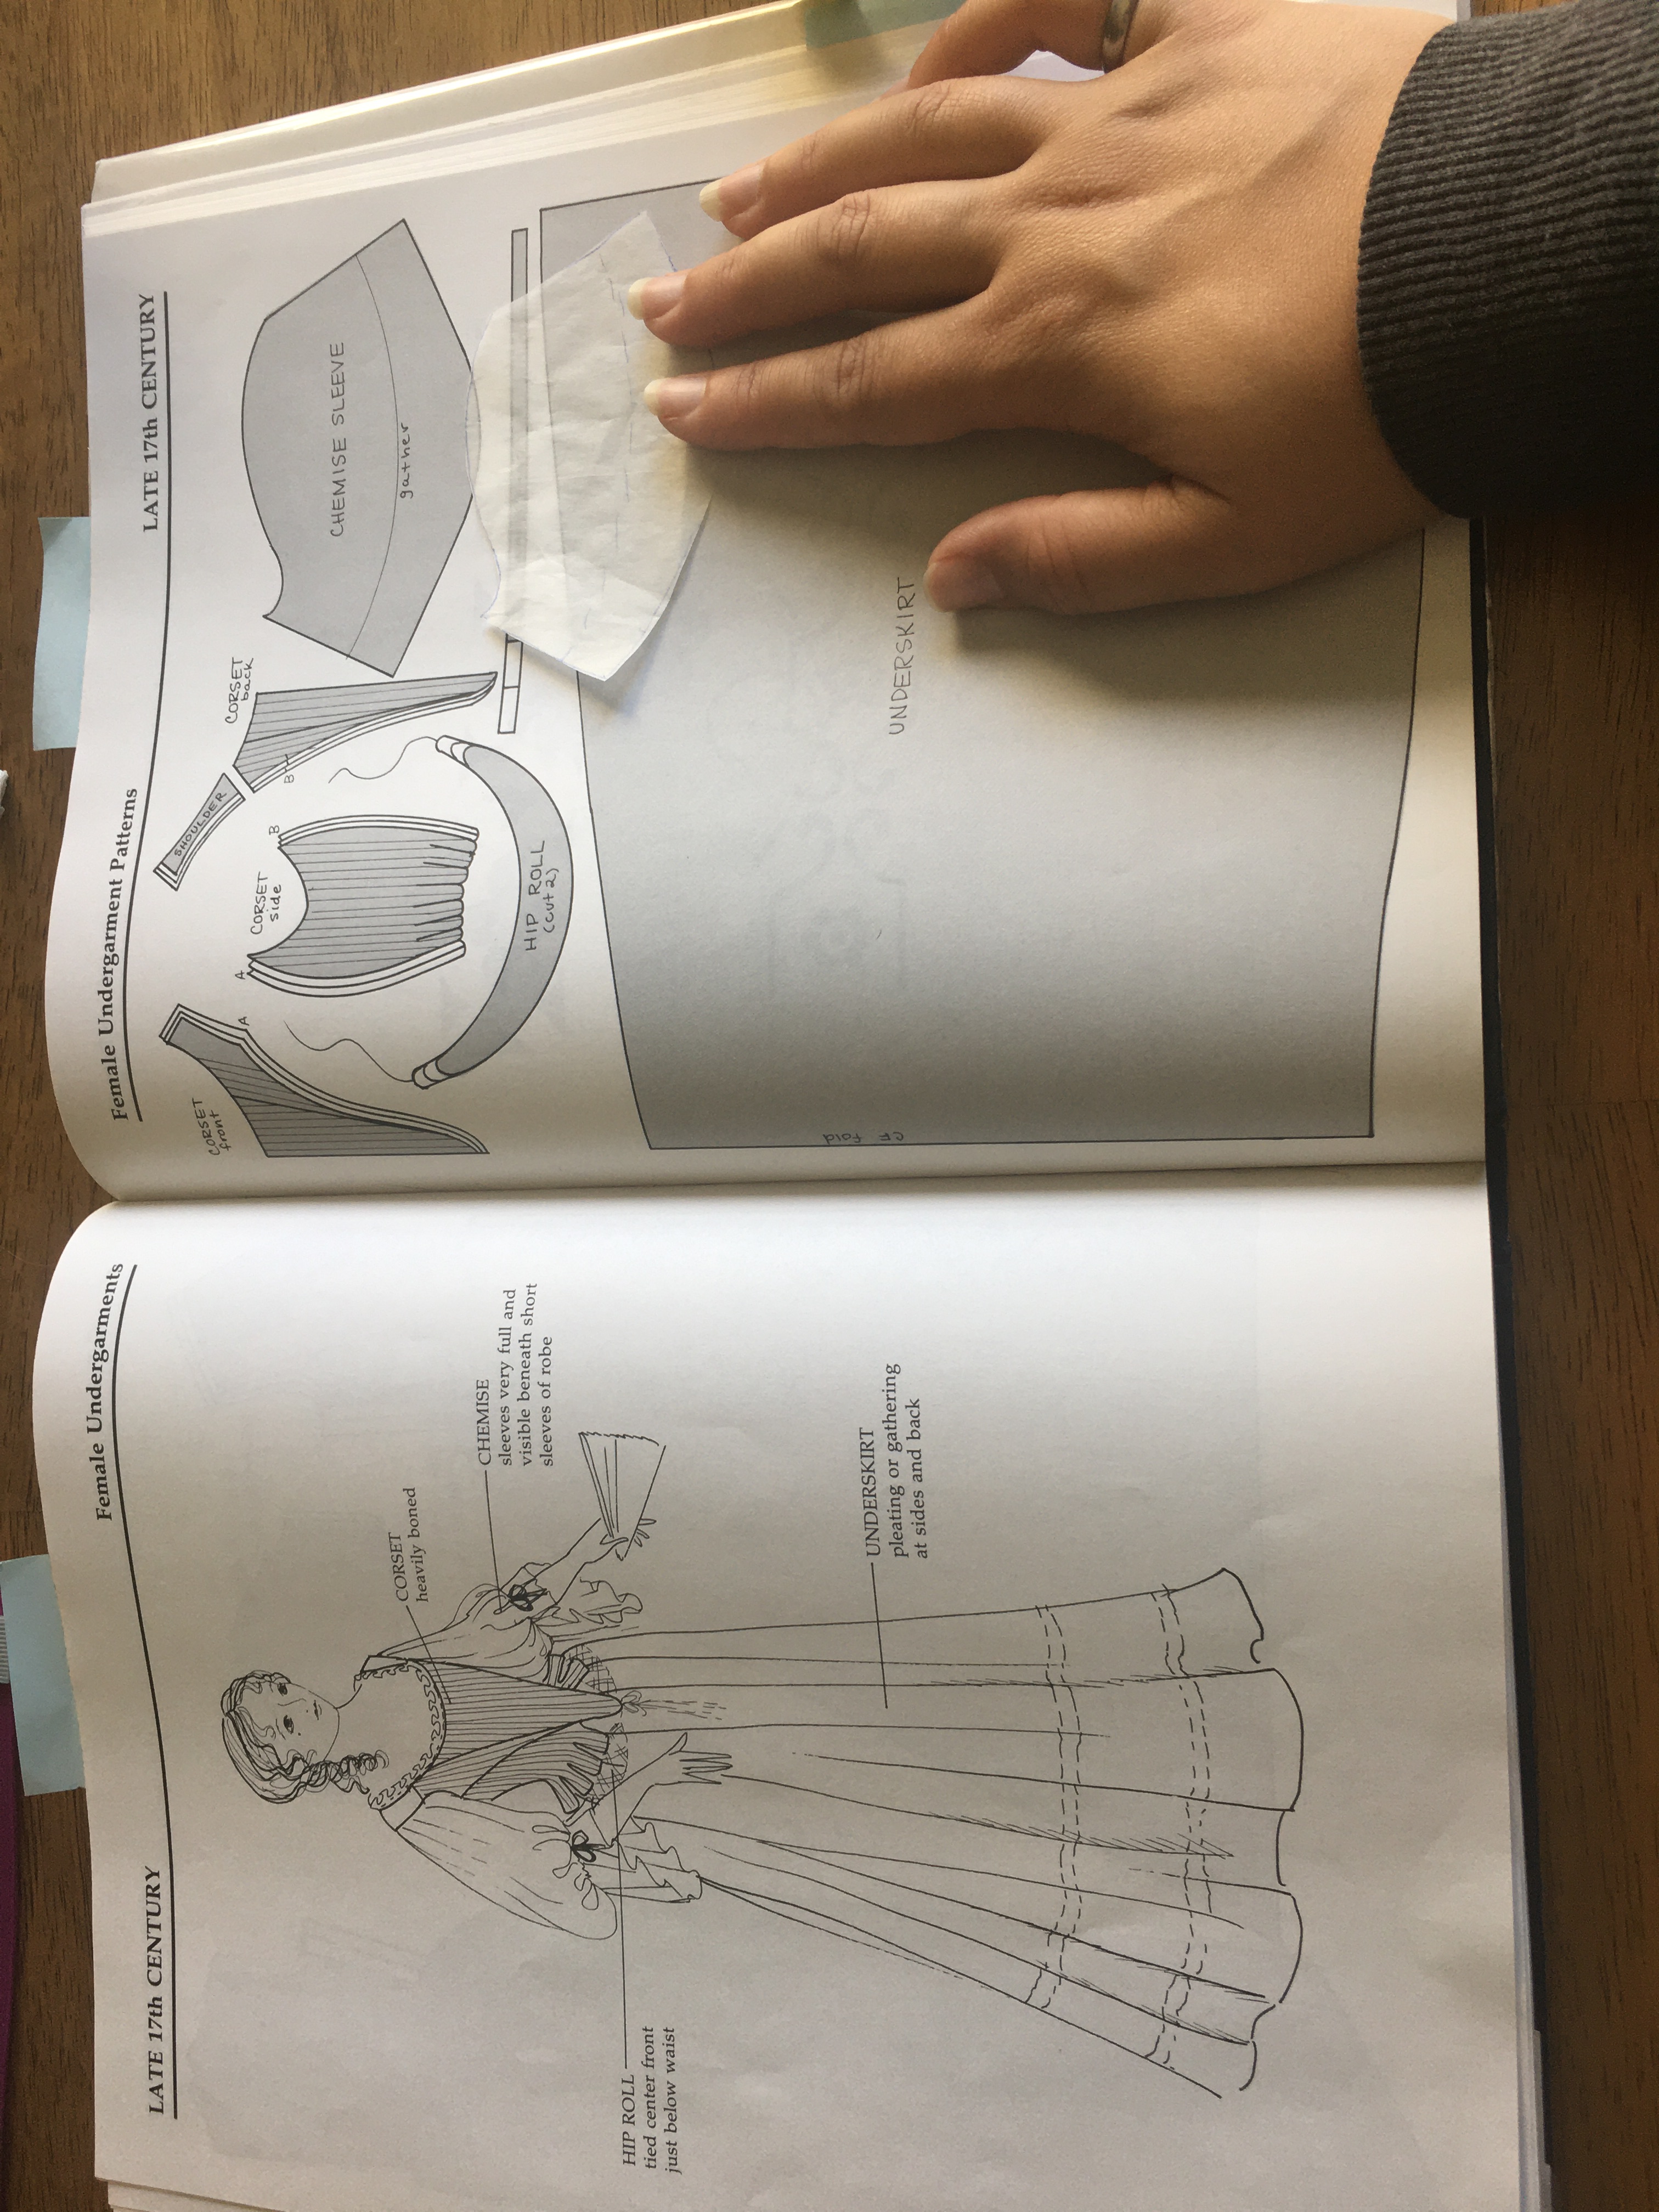
So here we are, with lots of room to play, a simple historical reference, and limited literary bounds. I was torn between two different directions to take the chemise: standard rectangles of a chemise or curved sleeves and neckline from a 17th century pattern I had on hand from Patterns for Theatrical Costumes: Garments, Trims and Accessories Egypt to 1915 by Katherine Strand Holkeboer.

This pattern gave me all the floaty, puff sleeves vibe that I wanted with a nicely curved neckline that would pop under the stays.  The pattern here is at ⅛” scale that I would need to transfer and build a mockup to test the fit. 

To scale a pattern from a book, you need:

  • Tracing paper
  • Meter stick (or measuring tape and long straight edge)
  • Tape
  • Newsprint or large sheets of paper (I reuse packaging paper I get from Chewy deliveries for my spoiled kitties)
  • French curve or drafting tools (link to purchase cheap set)
  • Scissors

I should preface by saying that this is simply my method for scaling and there are many out there that may work better for you.  

To scale a pattern follow these steps:

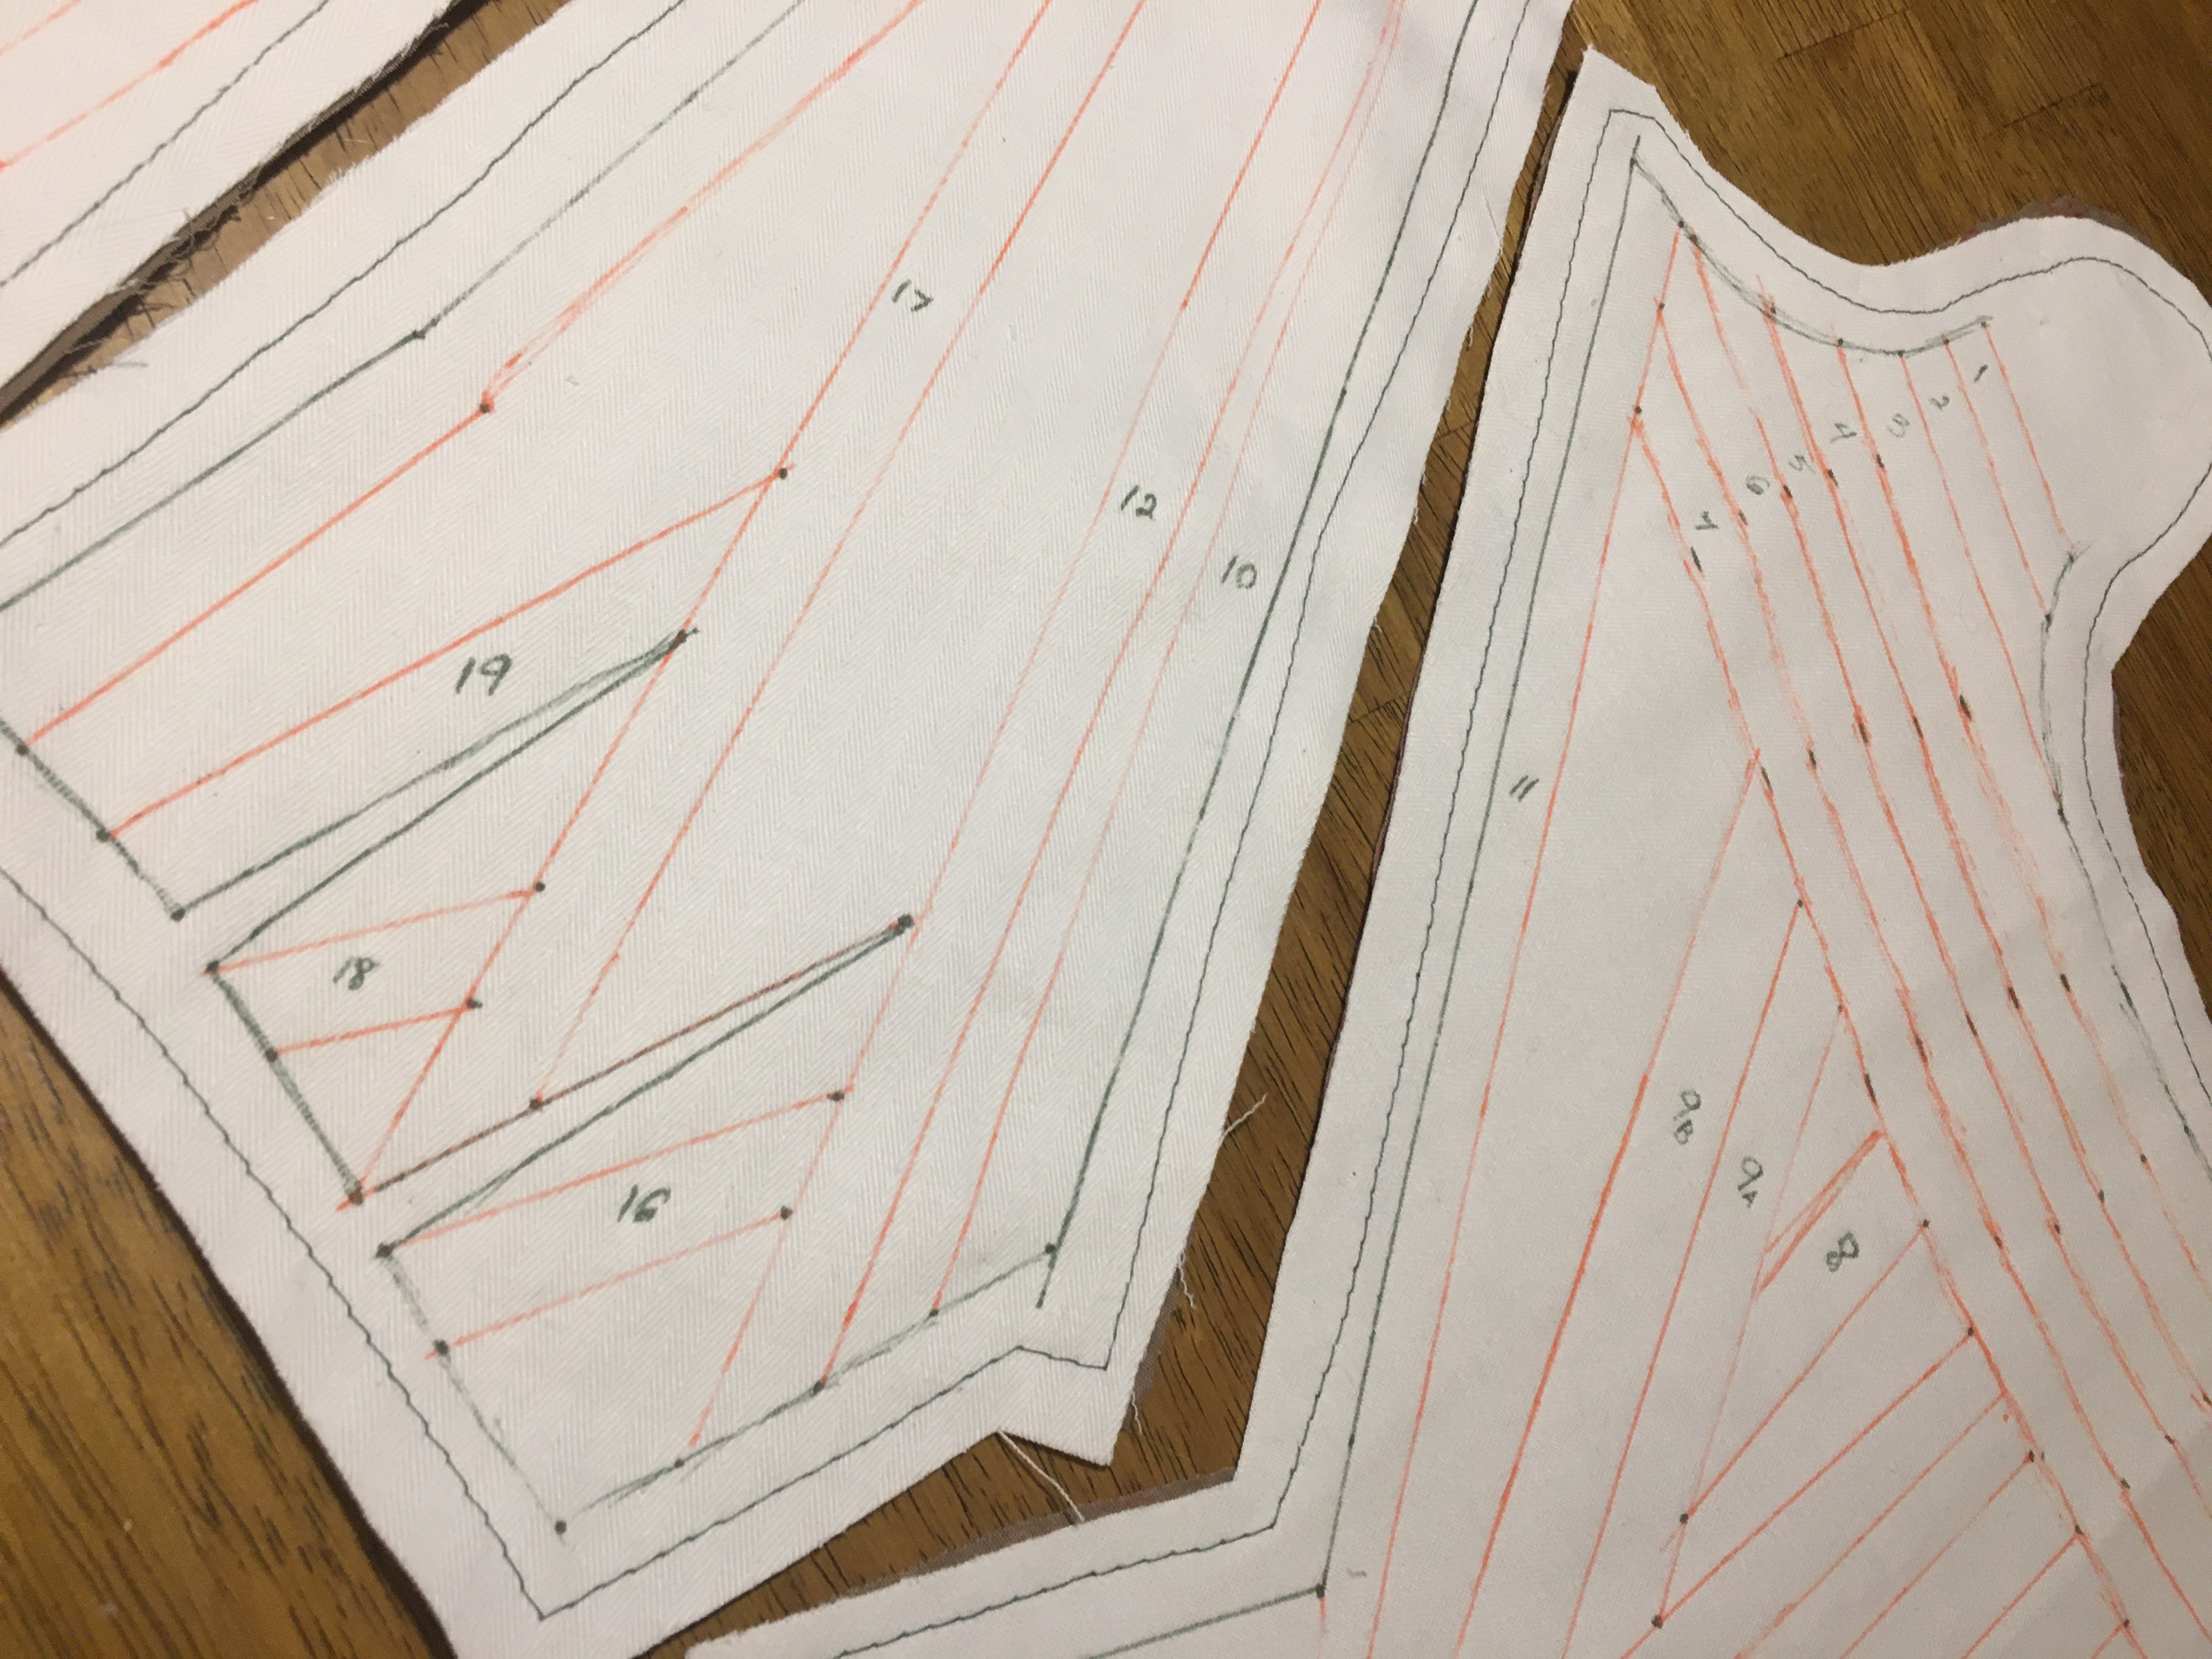
  1. Trace original pattern from book and cut out.  I recommend labeling what each piece is here already and keep them in a bag, folder, or dish so they don’t get lost. Also be sure to mark any notches or notes to be transferred later.
  2. Tape tracing pattern piece to corner of larger paper.  Ideally, you’ll want to match right angles with right angles if possible to make fitting on the paper easier.  In general though, make sure your piece isn’t angled in a way that you’ll run off your page.
  3. Select a point to measure from for all markings.  I always choose a point closest to the right corner of the large paper, again so that you don’t run off your page. 
  4. Measure the distance between this origin point to another point on the pattern (corner, convex/concave of curve, etc.)
  5. Multiply that measurement by your scaling factor.  If the book is at ⅛ scale, you’ll multiply by 8, ¼ scale = x4, ⅙ scale = x6, etc. 
  6. Then, using your meter stick or long straight edge, mark the value from step 5 from the origin point along the EXACT same angle as from the origin to the point on the tracing paper
  7. Repeat steps 4-6 for as many points as you need to accurately show the shape.  My usual markings is to have one point on every corner and a dot for every 1-4” along curves (depending on the tightness of the curve)
  8. Add markings in a different color pen or symbol for notches, folds, pleats, or other notes from the original pattern.
  9. Once you have enough points to see the constellation of the pattern, remove the tracing paper piece and begin to connect the dots
    1. Straight lines are simply connected using your meter stick
    2. Curves should be connected either free hand if you have enough points and a steady hand, or by using the French curve and curved drafting tools.  I try the various curves along at least 3 dots to find the depth of curve that fits best and continue with the various curves, blending between transitions as necessary.  This takes a bit of practice and finesse, and lots of reworking to get accurate curves, especially if you don’t have enough dots to start.  Err on the side of caution as you start with as many dots as you can tolerate.  This also helps eliminate inaccuracy of measurements, math, or transfer.  You may have an outlier or two just to the smallest shift in angle or even a 1/16” measurement off. Remeasure and replot these if necessary. 
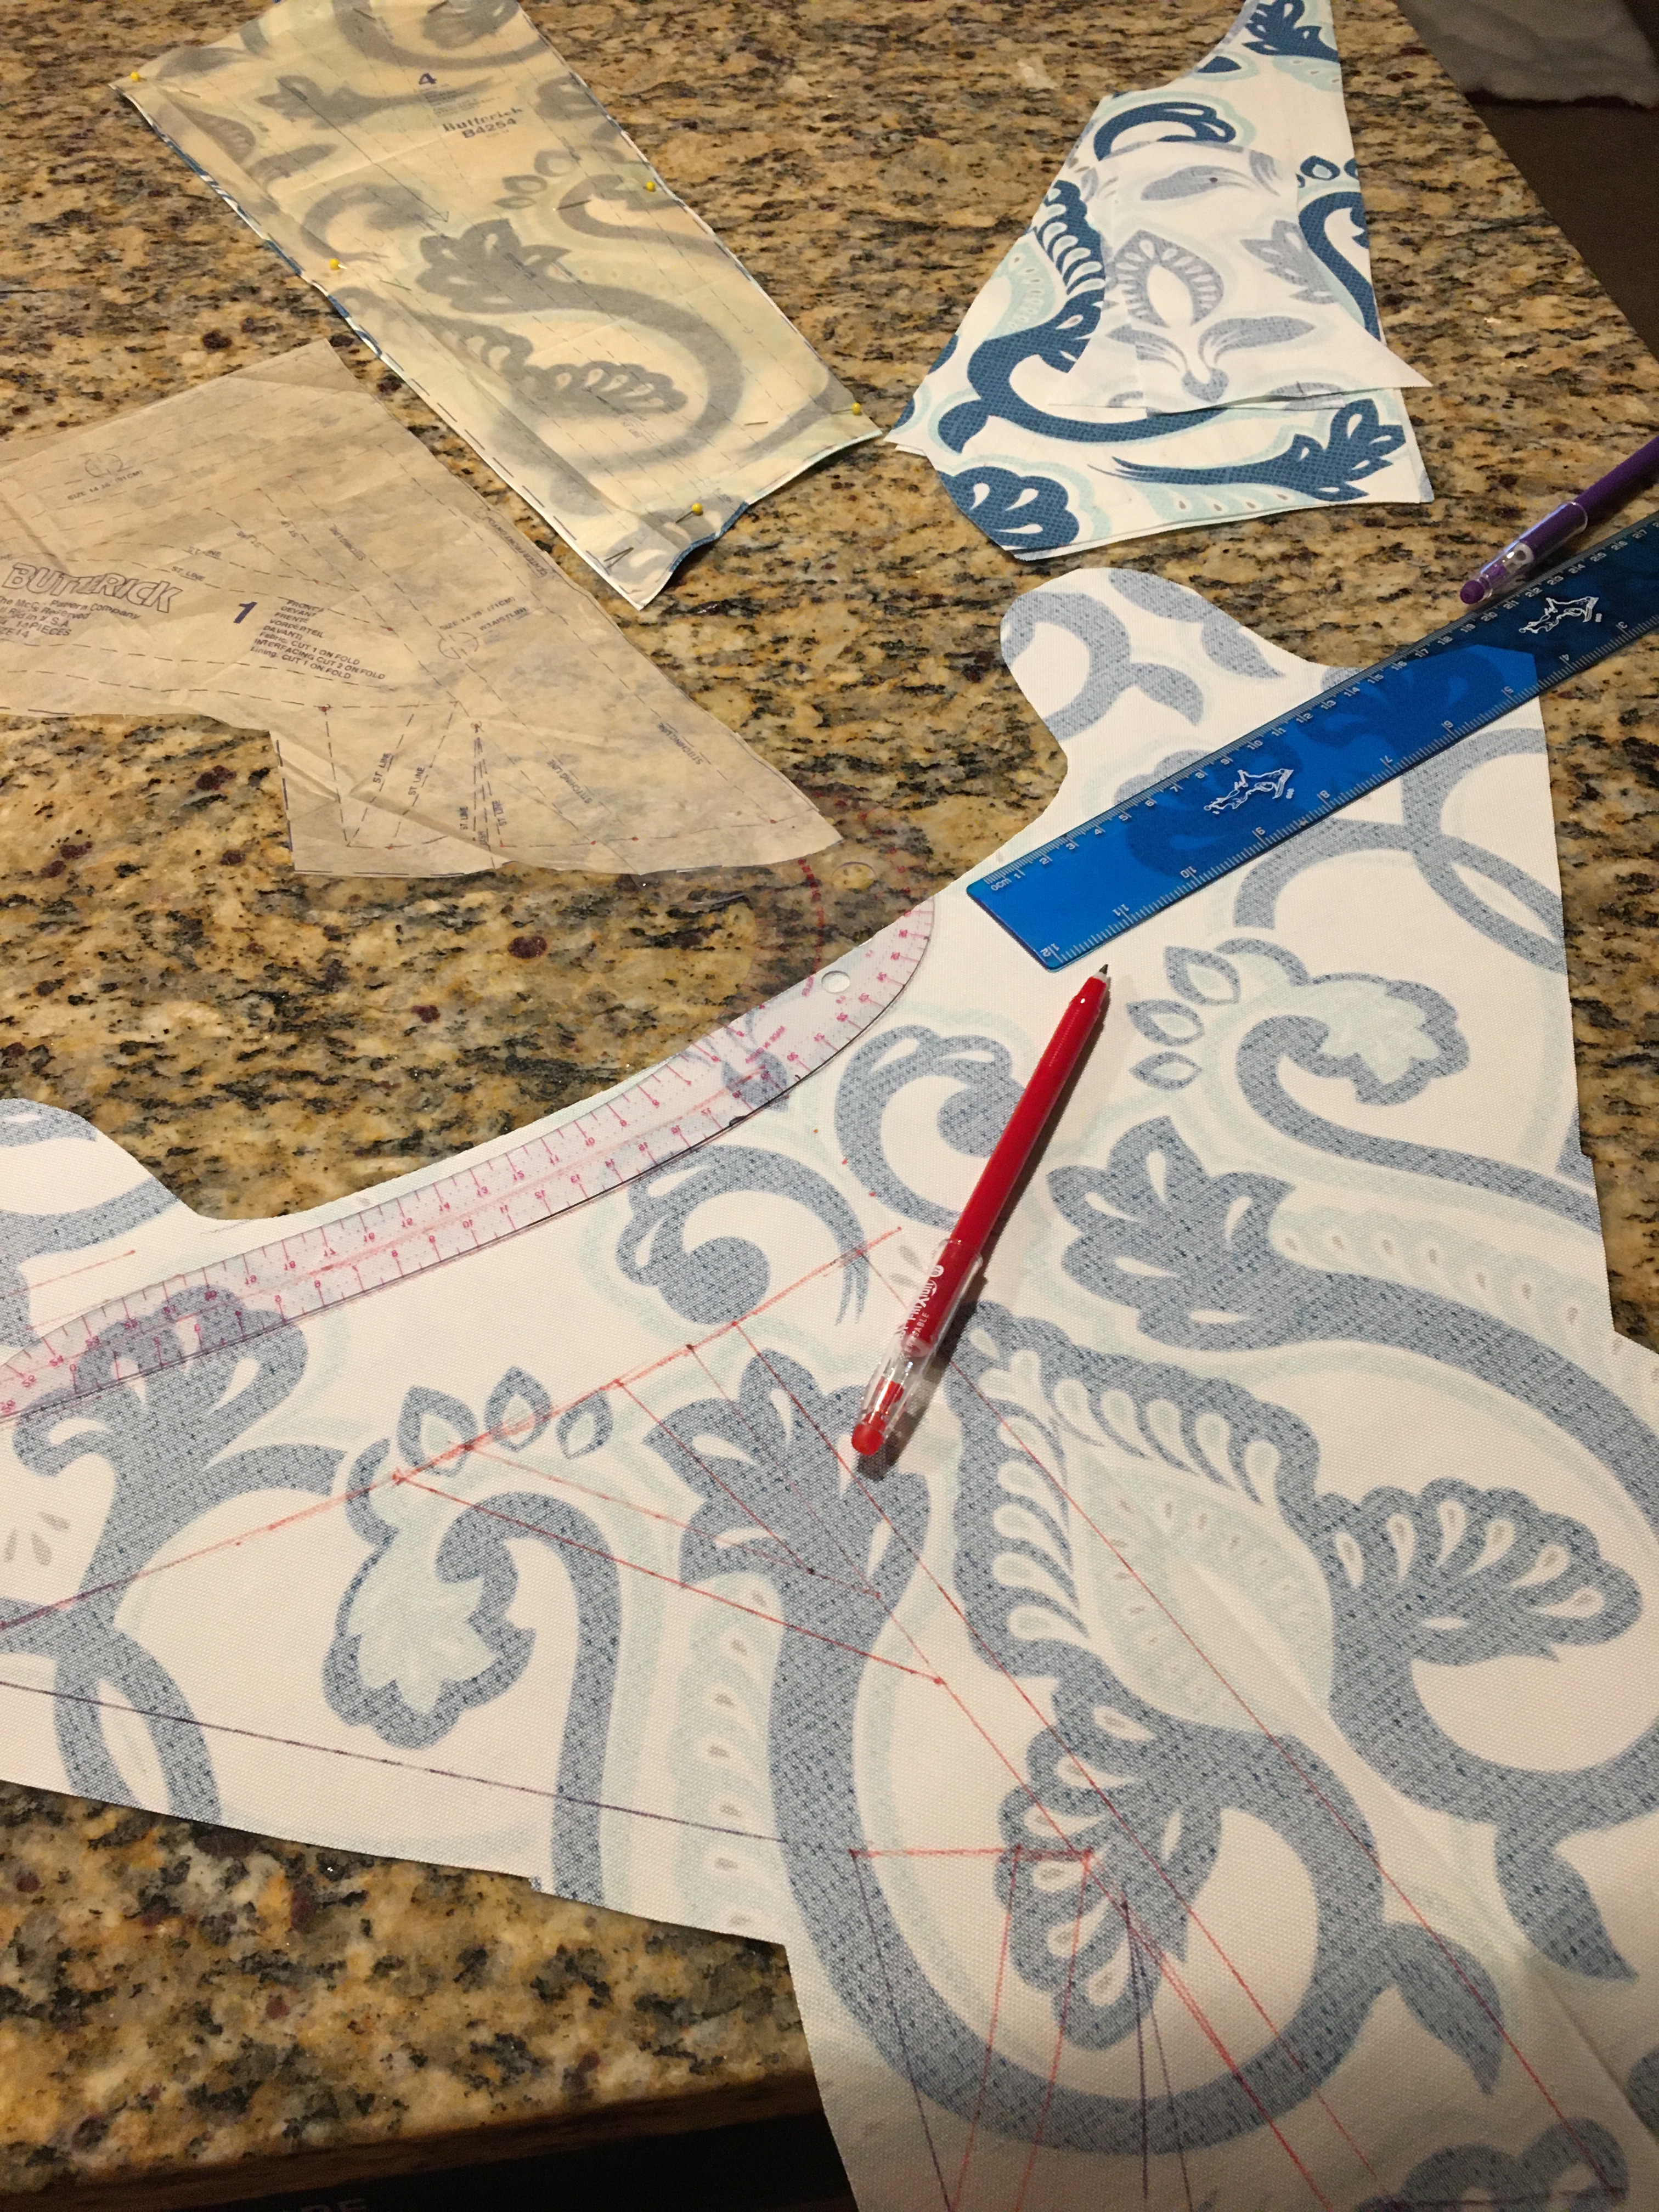
  10. Once your dots are all connected, you have a full pattern that can be cut and used for a mock up!  Transferred patterns like this typically need further size adjustment since they are a single size, so check the description on what standard measurements they are for and adjust initially before cutting mock up fabric. 

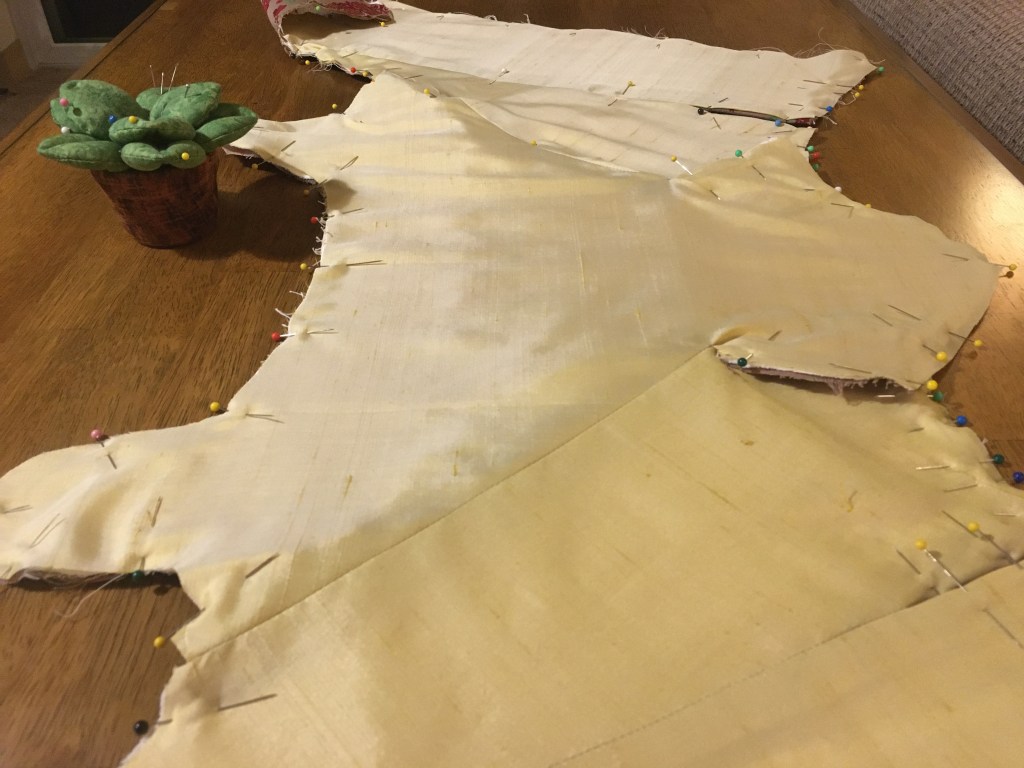
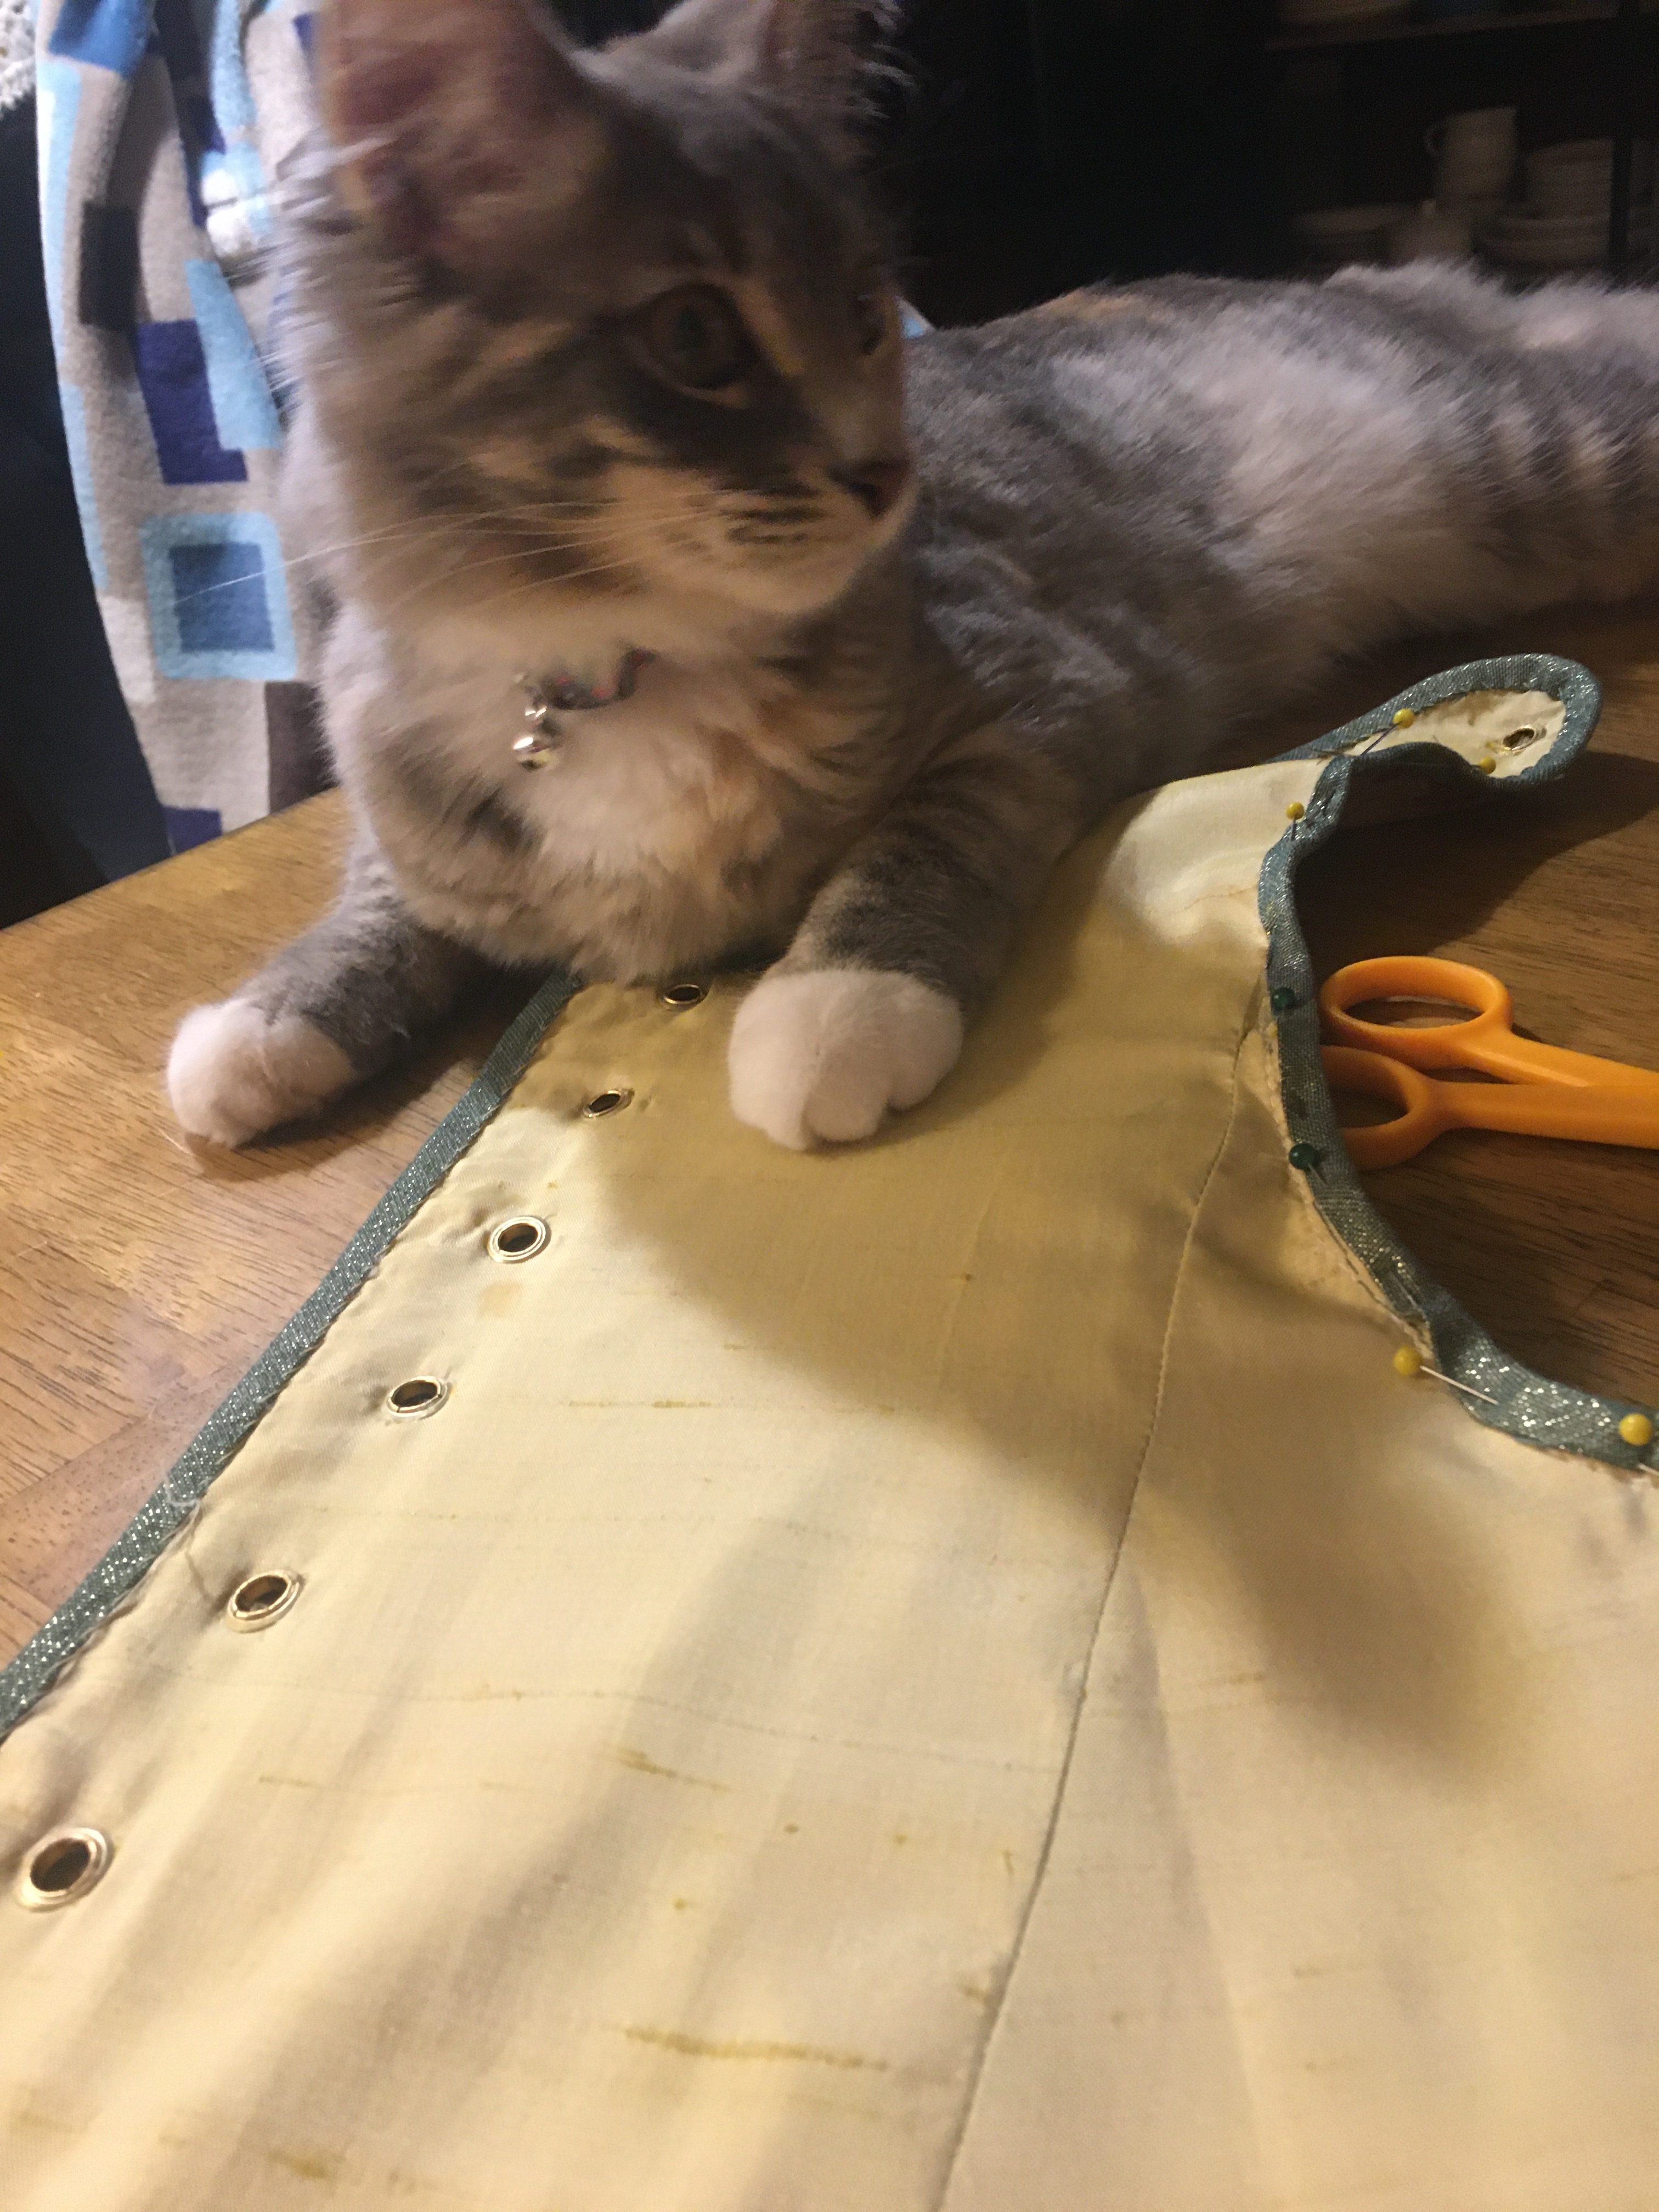
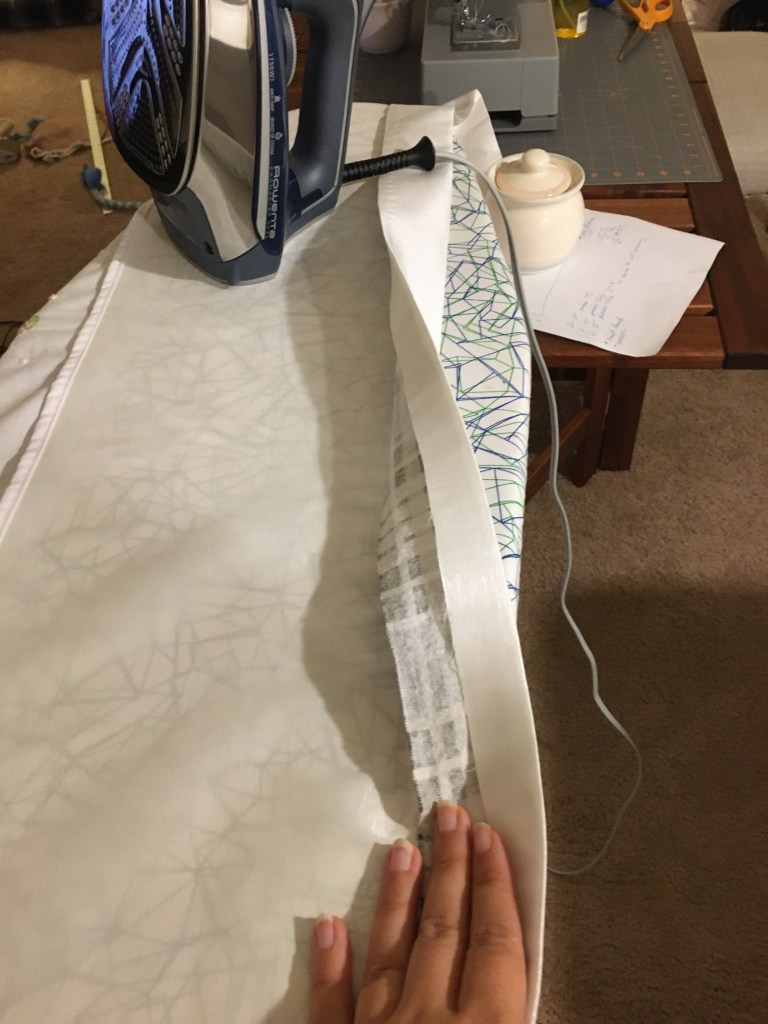
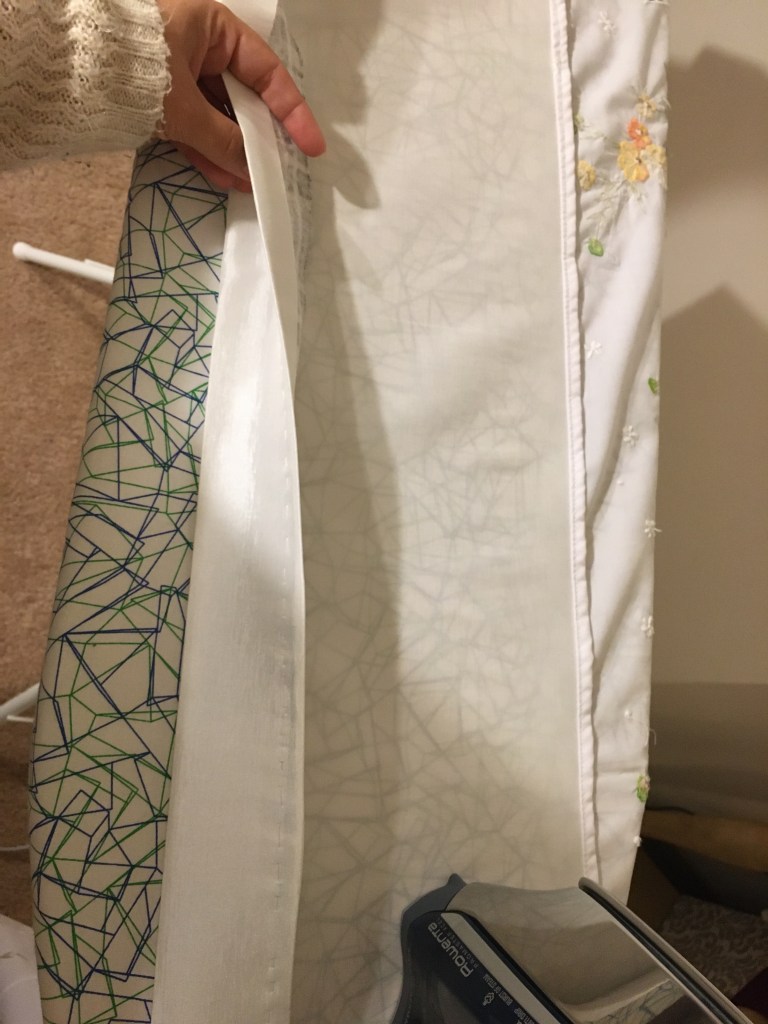
In following this technique, I drafted, adjusted, and cut a mockup of the chemise from a white microfiber sheet set my kitten had recently ripped.  

A general tip: thrift store king sheets are a great, cheap alternative for making mock-ups

I planned to use this mock-up as a PJ dress later, so I chose to be thoughtful about the soft side being toward the body, but this is not necessary for other mockups. Repurposing!

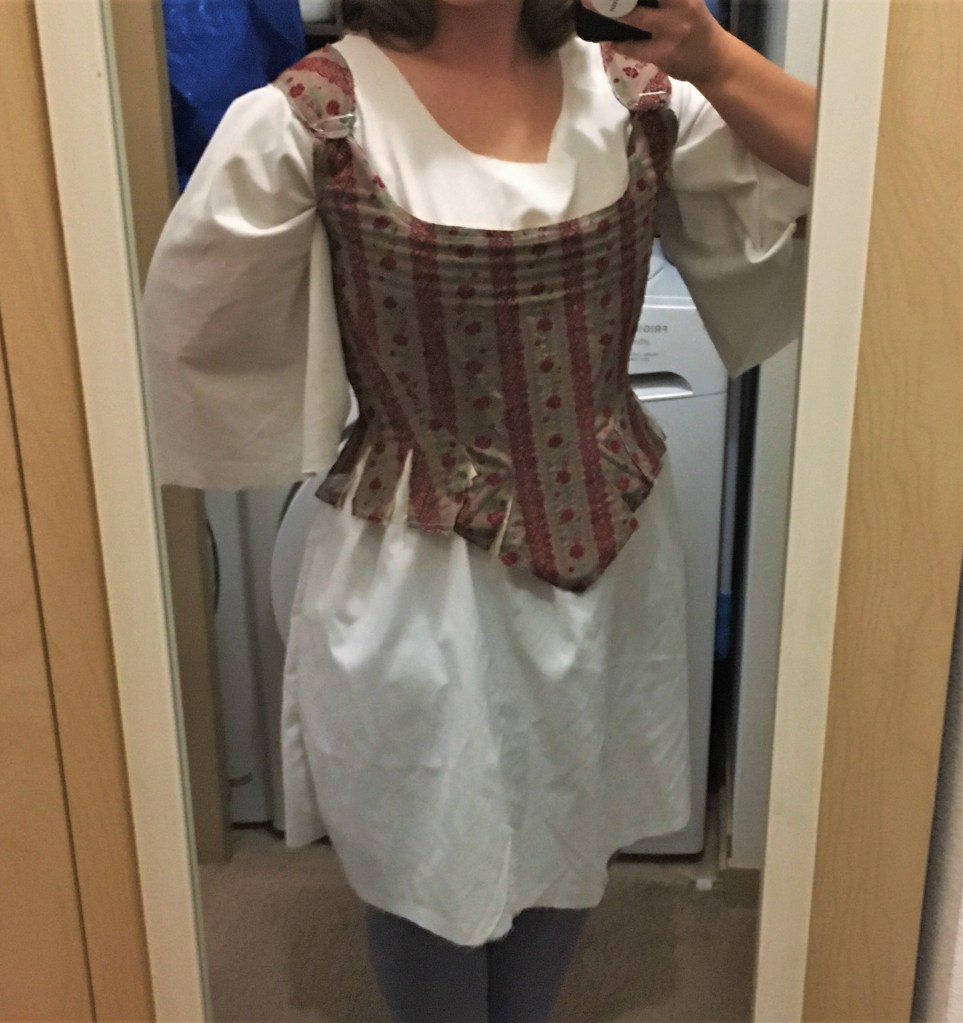
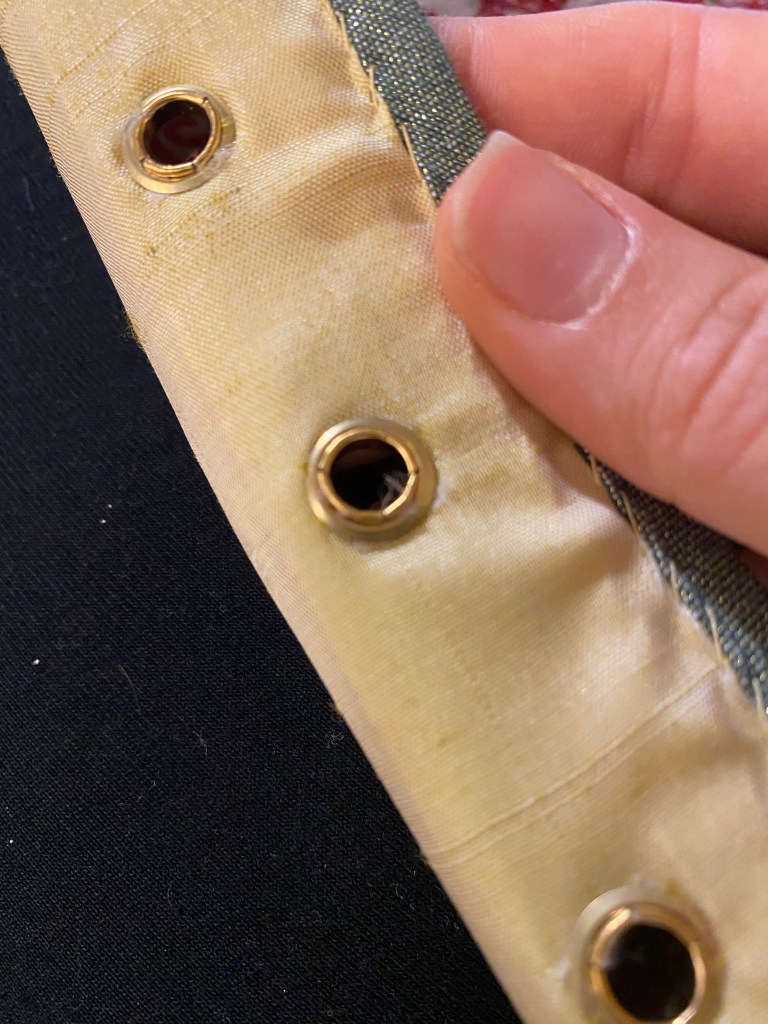
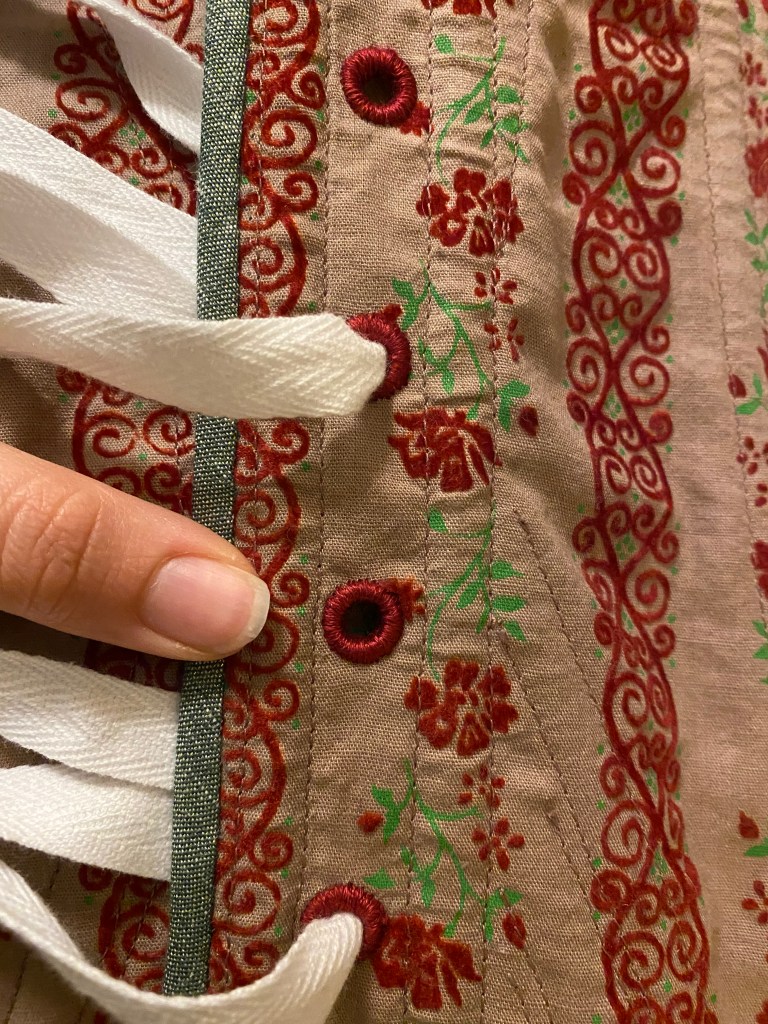
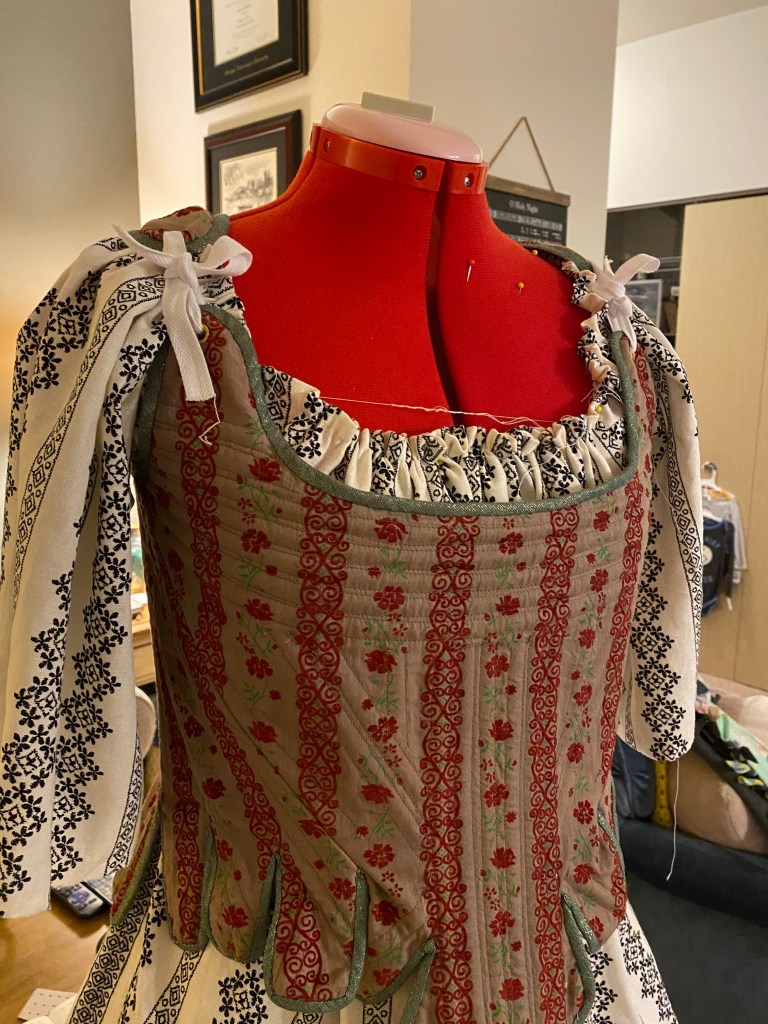
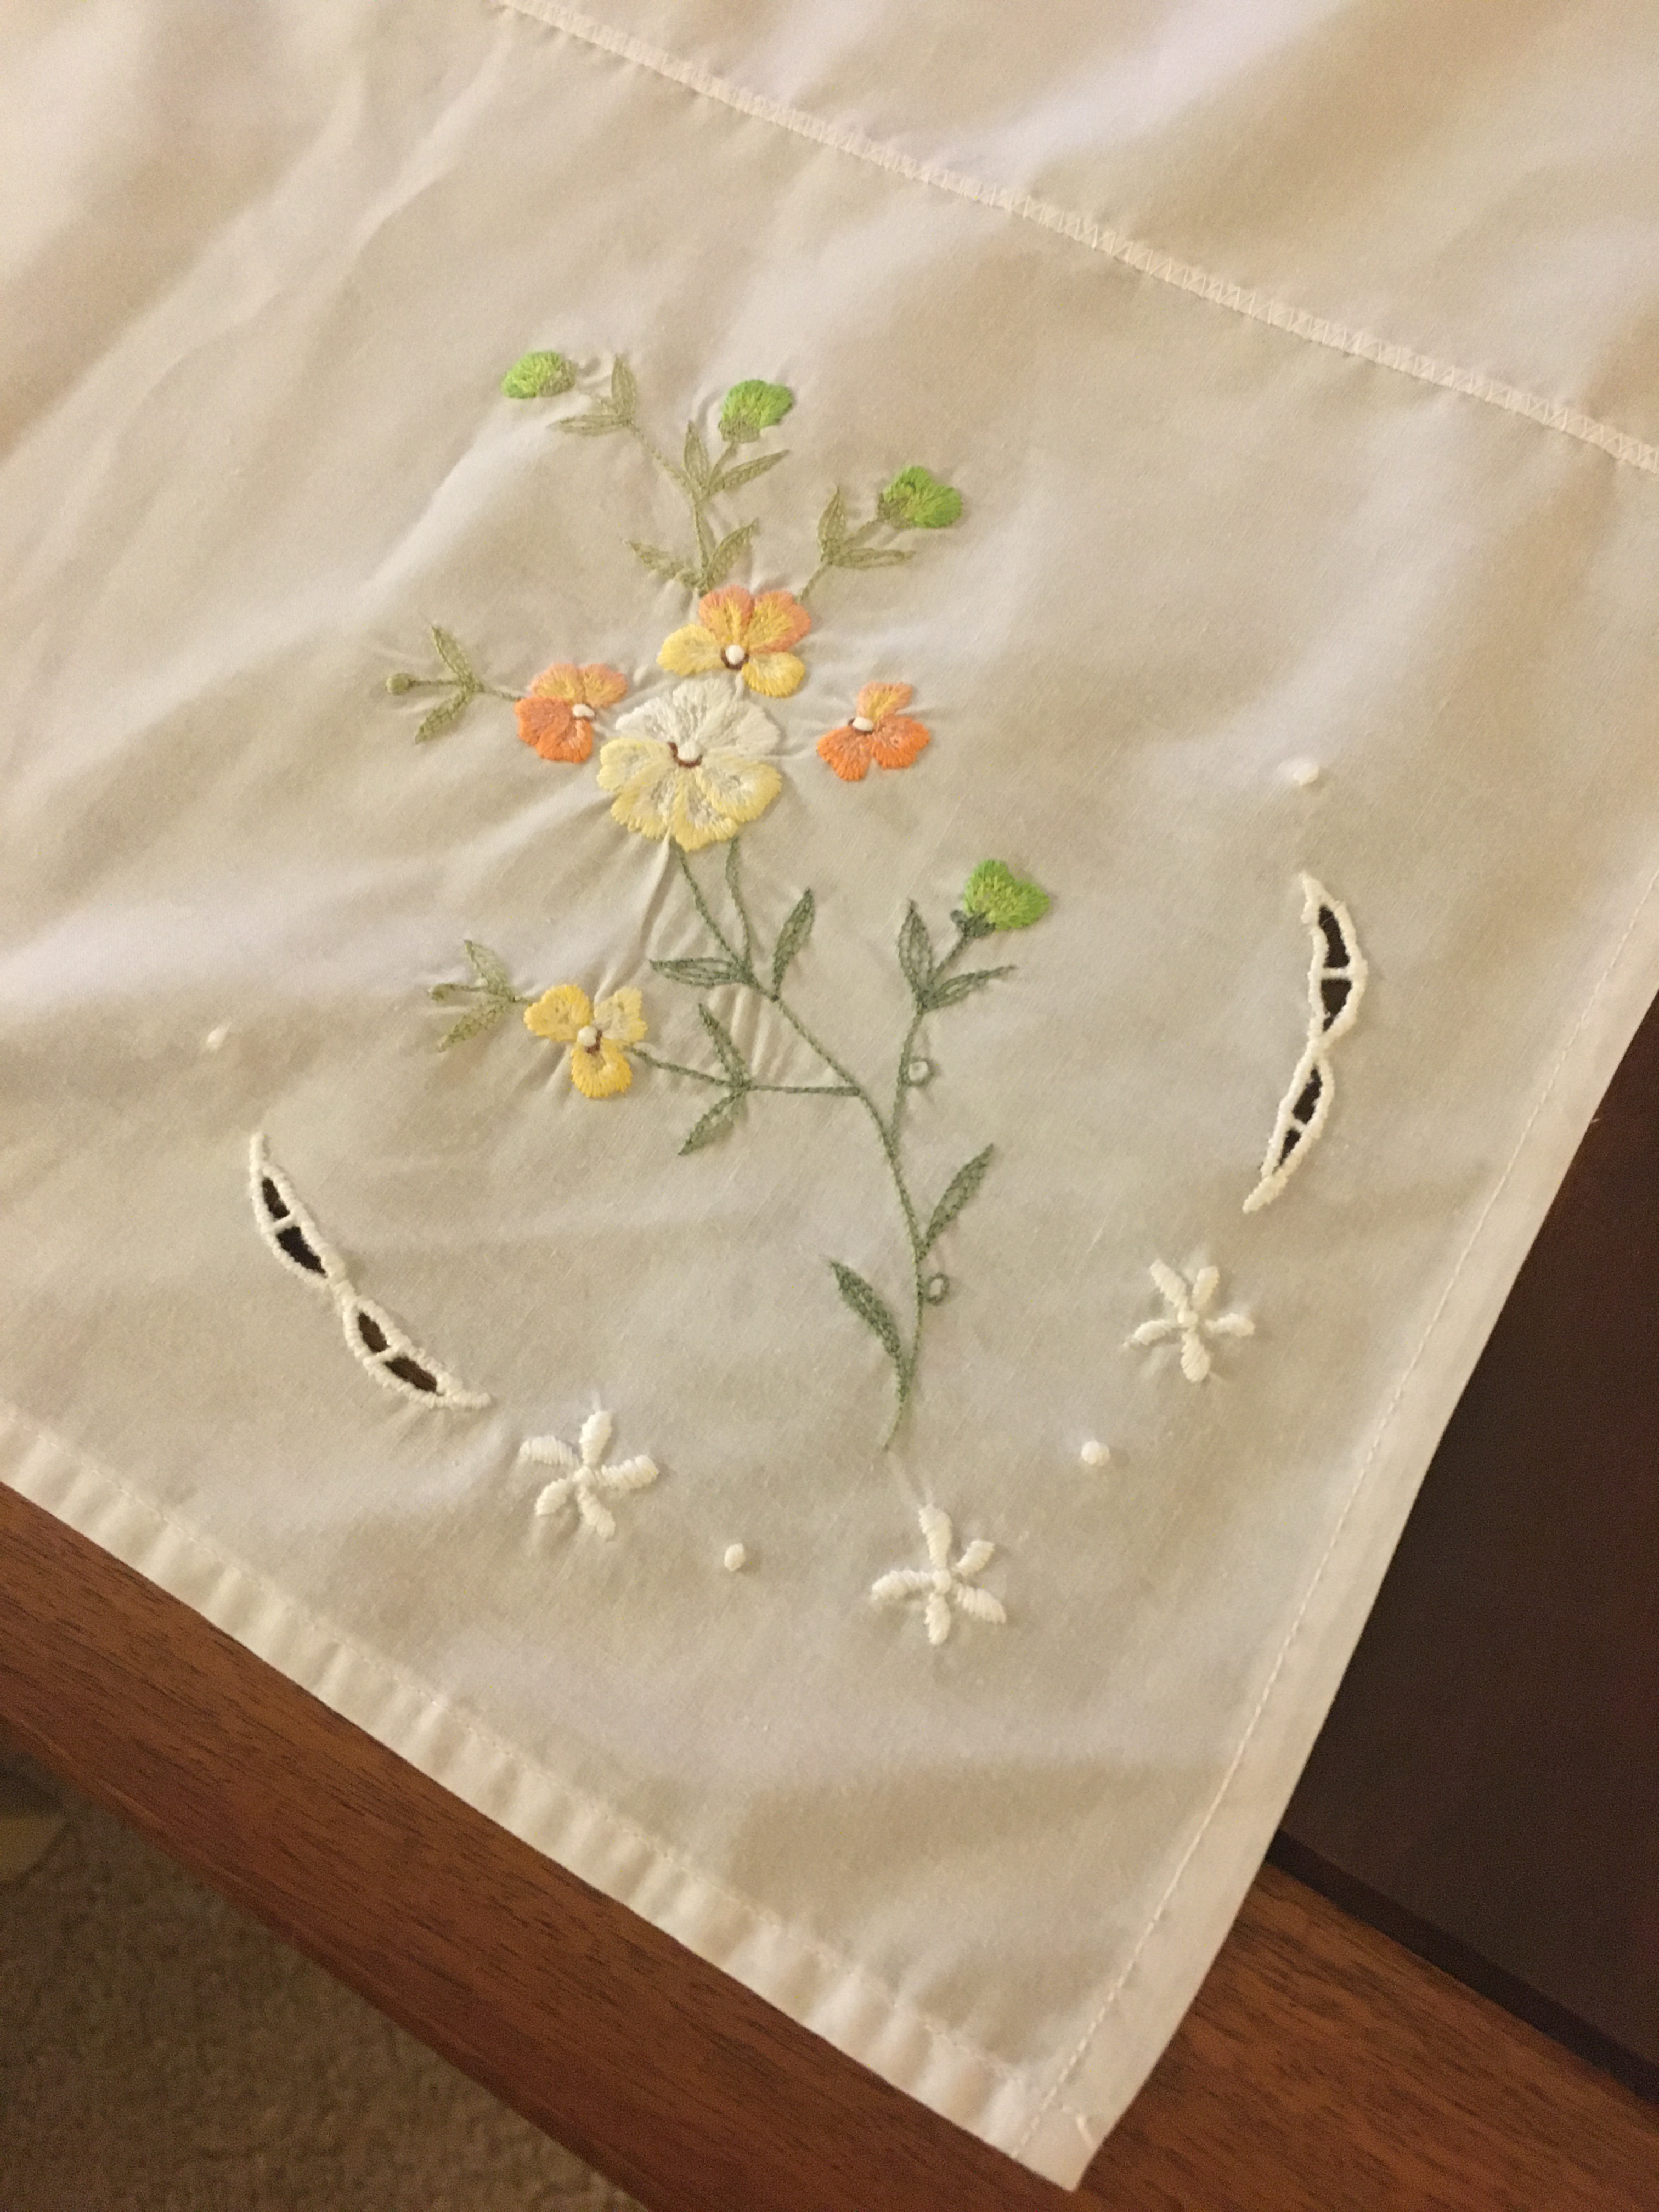
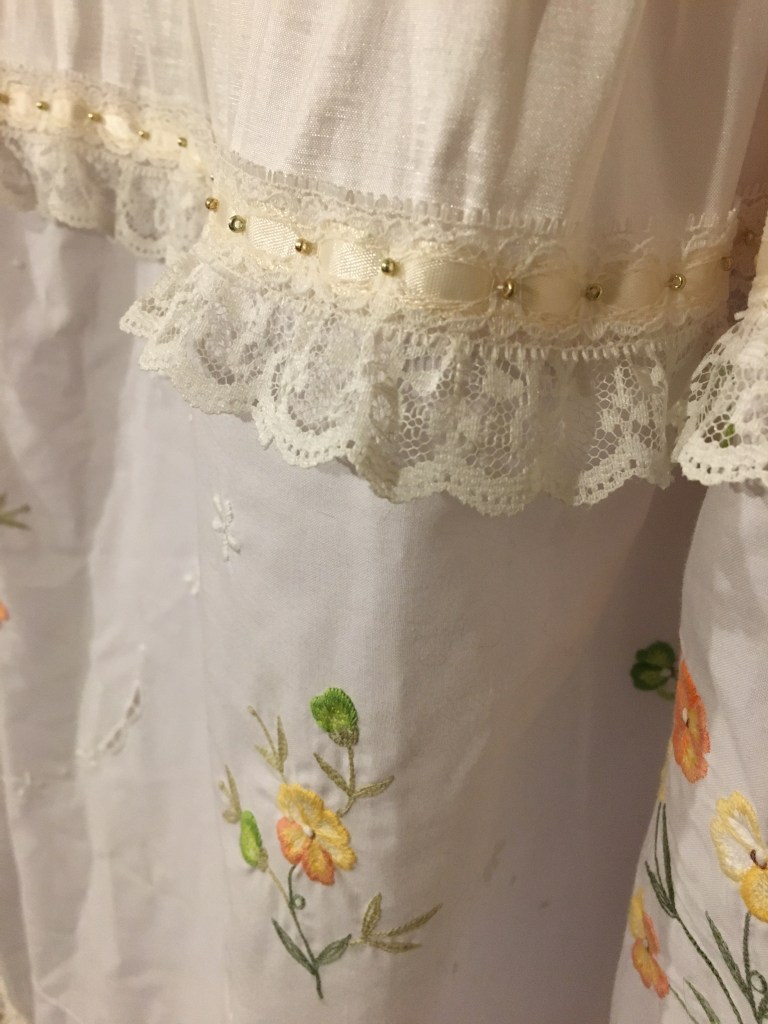
The neckline has a simple hemmed channel that I threaded cotton twill tape through to tighten and gather the neckline when worn. The channel gave a nice soft gather effect I was pleased with and eliminated any need for pattern alterations.  
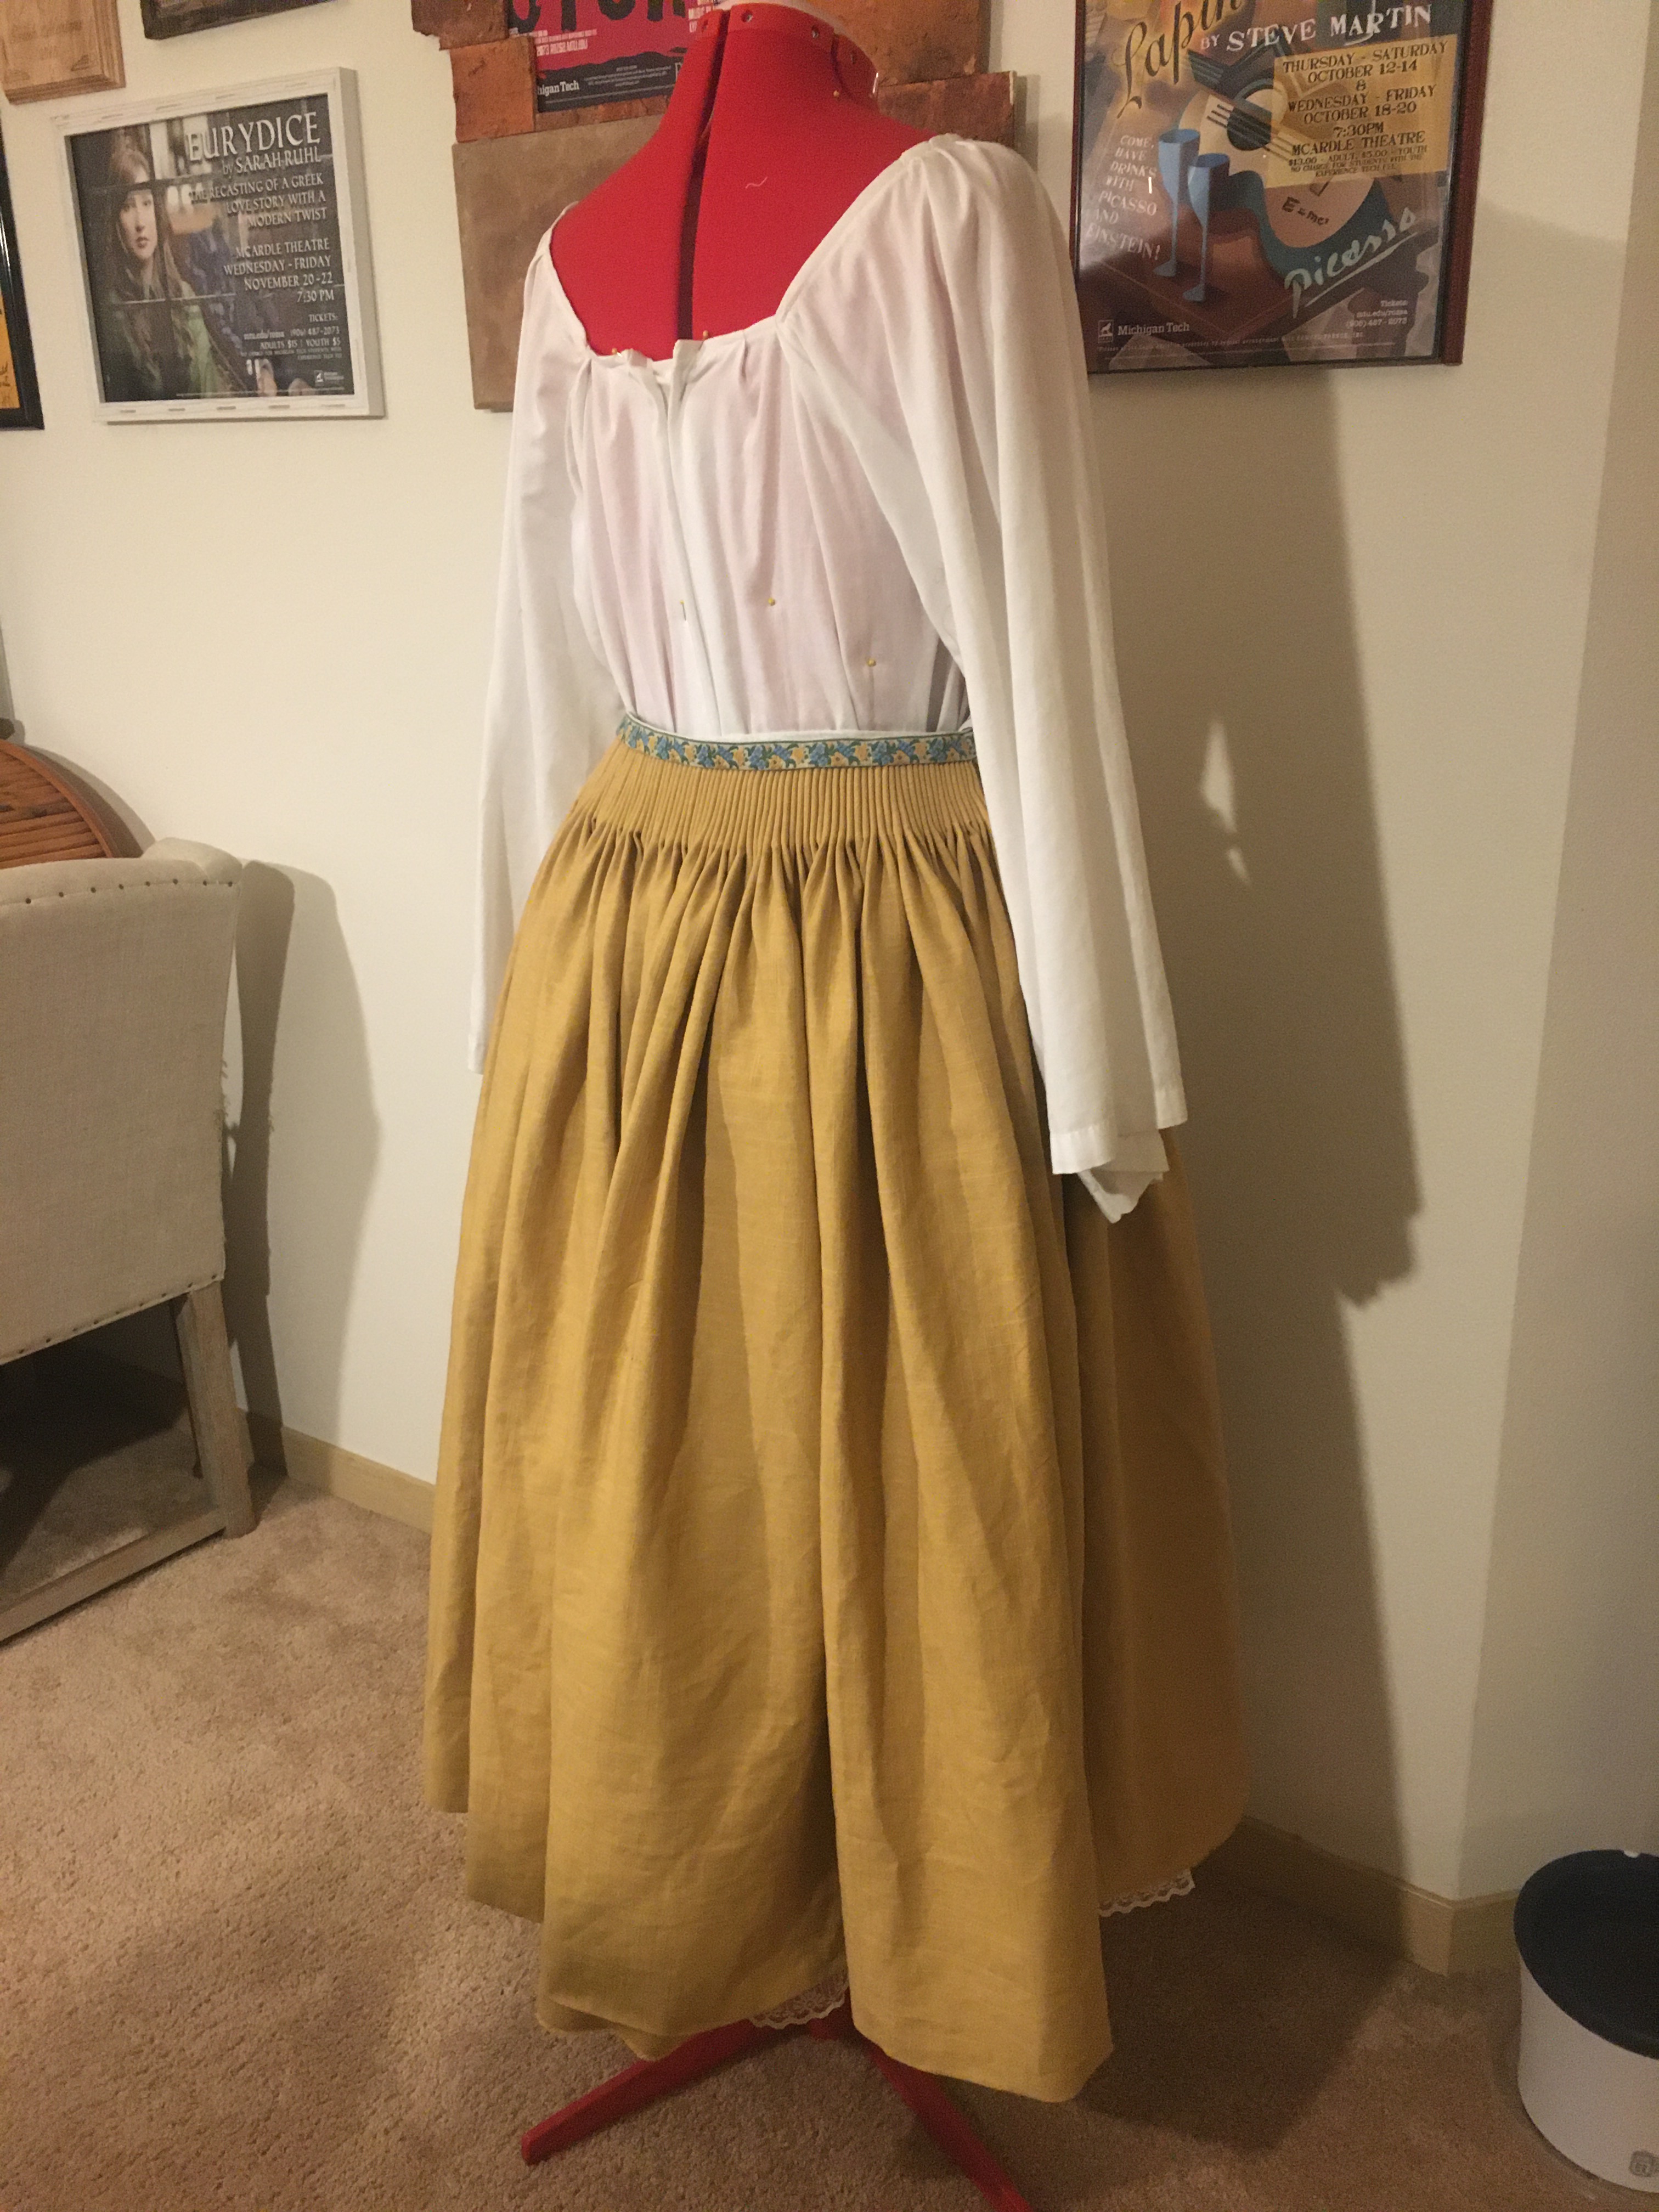
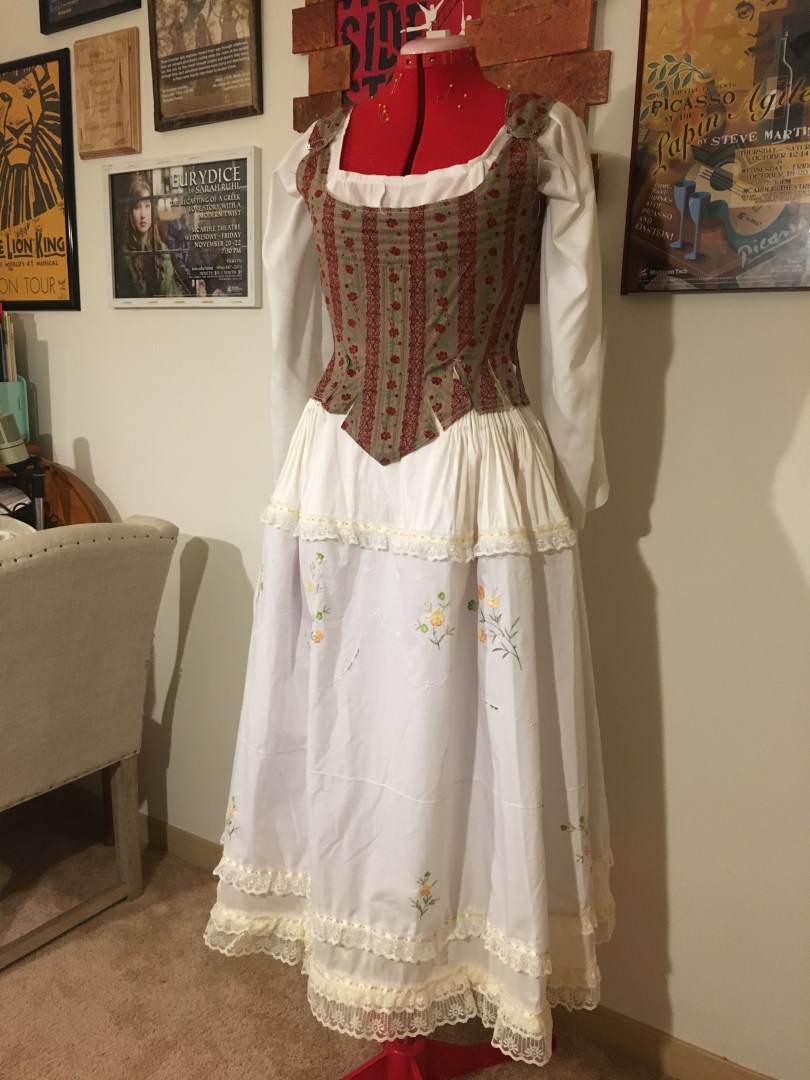
The Final Chemise

A lesson in Returning to the drawing board when fabric patterns get in the way

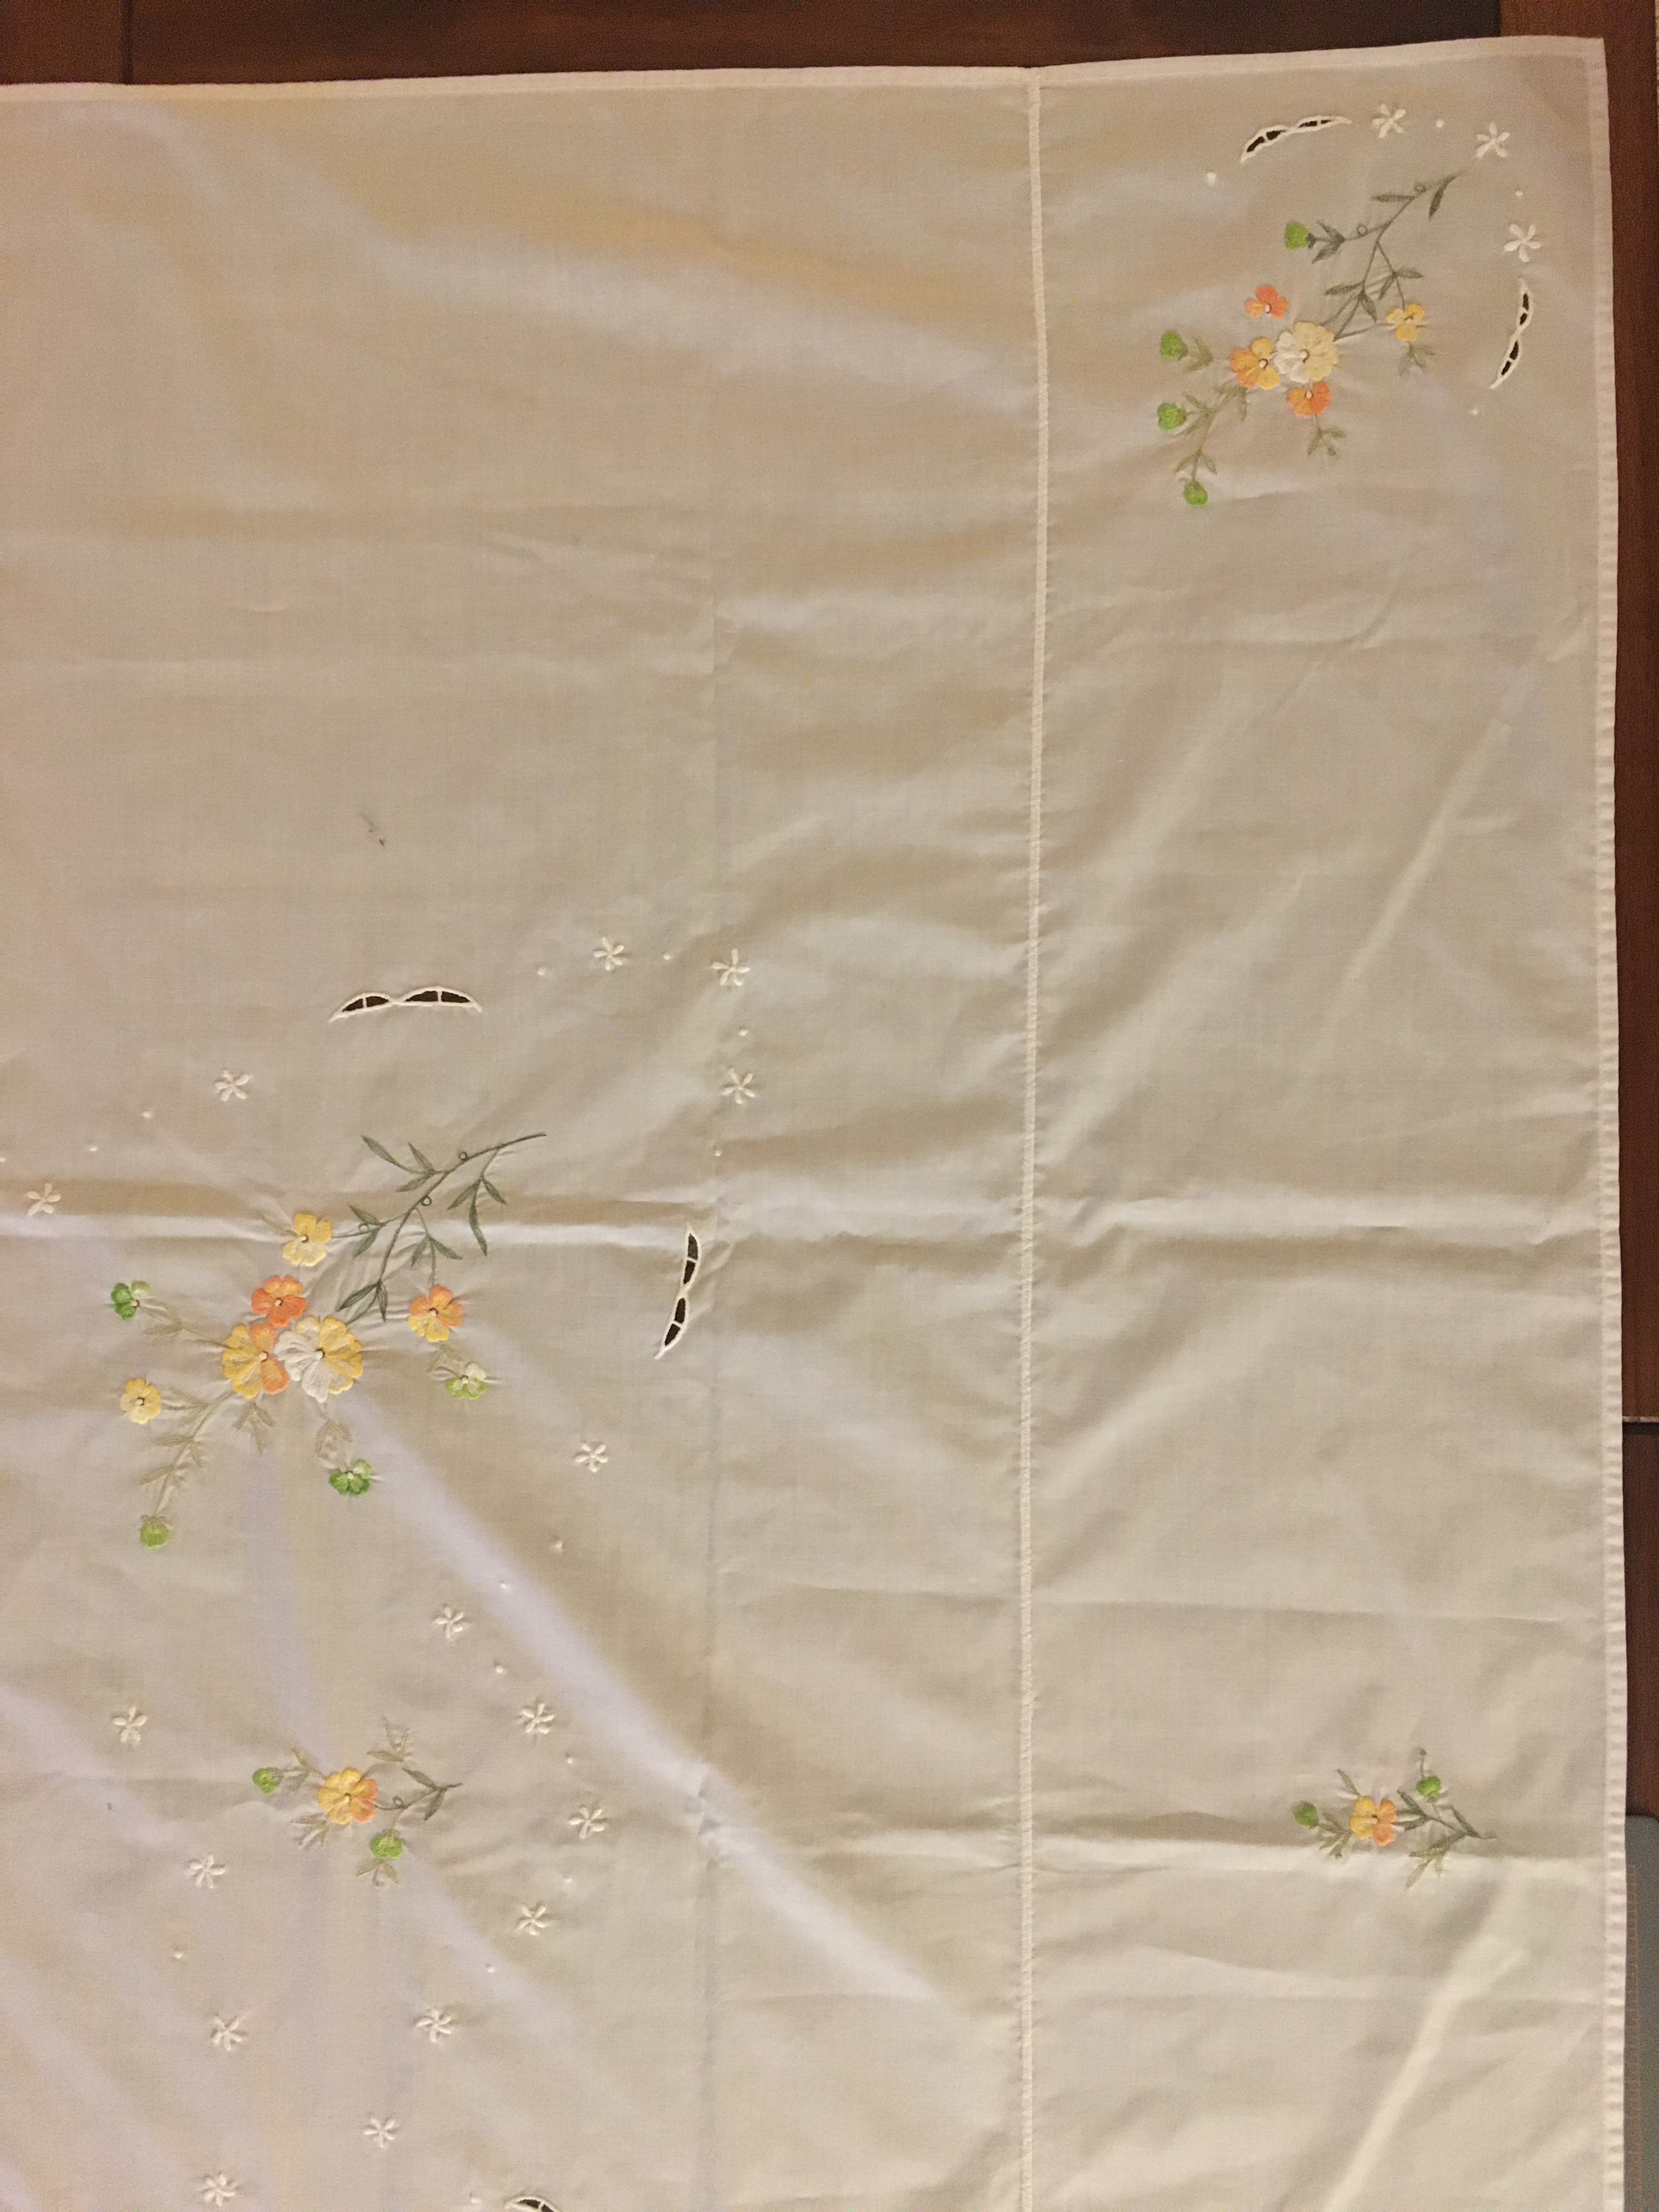
In selecting my fabric, I hoped to be able to piece together some of the vintage linens I had purchased originally as inspiration for the stays, but these proved to be much too small to ever be enough material.  Since I was set on using linen, I went to the local retail fabric store, hoping and praying I’d find something of decent quality so I could get started.  I struck out in the linens section as that they were all either too expensive for their lack-luster quality or simply uninspiring.  To feel better about the trip, I went to my tried and true clearance section to make sure there was nothing I missed for other project inspiration.

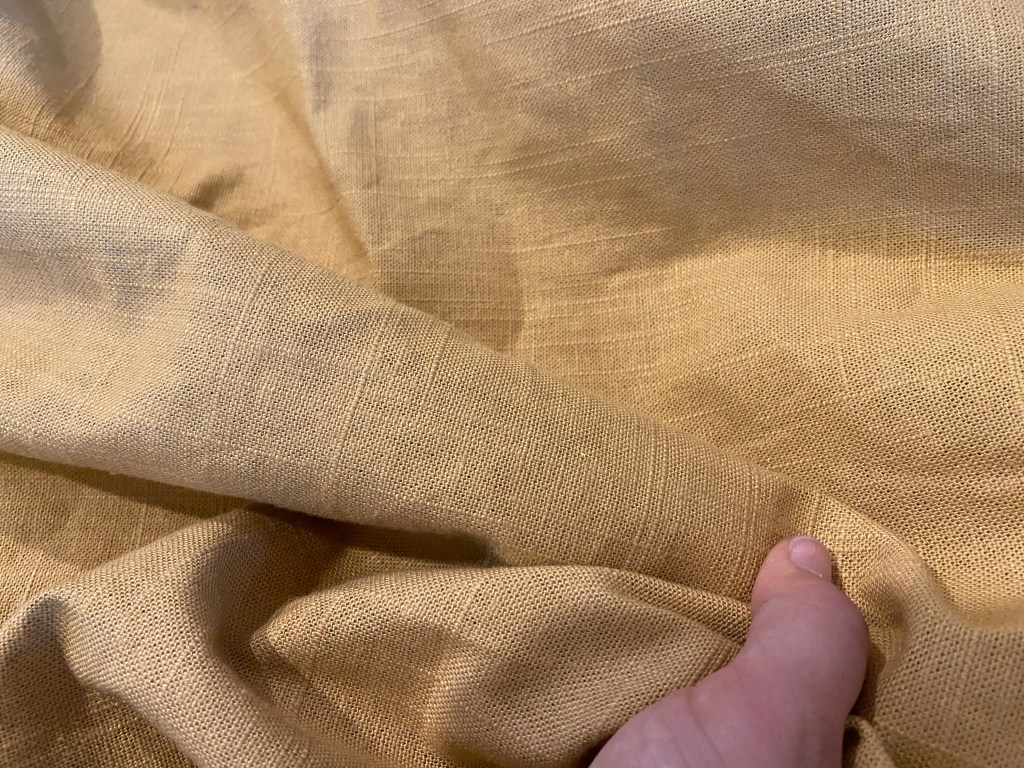
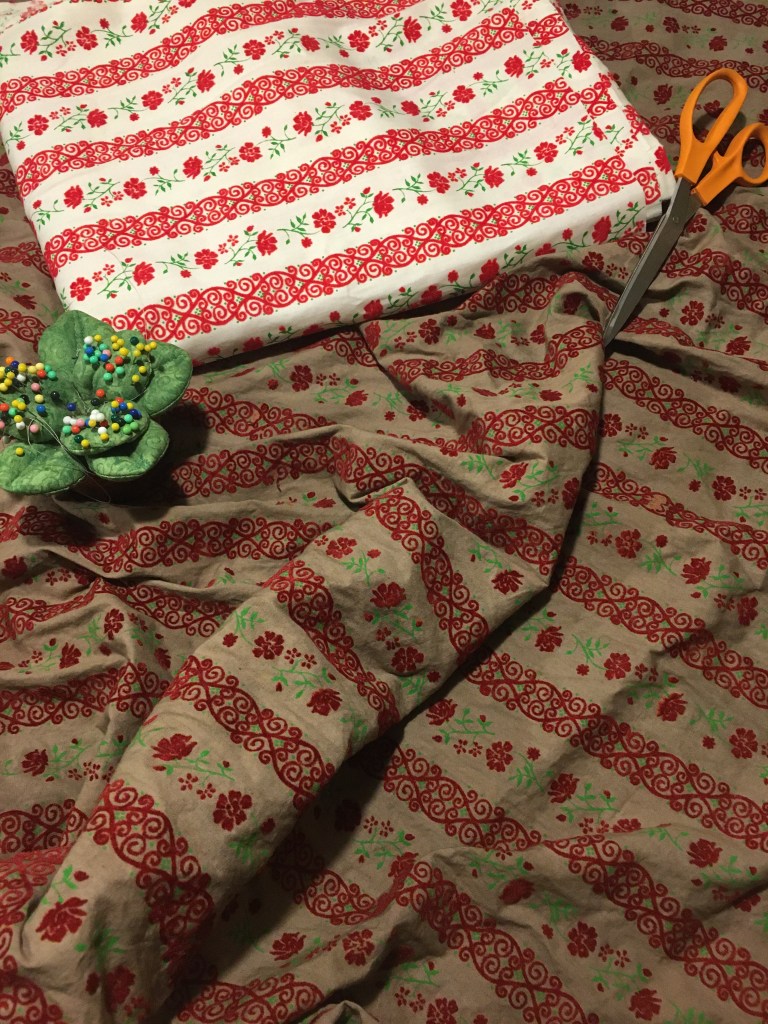
Low and behold, the perfect linen was there, on the spot check clearance shelf.  

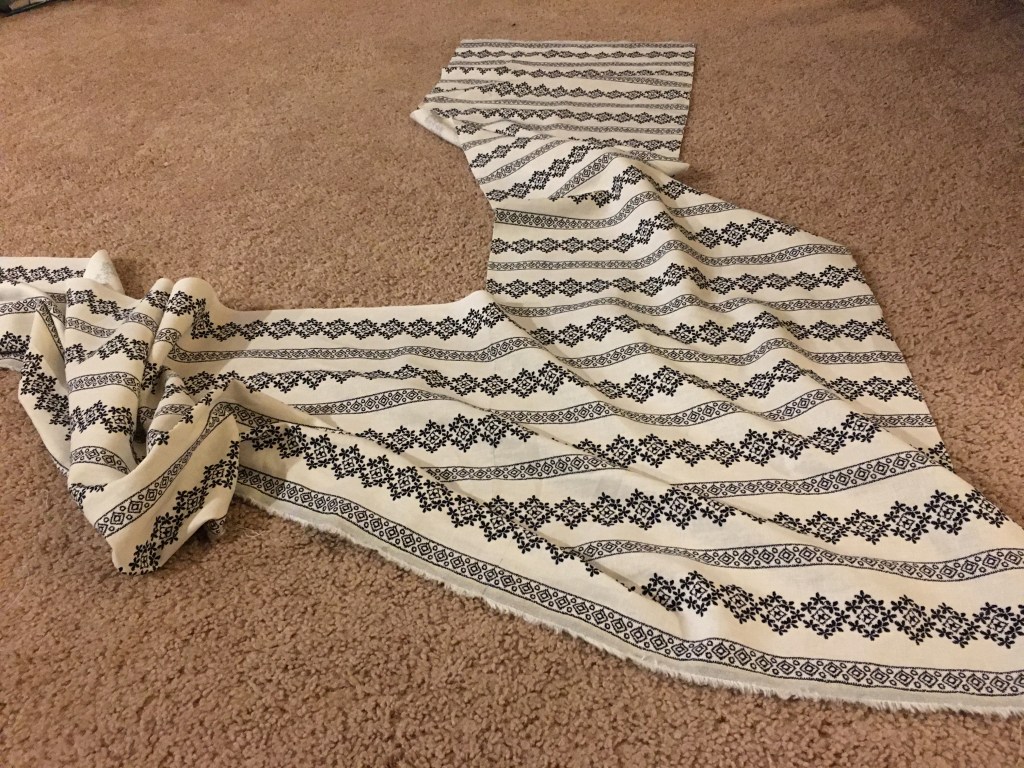
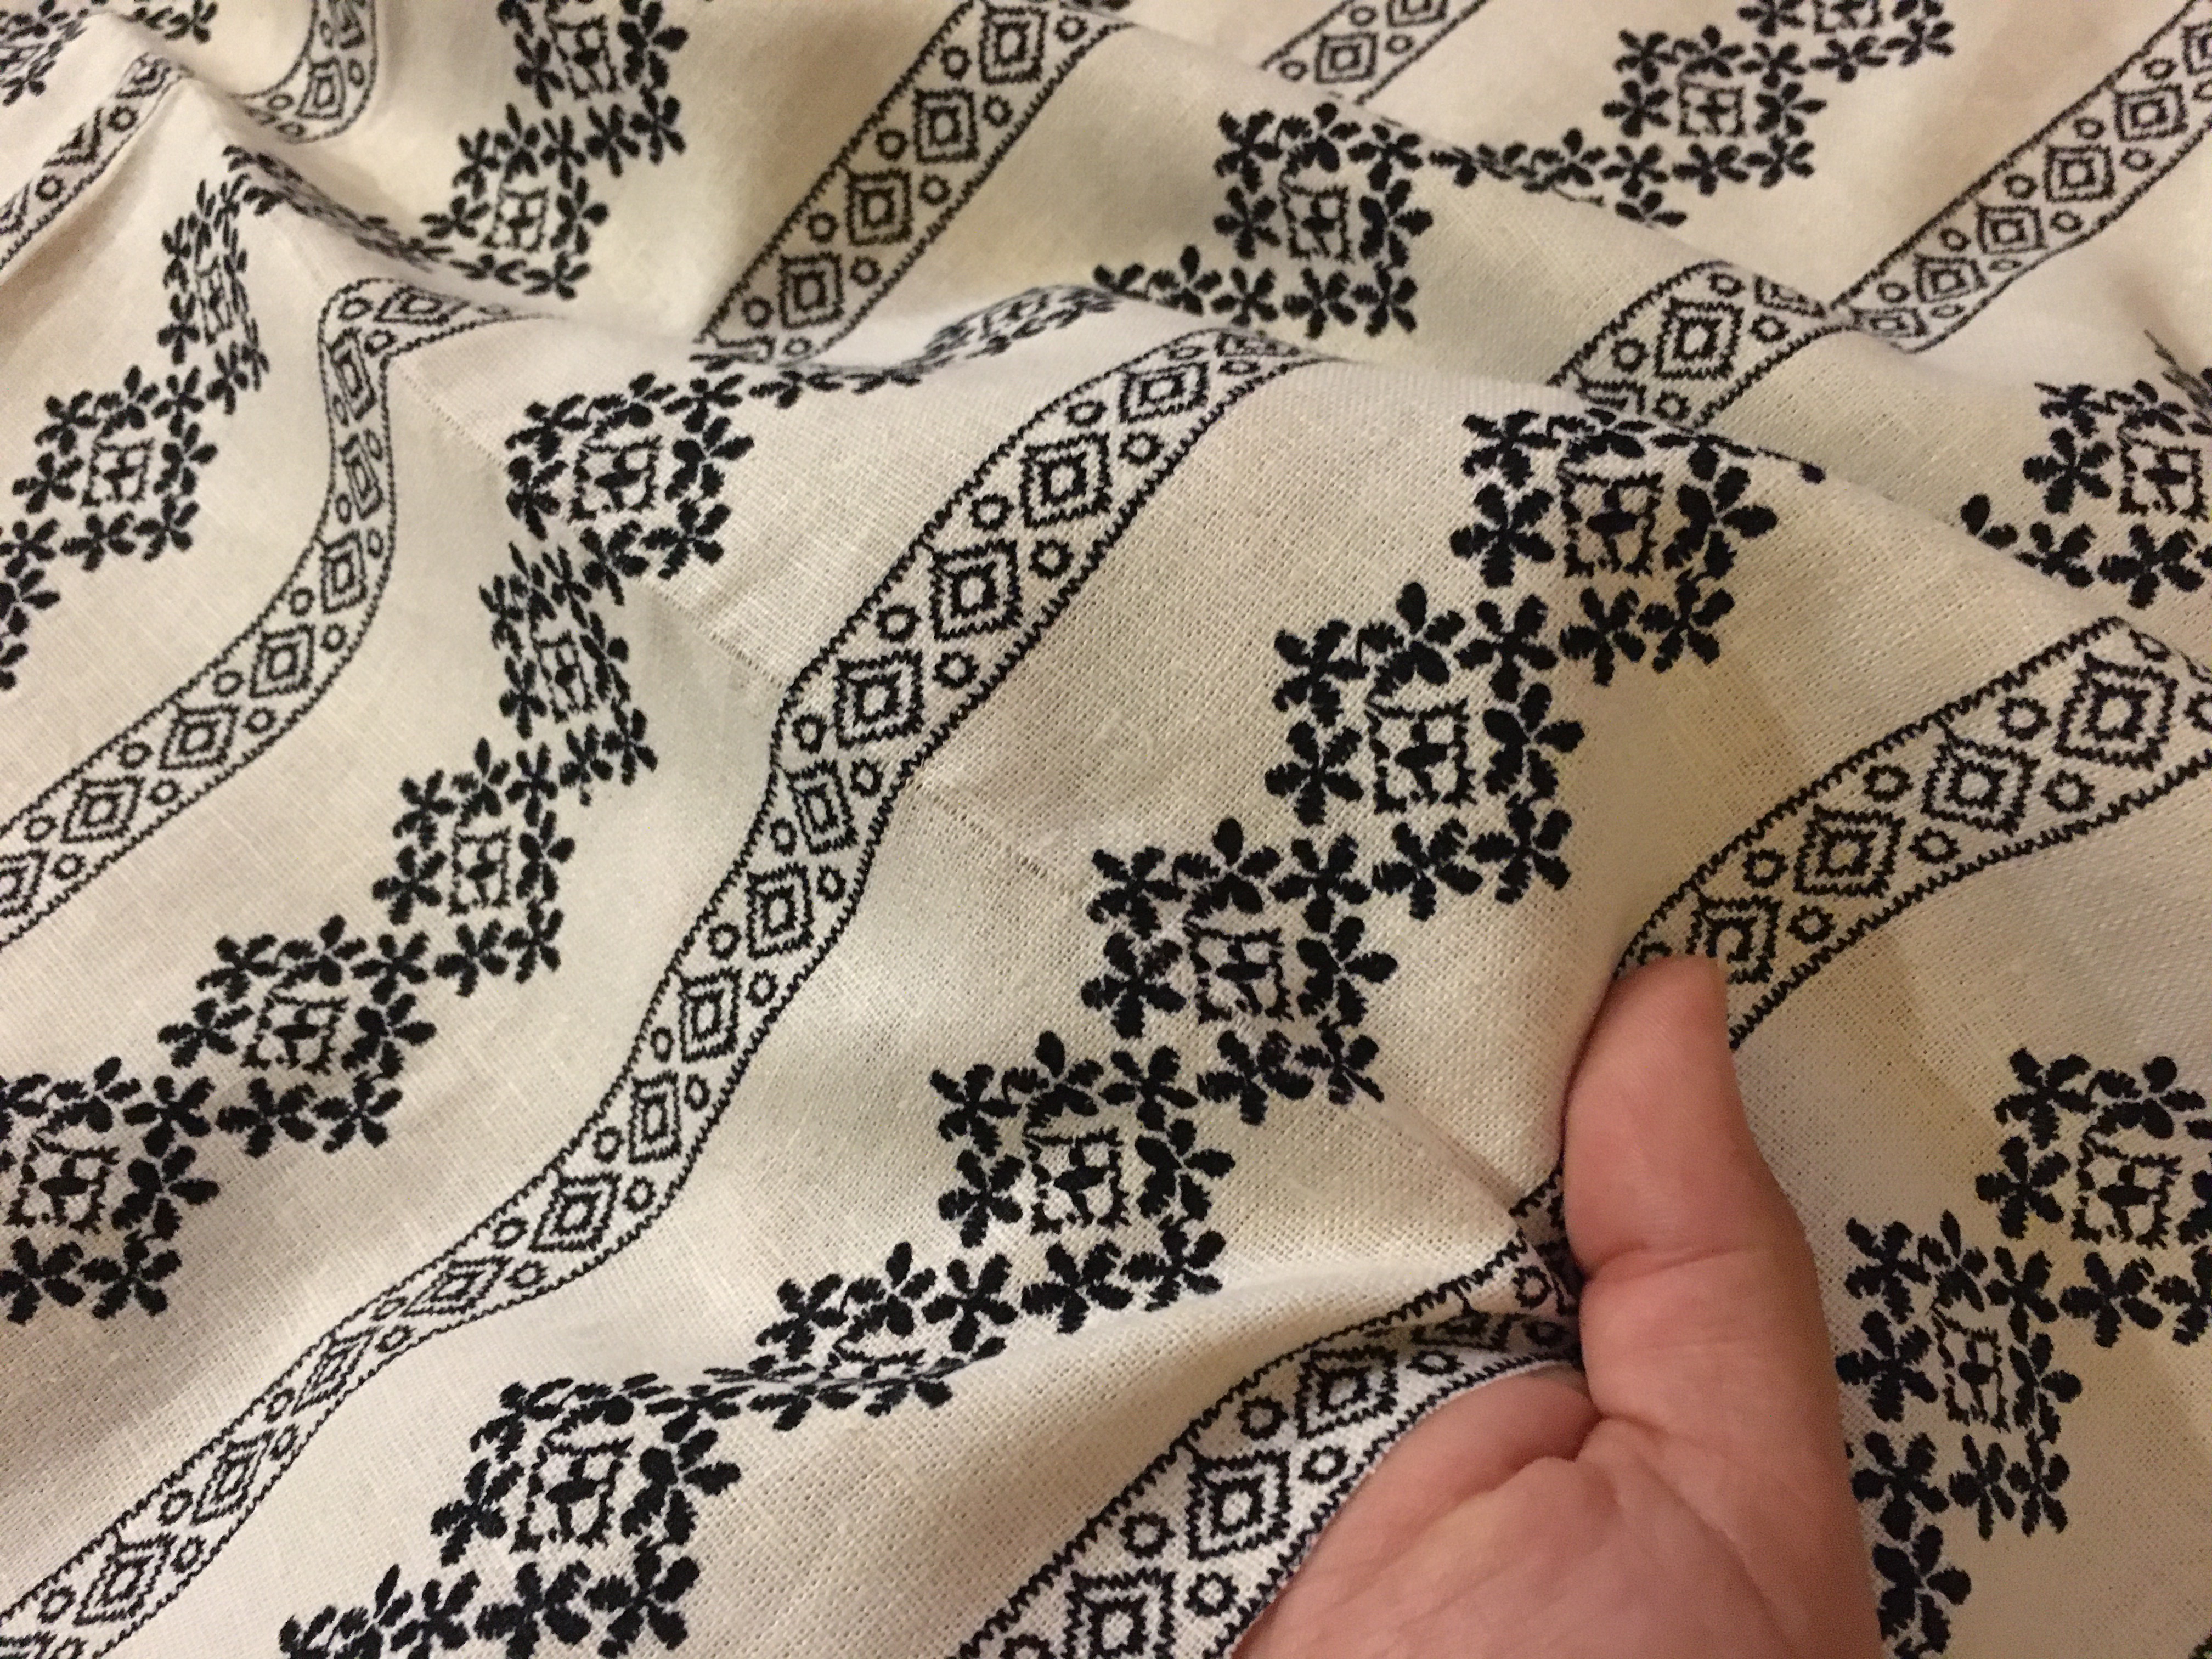
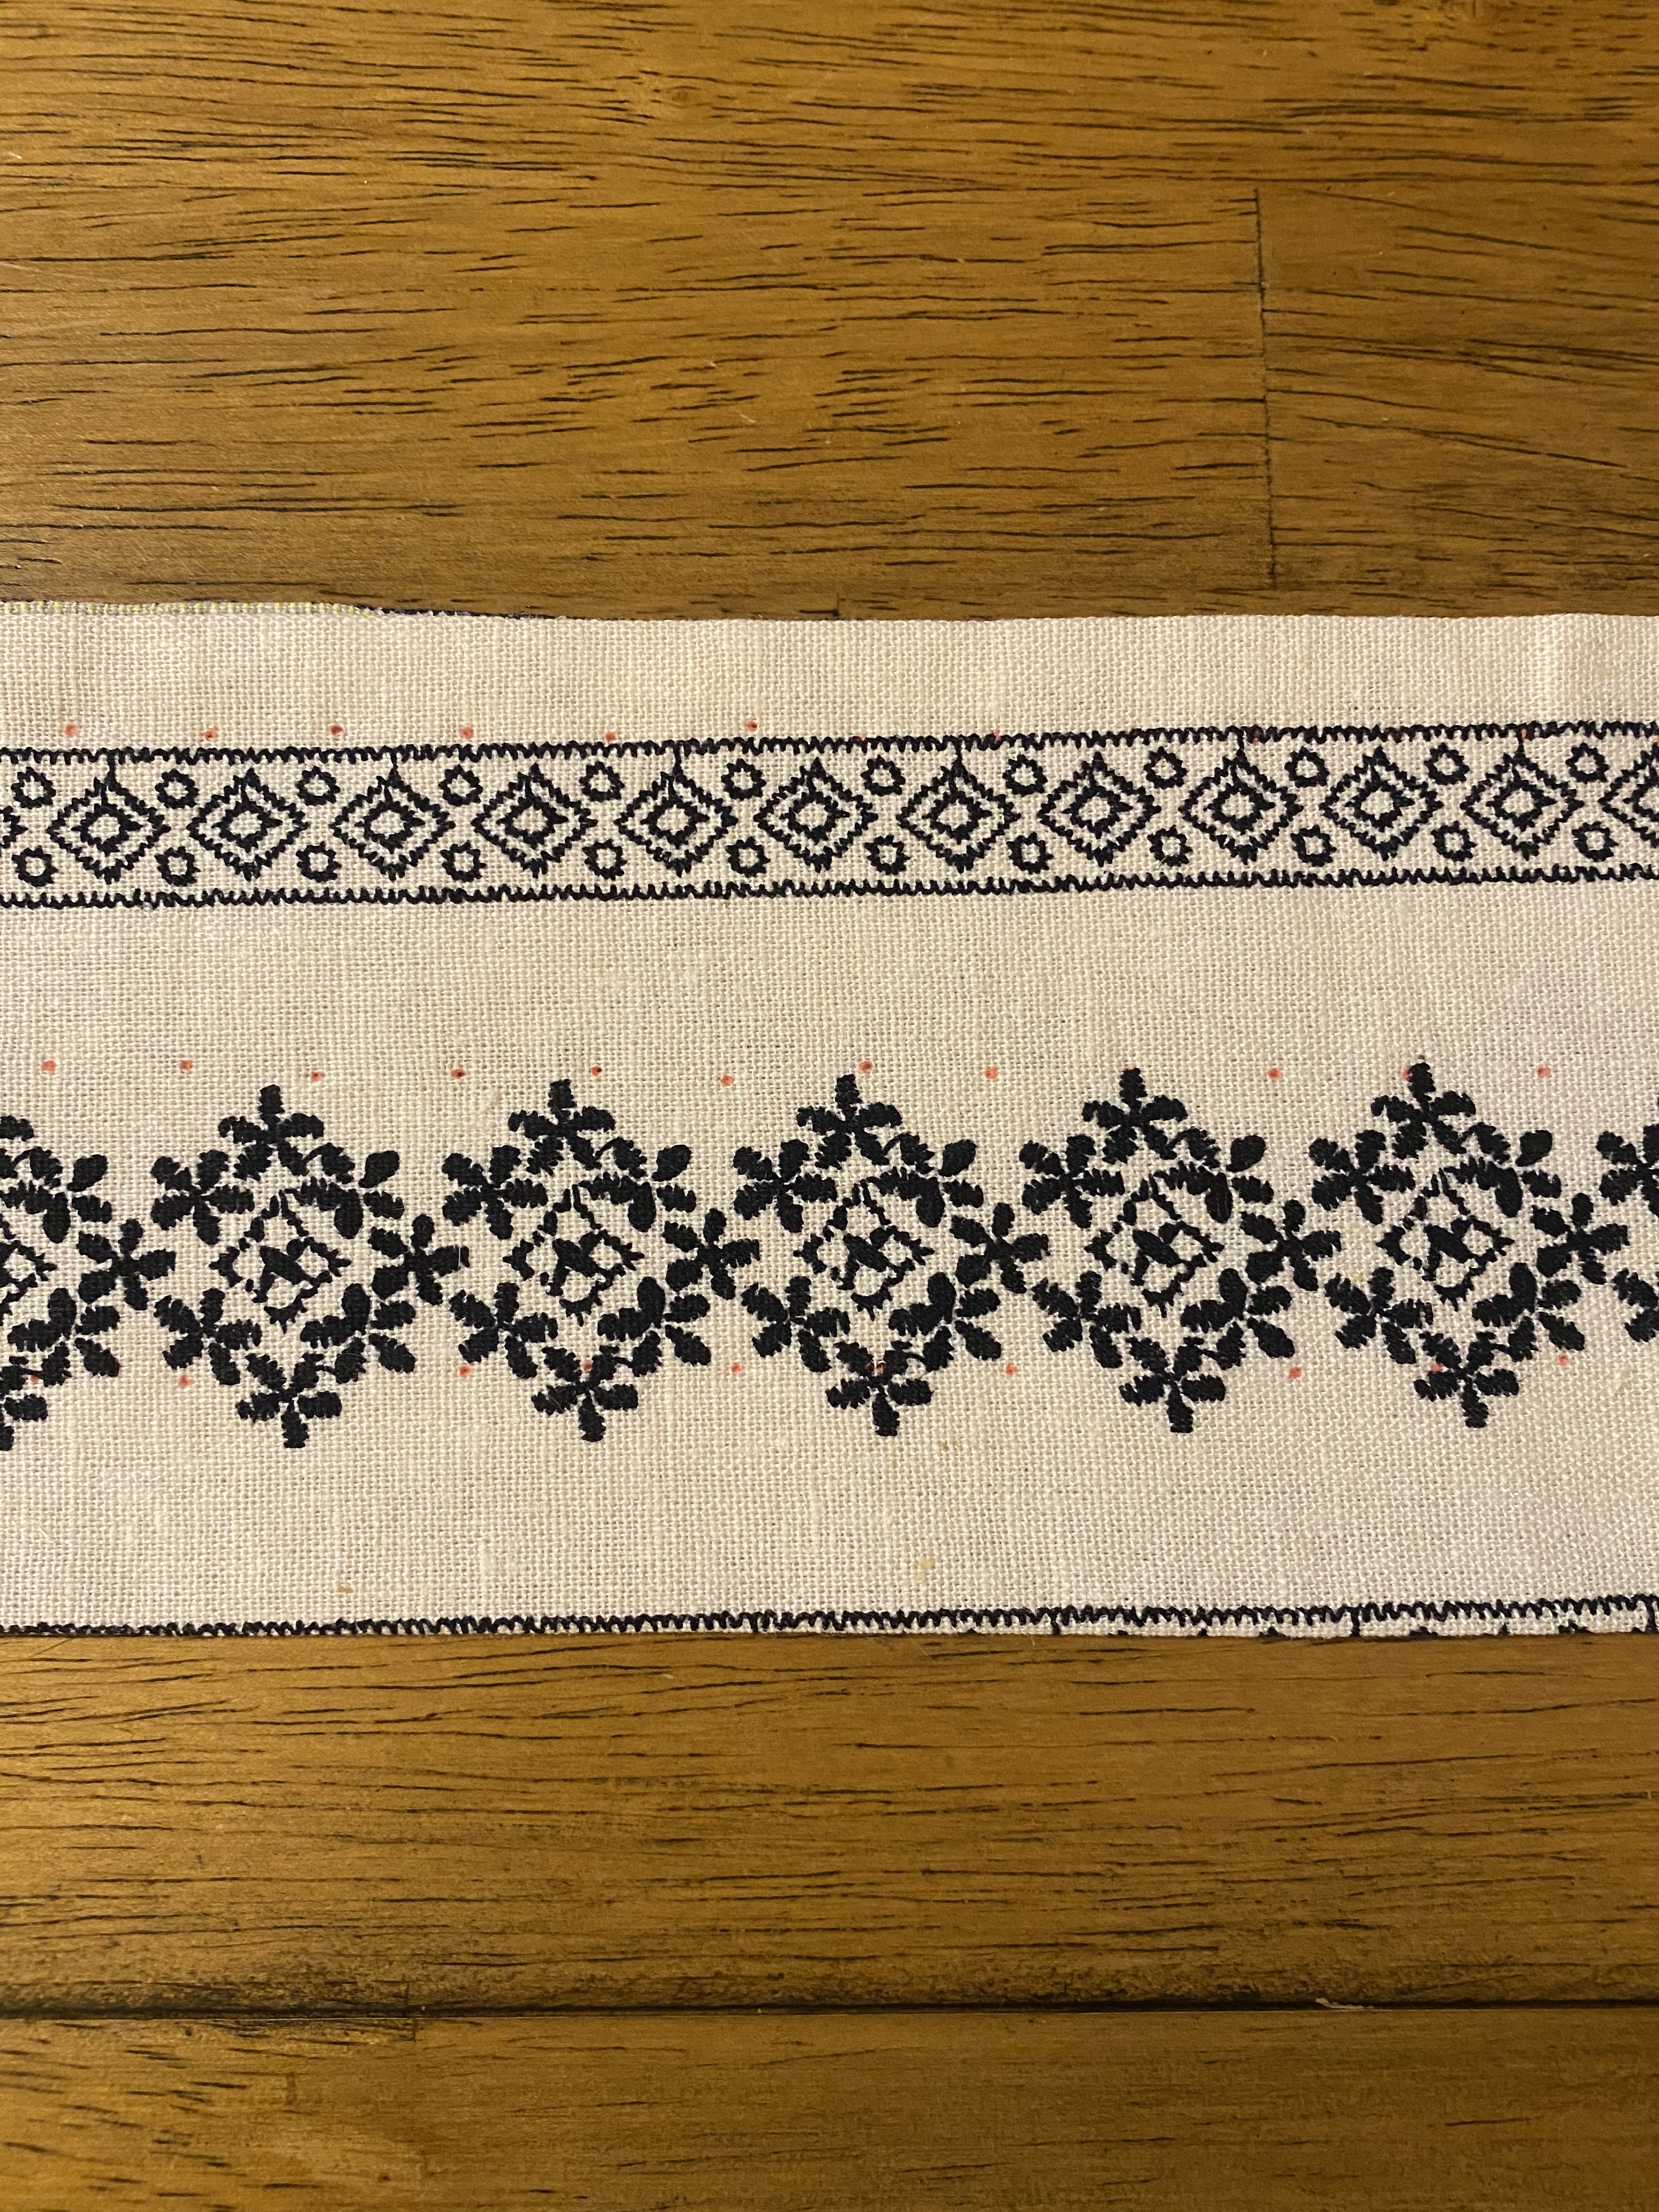
The pattern reminded me of blackwork embroidery and the contrasting color would add nicely to the design (though, I was a tad nervous about potential clashing of patterned stripes from the stays and a chemise.  We’ll cross that bridge later). Plus, it was 100% linen on CLEARANCE. The fabric was meant to be put to this second chance. 

I purchased 2 yards to stay in my budget, quickly doing math in my head, and hoping that it was enough.  Then, upon getting home, I realized I had made a disastrous error in judgement.  I had selected a striped fabric for a curved sleeve pattern.

I physically could have used the fabric with the pattern, but was afraid the stripes would not read as well and the clashing I feared would be more prevalent. 

Backtracking, I changed course and decided to use the simple rectangles and squares patterns of a typical 17th century italian chemise for my pattern.  Credit goes to Sarah Bendall’s blog post on “Back to Basics: The Smock in the Sixteenth and Seventeenth Centuries” for historical context and Jen Thompson of Festive Attyre blog for a starting point on pattern dimensions.  For this, I did not draft a pattern, instead opting to use the general measurements Jen T. provided since they were similar to my body already. 

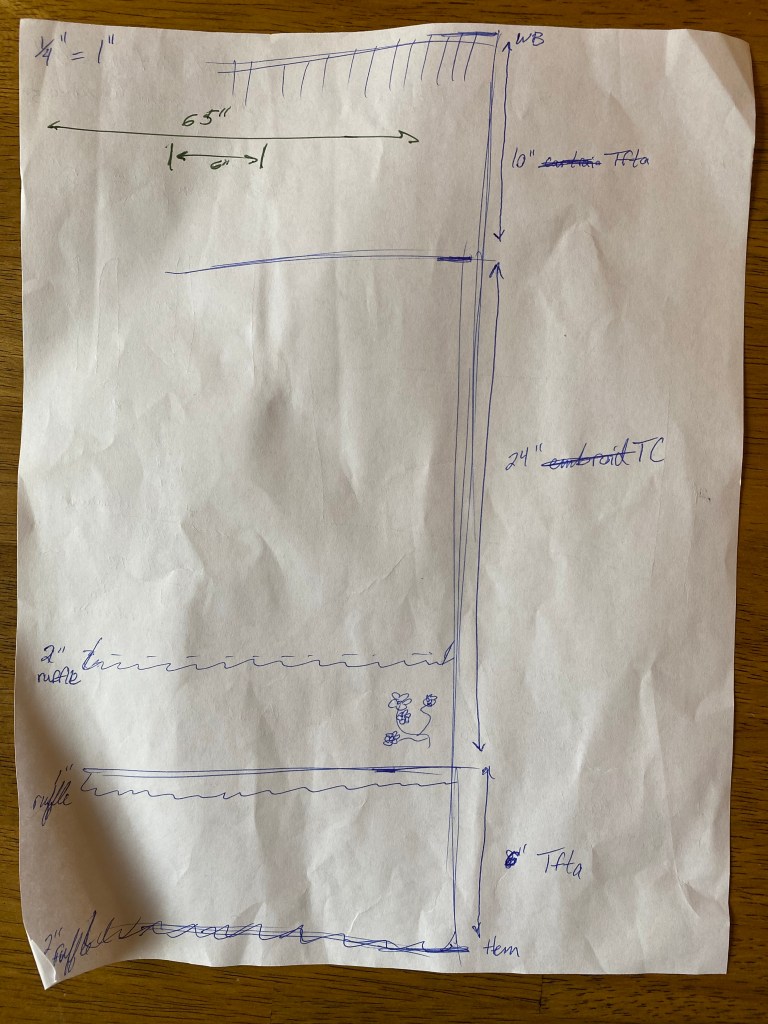
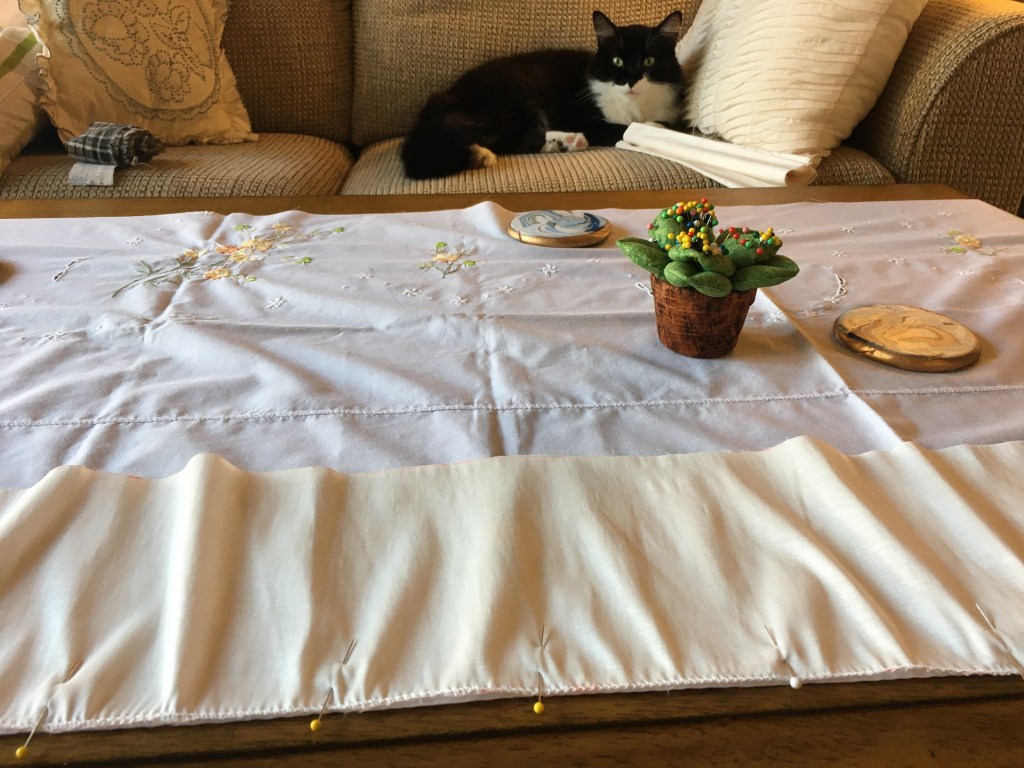
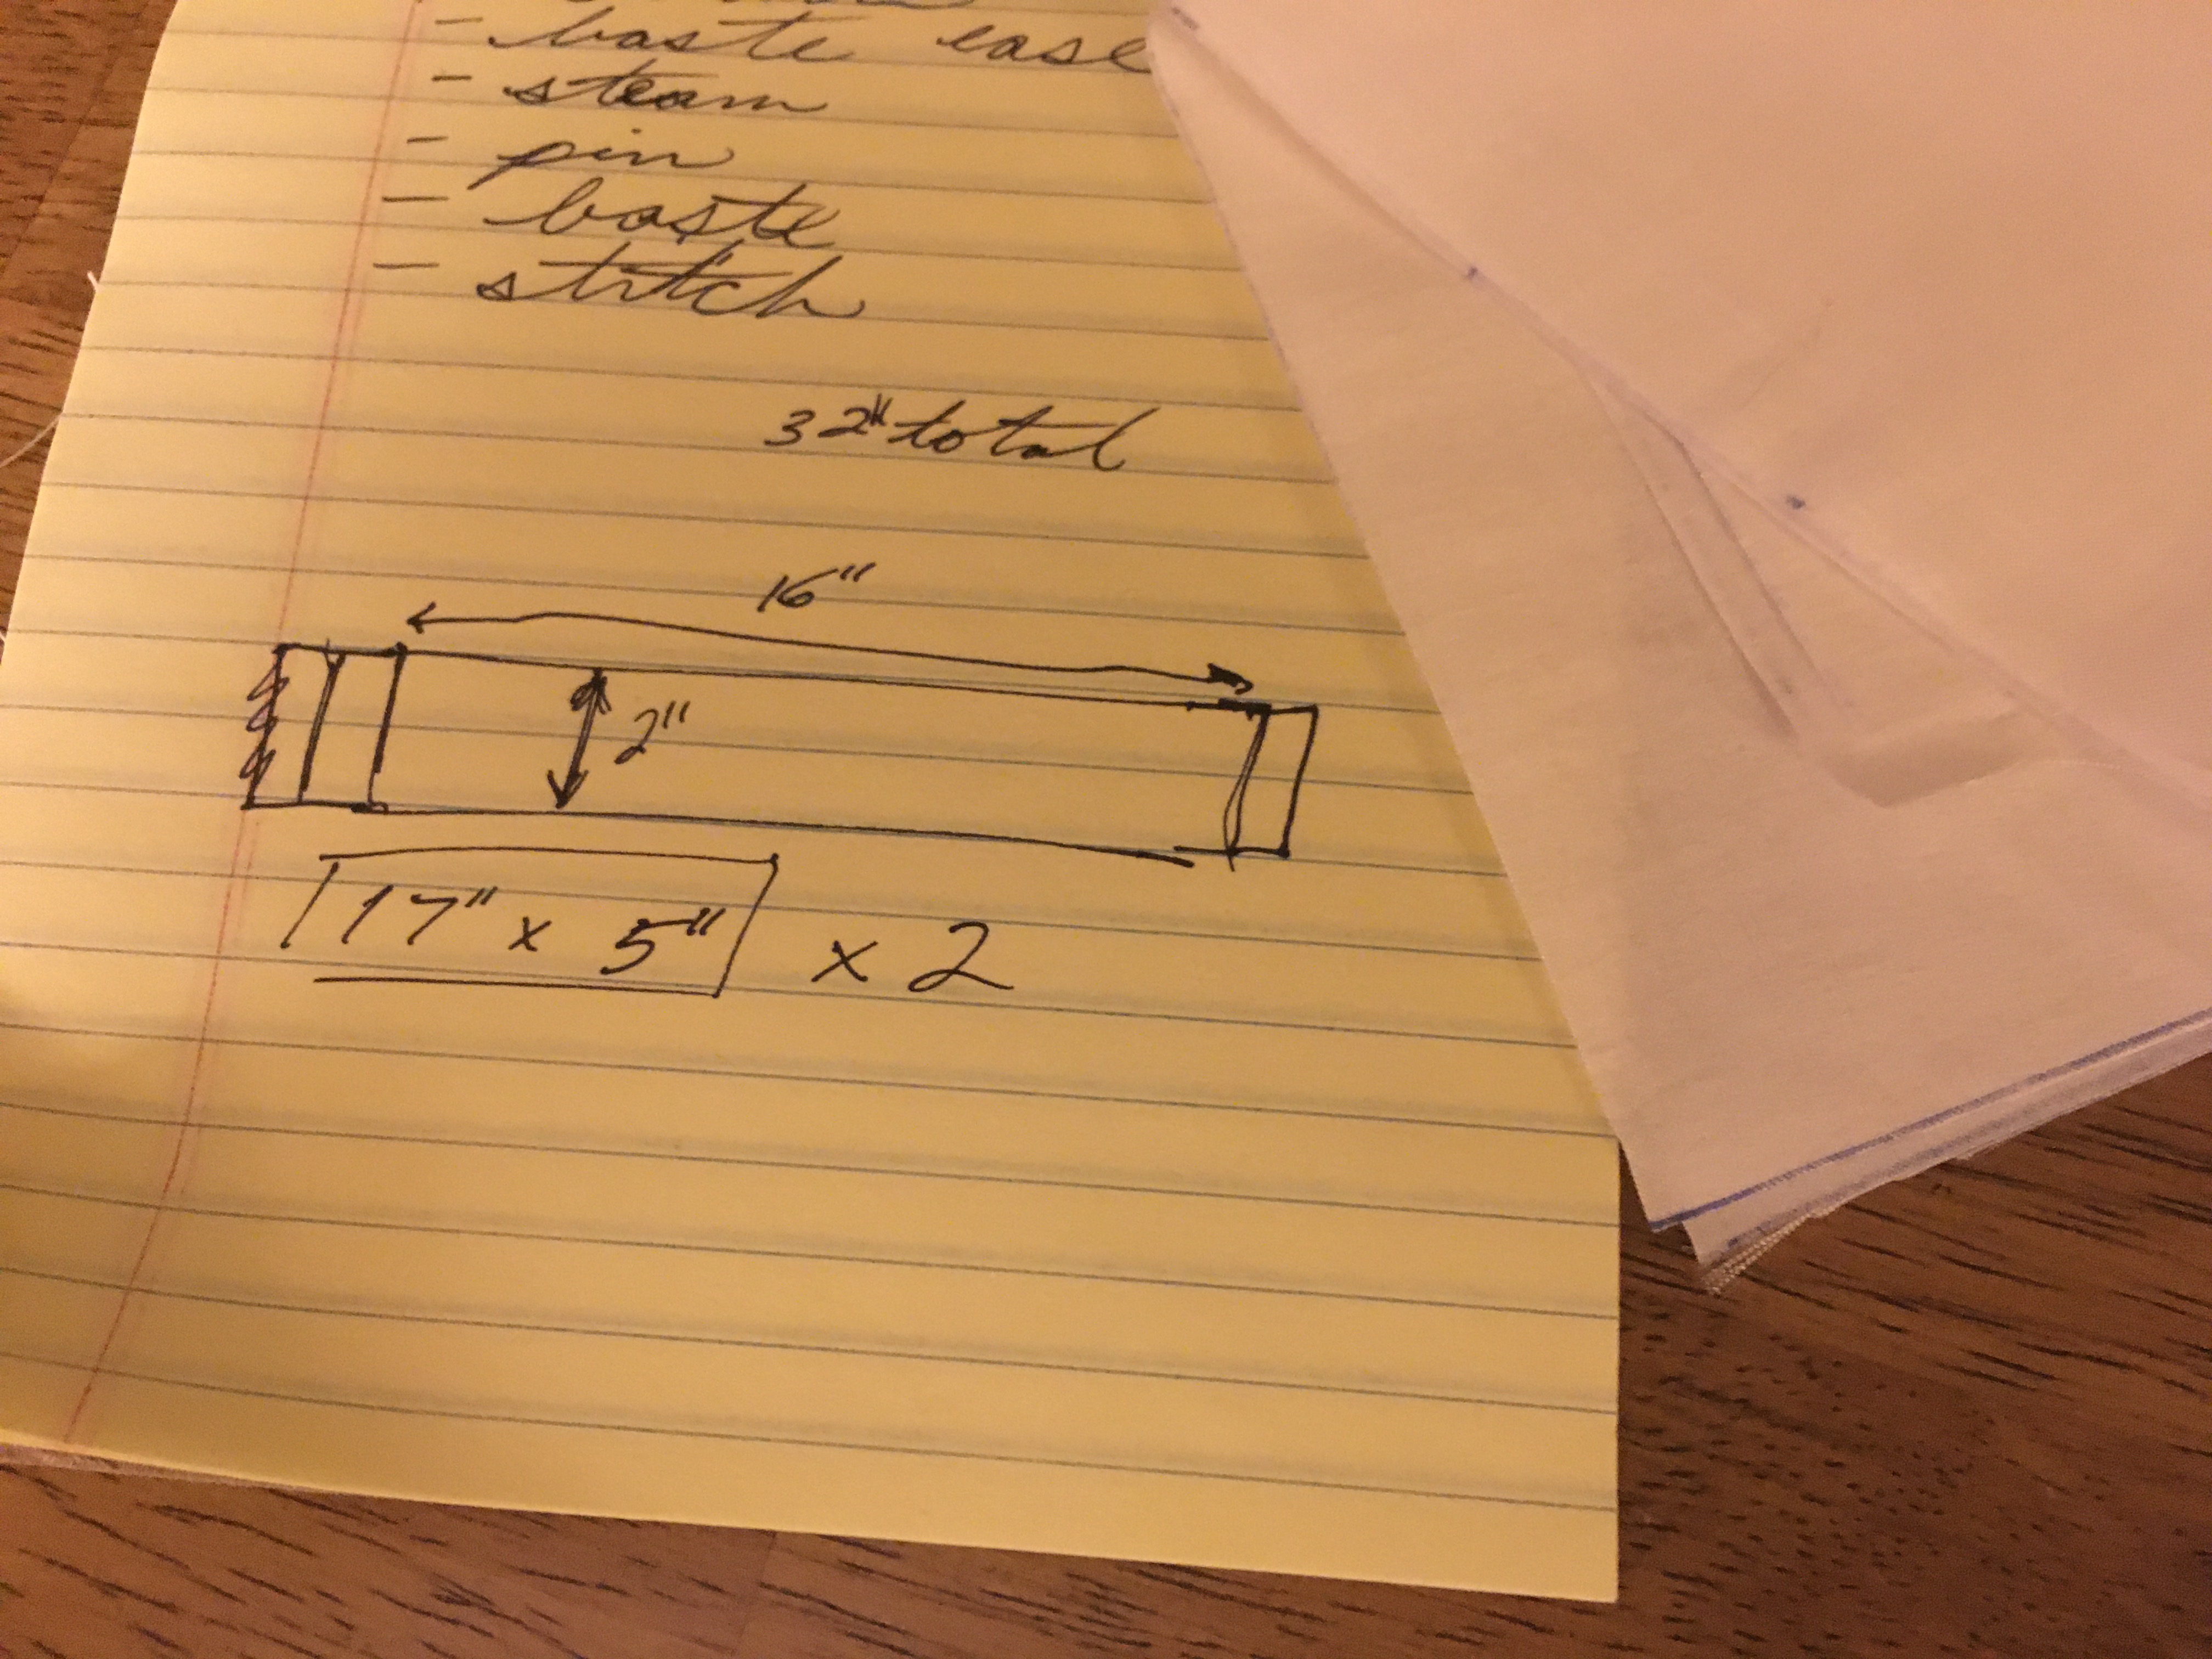
To optimize my small 2 yards of fabric (hindsight, not nearly enough as I’d like), with the full gathering effect, the body of the chemise would be more of a shirt length than a full chemise. Since I needed at least 12” for the sleeves to fall at approximately the elbow from the shoulder point, I was left with 60″ between the front and the back panels of the chemise body.  

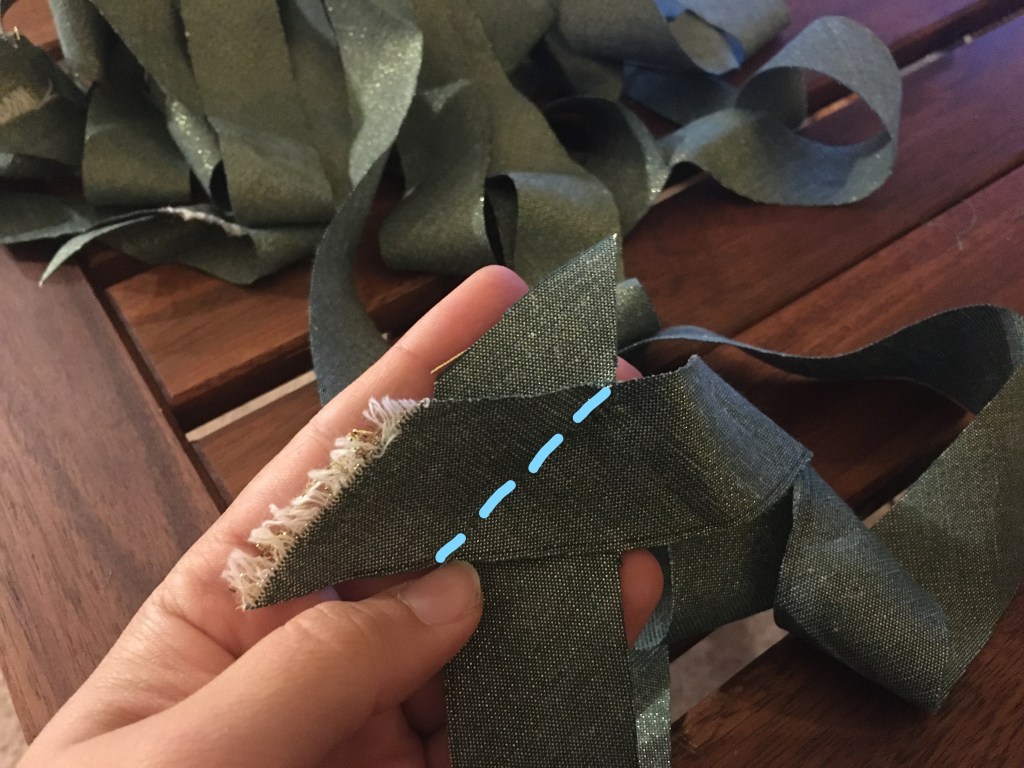
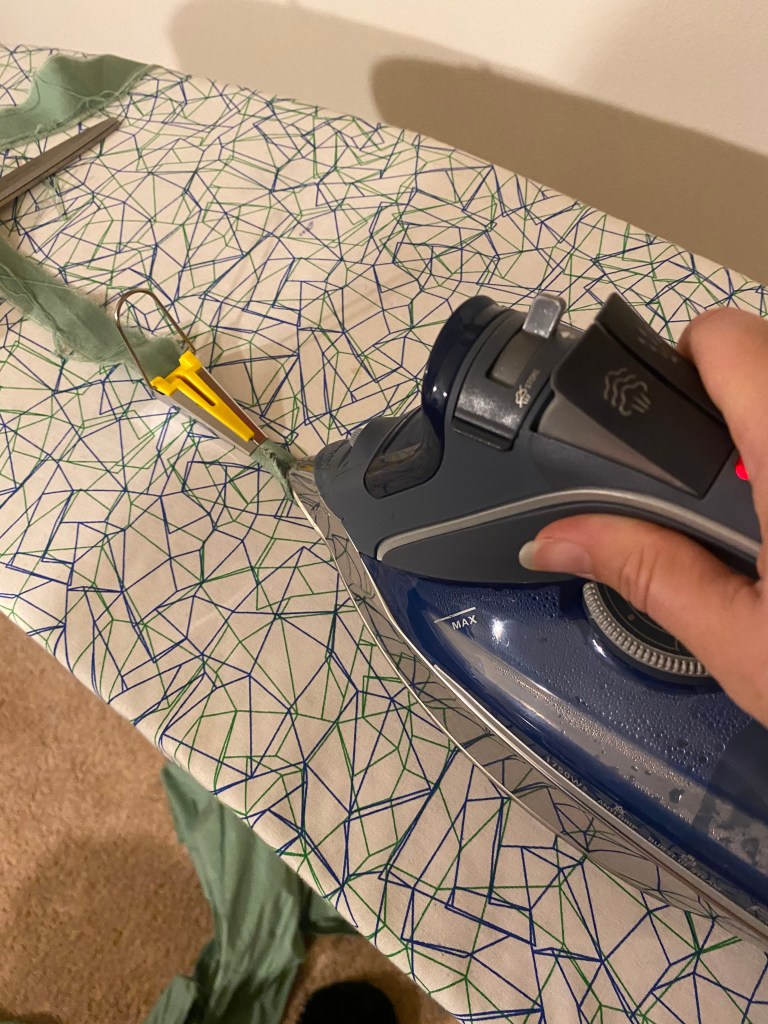
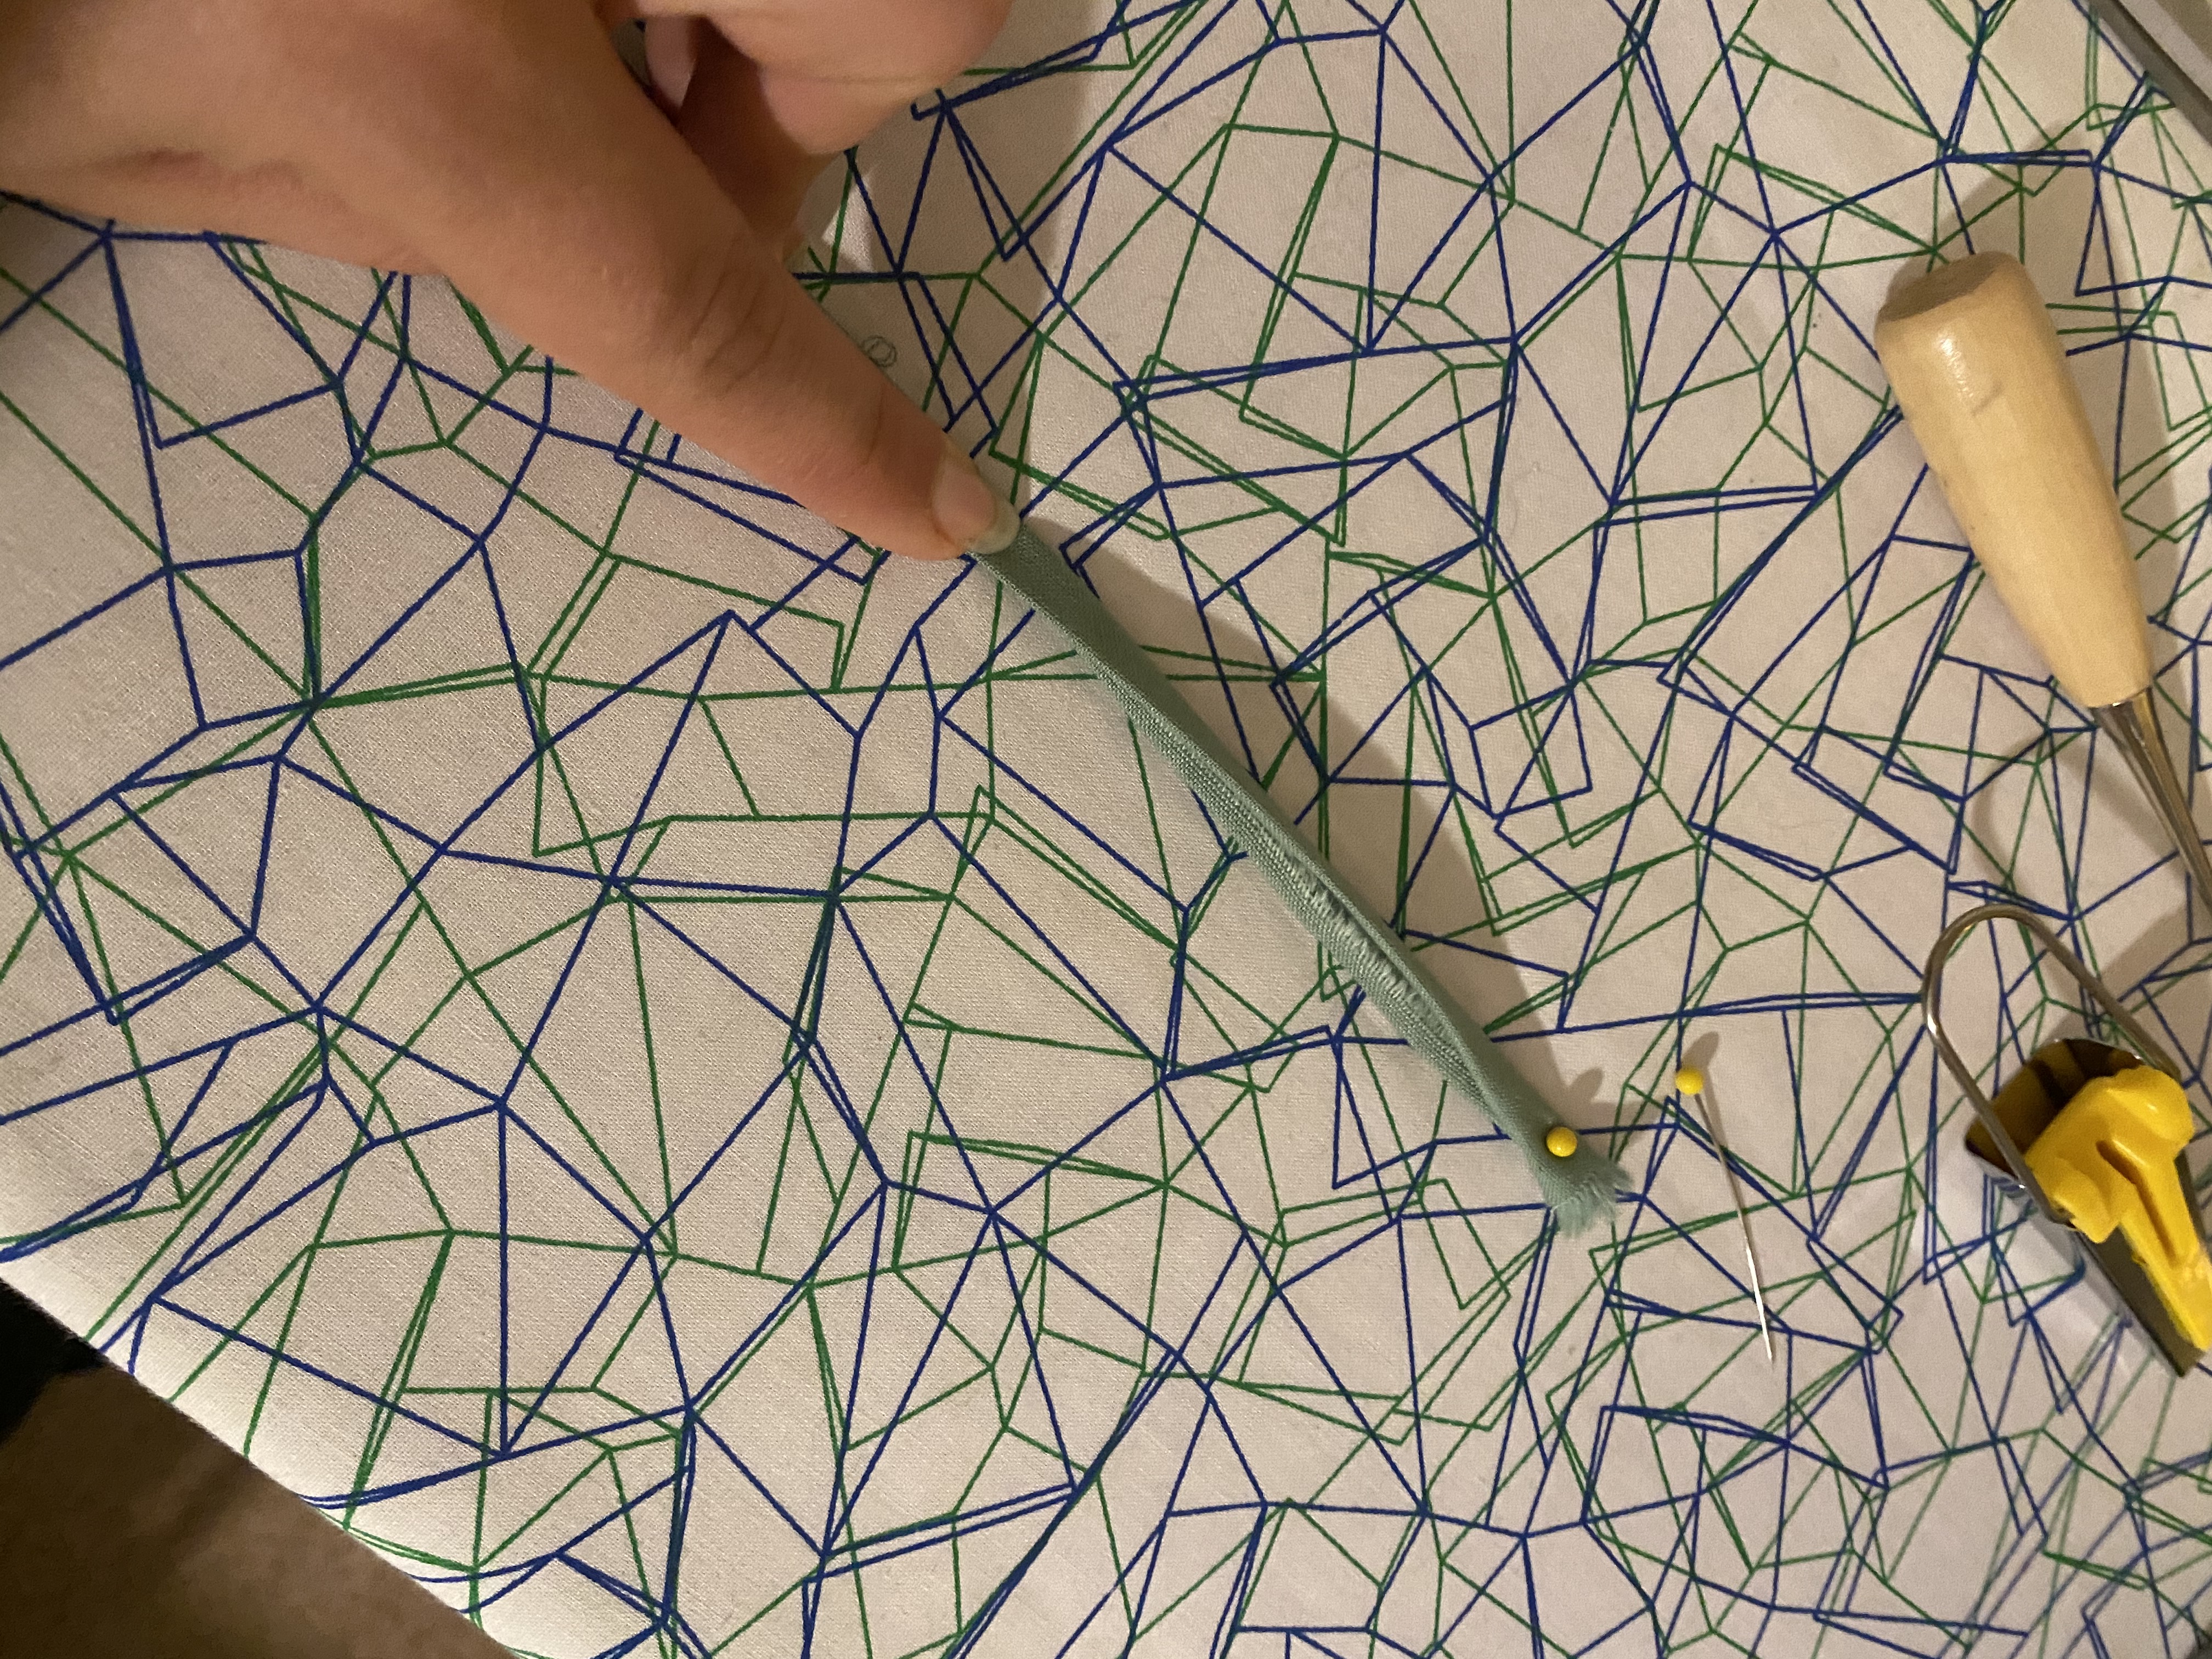
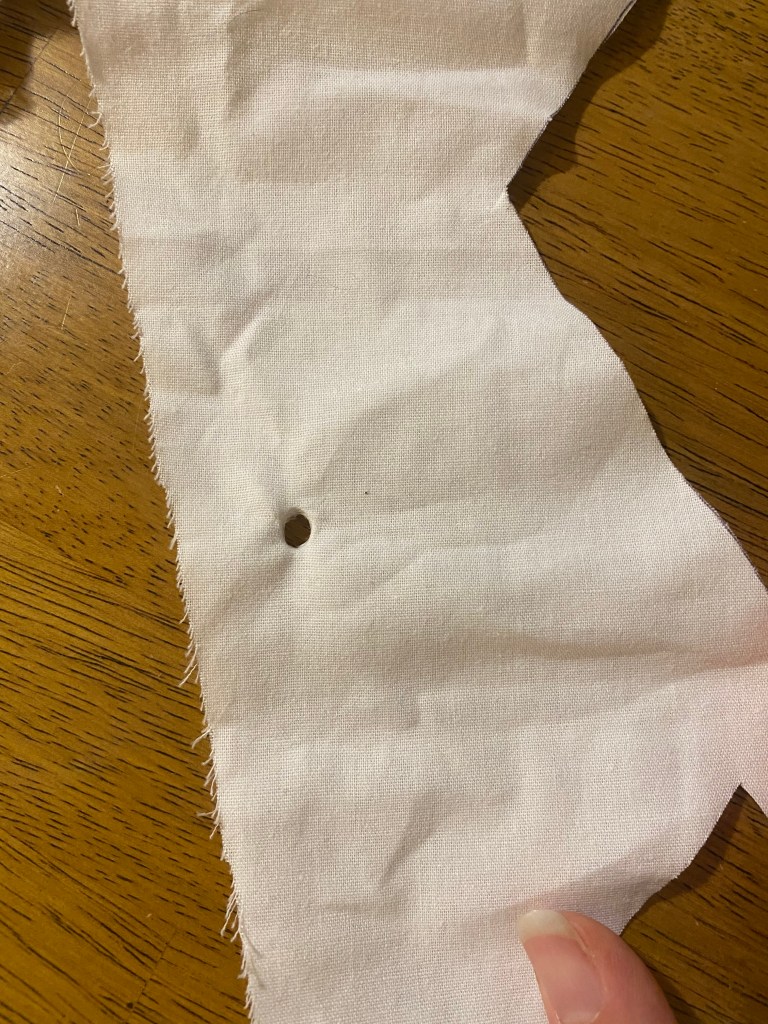
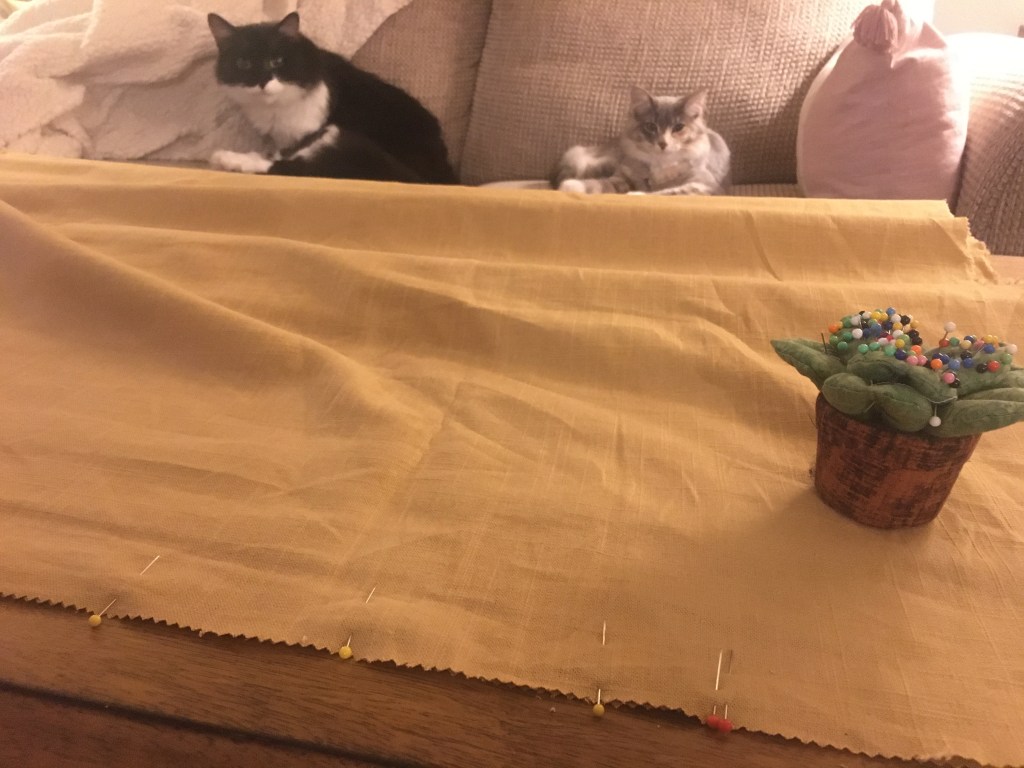
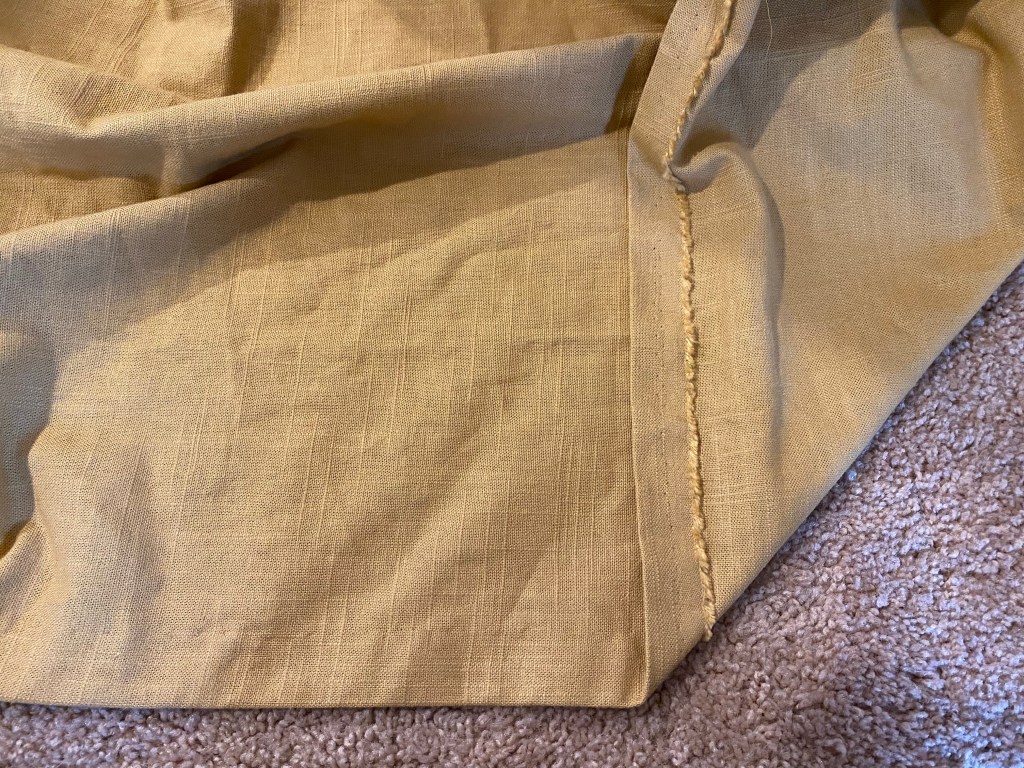
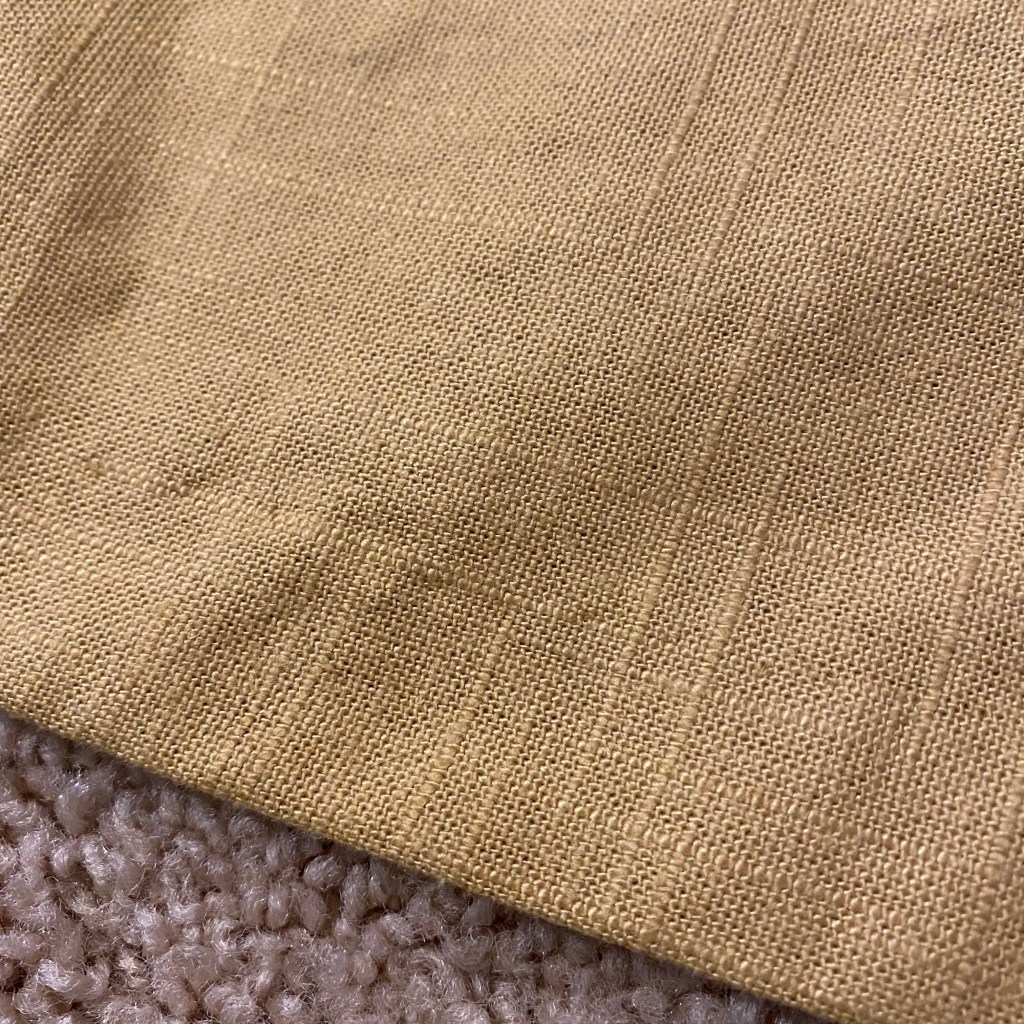
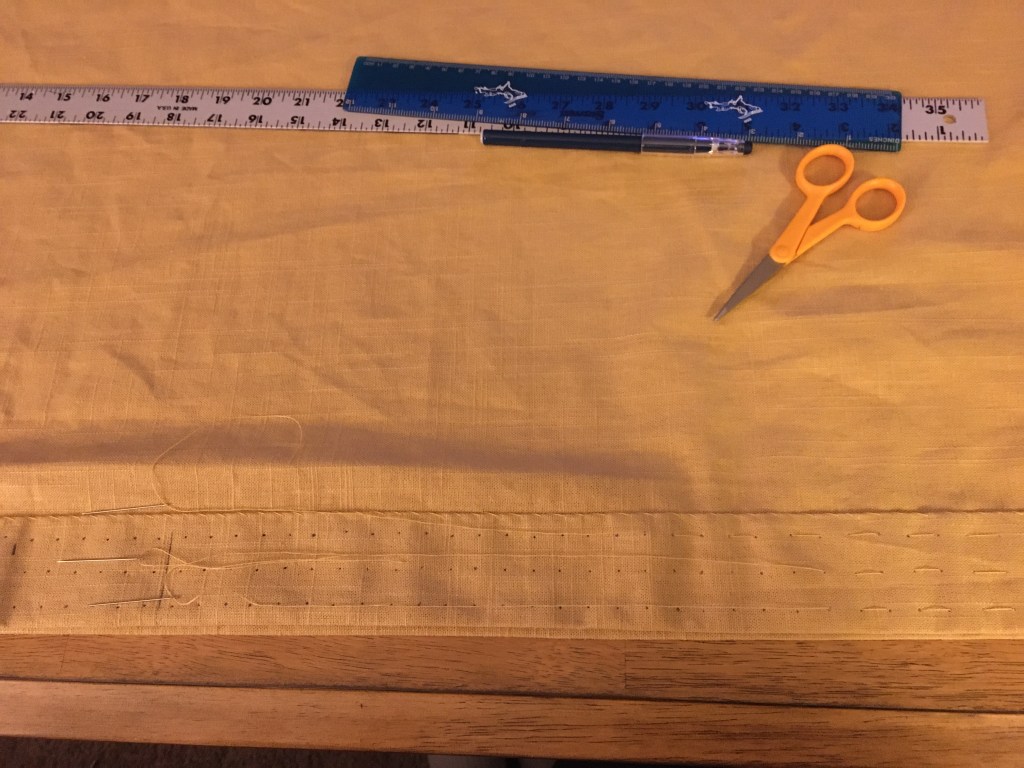
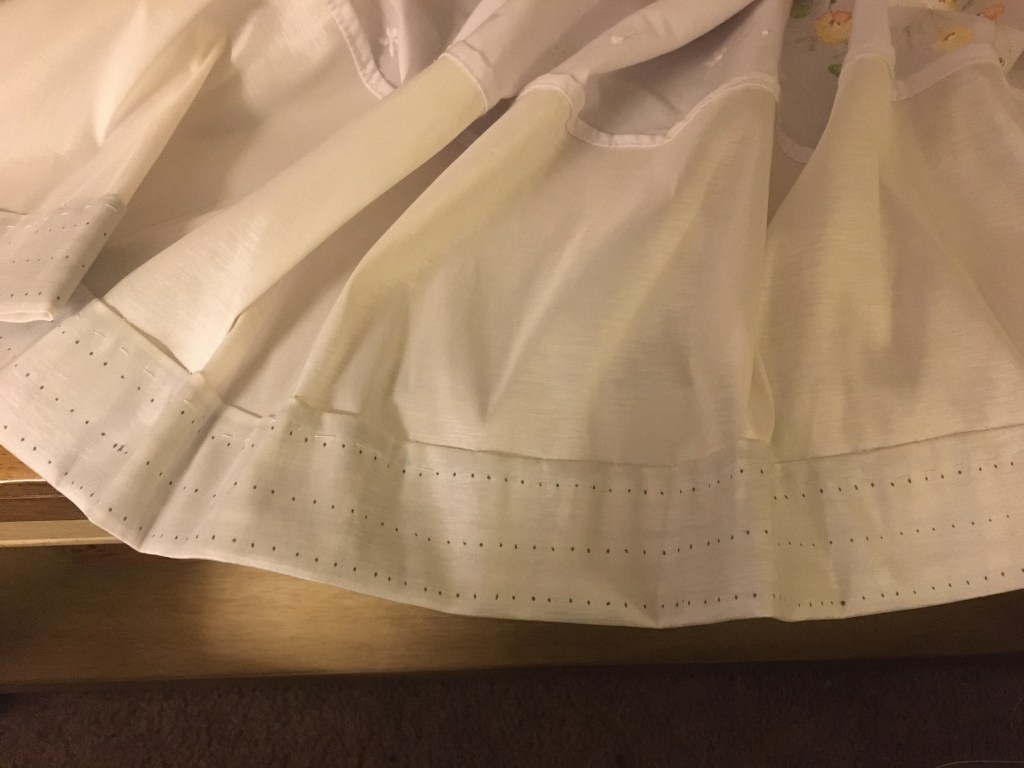
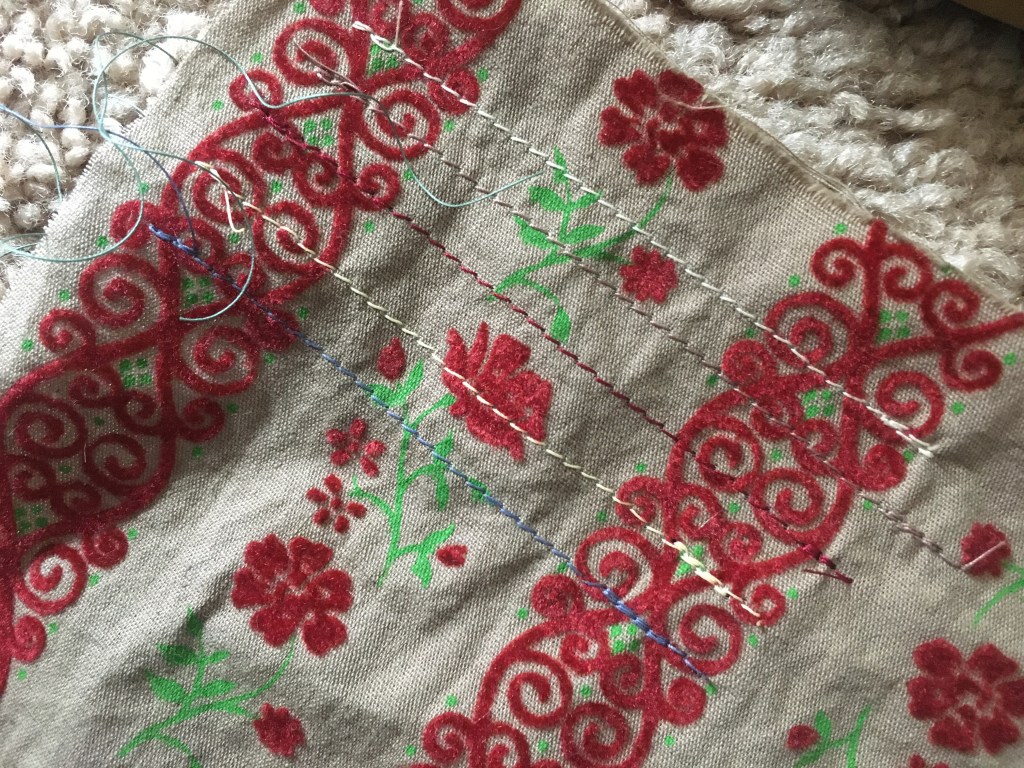
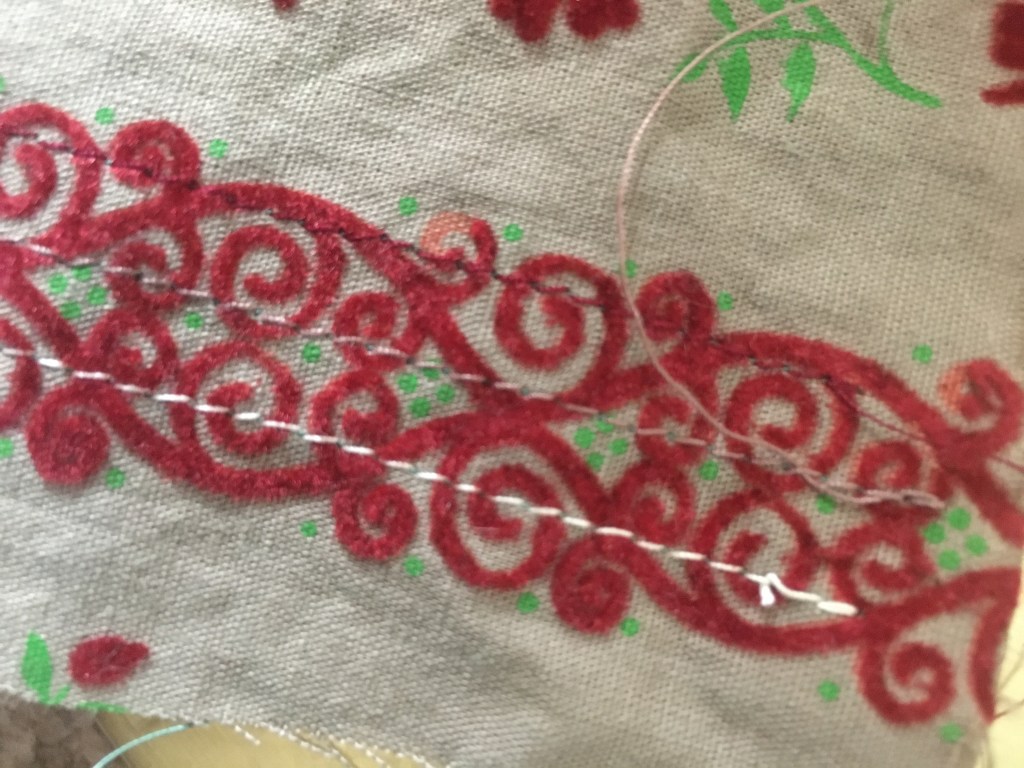
Ensuring I had perfectly straight lines when cutting, I measured the width of my body sections and began the slow, but surprisingly satisfying process of pulling a single thread from the linen.

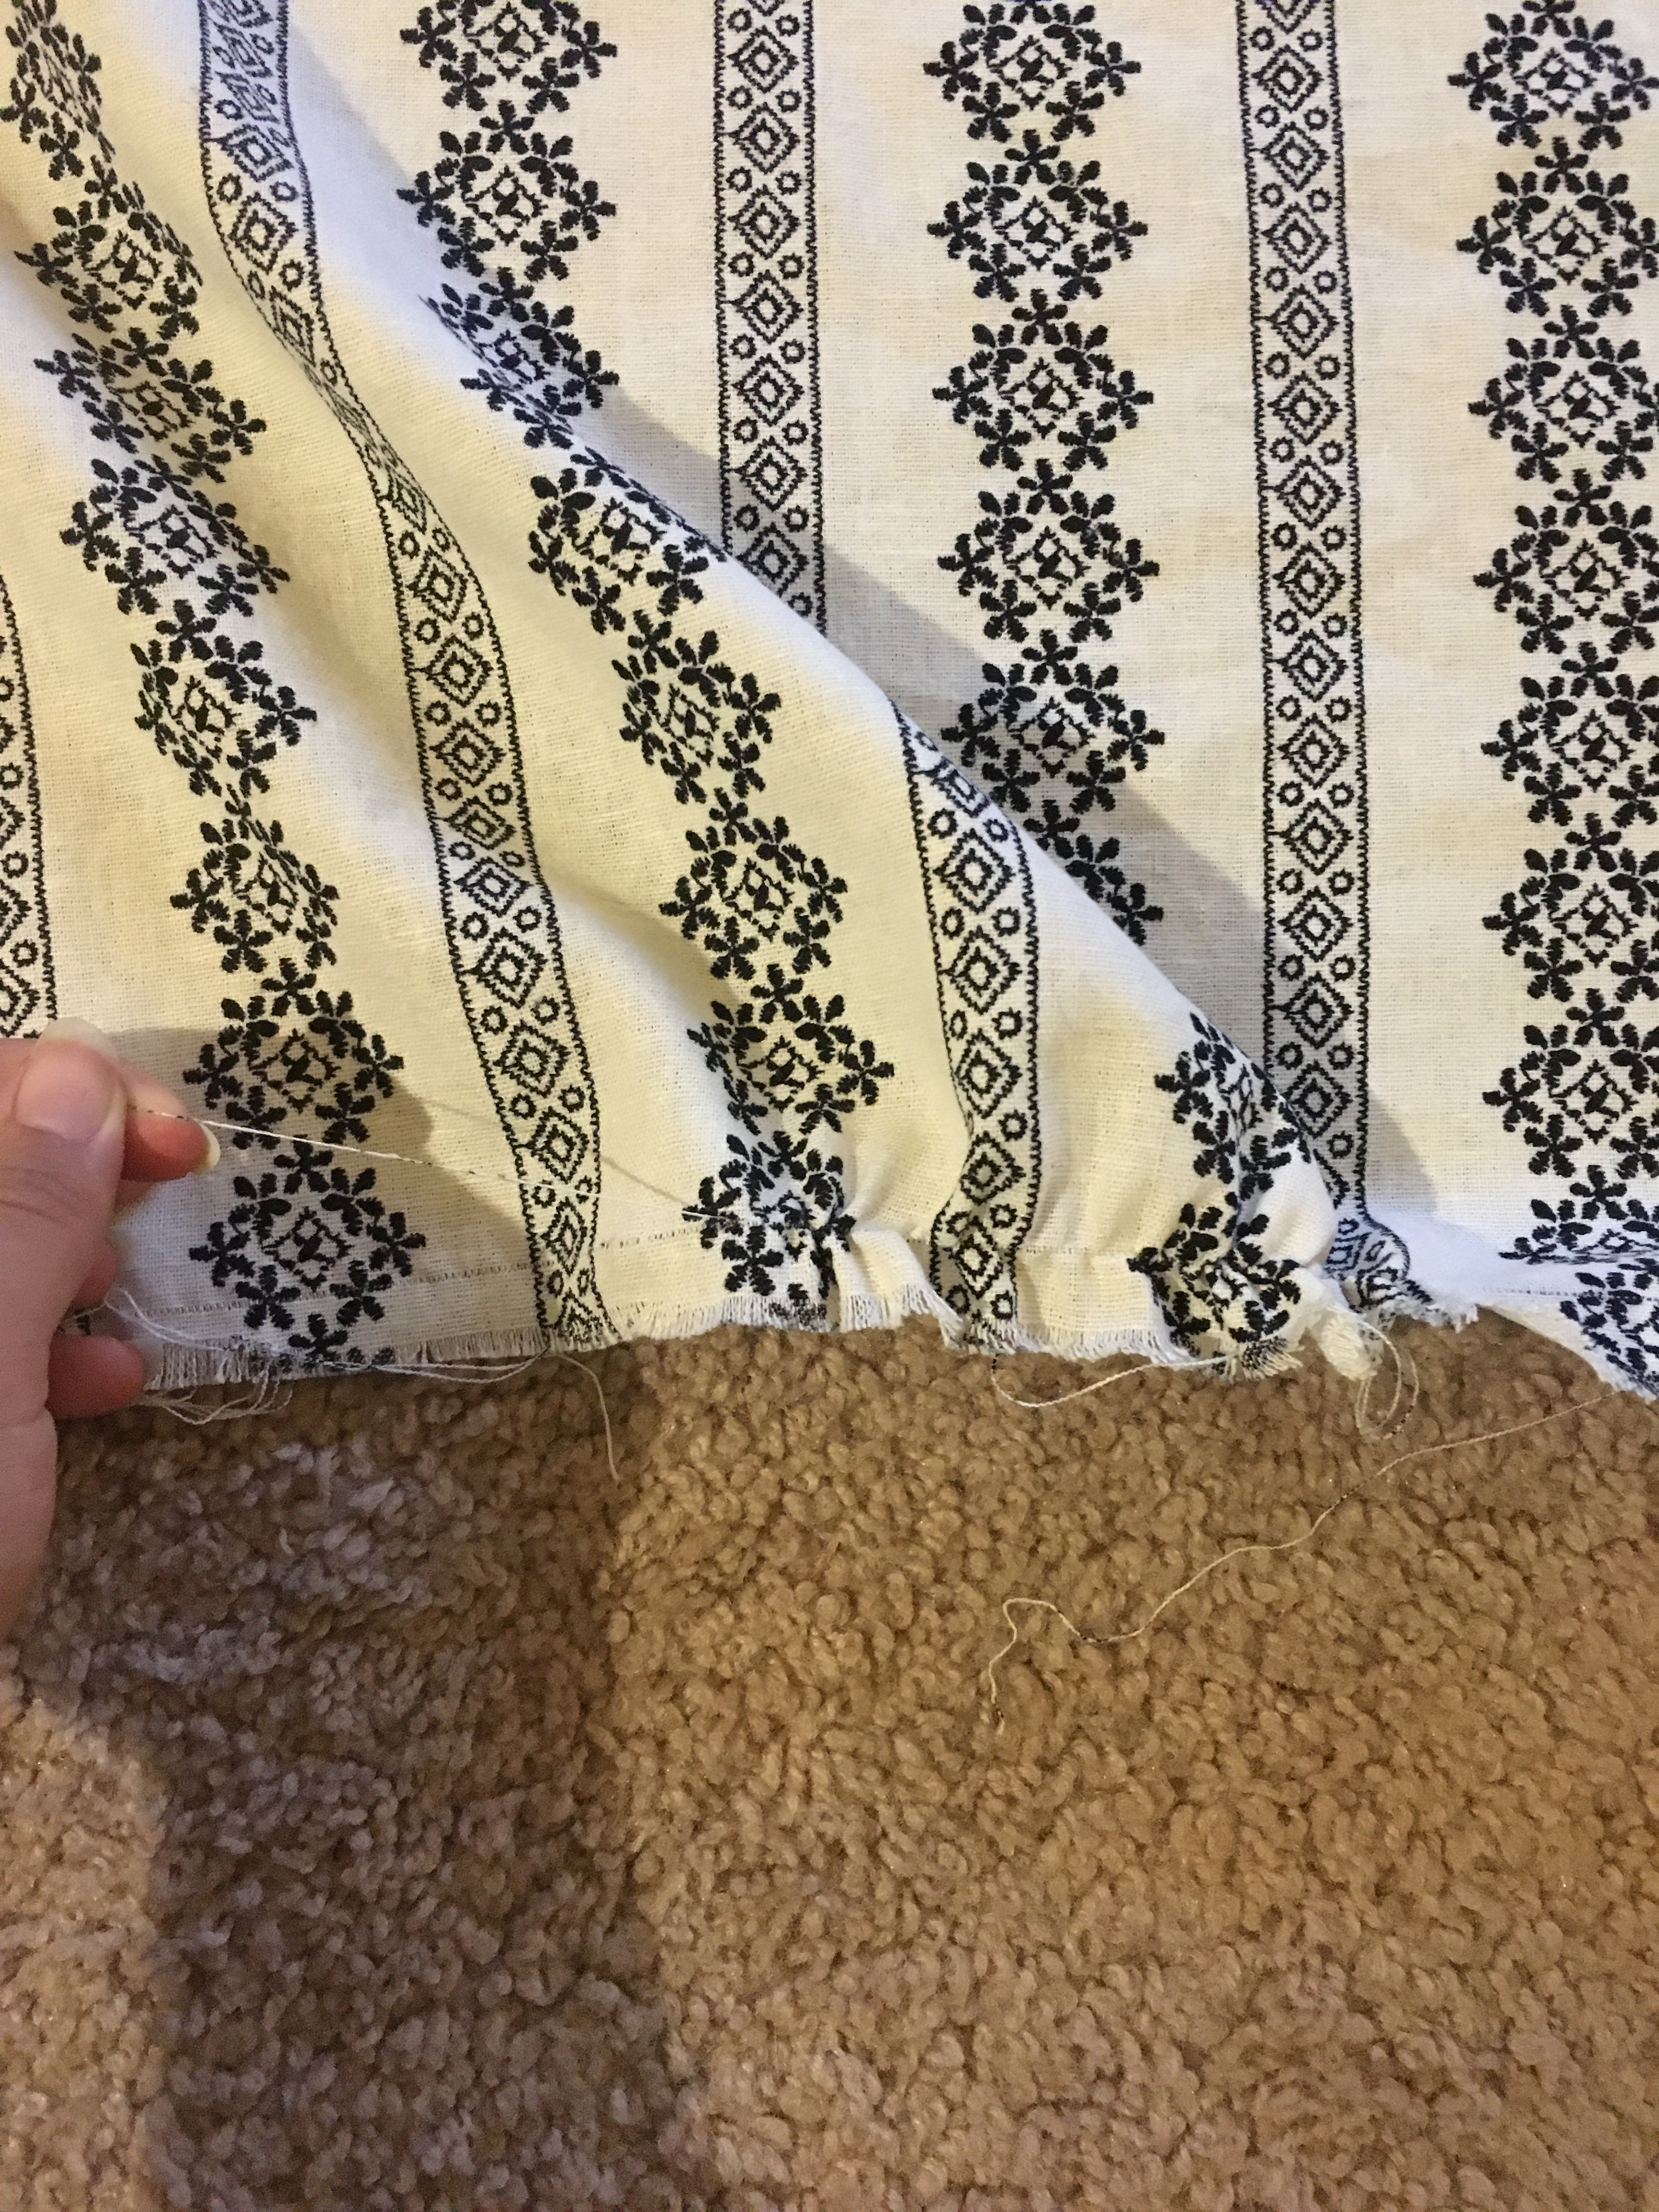
The thread broke often, but the effect was just so satisfying.  I continued with this method for all of my cutting lines for the two body pieces, two sleeves, and two 10” square gussets.

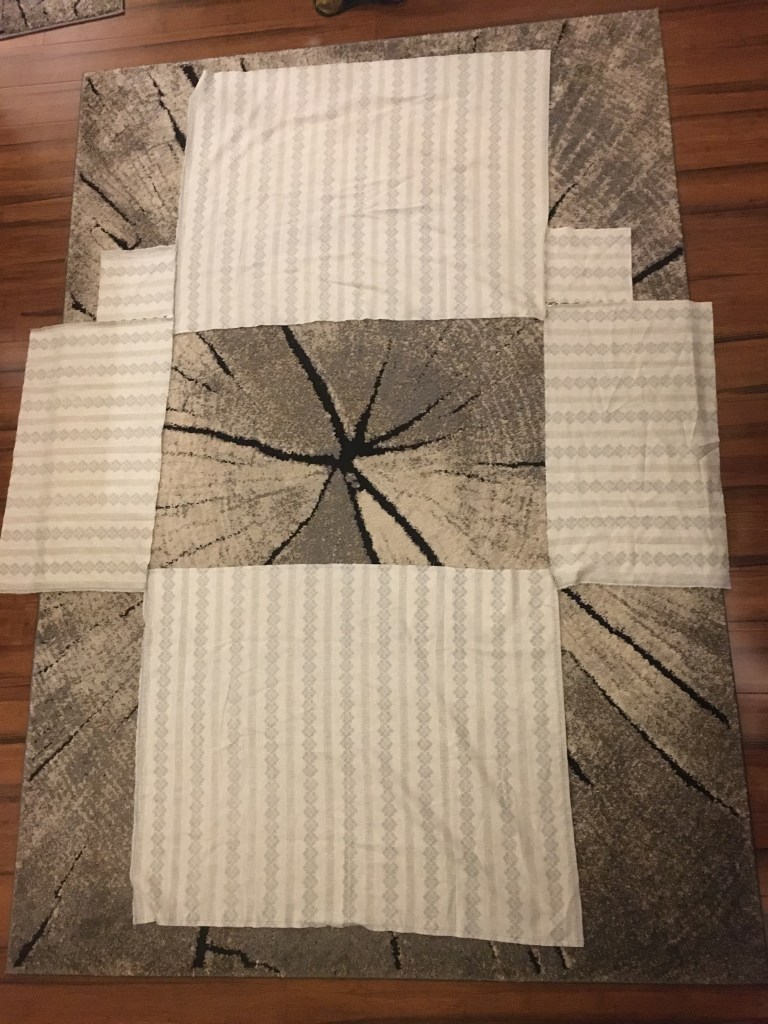
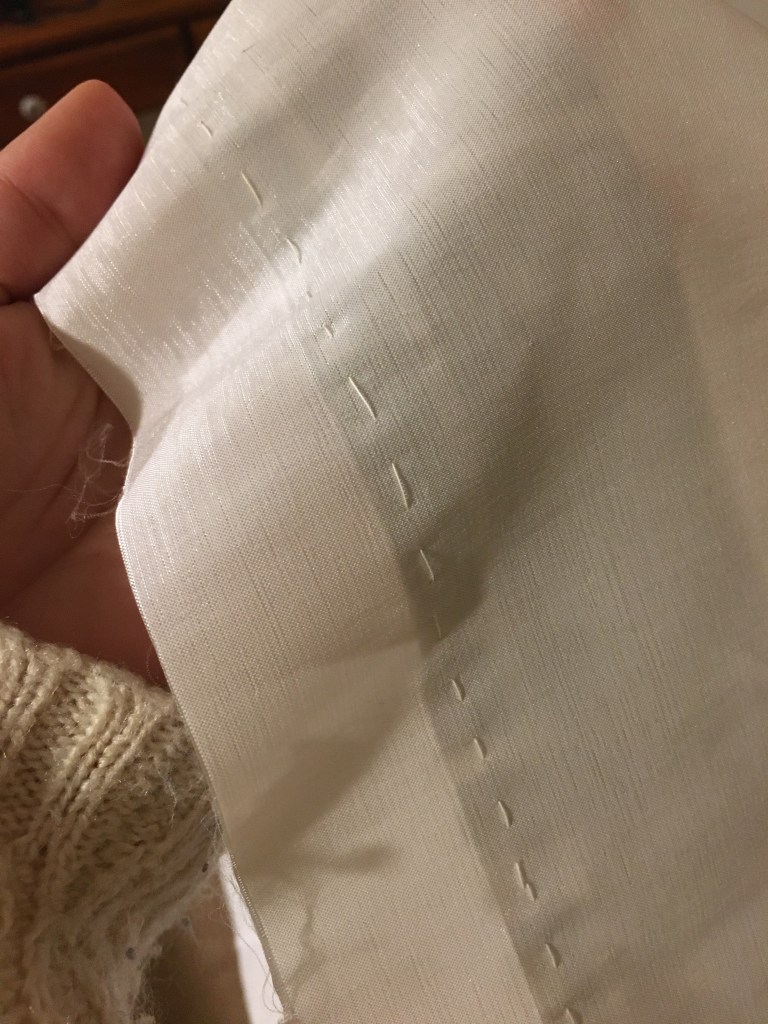
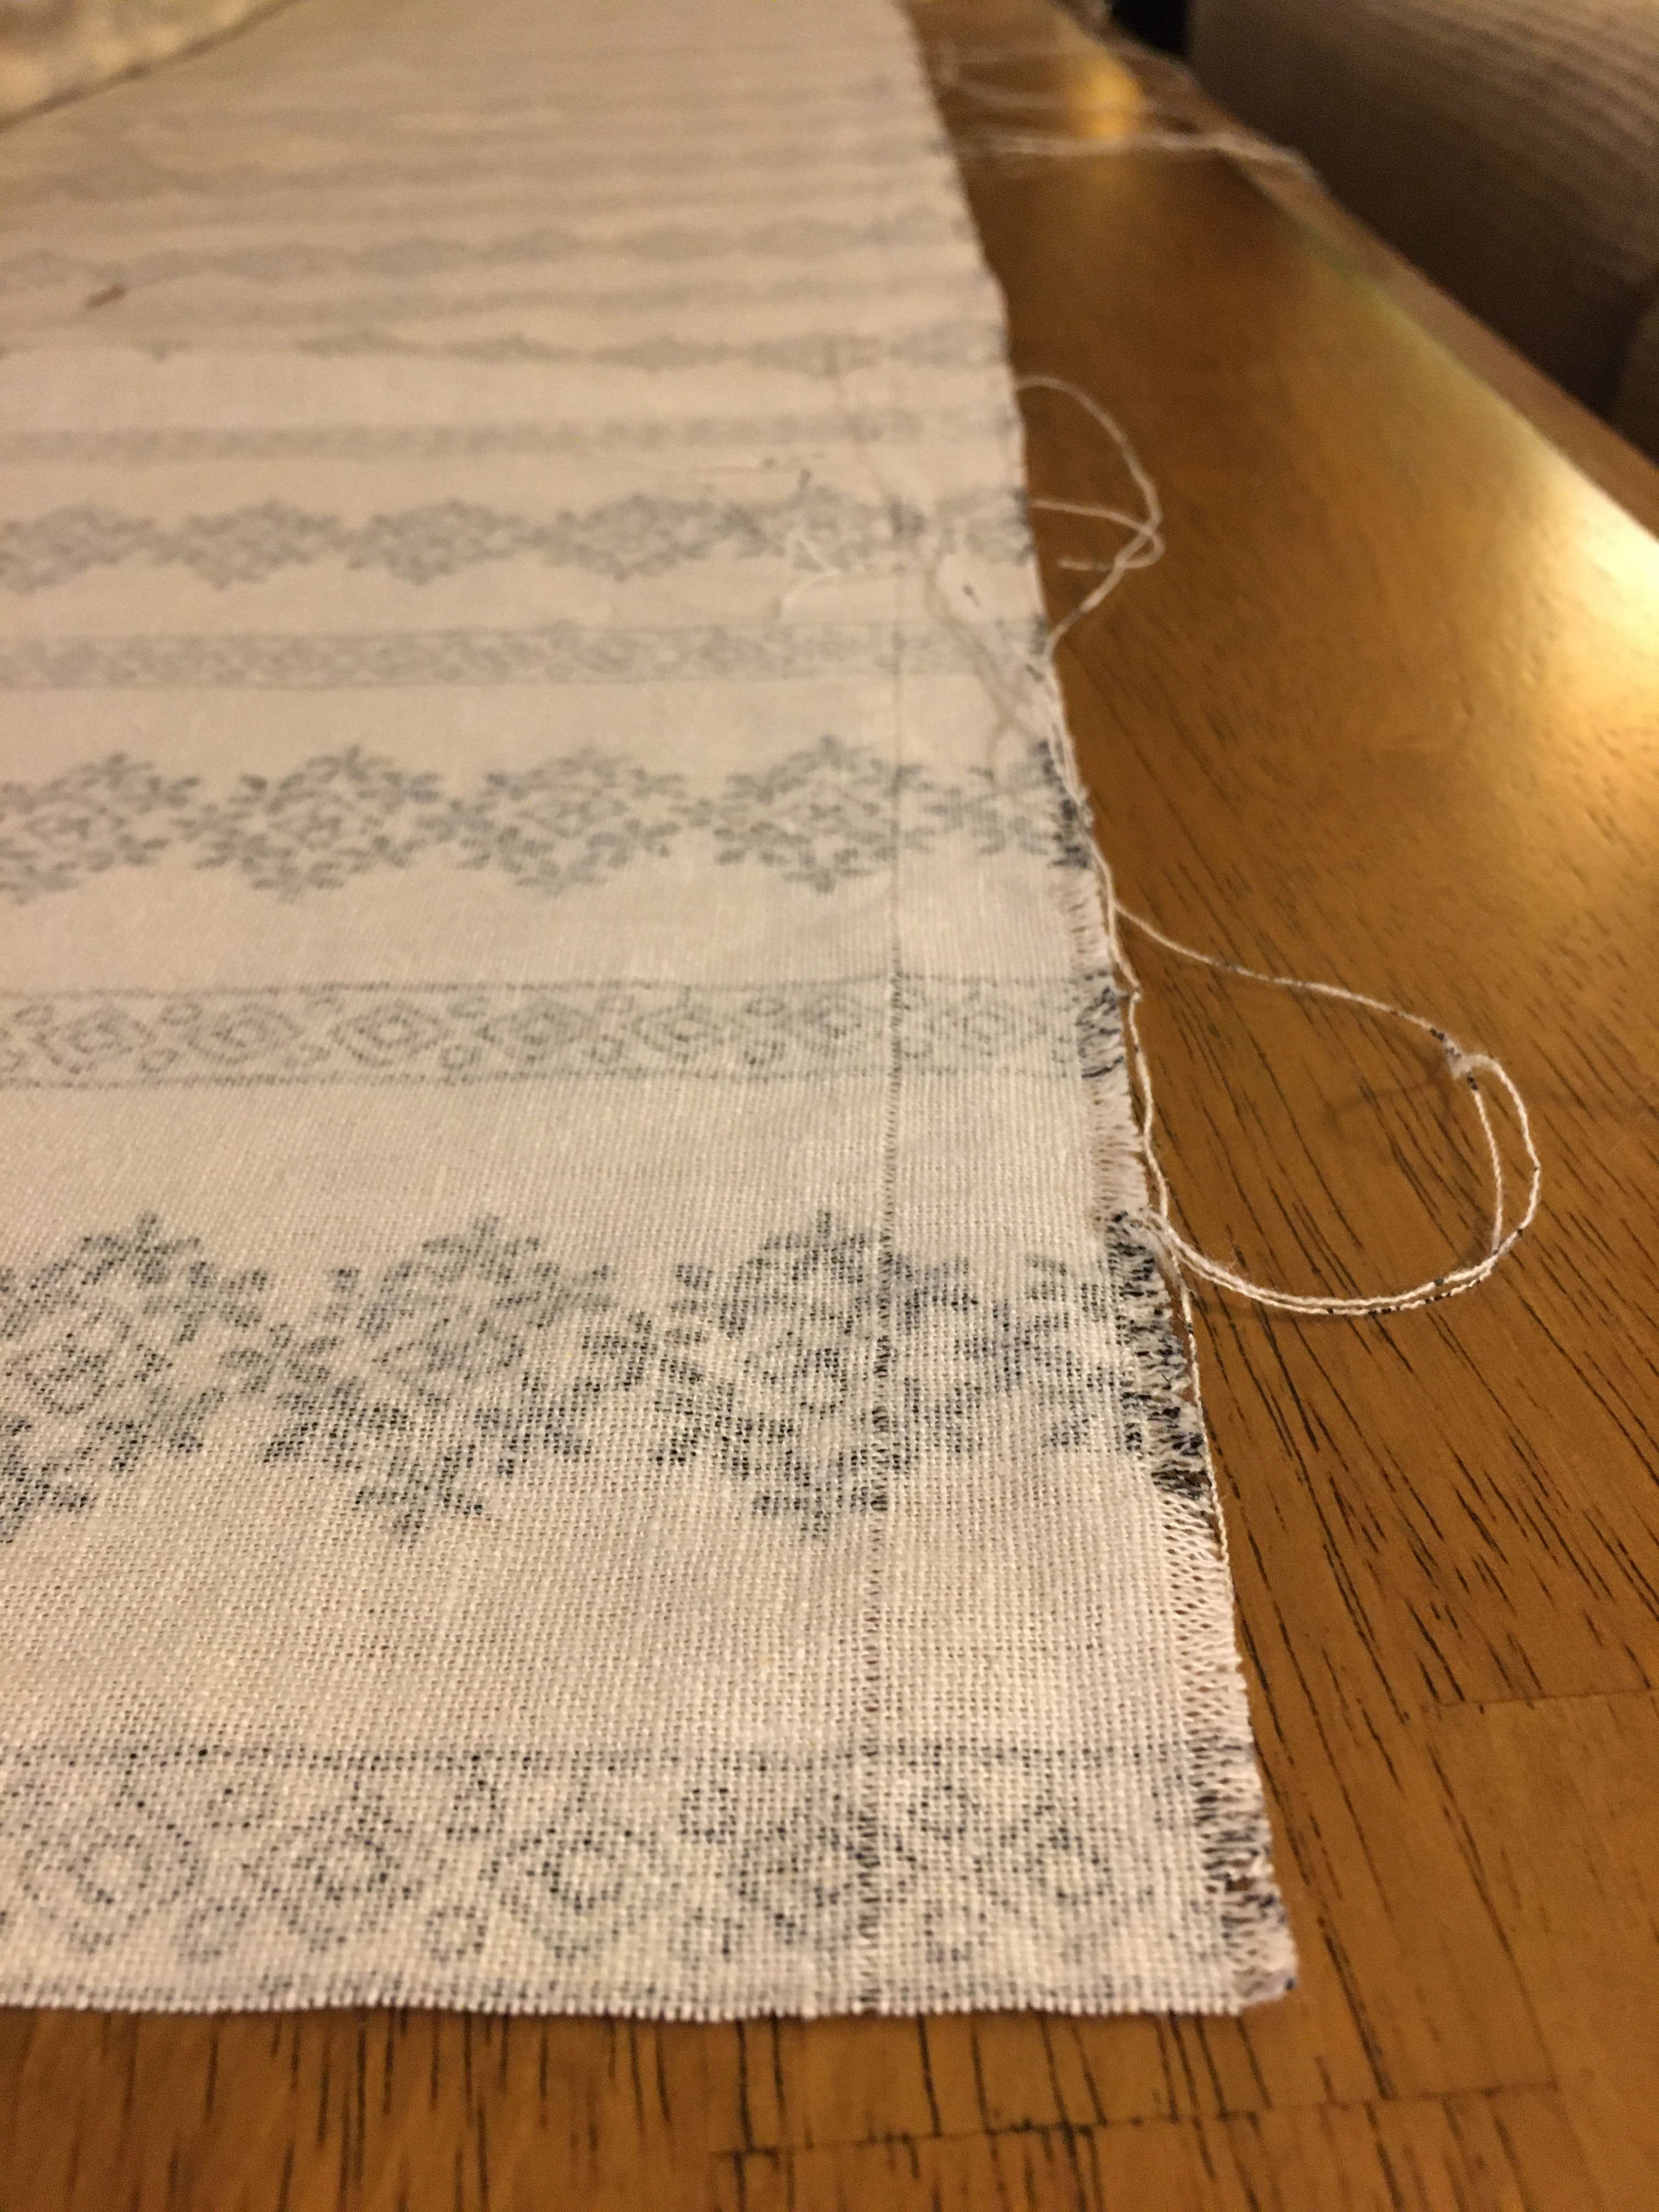
After cutting all my pieces along these thread lines, I also pulled threads ¼” from all sides of the pieces to mark my seam lines so they would be nice and straight. 

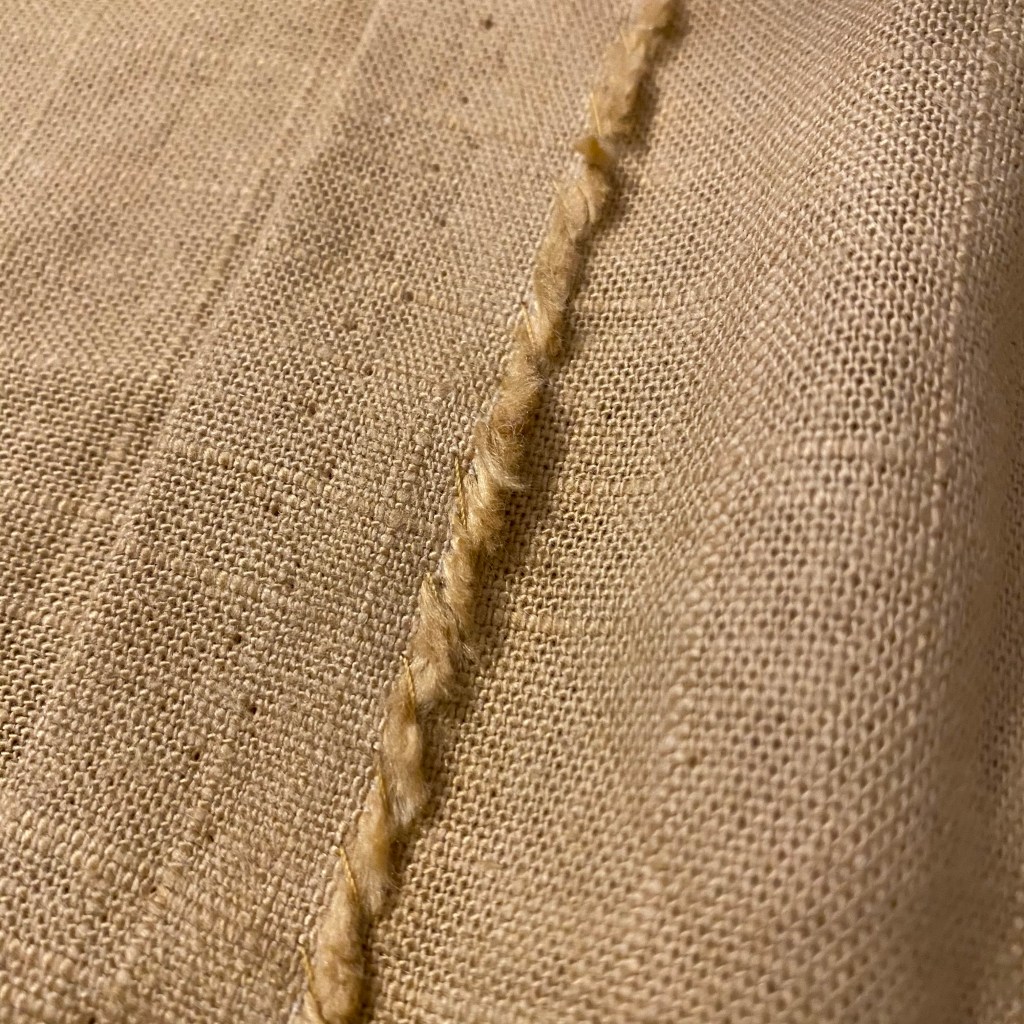
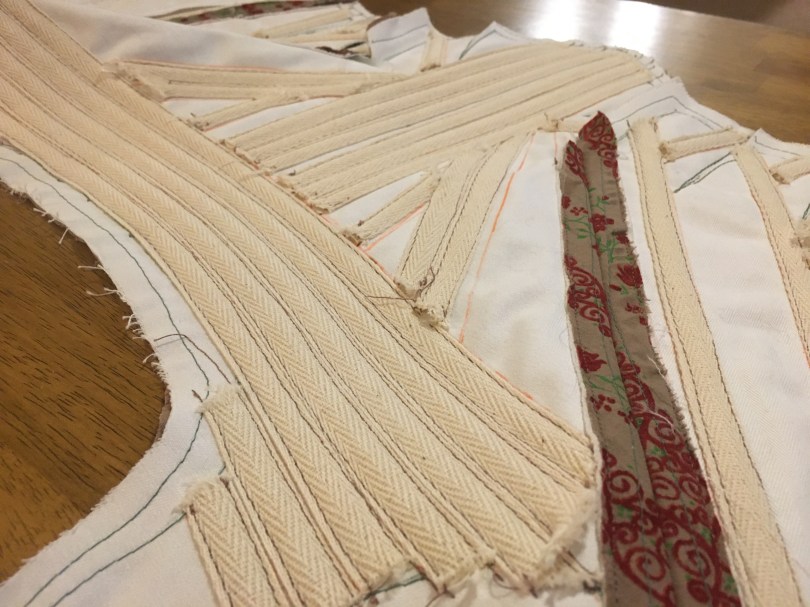
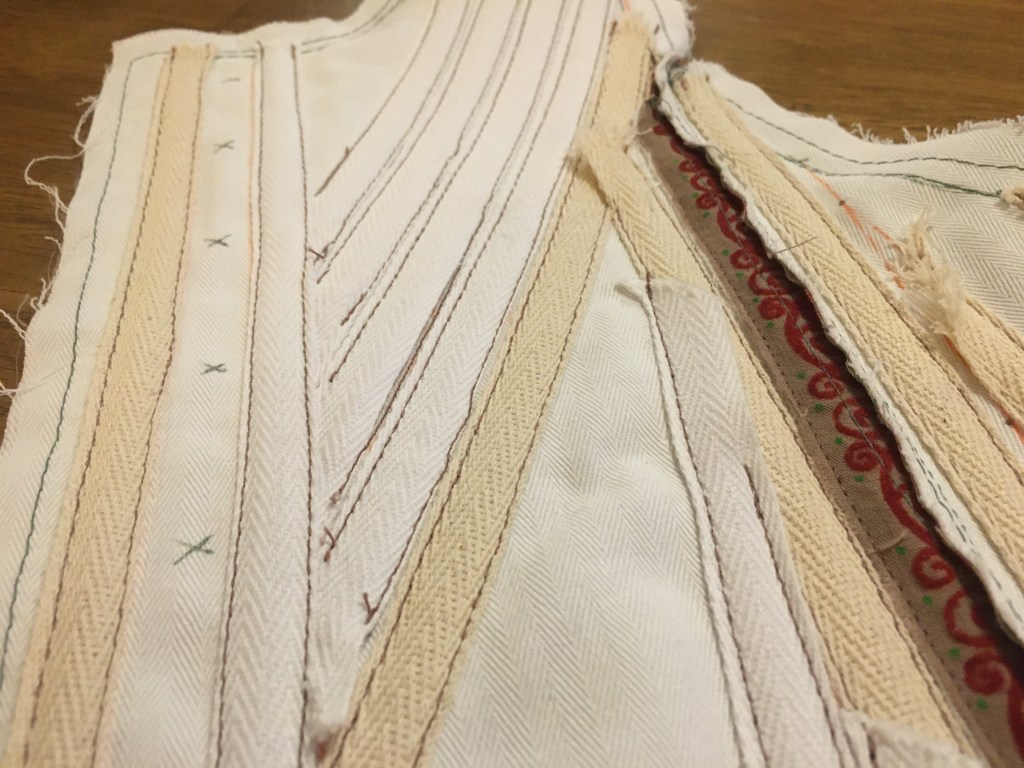
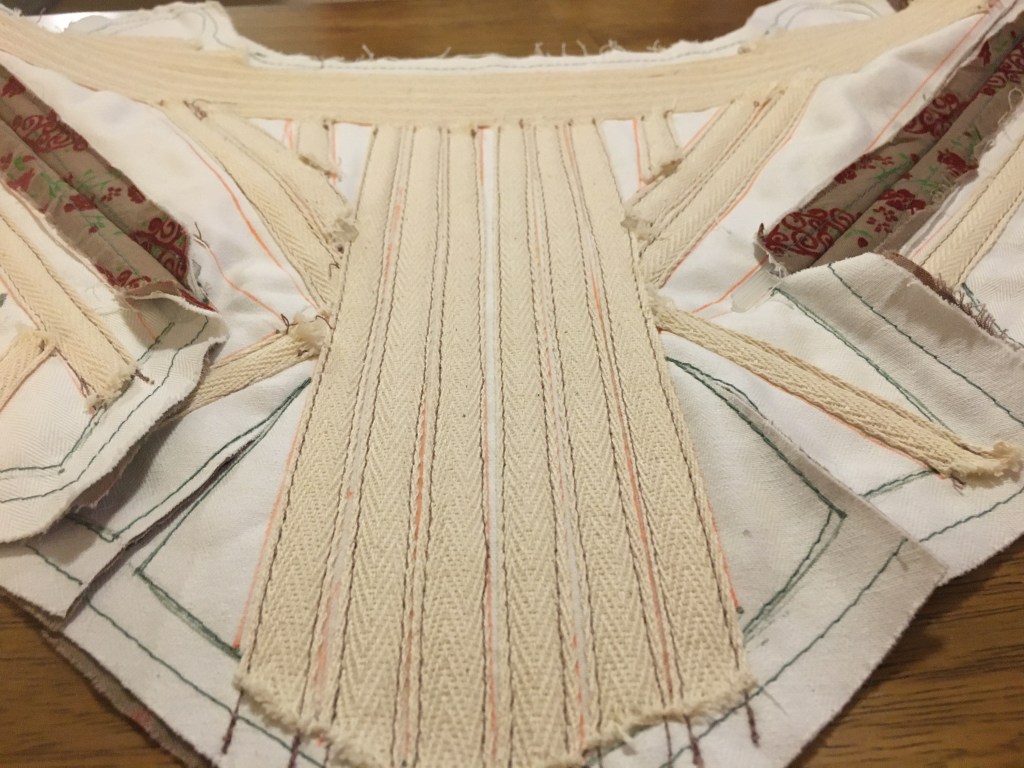
With all the rectangles ready to go, I started stitching seams using a tiny backstitch since this would take a large amount of strain, especially around the gussets.  I stitched the seams in the following order:

  1. Gusset to side of sleeve seam (x2)
  2. Gusset and top of sleeve (1” overlap) to body pieces (x2)
  3. Undersleeve to side body seams, including gussets (fold over along centerline of sleeves and stitch left side to left side and right side to right side)

Overall, the method was to work from the “top” of seams to the “bottom” to allow any inaccuracies to be compensated for in the hems.  For example, when stitching the side seams, I started from the end of the sleeve, to the gusset where the line up was precise, to the hem on the body. 

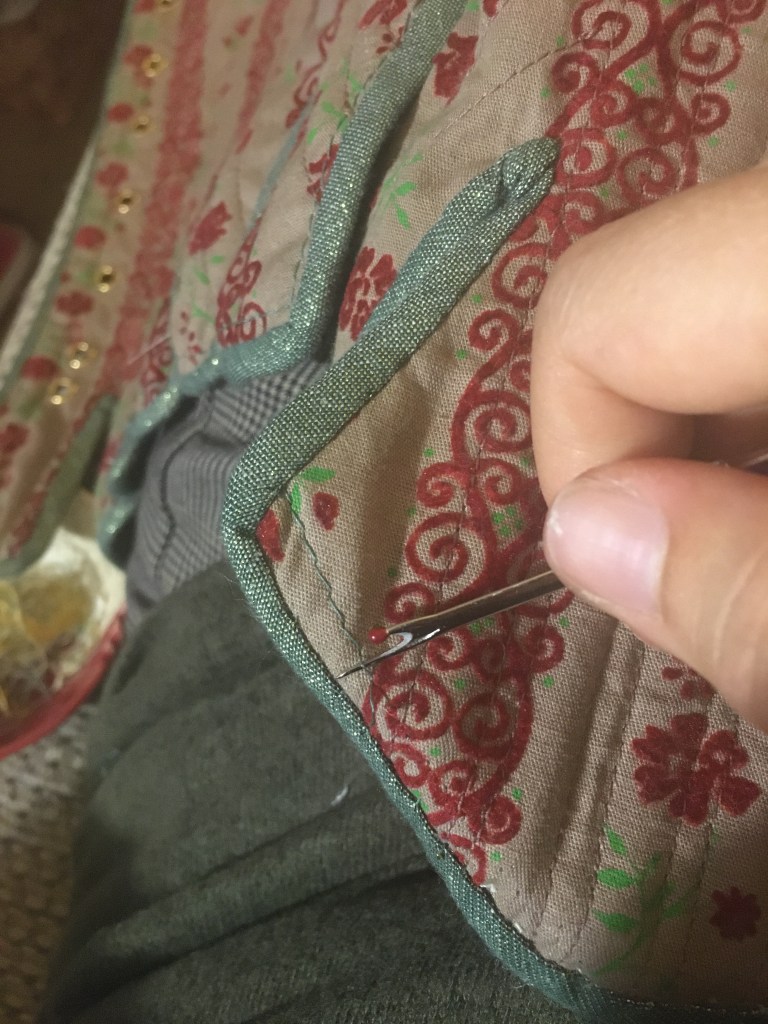
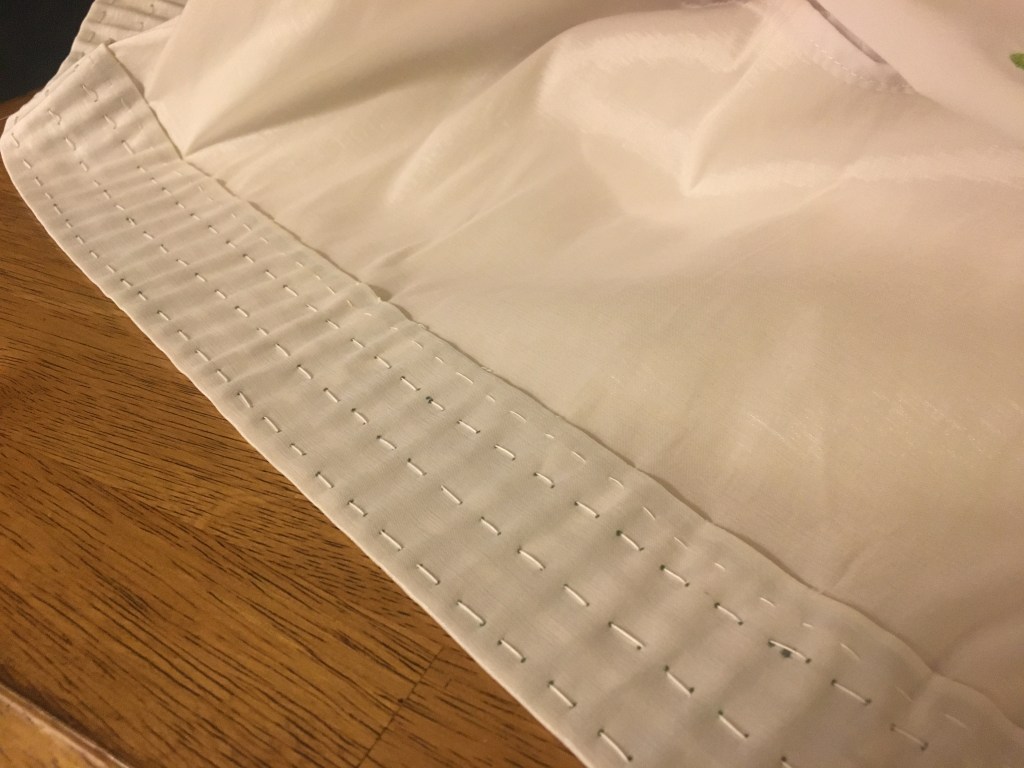
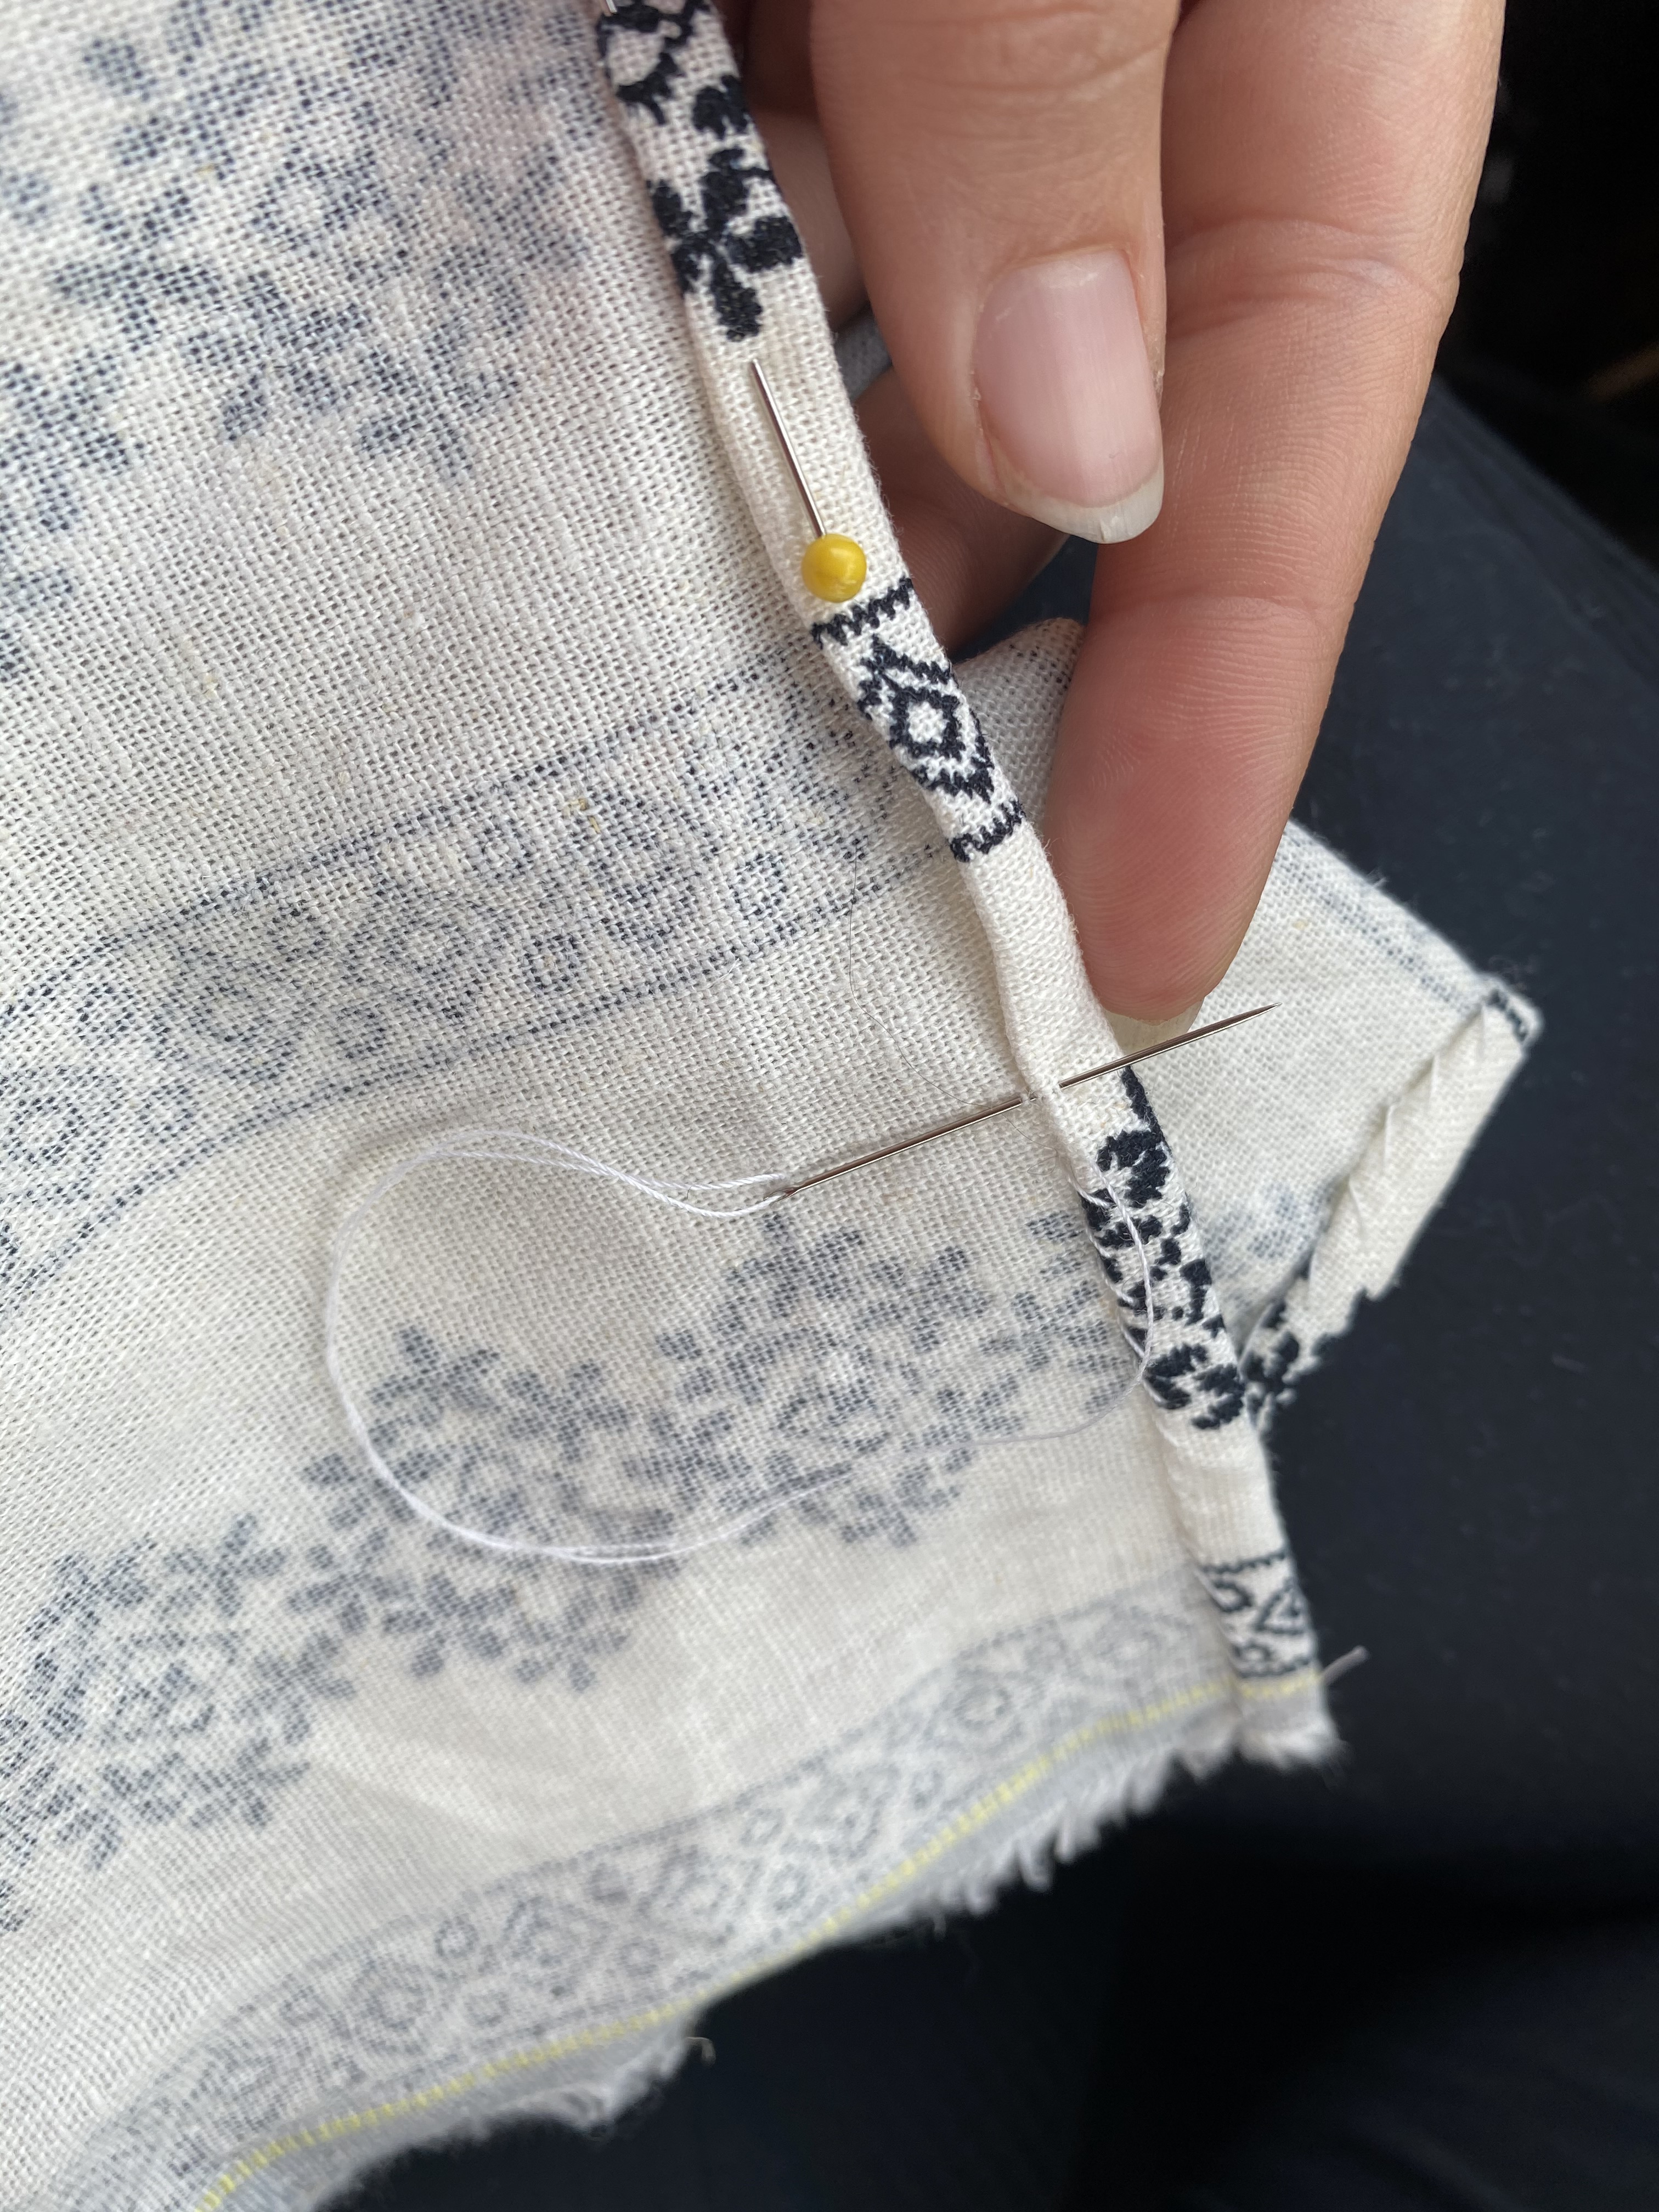
Once these seams were completed, I was able to hem the bottom of the body section, sleeves, and neckline using a simple felling method (whip stitch and prick stitch where only one or two of the fashion side fabric is grabbed by the needle so little to no markings are shown on the outside). 

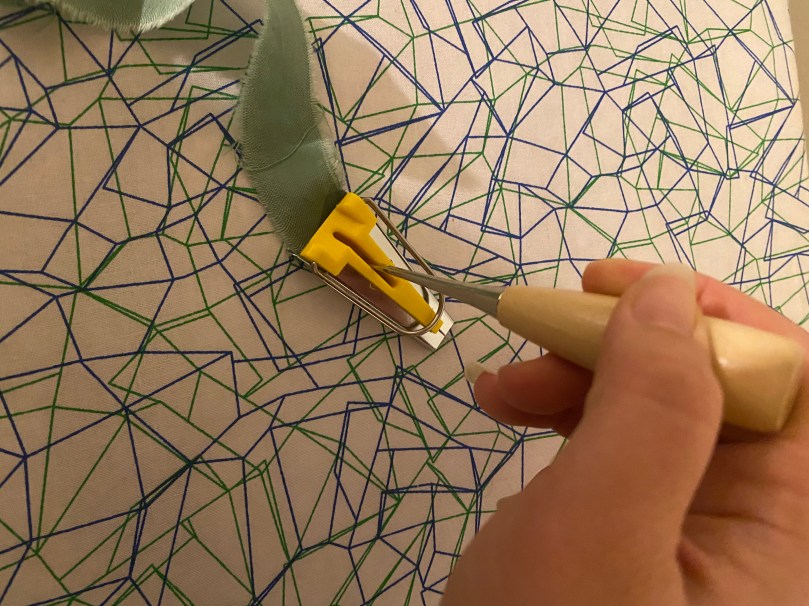
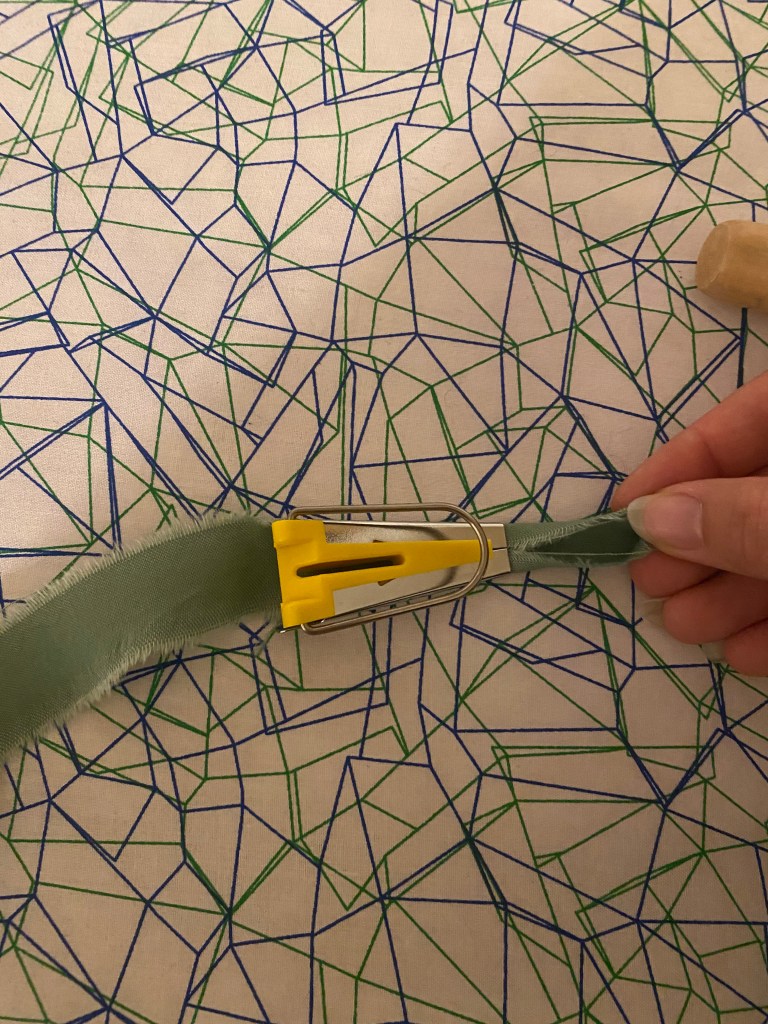
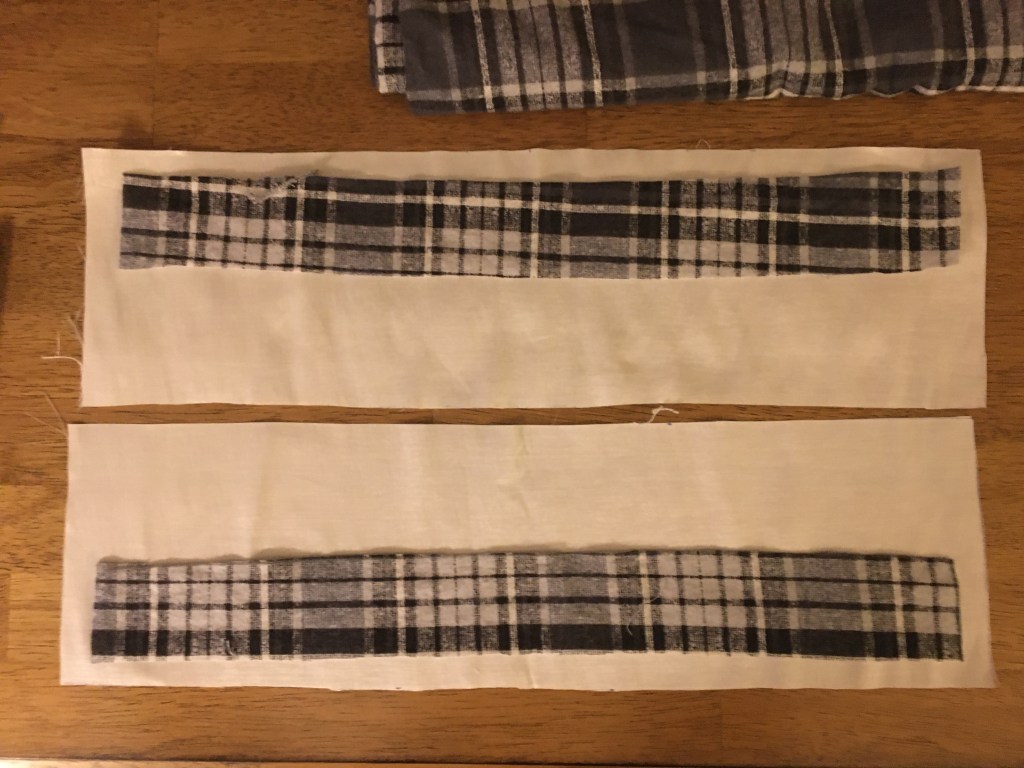
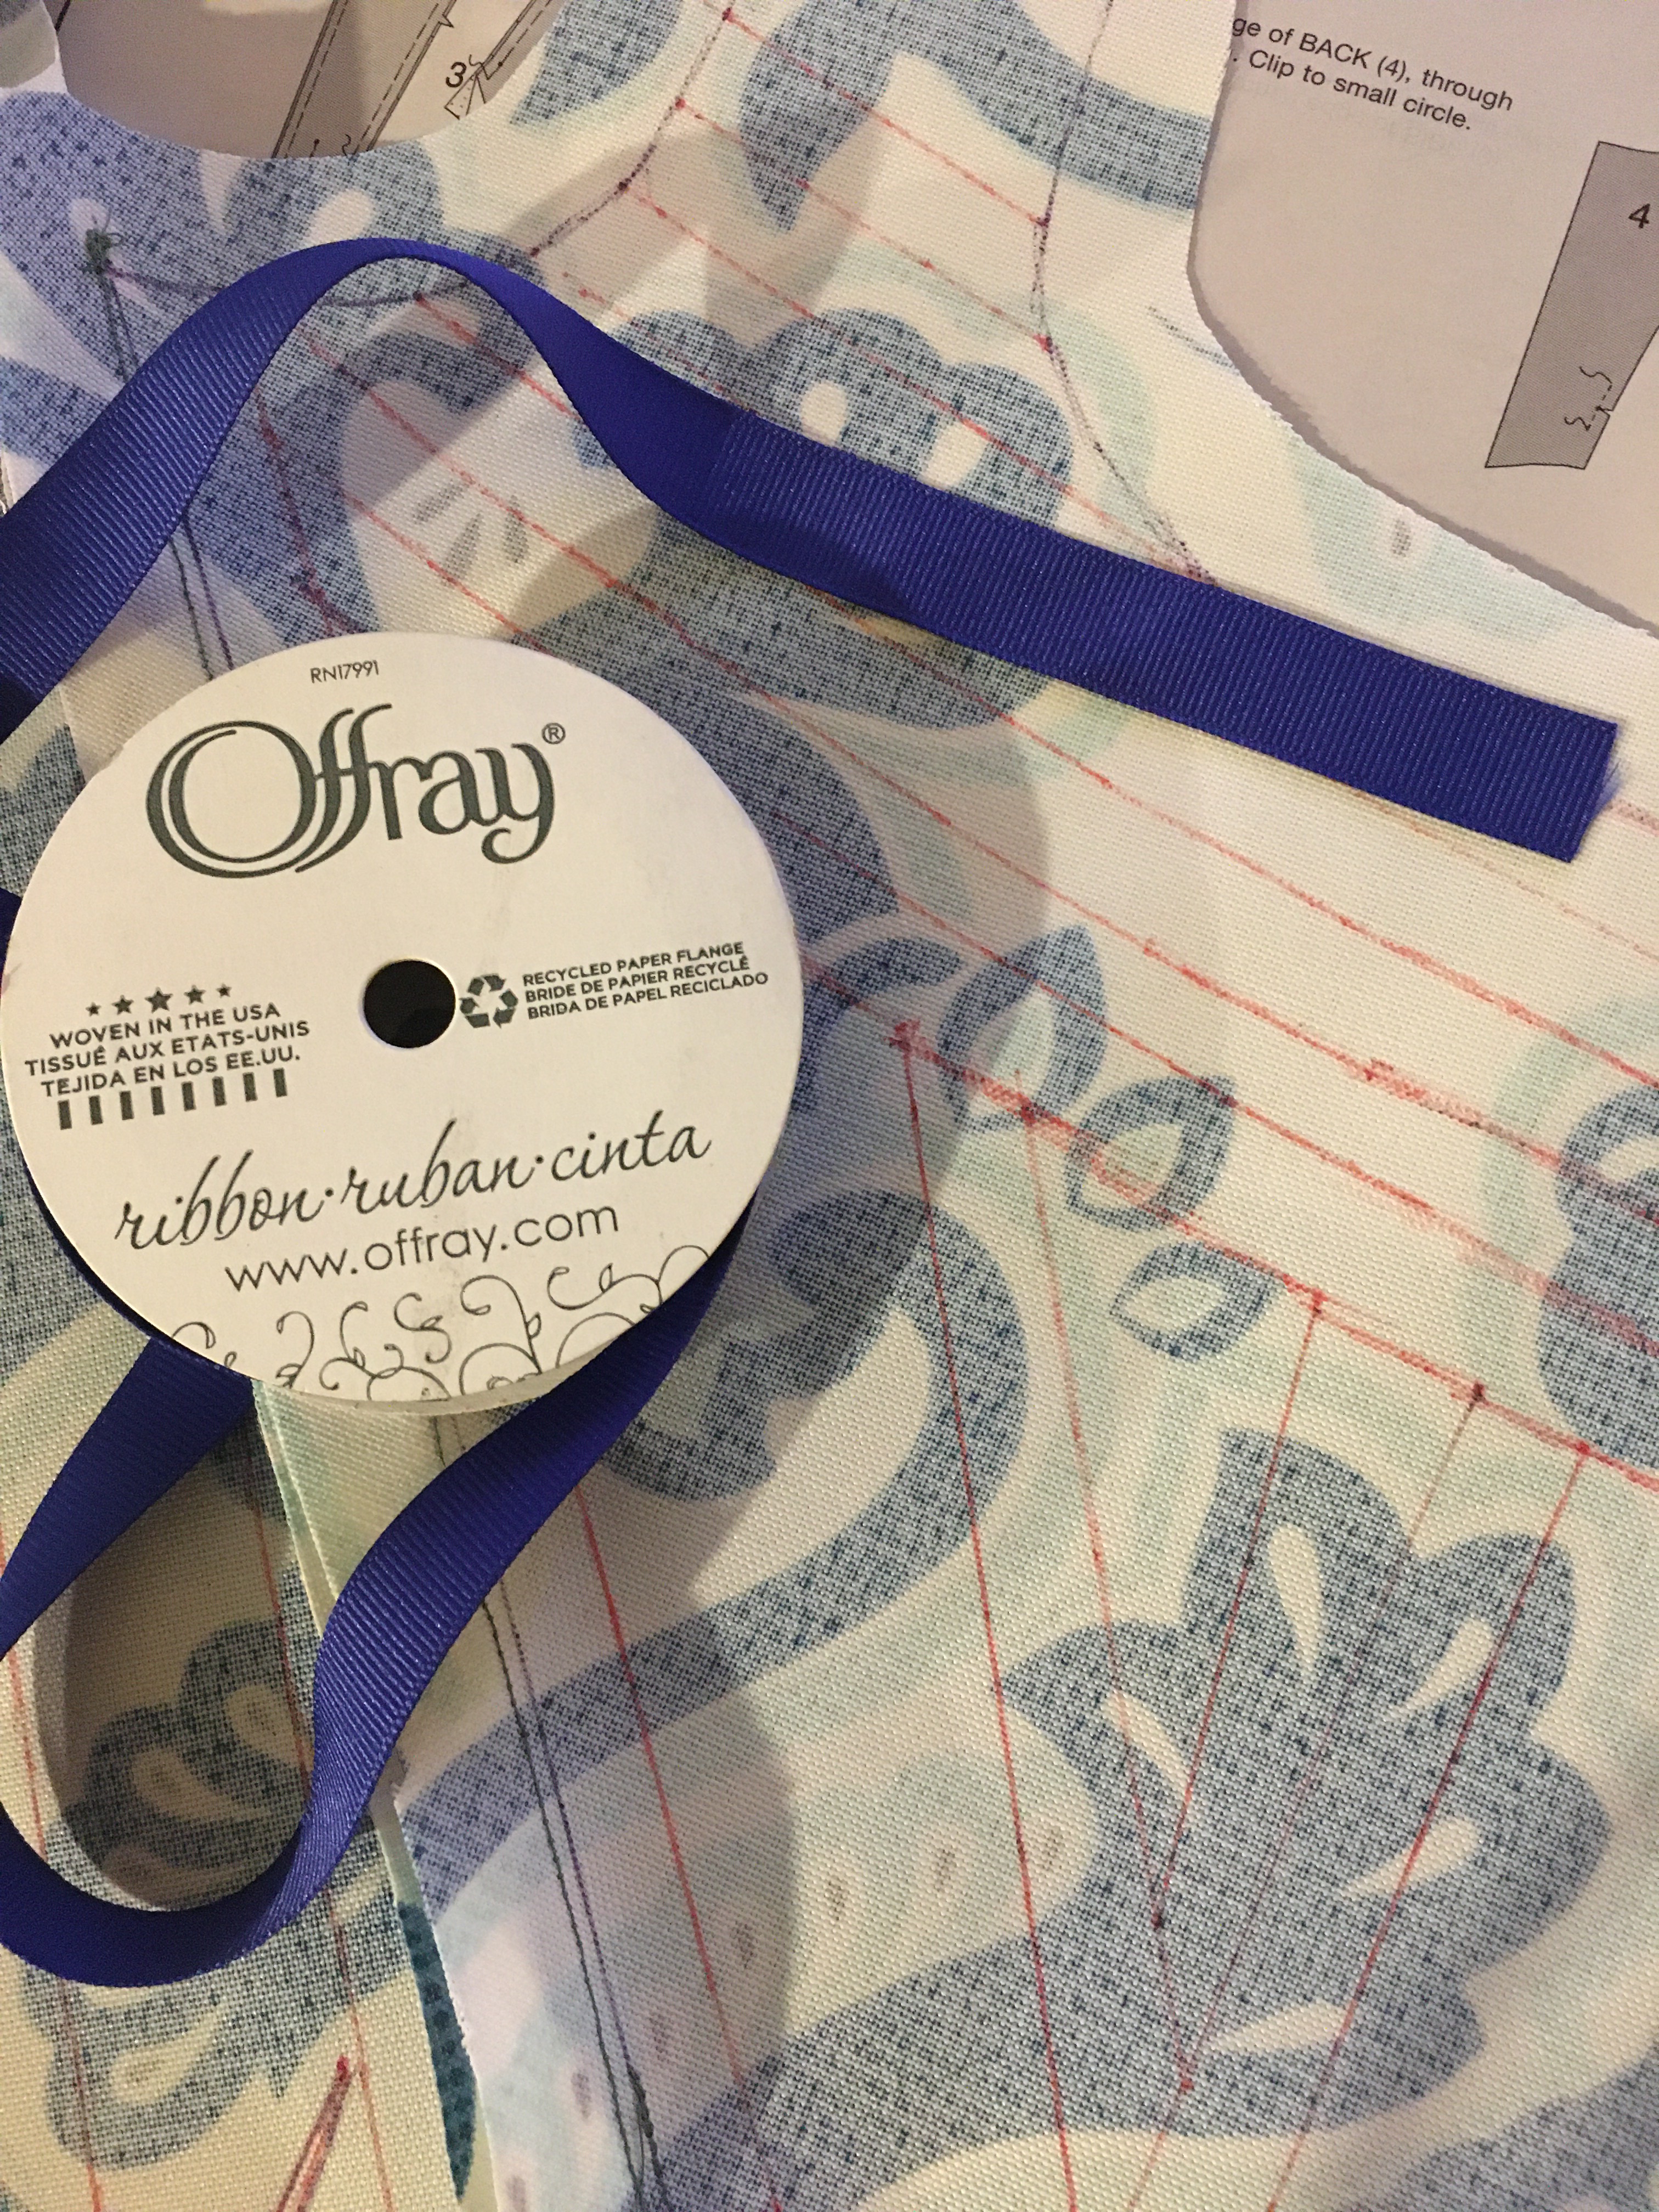
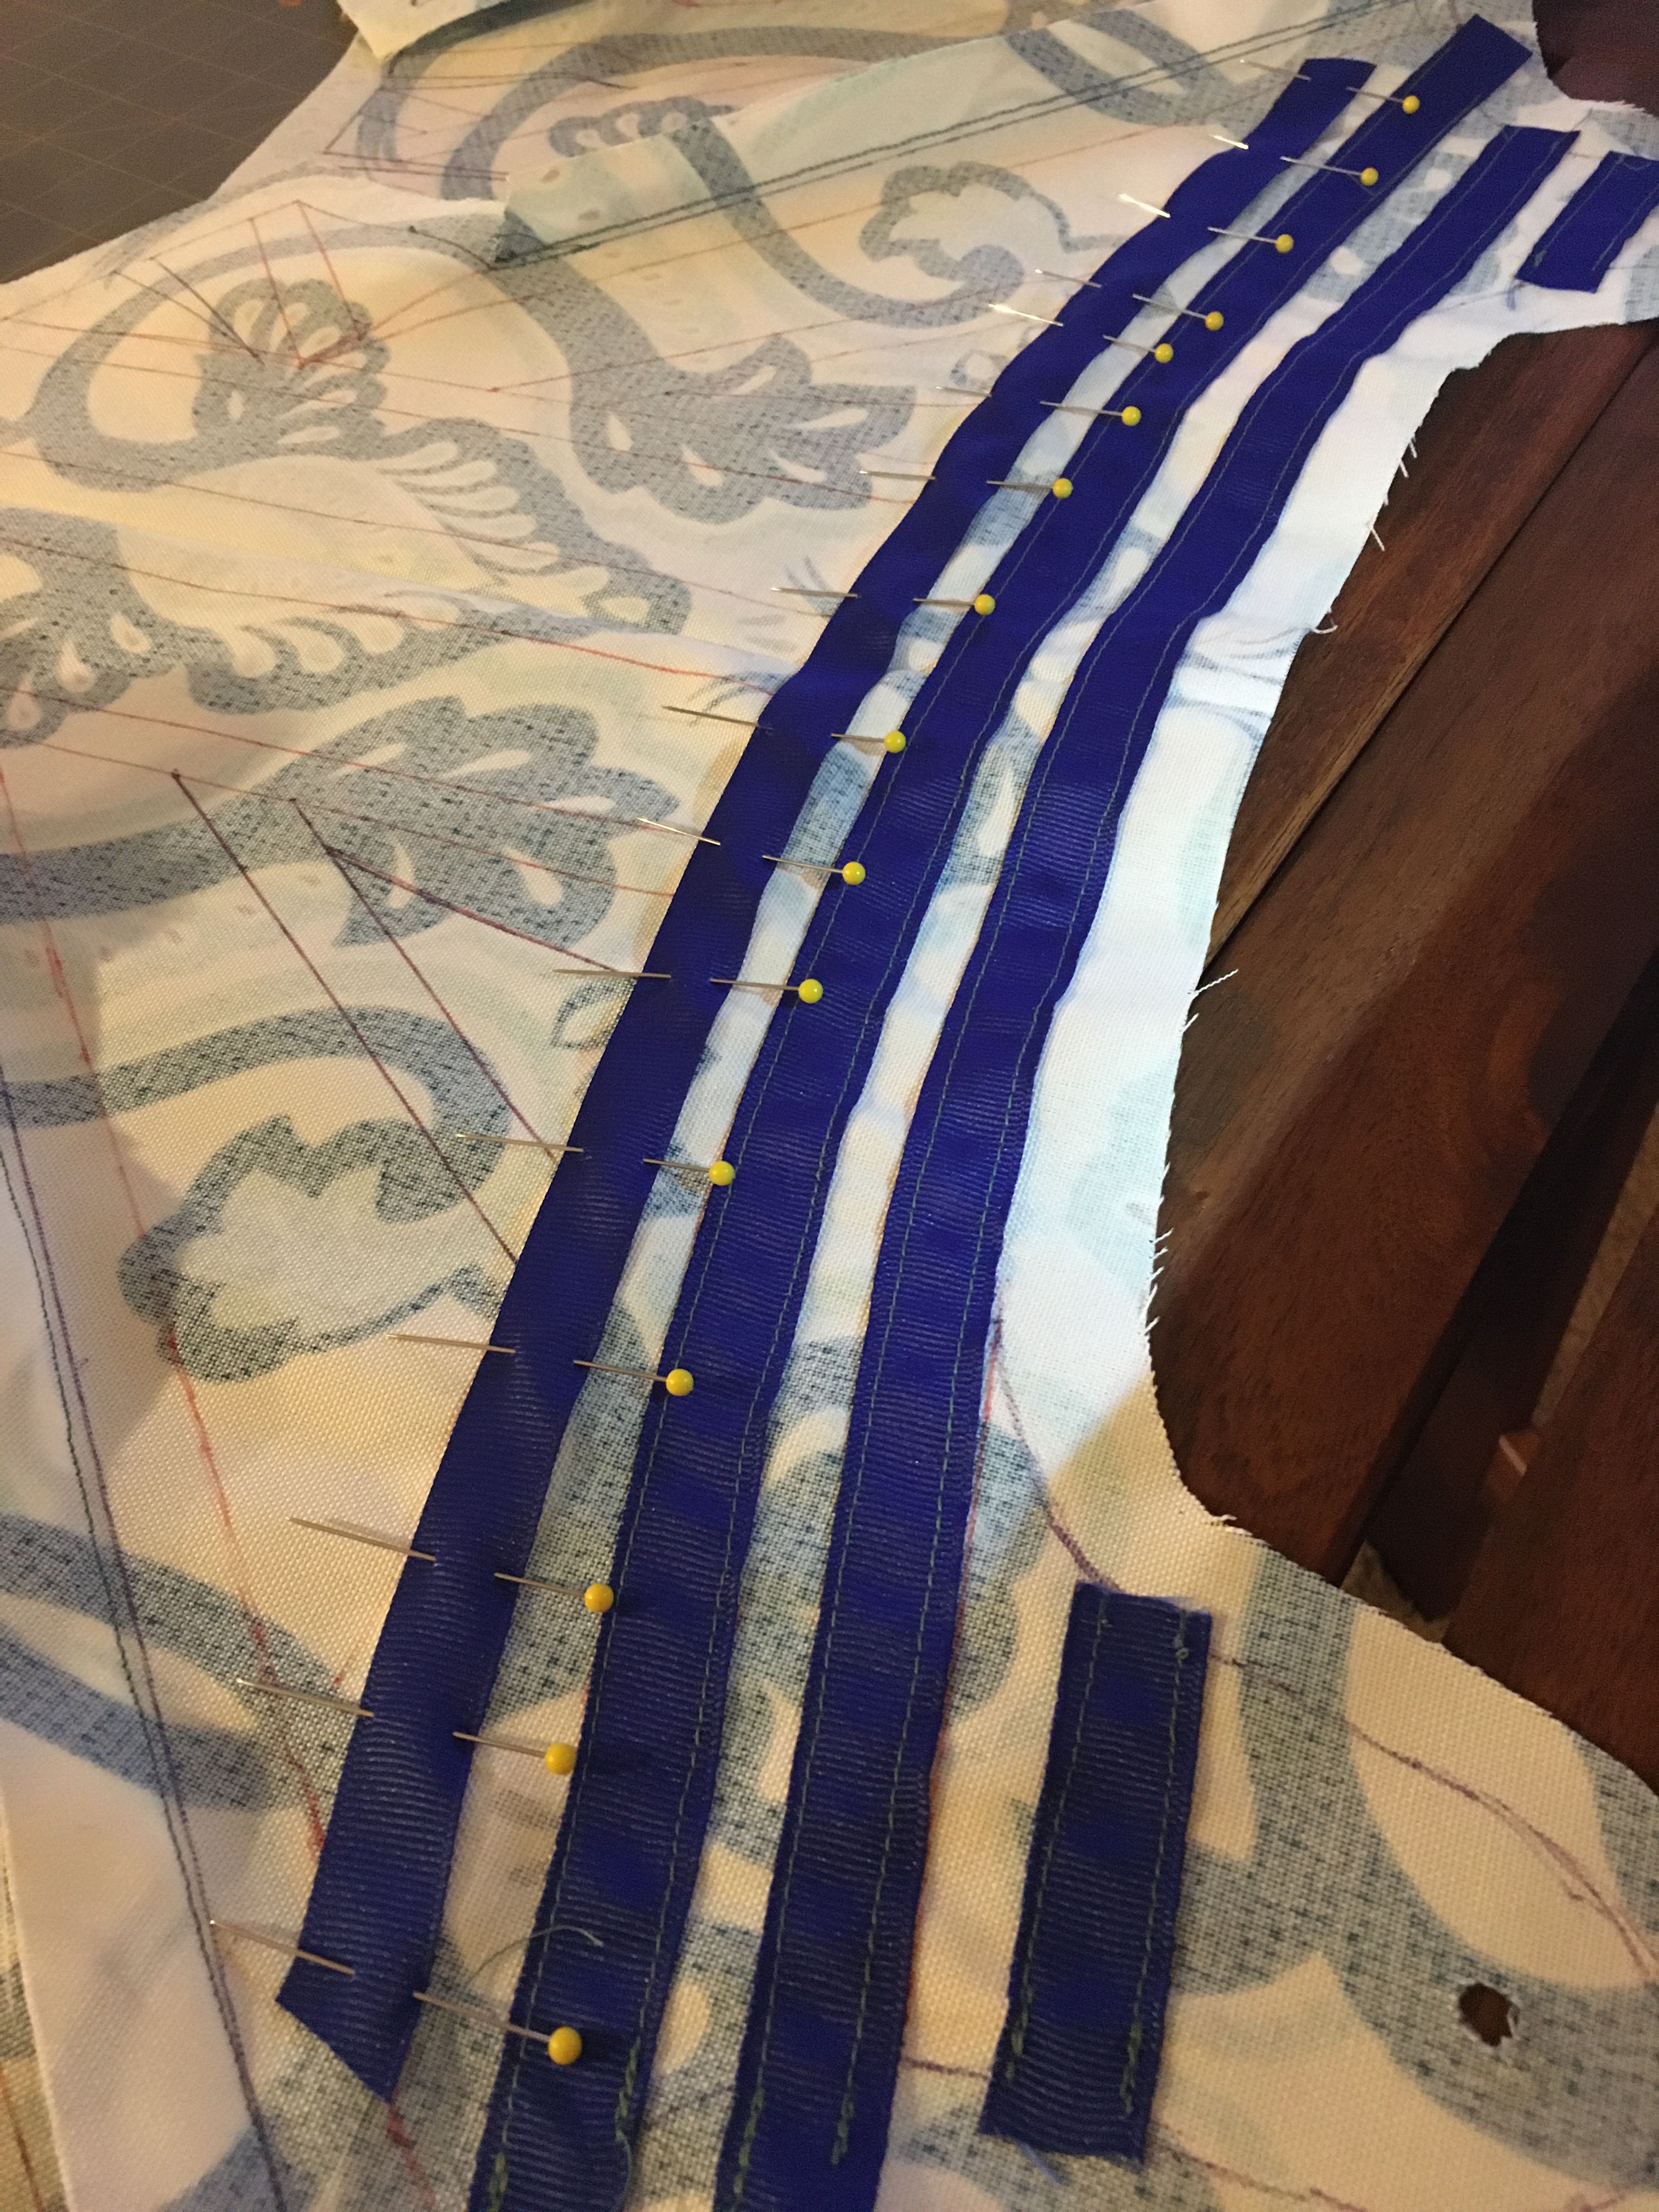
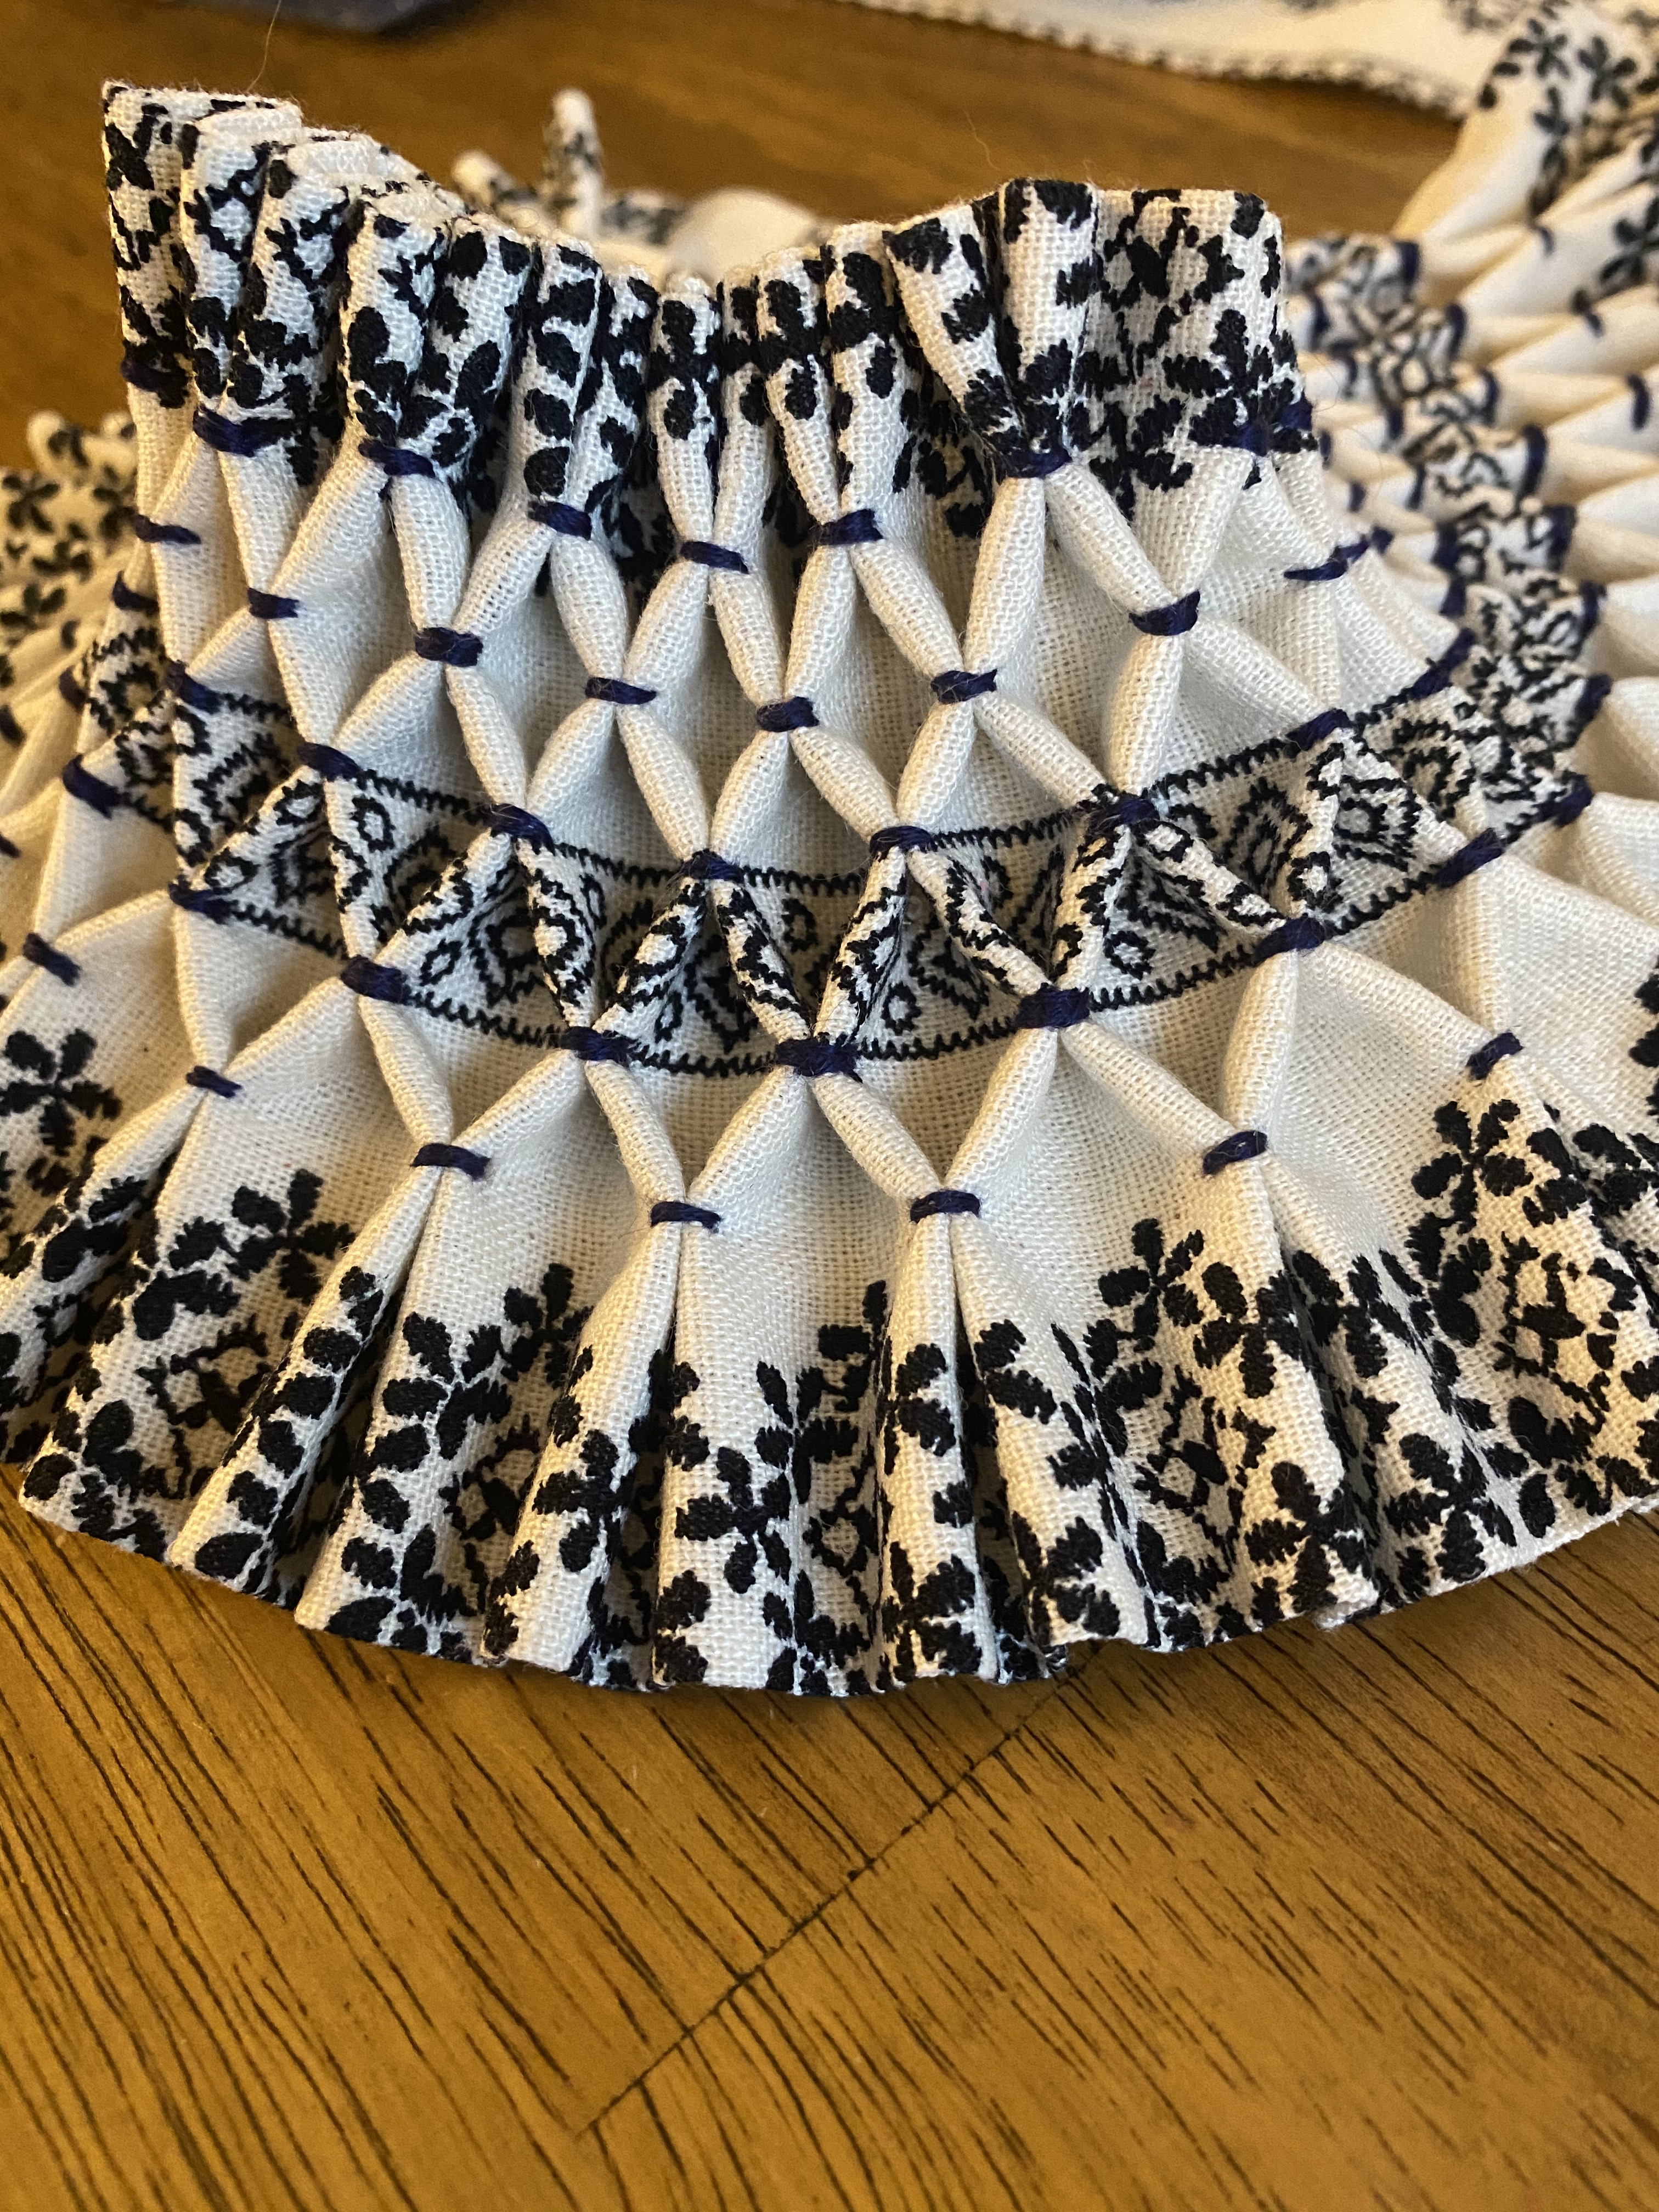
Since I had to limit my sleeve length to allow for a decent length for the body panels, I opted to add a cuff to the sleeves that would gather the fullness and create a nice poof around the bicep.  I had exactly 16” by 72” of material remaining to use for the cuffs that I thought to experiment with smocking on.  I pulled another thread along the 8” width mark to give me two pieces of 8” x 72” pieces that I could smock.  

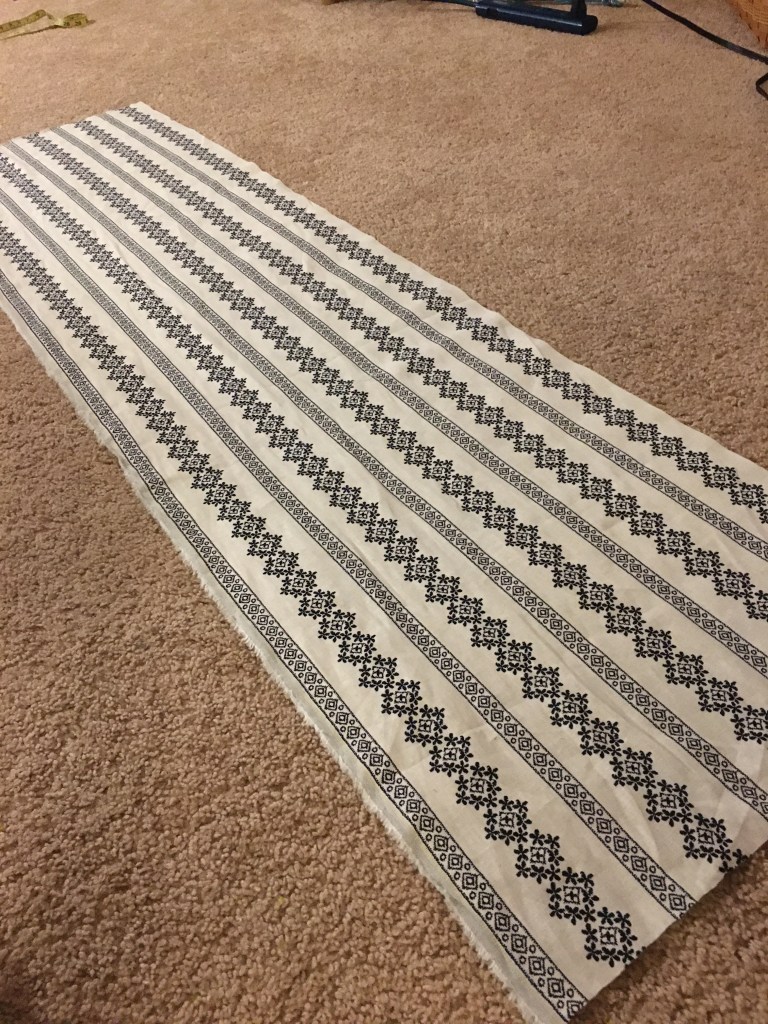
The short edges of the pieces were finished with a tiny rolled hem (~¼”) and whip stitch before folding the 8” length in half, right sides together.  Since this seam wouldn’t take heavy strain, I stitched the top with a tight running stitch rather than backstitches. 

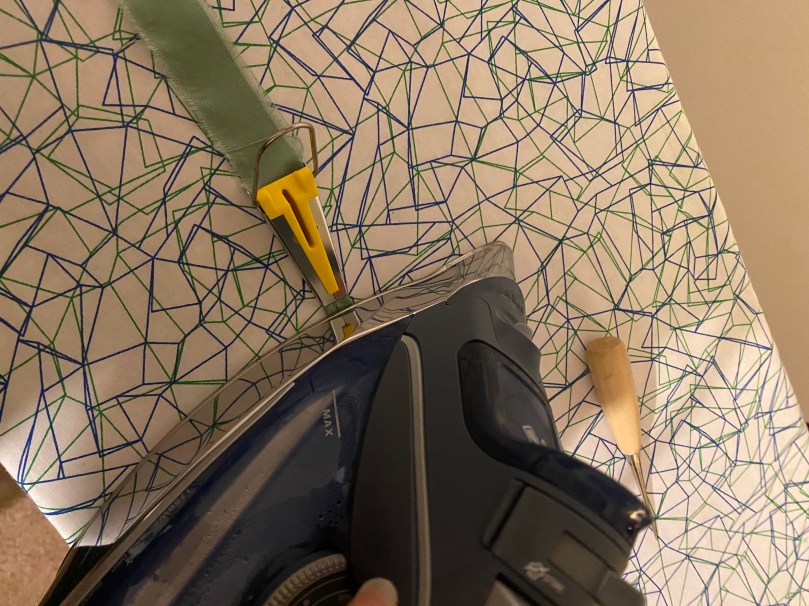
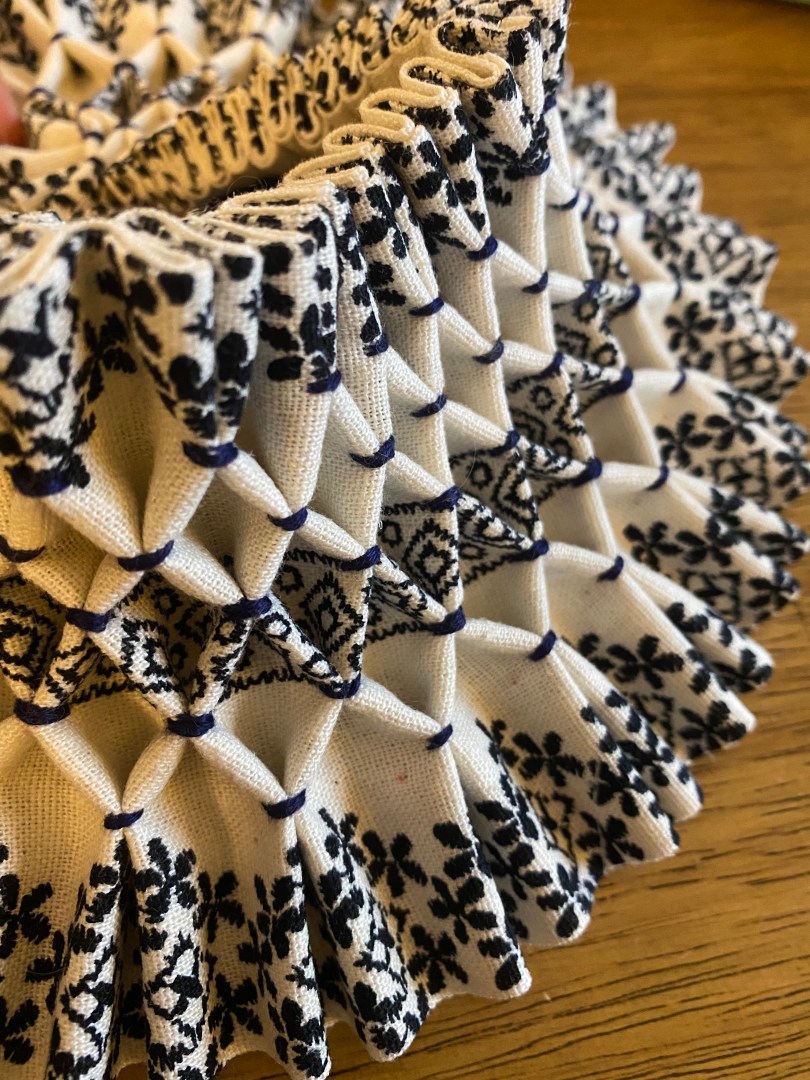
Once the long seam was stitched, the tubes were turned right side out and pressed to create the base of the cuffs. This was my first attempt at smocking and spent a good amount of time researching and reviewing diagrams on pinterest. In the end, I settled on keeping it simple and doing a modified version of the process detailed in Fortune Favor’s blog. 

Ideally, I was planning to achieve a look similar to the dutch blackwork from the period which my fabric thankfully lends itself to.

To smock you’ll need:

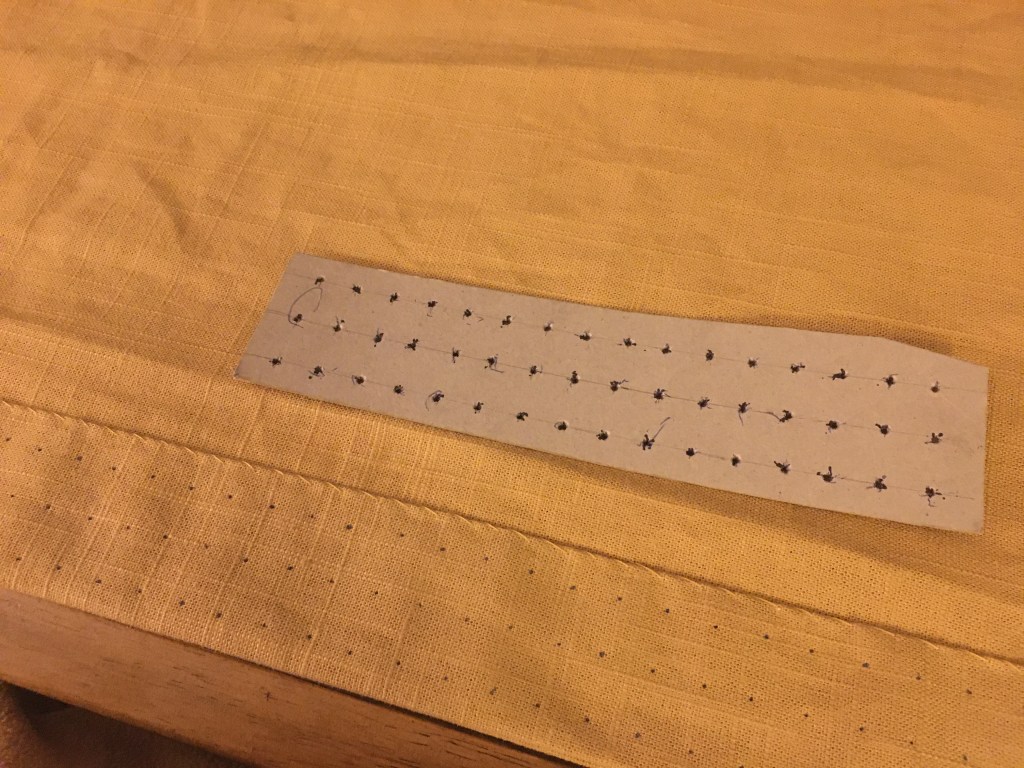
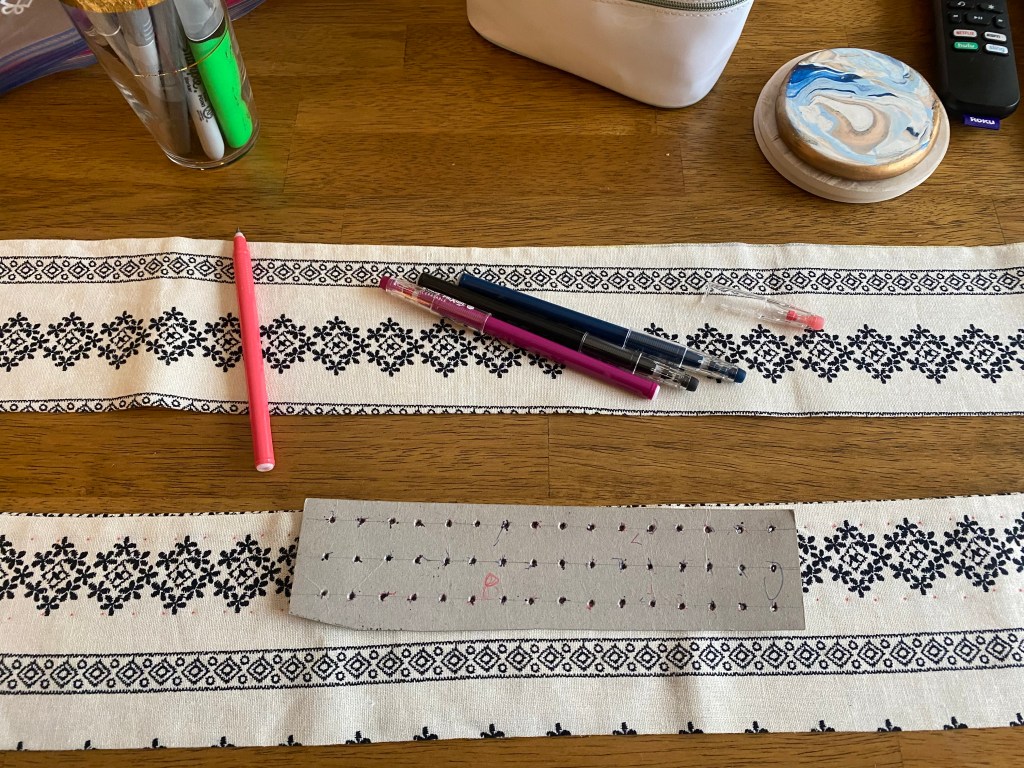
  • Heavy duty or buttonhole thread for pleating
  • Straight edge or cartridge pleat template
  • Marking tools (pen, marker, etc)
  • Embroidery floss

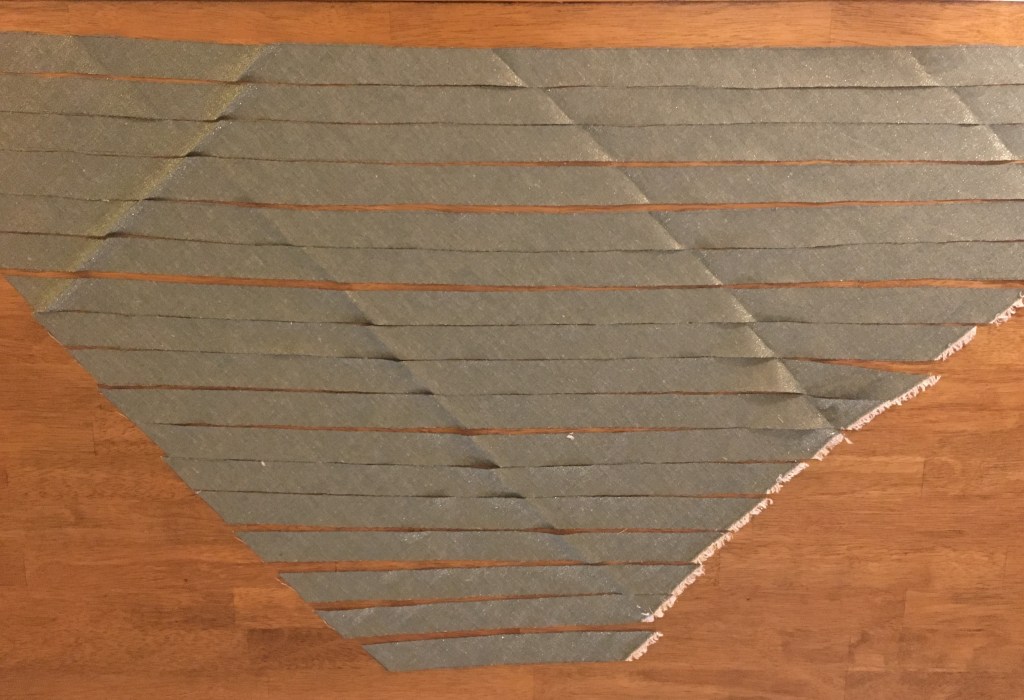
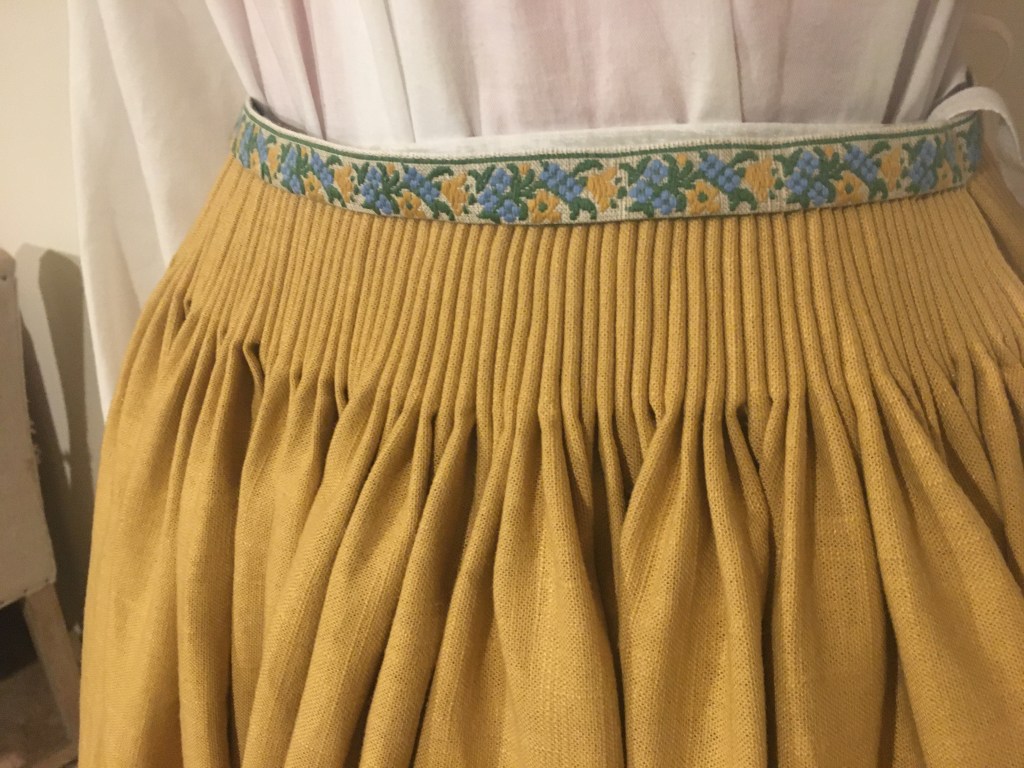
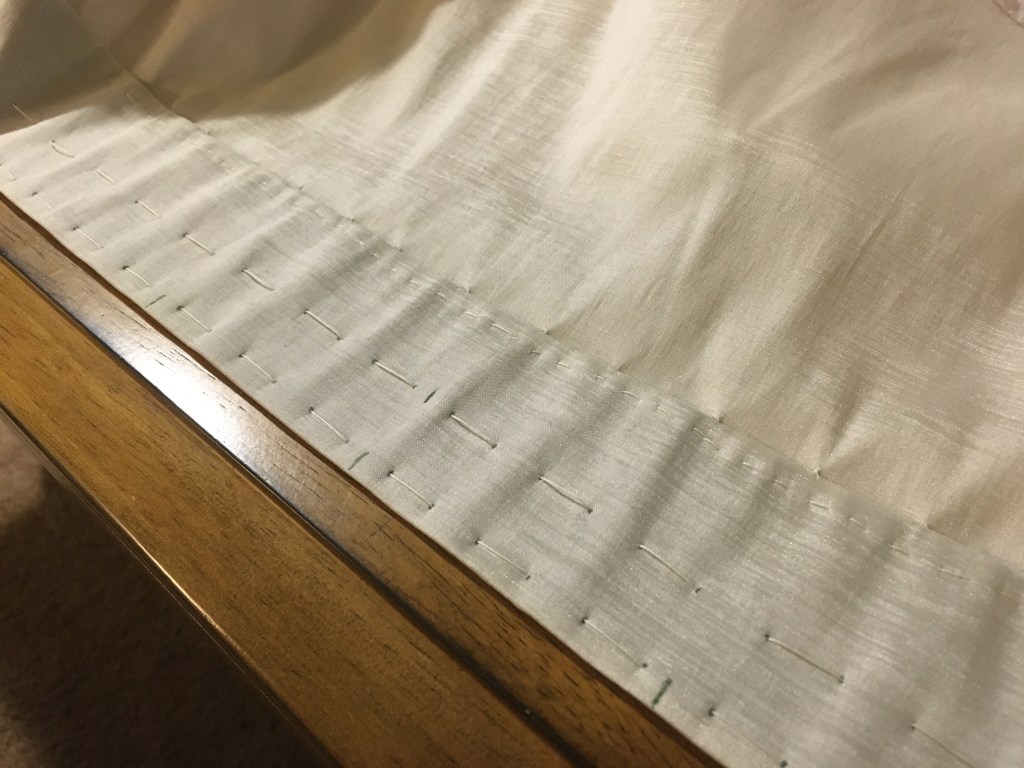
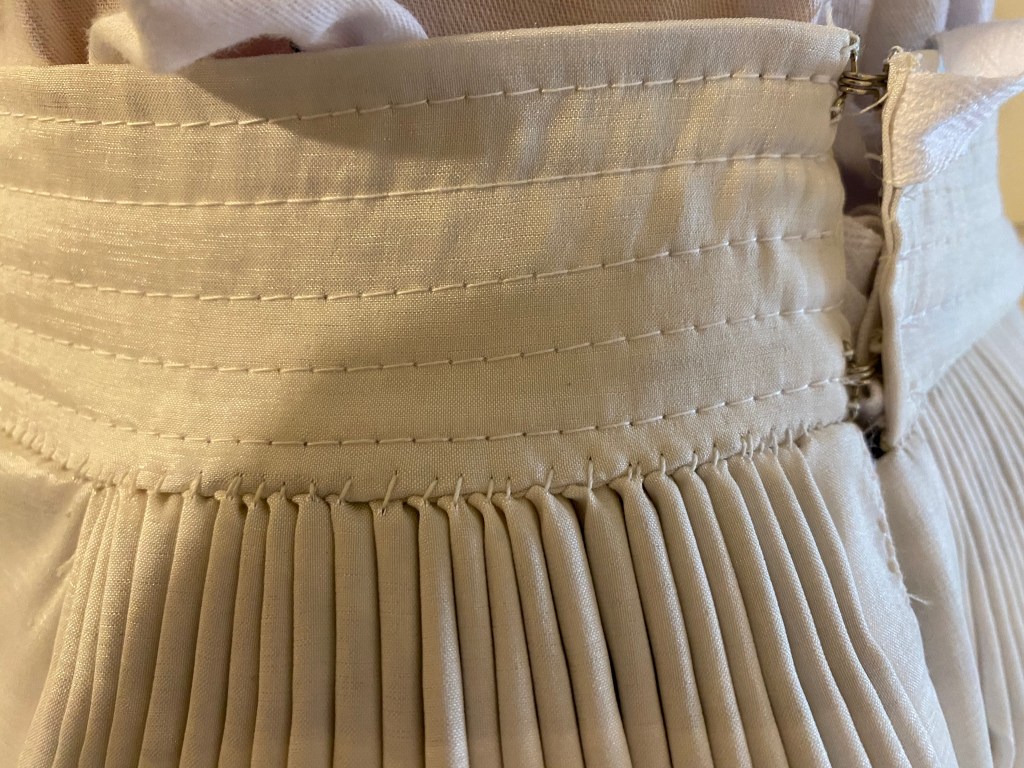
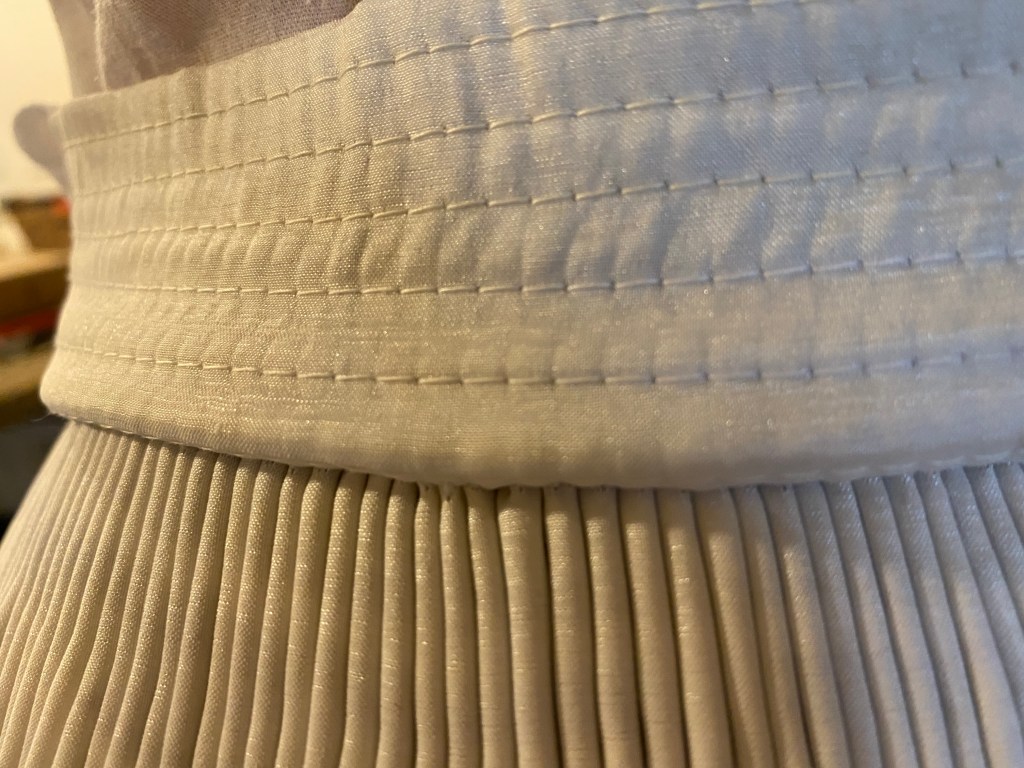
Rather than reinventing the wheel, I grabbed my cartridge pleat template to mark points for parallel running stitches to be made for the initial pleats.  This would make my smocking a bit coarser than the inspiration and sample imagery, but my timeline was getting a bit tight.  At the end of the day, I am glad I went with the coarser pleats for the final effect as well as the ease of stitching.  More pleats = more lock stitches = more time…

Using my standard method for pleating, I marked my running stitch points using the template and planned on three threads to be strung within the 3 ½” of cuff available.  My first length started ½” from the top of the cuff to give a tight pleating at the joint between the upper sleeve and the cuff.  The second and third threads were each 1” apart, leaving 1” of material at the bottom of the cuff to create a ruffle.  

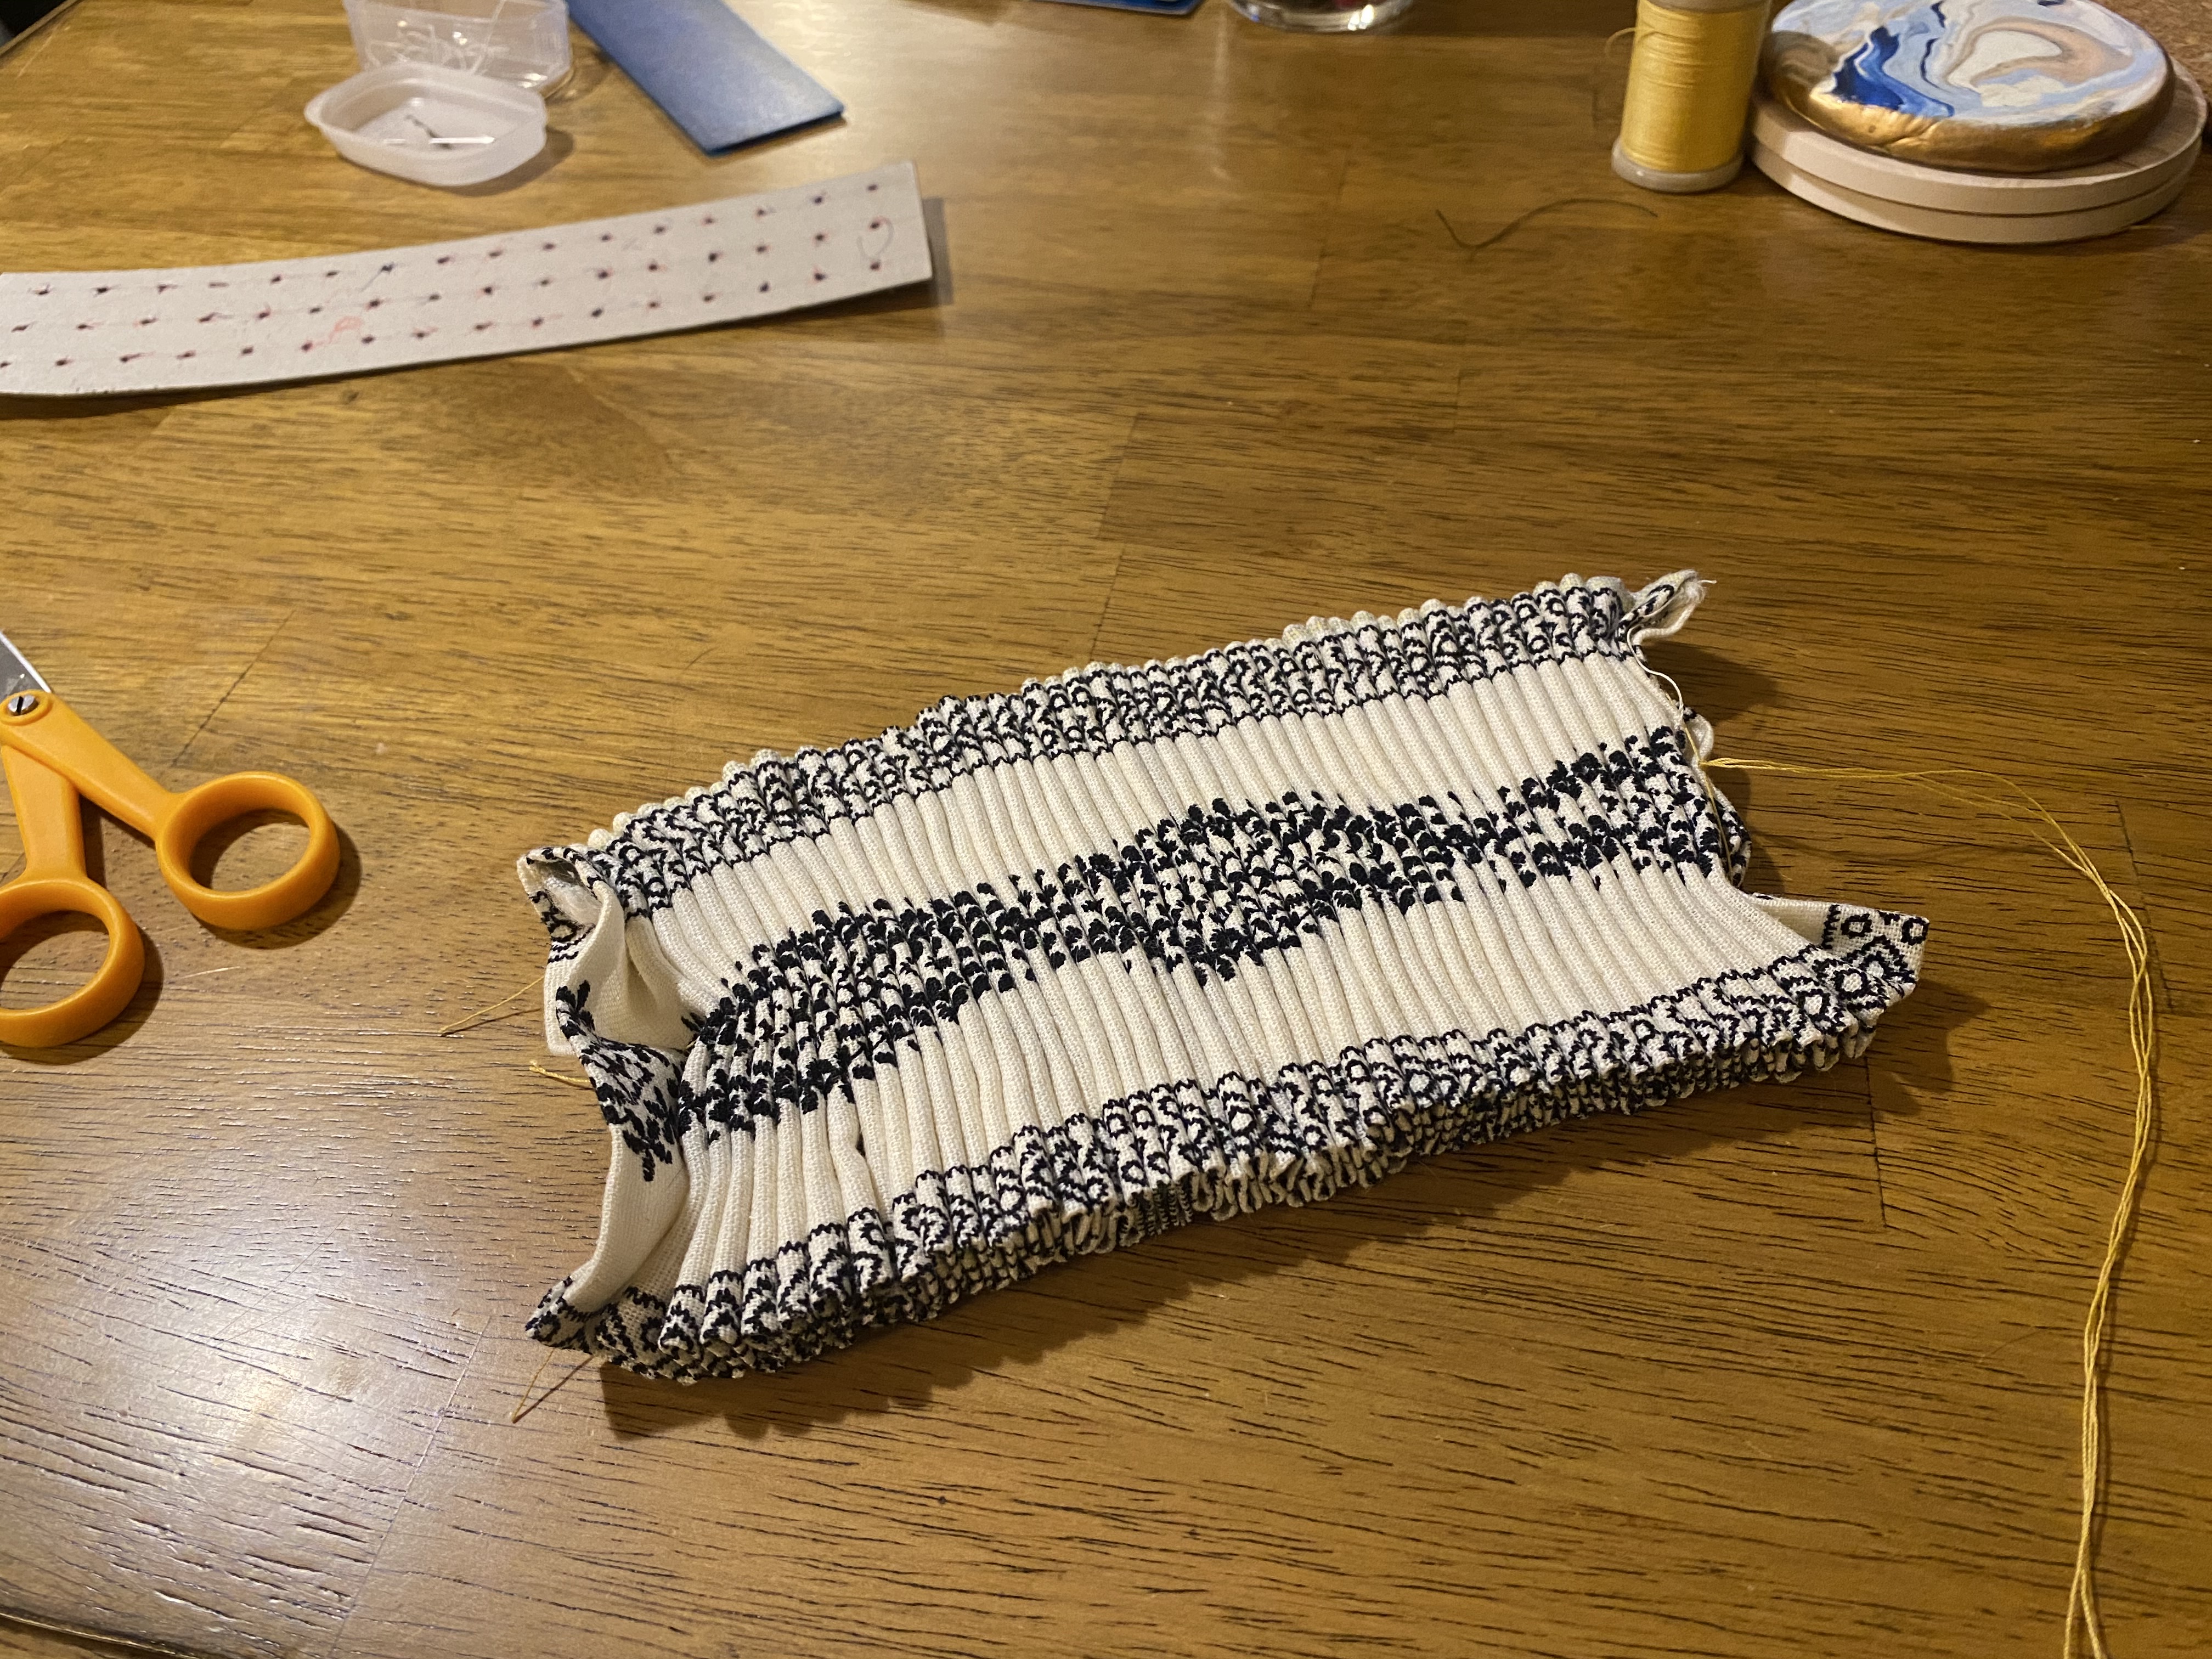
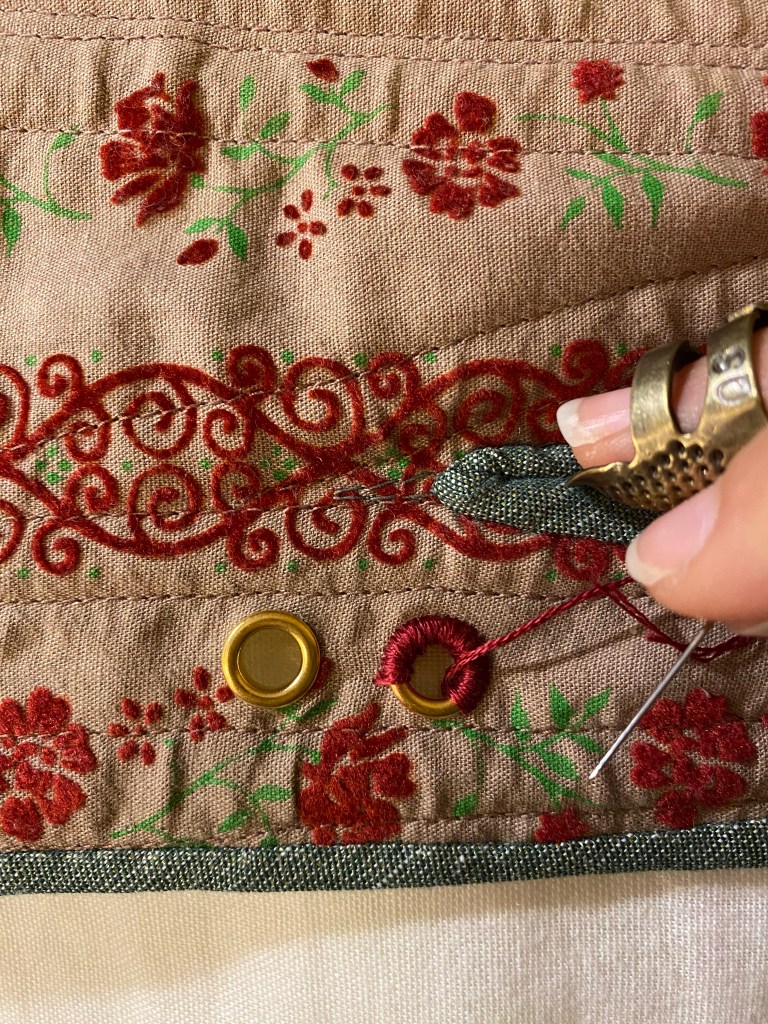
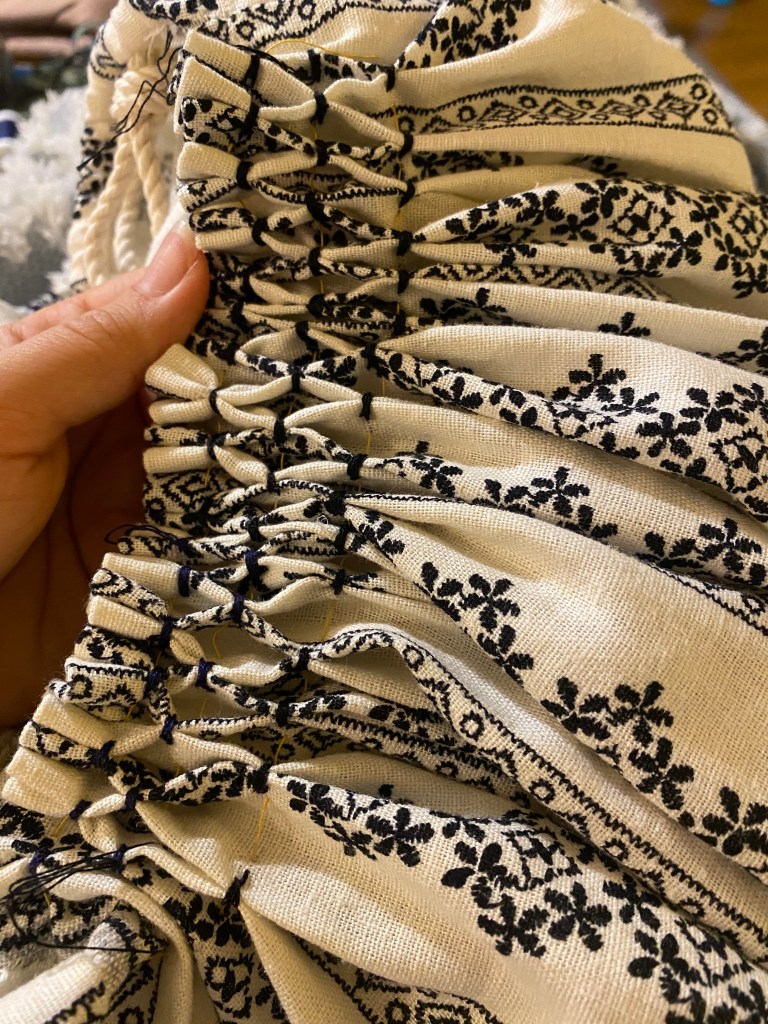
The threads are pulled tight and tied off to keep the pleats together while doing the embroidery work.  I used two strands of navy embroidery floss for speed and to give a tad of emphasis to the stitches.  The method I used creates a simple diamond pattern by working from left to right along the diagonal.  

Starting at the top row of running stitches at the left, the embroidery floss lock stitches pleat #1 and #2 together with two backstitches.  On the third stitch, the thread is sent into the right pleat (#2), down ½”, and out the left side of pleat #2 to start the next stitch.  Here, two back stitches lock pleat #2 and #3 together, followed by a third stitch into the right side of pleat #3 and up the channel ½” to be in line with the original stitch between pleat #1 and #2.  This zigzag process is continued from left to right through all the pleats.

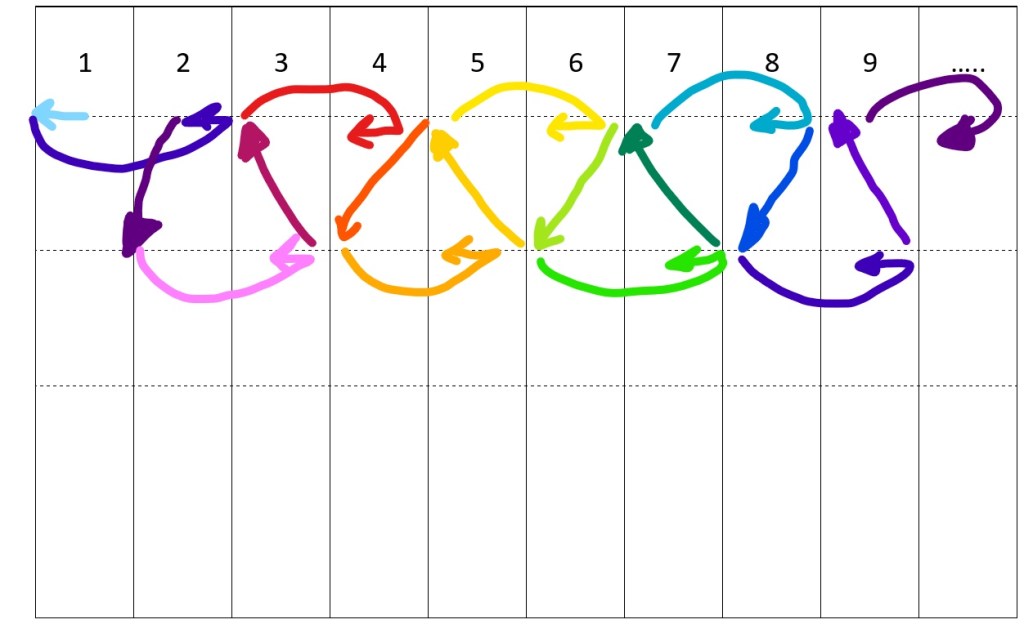
Once all the pleats have been stitched at ½” and 1” from the top of the cuff, the second row of smocking can be completed.  This needs to be offset from the original row or the diamond pattern will not be created.

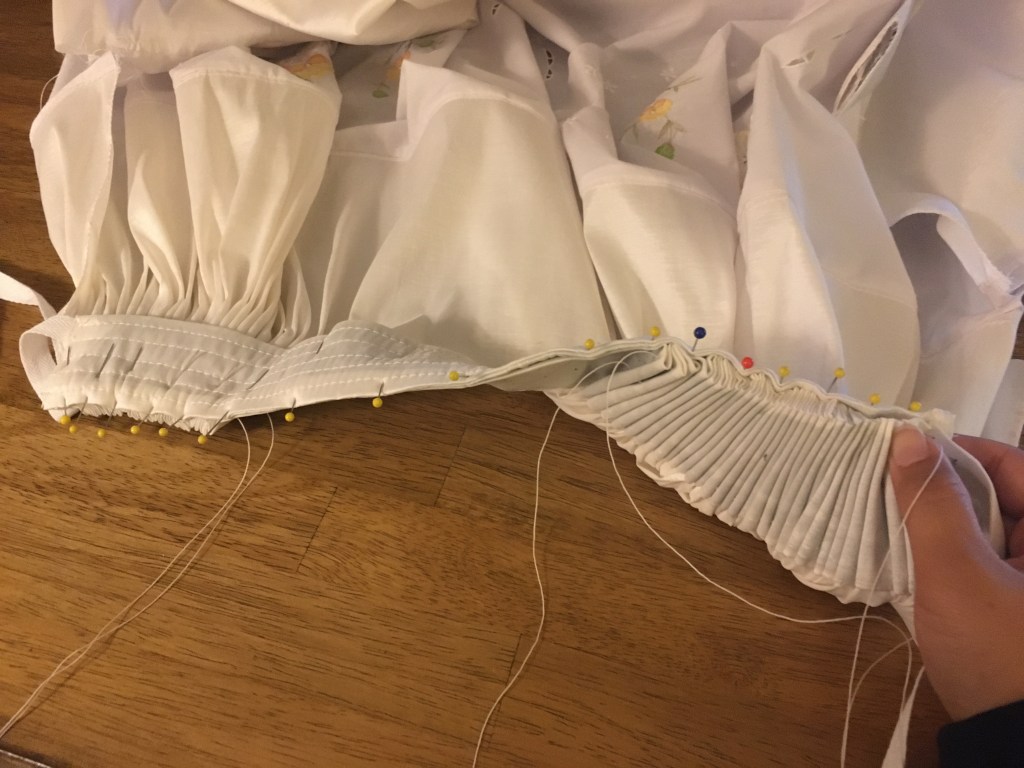
Once all four rows of lock stitch have been set, you’ll have a checkerboard pattern that when the running stitches are released, will create the diamond pattern.  You should have knots of stitching similar to the diagram here:

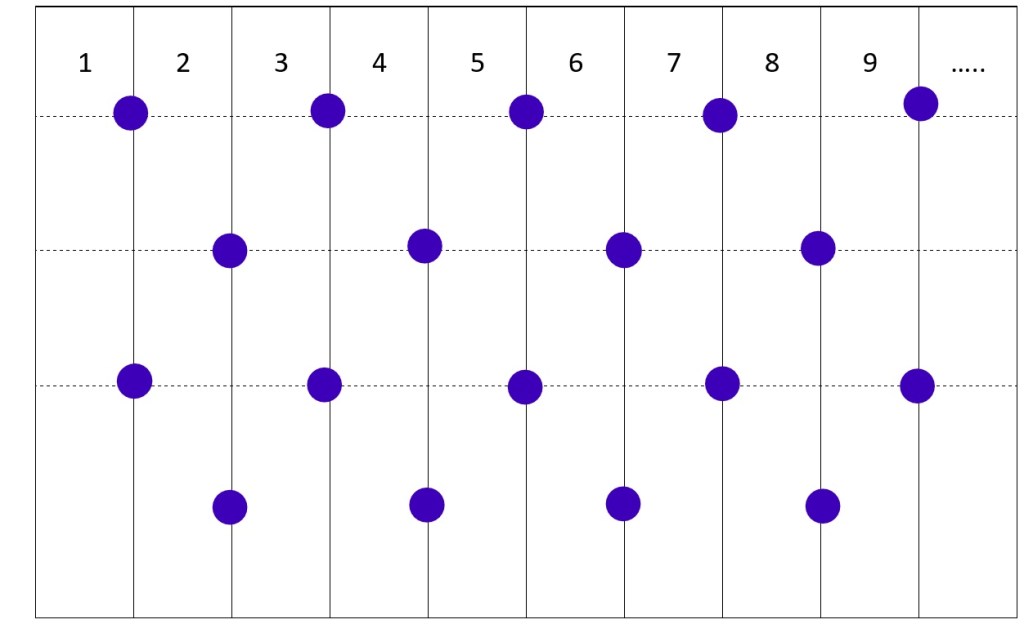
Mine differs a tad in that I added a 5th row of lock stitches to match with the pattern of the fabric under the stitches which was very pleasing on the right hand side, but not nearly as effective on the left since they were not the same sections of fabric. This 5th row was immensely frustrating since I still needed to follow the zigzag pattern but didn’t want to add excessive stitches to the 4th row of stitches.

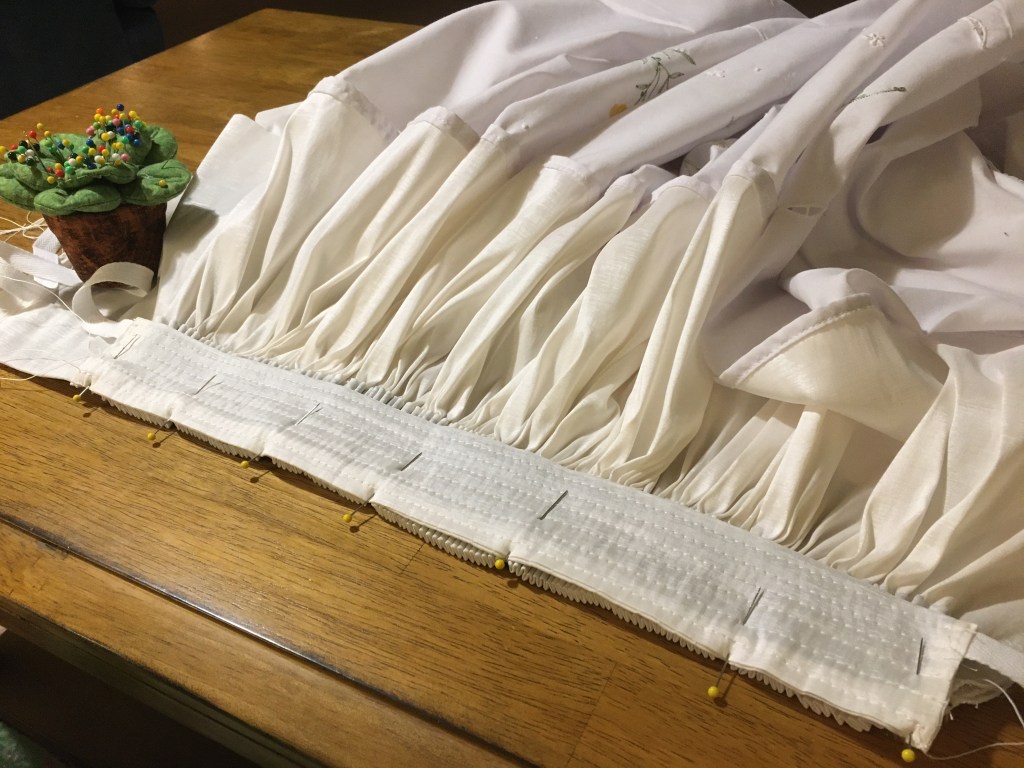
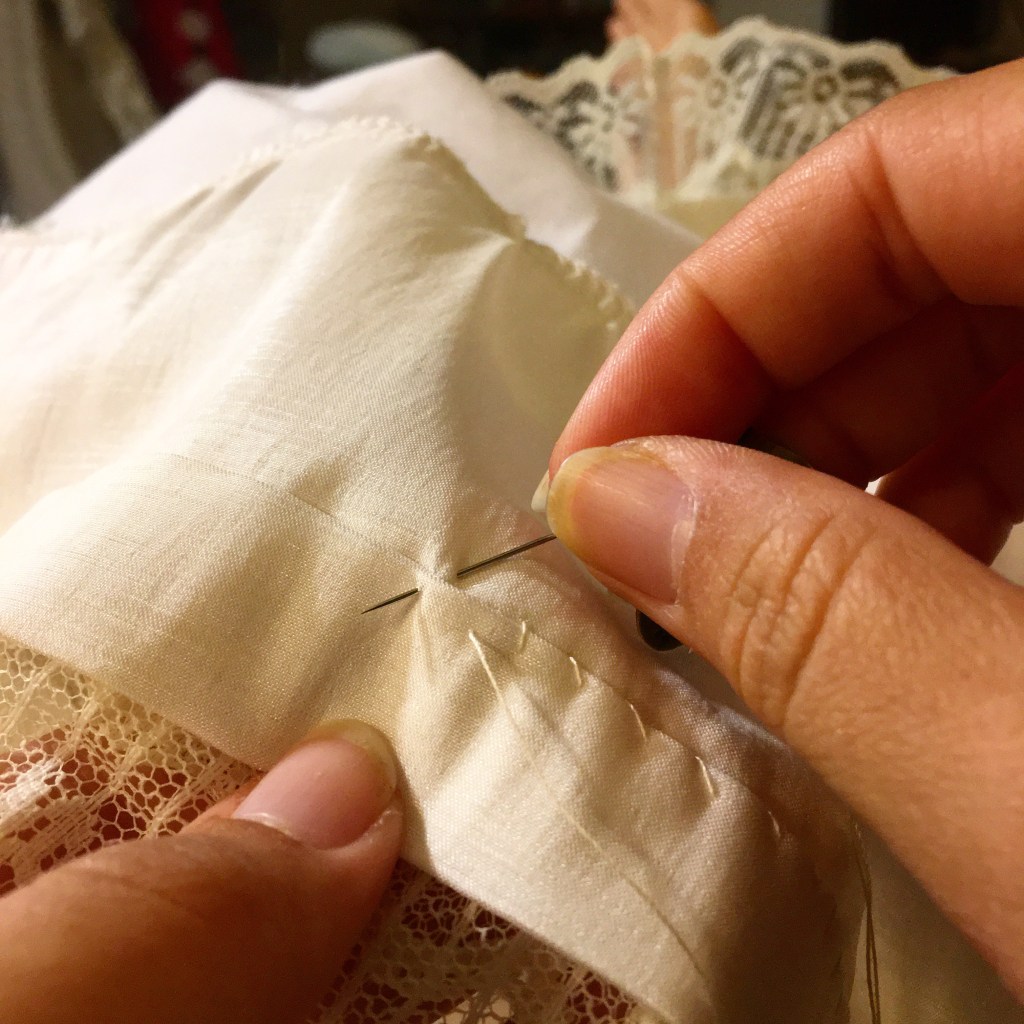
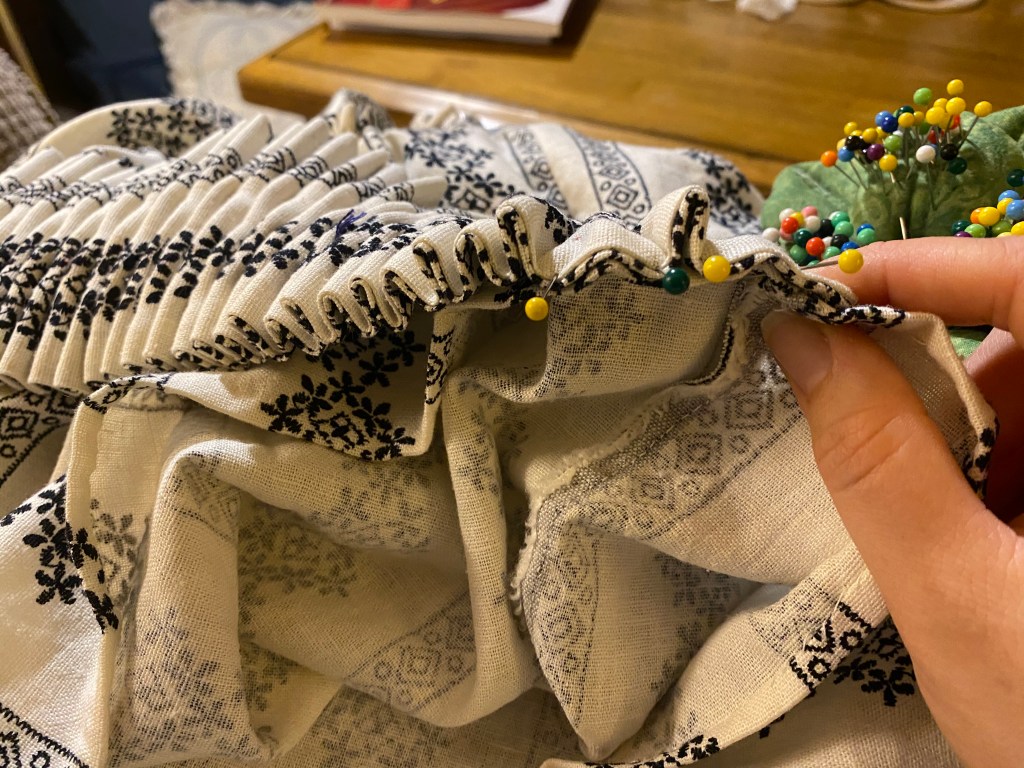
With the cuff completed, the smocked section was pinned to the upper sleeve for final stitching. I pinned the “open” section of the smocking to the upper sleeve and left the pleat created by the uppermost lock stitch in the smocking out of the whip stitches.  This is similar to how cartridge pleats are applied to a waistband.

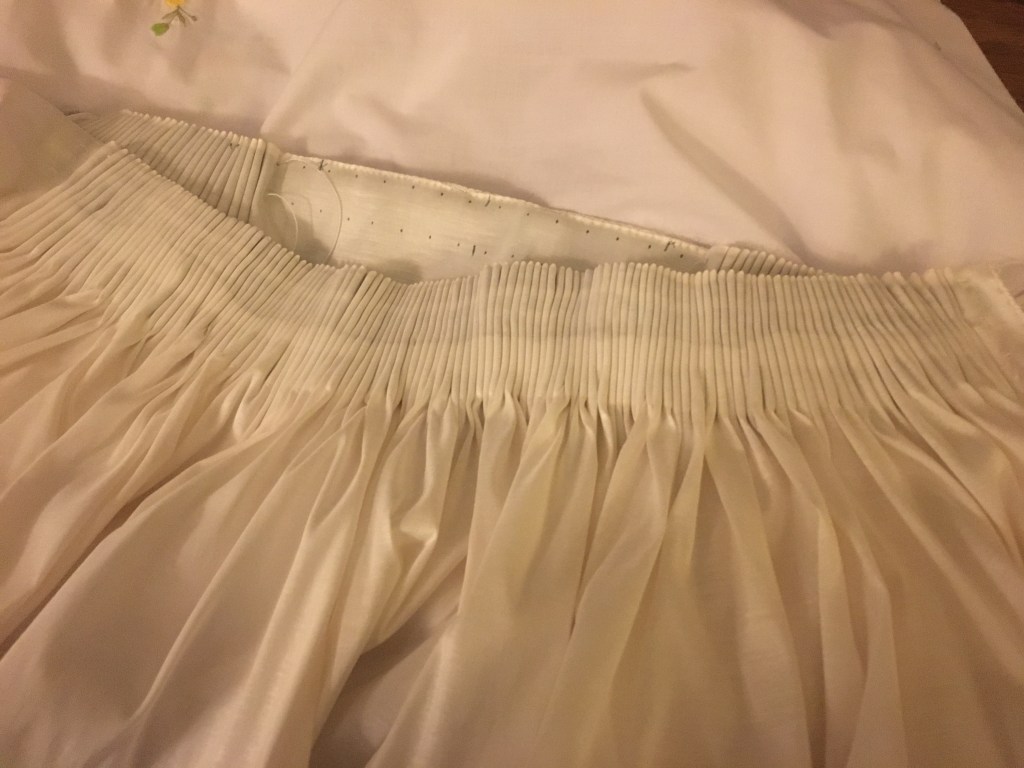
With sleeves done and all the other raw edges felled in place or hemmed, the neckline was quickly gathered using a coarse running stitch and buttonhole thread. However, due to the coarse weave and heavyweight of the linen, my threads would either pull out or break nearly every time I attempted to fit test the amount of gathers. 

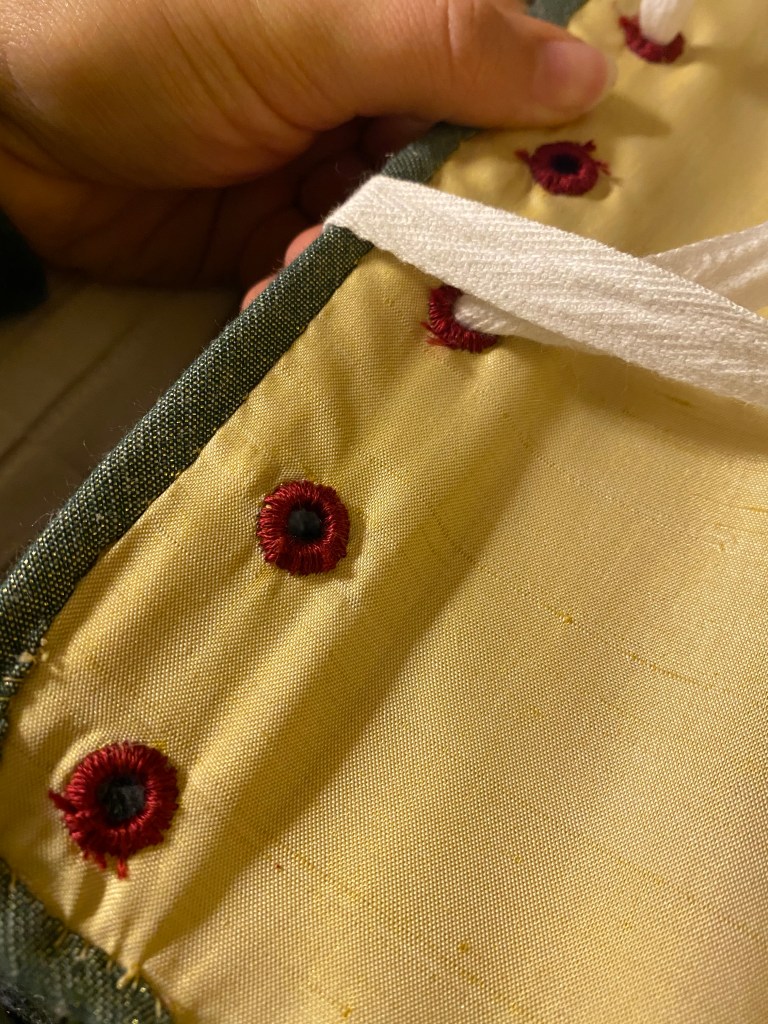
Since I enjoyed the smocking on the sleeves so much, I elected to attempt smocking on the neckline.  I removed the remaining gathering threads from the front of the neckline and added two running stitches using the cartridge pleat template and smocked with only three rows of lock stitches using the same method as above. 

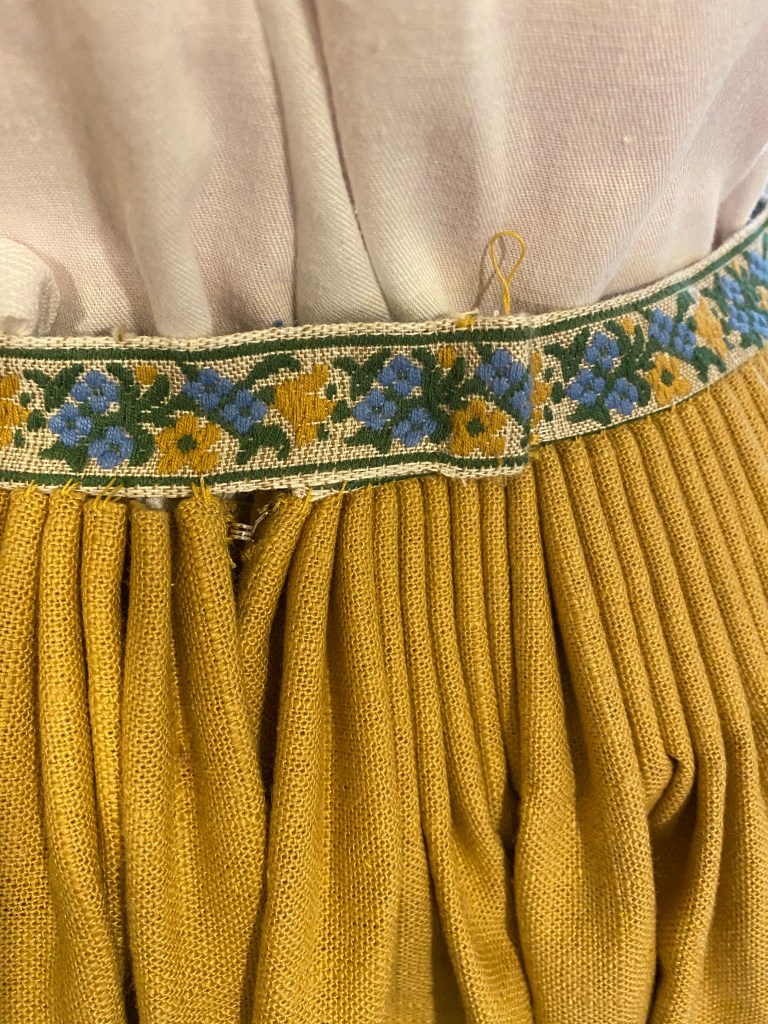
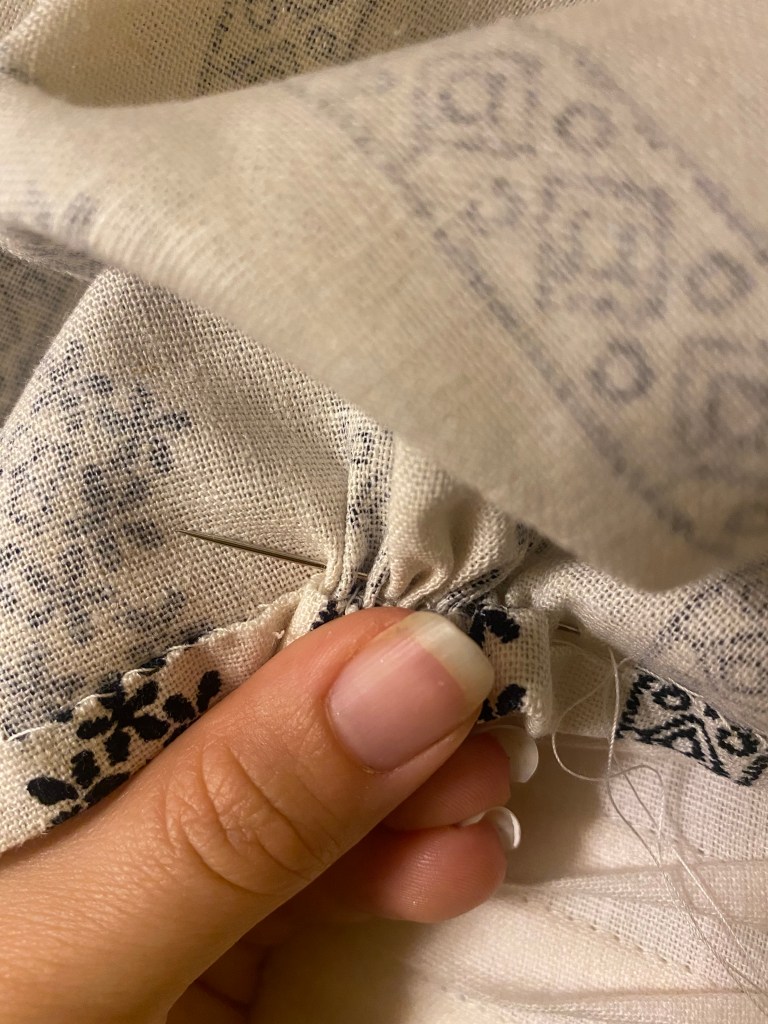
Upon fit testing the smocking, the natural elastic nature of the smocking was far too loose to create the right fit. This was due to the large pleats I had used in the original running stitches that did not create enough tension. To quickly solve this problem, I cut a piece of cotton twill tape at the correct length needed to cross my chest above the stays neckline, pinned the smocking to the twill tape (easing the bulk into the pleats as I went) and prick stitching the twill tape in place.  This locked the correct amount of fullness into the smocking without excessive stretch. 

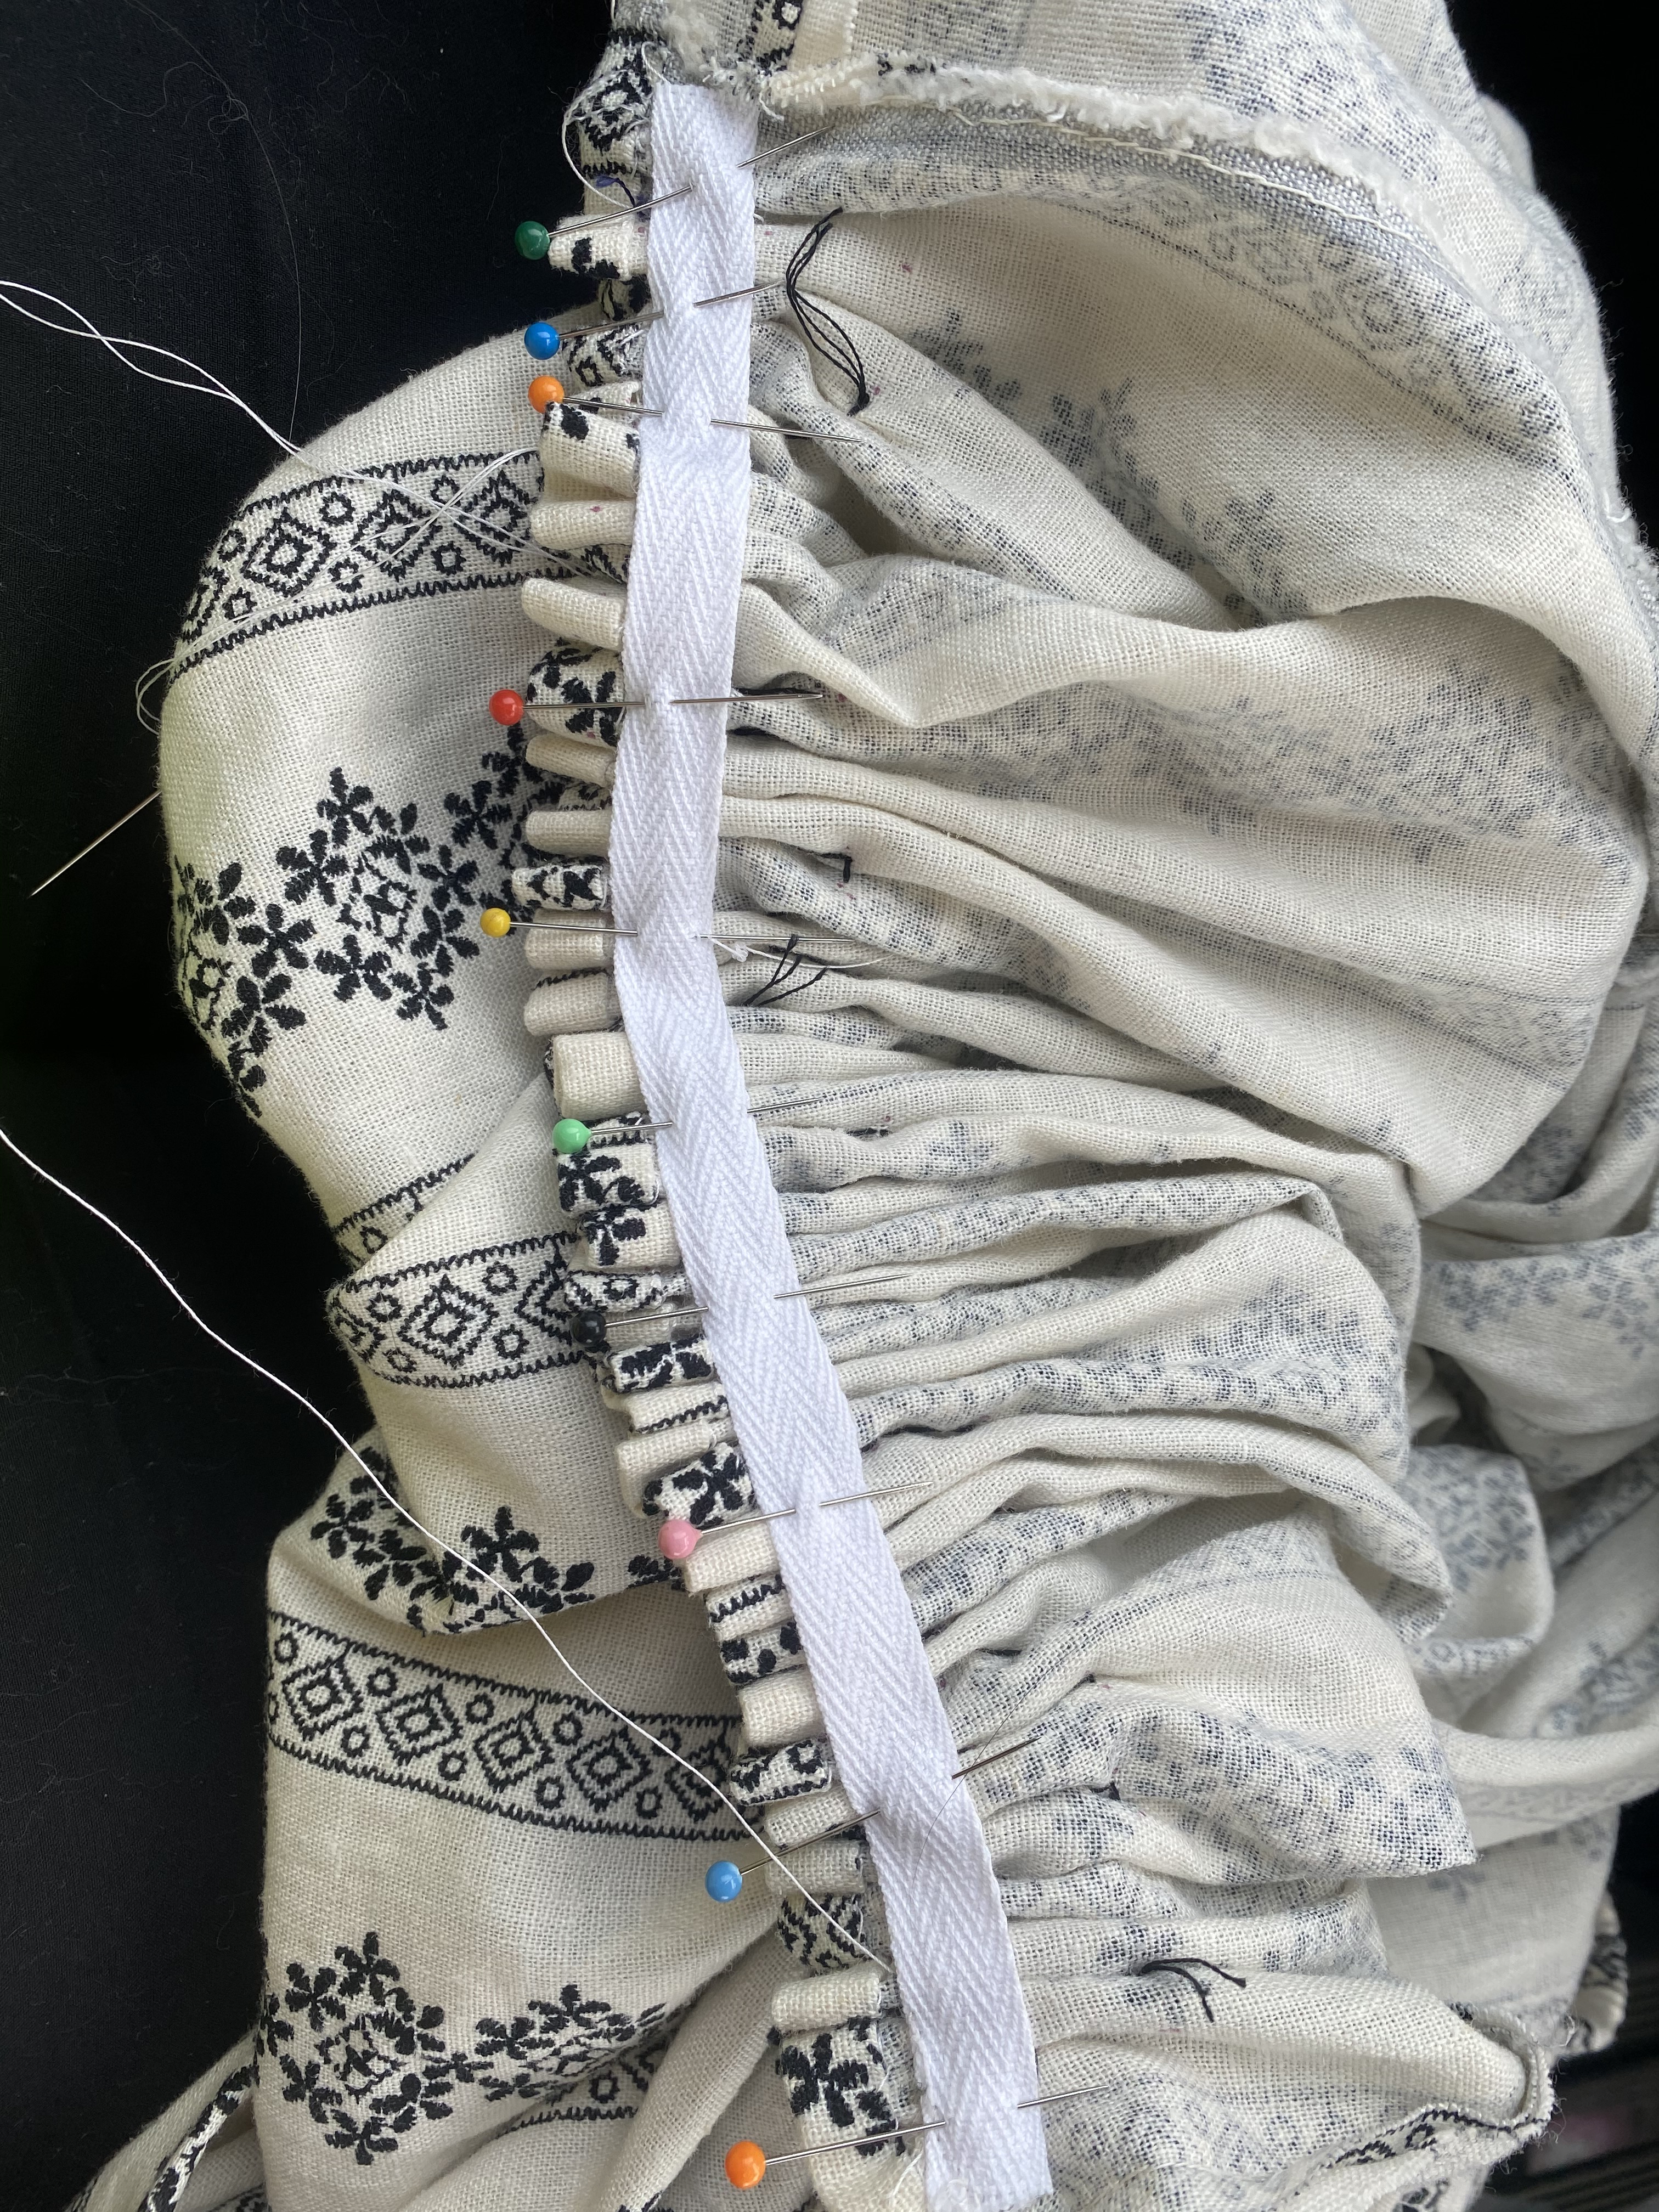
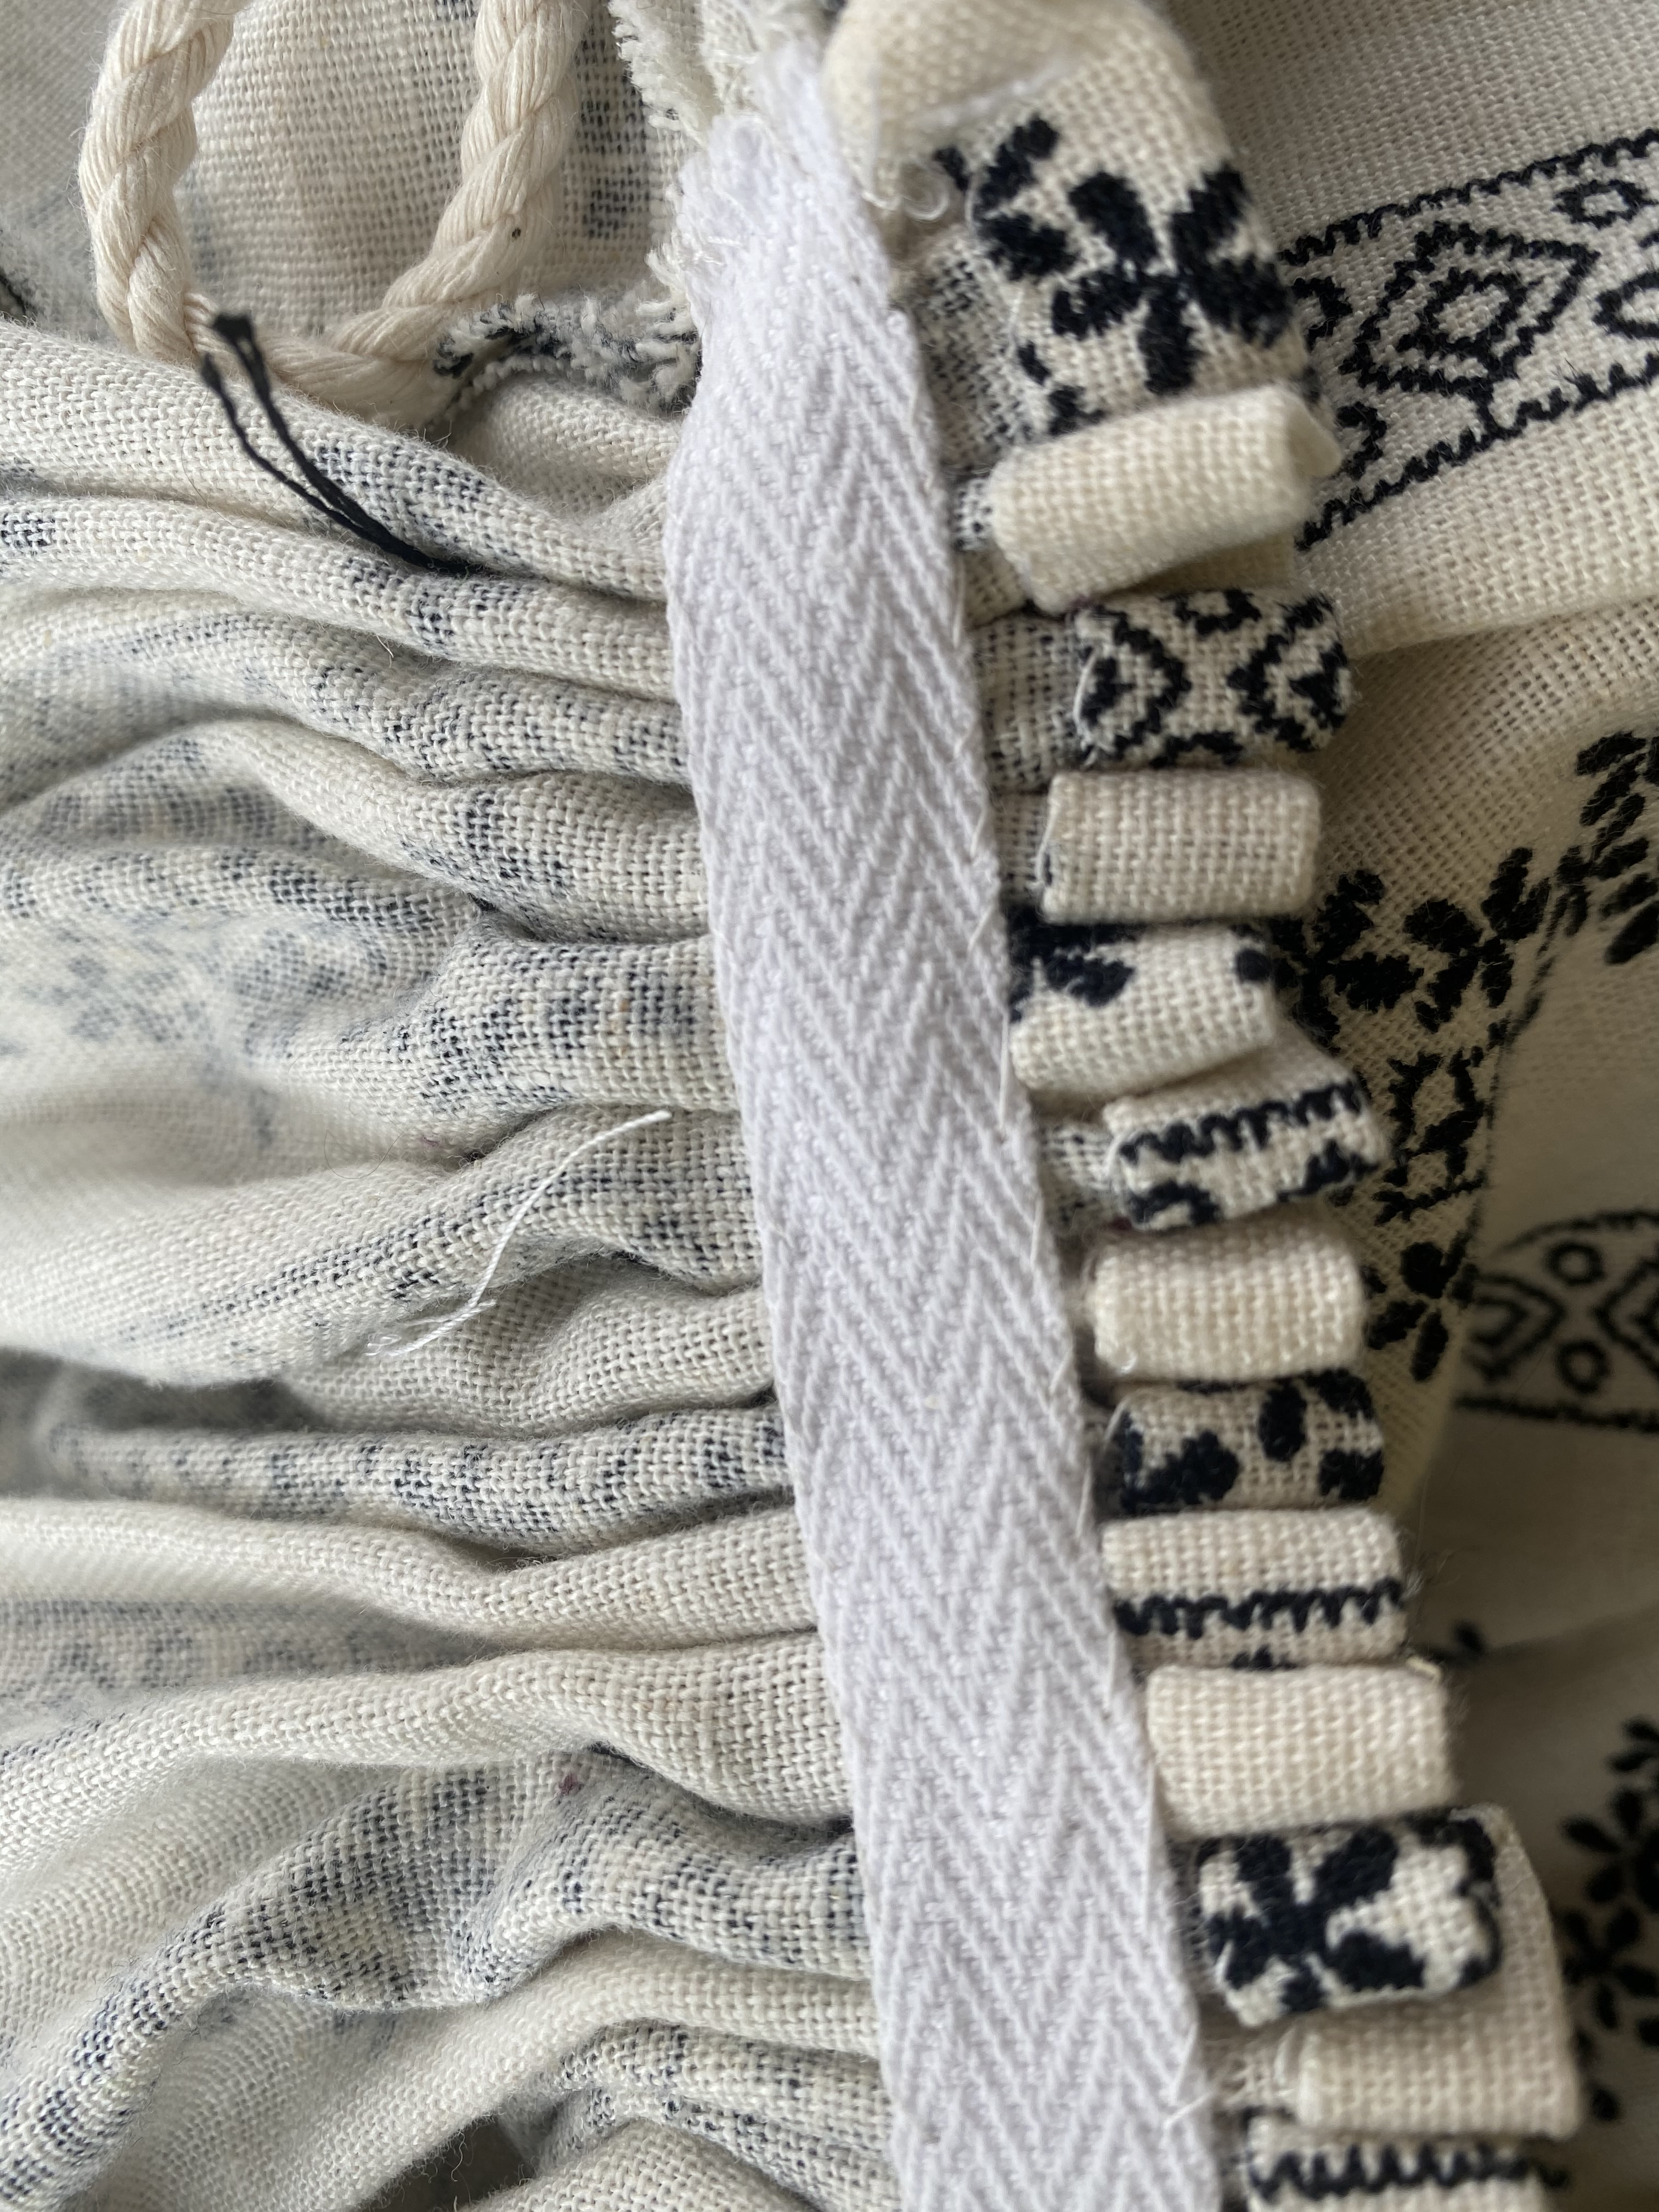
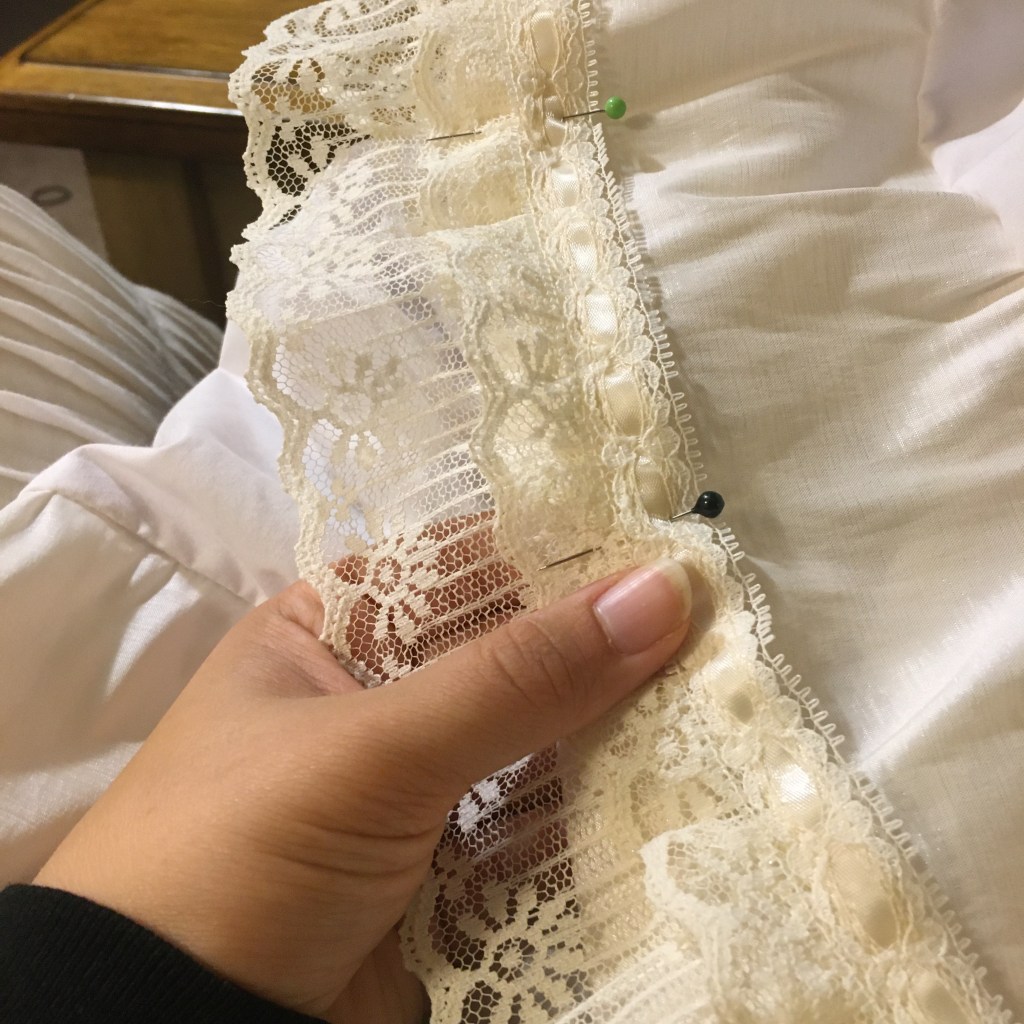
I then used a similar process on the neckline sides and back. I was able to temporarily gather  the remaining neckline using the quick thread method and then stitched the gathers in place to cotton twill tape whip stitched on the inside of the neckline.  Overall, I felt much better about the security of the neckline under the stays with the application of the twill tape.

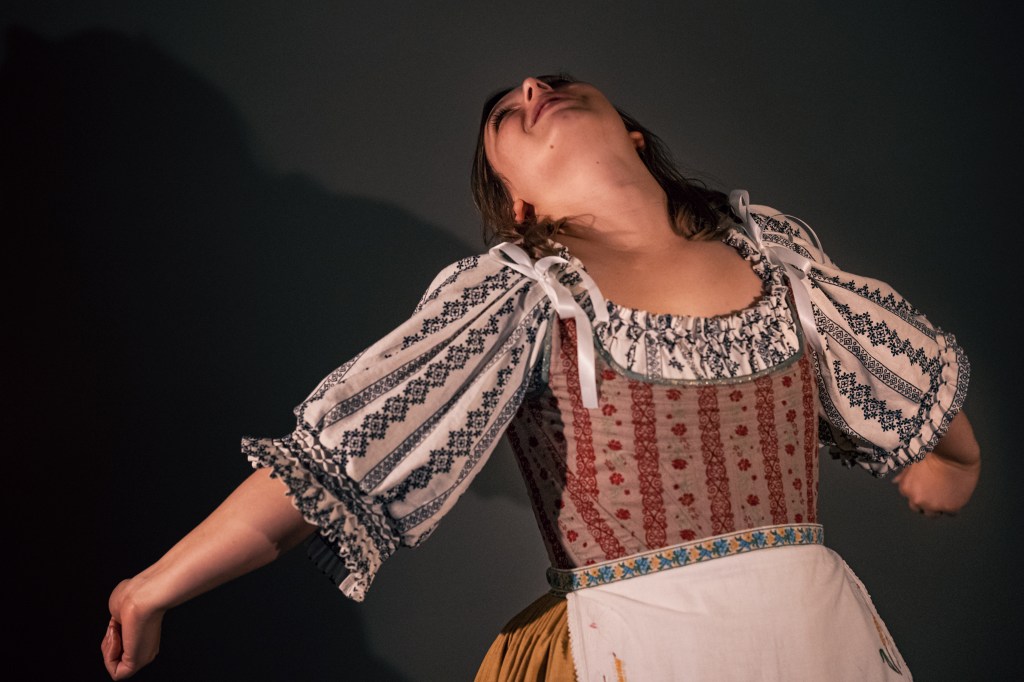
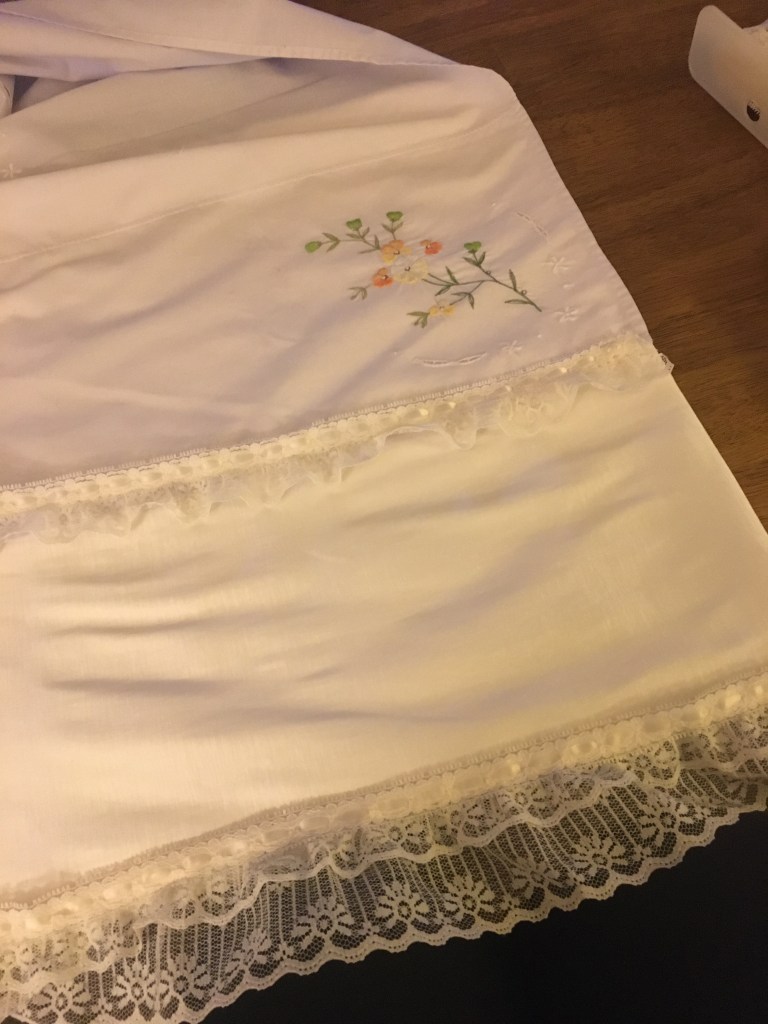
The chemise was finally finished!  What started as a simple shirt pattern, turned to squares and rectangles, became a MUCH more involved process than I would have imagined, but I am quite pleased with the final product.  The shift is simple while having details to allude to the blackwork of the period.  Ideally, after this project is done, I would like to line the shift since it is a tad scratchy due to the cheapness of the linen, add a smocked or modern elastic waistband, and wear it as a simple modern summer shirt.  Repurposing!

The Goose Girl: Bodice Finishings to Flare

Now that I had completed the structure and fit (See The Goose Girl: Bodice Beginnings to Boning), I could line the stays, finish with binding, and add eyelets and cording.

For my lining, I use the same pattern as with the fashion fabric. I decided to use a pale yellow fabric I had found at a vintage sale in downtown Milwaukee. I honestly do not think it is pure silk, though it has a similar look and feel. I tested a couple swatches using the burning method and bleach test and got mixed results. When burnt, the material turned to very light ash rather than melting. When placed in the bleach, the material broke apart and some of the fibers broke down fully after hours, but not all. So I think it is a silk-poly mix. It also has a lovely color, texture, and is far too small of a piece to use for anything substantial (though it has amazing drape).

The fabric was also a sweet nod to “The Yellow Lady” portion of Shannon’s novel. Isi is described in the book as having yellow-blonde hair that is distinctly Kildendrean (her home) versus the local dark brown or black hair colors of the Bayern people. Throughout the novel, the Bayern workers she grows close with and the other locals describe the princess as “The Yellow Lady”. I liked the idea that this tell-tale color would not be visible to the outside, much like the character’s hair.

The lining was stitched at the seams, like the fashion side, and pressed open. The wrong sides of the lining and structured outer layers were pinned and then basted together on the stitching lines. I had to be careful around the tab areas at the bottom since I had stupidly slashed these open for the outer layers. Rather than risk missing the corners of these with the machine, I hand basted the bottom edge to have more control.

Now that the garment was all in one piece, I planned to finish the edges with a very narrow bias tape binding.

I had a few choices in selecting my binding and the choice primarily came down to color. It would have been best to match the fashion fabric and make bias tape from the original material, but I had not dyed enough initially to do that and worried I would not be able to exactly reproduce the shade.

My second thought was to use a contrast color: green.

Green would tie into the screened color in the stay fabric pattern and would complement the Bavarian landscape inspiration nicely. However, small, double fold ,1/4″ bias tape is difficult to find commercially in anything other than the staple white, black, and cream. I would be making the bias tape by hand.

To make bias tape you need:

  • Fabric
  • Meter stick
  • Right angle ruler
  • Fabric pen
  • Bias tape maker (plastic or metal)
  • Iron
  • Thread

I found some green cotton with gold thread in the warp on clearance at Joann’s and purchased 1 yard. I pulled the material from opposite corners a couple times to keep the grain of the material in line before cutting.

Lines are marked using a right angle ruler at the farthest corner of the fabric. I cheated here and used the selvage as my straight edge rather than pulling a thread to make a proper straight line.

I then use my meter stick to mark parallel lines offset from the right angle based on the size of the bias tape needed. In my case, I was making 1/4″ double fold which equates to 1″ overall to be cut. Luckily, my meter stick is exactly 1″ wide.

A cat is obviously necessary to supervise this sort of work.

If I were making larger or smaller bias tape, I would mark the width needed along the selvage and then draw lines upward using the right angle ruler and meter stick. You can also cut an exact square up from the selvage, mark the necessary width on both the cut edge and selvage, and connect the dots. Any method works, as long as your strips are always on the bias.

I check my angle with my right angle ruler every 5 strips or so to ensure I’m still on track.

These strips are then cut and prepped for stitching. I cut way more than I ended up needing, but if I’m putting in the effort and have plenty of raw material, I like to make extra.

To stitch, the strips are placed fashion sides together perpendicularly and stitched at a 45-degree angle. It takes a time or two to line up just right, so take a couple scrap pieces to test the method first. Always use thread that is either an exact or close match since the thread may show ever so slightly after ironing. This depends primarily on the strength of the fabric.

The tails are trimmed back, pressed open, and the full length of strip is ran through the bias tape maker, ironing as you go. I like to use stainless steel bias tape makers since I can get right up close to the maker with the iron on full steam. But 3-D printed bias tape makers are quite common and cheap. They’re also more customizable for sizing and often have attachments to make double fold all on one iron pass.

My bias tape maker generates single fold bias tape at 1/2″ that I then fold over and iron again for double fold.

The bias tape can then either be applied by hand or machine. I’m attaching by hand because of all my crazy corners with the tabs. I start by folding open the bias tape and pinning the right side along the edge of the stay. This is back stitched in place using the ironed crease as a guide.

This continues all around the garment with care taken along the curved sections and tucks due to the tab inner corners.

After finishing with my tiny backstitches on the front, the bias tape is folded over the edges, pinned on the inside, and felled in place with tiny whip stitches. Since this was facing toward the body, visible stitches was not an issue. The process of tightly folding and stitching the bias tape was a bit tricky at the top of the tab slashes. I had to wiggle the fabric and wham it down a bit more than I would have liked. Though, again, the important part is the outside where the bias tape needed to be straight and tight; the inside could be as messy as needed.

As you might see in the prior photos, I had taken a break from hand stitching to create the structure for my eyelets. I use a cheater method for eyelets that is no where near historically accurate, but makes my eyelets stronger with use of metal grommets.

For my cheater method of stitched eyelets, you’ll need:

  • 1/4″ metal grommets
  • Tailors awl
  • grommet pliers or shank and hammer
  • embroidery floss
  • sharp, fine embroidery needle

The first step is to mark the locations of the eyelet using the pattern or calculating equal distances based on how many eyelets to be applied. Here, I made an error that is probably by greatest regret of the project. I used the eyelet locations as indicated by the original pattern which are located mirror image of each other from left to right rather than an offset or staggered pattern that would have allowed the stays to have spiral lacing. Spiral lacing would have been more period specific, but what is done is done.

After marking the eyelet locations, you can use the tailor’s awl to create eyelet holes without breaking the threads. By doing this, the surrounding material stays structurally sound and there is less likelihood of breakage, fraying, or stretching due to the tension the lacing will create. My tailor’s awl is about 1/4″ just below the grip and thus creates the exact size I need. If you were to make eyelets without grommets, you would begin stitching at this point.

A small tailors awl that creates 1/4-1/2″ eyelets. I purchased a 2 pack of these online for $9.

Since I am hard on my lacing and the stays do not have a busk to support the eyelets, I am opting to use metal grommets under my stitches. I had 1/4″ gold eyelets on hand from a previous bulk order and applied them using a shank and hammer. I have a grommet pliers but was unable to get a nice, clean finish with these because of the surrounding fabric thickness. The pliers didn’t give me as much control and caused me to catch the fabric in the metal teeth a few times. Not a great use of $35….. thanks Dritz…..

Now that all the neat metal grommets are in place, they can be covered by embroidery floss to give a great historical finish look. I use two strands of floss at a time which is faster than using thread, but gives a smooth finish to the stitches. The eyelets are covered simply by large whip stitches around the ring by starting from the back and stitching down through the fashion side of the fabric around the outer edge of the metal grommet.

This can take a LOT of time, especially if your thread knots. When I first started with this method, it could take up to a half hour per eyelet to fully cover the metal grommet. Once I am into a rhythm though, I can complete one per 5-10 minutes. I’ve found that using 3 strands of floss (or even 4 if you have the right sized needle) can seriously reduce the time to stitch them, but will also make the eyelets have a “coarser” look. I also noticed that using more stands makes hole itself smaller due to the excess bulk when the additional strands wind around each other rather than lying flat as you can achieve with only 2 strands.

A lot of time and attention, but it sure looks nice when it’s done.

With the eyelets done, the garment is complete and wearable! All that was left was to remove any baste stitches still visible from the front. I used green and white thread when baste stitching (both on the machine and by hand) so that I could easily find and remove them later.

Finally, it was time to replace the cotton twill tape that I had been using as lacing for the fit tests. Though strong, the bright white cotton clashed horridly. Since I had made so much excess green bias tape, I was able to repurpose the tiny tape as lacing. All I had to do was slip stitch the folded edges of the bias tape and finish the ends.

Poof! Yards and yards of beautiful coordinating lacing

And there it is, in all its wonderful finished glory! Now, time to wrap up the other garment elements.

The Goose Girl: Peasant Skirt

As discussed in my previous posts, the concept behind the Goose Girl garment is to have a coarser peasant look on the outside layers with more delicate layers hidden underneath.  This mirrors the story of The Goose Girl as she hides her royal identity while working in the Prince’s kingdom. With the delicately embroidered petticoat finished, I could start work on the coarse peasant skirt.

My original design concept had the skirt drafted in blue as is described in Shannon Hale’s rendition of the story.  In shopping for fabric, I stumbled upon a roll of coarse 100% linen home decor fabric on clearance at Joanns. However, it was goldenrod yellow rather than blue.  The material was too good of a deal to pass up on though, and it helped that the tone of the yellow perfectly complemented the fabric of the stay already constructed. 

In plotting the draft of the skirt, I planned to use similar dimensions as with the petticoat. Since it is home decor fabric, I was able to get 4 yards of material at 60” in width which gave me a bit more volume to work with.  Overall, in looking at paintings and fashion plates from my time period, I wanted more fullness in the back than the front.  I also wanted to mirror the flat center front, bound by pleats as I had achieved in the petticoat.  To do this, I used ⅔ (96”) of the original length as the back panel and ⅓ (48”) for the front. In hindsight, I could have kept it all as one piece and only had one seam at the back or side. Live and learn.

The length of the skirt was based on the length of the petticoat plus 4” for folding over the top for the pleating and 1” for the hem.  I planned to use the selvage on the hem line to save on a bit of finishing time.

The front and back panels were finished by cutting with pinking shears and then machine stitched together using heavy duty thread due to the weight of the fabric. I used polyester thread in a matching color and a large stitch length.  Both sides were stitched to 8” below the top to allow for closures. 

The 1” hem and top fold over were ironed to make stitching easier and felled with an extremely tiny prick stitch. I took advantage of the selvage on the hem so I would only have to fold it once and thus saved on excessive bulk.

I tried taking only one or two threads from the front fabric since my thread wasn’t an exact match and was visible if stitched through. Since the material was thick already, I did not use an extra bulk layer in the top fold over like was done for the petticoat. 

Then began the cartridge pleating process again.  I initially draped the skirt on Molly (my “me” sized mannequin) over the petticoat and pinned mock up pleats in place to get a general idea of the depth I would need for the pleats.  To do this, I pinned the skirt at the side seams, center front, and center back to the corresponding spots on Molly.  Then, each quarter is halved, pinned at the halfway point on Molly.  This process is repeated until there is little room left to pin.  

This gave me about ½” depths to my pleats for both the front and back.  This was different from the petticoat on the front since I had compensated for the 8” flat center front by reducing the panel width. This time, I got smart and made a template out of cardboard with my markings that I could use.  The template gives three parallel threads at ½” apart lengthwise and widthwise. 

I tried not to think too hard about the pleat depths and width beyond the mock up and template since I would be able to wiggle the width as necessary onto the final waistband. 

For the pleats, I followed the same method as with the petticoat using thick buttonhole thread in a matching color and stitch running stitches at my marks.  These were then pulled and temporarily tied together while I made my waist band 

For my waistband, I measured my natural waist while wearing the petticoat since the skirt would need to fit over the extra waistband layer.  I then added 3” to this length for finishing and overlap length.  Though I had stitched the skirt panels with two side openings, I changed my mind so there would be only one opening at the left side and an overlap to hide the closure.  

For my waistband, I use the vintage jacquard ribbon from Studio RicRak that I had been originally inspired by.  The waistband would eventually be hidden under the stay when worn, but it was a lovely touch and the yellow in the ribbon was an exact match to the skirt color!

Both ends of the ribbon were quickly whip stitched (“felled”) to finish.

I then marked the right side seam point with a red pin, and the beginning of the overlap portion with a blue pin. The finished pleated skirt panels were pinned to the ribbon about every three to five pleats.  The back section of pleating ended up being a bit too small, which was remedied by removing the temporary knots in the thread and releasing a bit of tension to expand the pleats to match the waistband. 

The pleats and flat front were whip stitched to the ribbon with the heavy duty thread and the extra left side opening was closed. To finish, a skirt slide and bar was added to the overlap, and hook & eyes were added at the top of the side closure and 2” down to keep the cartridge pleats next to the opening tight together when worn. 

This is where I started backtracking.  When put on Molly, the cartridge pleats looked too stiff and perfect. It looked almost Victorian.  I also wasn’t happy with the distinct line where the fold over ended due to the third row of stitches to make the pleats.  

Since my pleats were stitching in place on the waist band, I simply removed the three rows of pleat threads. It was a very subtle change to do this, but I felt the released volume gave a better shape outwards from the hips and rear rather than the tight pleats.  

Overall, I was very pleased with the look and how the length allows for the petticoat lace to peak out from under the hem, especially when in movement. 

The sheer bulk of the home decor linen did weigh down the garment a bit and I am considering adding a hip-roll to achieve the 17th century look I am designing for.  

Check back on the next posts to see where we go from here!

The Goose Girl: Petticoat

In following the concept of the Goose Girl’s story, the petticoat is a bit more regal and embellished than the rest of the garment.  In the original tale, the lady’s maid demands that the Princess hand over her dress while they are on the road together.  The maid then wears the Princess’ clothes and rides into the Prince’s city where she is announced as the Princess. But I doubt she would have demanded her petticoat.  This let me have a bit of fun with the garment and build on the motif of the Princess’ hidden identity under the coarser worker’s clothing.  

While researching the petticoat, I found little specifics that I would have to stick to for my 17th century style aside from the length being just to the ankle. So, I let myself run a little wild here. 

For choosing the fabrics, I wanted to incorporate one of the embroidered pieces I had sourced from vintage shops that were all too pastel for the stay. 

Fortunately, I found the absolute perfect piece at a garage sale in Bay View from Bandit Vintage. This linen tablecloth was hand embroidered with delicate pansies in yellow, orange, and green.  Total, the tablecloth measured 54”x 90”

I wanted as much volume as I could get into the petticoat and planned to use cartridge pleats to achieve the effect.  In order to make the most of the tablecloth, I decided to cut it in half lengthwise and add a strip of taffeta to the top and bottom for the full length (measuring from my natural waist to ankle bone + seam allowances + hem). 

Please enjoy my chicken-scratch plotting…

The cream taffeta was found on clearance at Joann’s, had a bit of sparkle to it, and more stretch than I realized.  The cream also contrasted the bleach white of the linen.  However, I had a massive pile of ribbon polyester lace from my grandmother that would create a lovely transition between the fabrics while hiding the seam lines. 

Here I have the linen, taffeta, and ribbon trim set out to check color and proportions of the cut strips of taffeta.

I had to get a bit creative with cutting the taffeta strips since the clearance fabric had an odd wrinkle through the middle and deep crease that would not come out with steam. Compensate, I adjusted my measurements for the strips so that the top strip would cut with the crease at the fold over line and the wrinkle was outside of the bottom strip.

I cut all my strips and finished the edge of the bottom layer taffeta with a zig-zag stitch. While doing and then stitching to the linen, I realized the stretch in the taffeta was causing it to gather slightly. Fortunately, the gathering actually made for a nice ruffle effect at the bottom tier.

However, I wouldn’t be able to finish any of the other edges of the taffeta in this way or I would have that ruffle effect everywhere. Instead, I used a French seam to encase the edges of the quickly fraying taffeta at the upper tier and side seams. The stretch of the taffeta is only in the width-wise direction, so I still had a bit of gathering occur at the top tier seam, but the sides had no puckering. The gathering would later be covered by lace trim, so I was not concerned.

The sides, as mentioned, were stitched together with a French seam and I left about 8” at the tops of both seams unstitched for the side openings. 

For the waistband, I cut two strips of the taffeta equaling half my waist measurement + 1” for ½” seams. I would be using side closures for the waistband as was typical of the period. I made a mock up to check the sizing and used twill tape attached at the top and bottom of the waist band for ties. I decided on a rather thick waist band (5″ wide)

The mockup went well. But as I fit tested it, the taffeta began to stretch. To combat this, I cut two strips of flannel equal to the length of the taffeta, minus the seam allowances, and only half the width since I would be folding the taffeta in half, encasing the flannel. 

The flannel was baste stitched inside the taffeta casing to hold it in place. I then pressed the folds with the iron on “synthetic” with a press cloth and steam to make for crisp lines to stitch along. The pressed fold over was hand stitched with a tiny slip stitch.  I then carefully machine stitched every ¼” along the width to give additional stability to the band. 

The stabilized waistband during the final fitting

Before attaching to the band, the skirt was prepped for pleating.  The flannel was used again at the top of the skirt to give additional bulk when making the pleats since the taffeta was so thin. The taffeta was folded over the flannel, ironed, and stitched like the waistband to finish the top edge.  

To prepare for the cartridge pleats, the wrong side of the fabric is marked with precise dots for where the running stitches will go.  For the front, I marked 2 parallel running stitches at ¼” and ¾” from the top and ⅜” apart. 

Once marked, a quick running stitch with strong buttonhole thread is used.  With long tails on either side, the pleats are pulled together.  I was honestly terrified of this process because of how precise it is but found it to be an incredibly satisfying experience! I want to put cartridge pleats on everything now.

Getting just the right amount of pleats to match the size of the waistband wasn’t nearly as satisfying.  I have to admit, it was quite a bit of guess and check on the front.  I had made my pleats too deep on the front, and didn’t have nearly enough to make the full length of the waistband.  Luckily, this worked out in my favor.  I cut the pleat threads at the exact middle of the panel and released enough pleats to make the full length of the waistband.  In the end, the front was pleated for 6” from either side while the center is flat, allowing for the stay to sit flush against the body. 

Learning from this, I used different measurements for my back panel: 3 parallel running stitches at ¼”, ¾”, and 1 ¼” from the top and ½” apart.   With the change, the length fit to the waistband much nicer.

The threads from the pleats were backstitched in place and then the skirt could be attached to the waistband.  To attach, the button thread was used again, and the pleats were whipstitched on.  I used two stitches for every pleat to ensure a solid hold. 

Originally, I finished the side seams of the waistband with cotton twill tape that would be tied around the body, overlapping front and back as was common of 17th century petticoats. But, I added dress hooks to the sides to make a tighter closure. 

Because of the ruffling effect with the taffeta discussed earlier, I knew I wouldn’t be able to finish the hem or the waistband on the machine. In finishing the hem, I steamed the fold in place so I would have a nice crisp line. I then killed two birds with one stone by felling the hem on the inside while taking small bites of the lace trim with the needle to attach to the front of the hem. 

Now, the fun embellishing could begin! 

1” ribbon lace trim was applied with a prick stitch at the two seams where the taffeta and linen were attached. At every stitch to the outside, one gold seed bead was strung.  From a distance, the beads give just a bit of sparkle.  Between the glint from the beads, the sparkle in the taffeta, the hand embroidery, and delicate lace, the petticoat was absolutely over the top lux. 

With the taffeta and linen being lightweight, the finished petticoat has lovely fullness at the pleats and float just at the ankle.  The final length was a bit long since my bottom tier of trim was 2” past the planned hem. This would need to be accounted for in the skirt construction.

The Goose Girl: Bodice Beginnings to Boning

In deciding on the Bavarian styling as my rooted inspiration and wanting to build a 17th century stay as the main structured garment, I couldn’t help but pull from those ever so darling drindls. (See The Goose Girl – Intro to get caught up on the inspiration story).

The colors, the embroidery, the trims. Ugh! To dye for!!

I’m most frequently inspired by the fabric I select and I knew I needed to select the right fabric for my stays first, with the drindl thought in mind. Usually, once I have my concept fabric, I’m and running! However, this fabric I struggled to find.

I initially thought of using some embroidered linen I had inherited from my grandmother to imitate the patterns typical to Bavaria, but it wasn’t quite right. So I began scouring Etsy and vintage shops for larger, more heavily embroidered pieces. I found a lot of pieces I loved, but none were heavily embroidered enough for the rich Bavarian colors I had in my mind. Anything I could find with enough embroidery was pastel, pastel, pastel. The pastel against the cream or white linen was pretty but didn’t quite match the Bavarian theme I had my heart set on.

No! There would be no pastel on this stay.

However, in perusing Studio Ric Rac, my local vintage shop, I found the PERFECT piece to inspire. A lovely dresser scarf embroidered with a swan on water and perfect little flowers. And! To top it off, the shop also had a length of vintage jacquard ribbon that complemented perfectly.

Yes, I know, it was swans, not a goose. However, in the novel by Shannon Hale that I was originally inspired by, the Princess learns to speak to the birds by speaking to swans.

Here was a lovely piece that could tie to the contrasting styles of her home and her secret identity against her new world of Bayern. It was perfect, but it was not enough and none of the other pieces I had gathered were the right shade or style to complement the swan.

So I was back to square one.

I thought Etsy would be my friend, but all the beautiful Bavarian embroidery I found was either too expensive for the project or so lovely I couldn’t bear needing to cut it up into pieces. I wanted to put unwanted embroidered pieces to a new use, but not at the expense of someone’s heirloom.

Then, destiny arrived. In the form of a costume shop overhaul sale.

The Racine Theatre Guild was holding a rummage sale after deep cleaning their costume stock and shop storage. There, I found the most beautiful cotton fabric, embossed with stripes of red velvet.

It was gorgeous, it was authentic, it was luxurious, and I could get 6 yards of it for $6 (way more than I needed, but extra is always amazing).

However….it was almost too vivid! I shouldn’t complain since that’s what I had spent essentially the entire summer looking for: vivid, Bavarian inspired, textured fabric. But it was just such a bright red.

So I decided to dye it.

Like what I did for distressing fabric in my Lost Labs of Dr. Z post, I prepped my dye pot and got to work. The major difference here was that I was doing a full dye rather than toning with color. This means I used the full strength quantity of Taupe dye I had on hand rather than the diluted version for distressing.

Its a good idea to always do a test piece and this was especially critical since I had prepped my dye for cotton (base fabric) but wasn’t sure how the embossed velvet would take the dye or react. I’m pleased to say, it dyed perfectly!

Before and after dying the main stay fabric

Now that I had my fabric, I could begin the process of patterning and stitching my structured bodice.

I decided to use Butterick Pattern B4254 since I had not made a stay or true corset before and wanted a bit of guidance initially. Since it was a commercial pattern, I selected the size that fit my measurements closest, which for me usually is between two or even three pattern sizes. I opted to start with the size that would match my bust measurements and adjust from there. Since my bust includes my rib cage, it would be the least “squishy” measurement and needed to be perfect without help of lacing to fit well.

The fitting process began with the first toulie, made from mock-up fabric of clearance outdoor fabric. The fabric is ugly as sin and has a terrible hand, but it is stiff and doesn’t stretch in any direction.

I marked all of my boning channels and began piecing it together, matching stitching lines precisely. I have a short torso and was nervous the stay wouldn’t accentuate my natural waist correctly or have odd bunching because of my hips, so the fitting process made me nervous. After piecing them together, I was able to do a first fitting without bones. A less than helpful experience. It was time to add mock up boning.

To save on time and budget, I stitched every other boning channel, used gross grained ribbon I had on hand, and 12″ zip ties to test the boning channels. I would not use the gross-grained ribbon in the final garment though since it stretches in the center and can fray easily. But it is a great cheap and fast method to test.

The initial toulie did it’s job and showed just how poor of a fit it was. I could tell that the back would not lace straight due to too much material at the bust and not nearly enough at the hips. This however, was actually a sorta easy fix in the pattern. I essentially needed to reduce the bust by 1″ and add 1″ at the hips.

I copied the back piece to paper, slashed it at the shoulder line along one of the existing boning channel lines, and pivoted it equal amounts closed along the bust line and open along the hip line.

Now, I made the second toulie and again added half of the bones. To save time, and my sanity, I reused the sides and front panels since no changes were made to these pieces.

Here, my fit issues were almost solved and I decided to move forward to the real deal. These are all the materials I would need for the final construction:

  • 1 1/2 yards Fashion fabric (red and tan striped cotton)
  • 1 1/2 yards heavyweight herringbone coutil
  • 1 1/2 yard lining fabric (yellow silk)
  • 15 yards 100% cotton twill tape
  • 15 yards synthetic whale bone
  • 24 metal eyelets
  • 8 yards double fold bias tape
  • linen thread

The first step was to cut out all of my pattern pieces from the coutil and dyed fabric. The strong coutil layer would prevent the other two semi-delicate layers (cotton fashion fabric, silk lining) from stretching. My plan was to baste the fashion fabric and coutil together, add the boning channels, and then flat line with the yellow silk.

After cutting, I was able to painstakingly mark all of my boning channels and stitching lines onto the coutil which would back the fashion fabric and be visible for channel sewing before adding the lining later. This was a process…

In marking the channels, I numbered them based on the order to stitch them. The order keeps the top of the channels open while closing the bottoms of many of the channels where they meet with other channels.

I had made a few additions and adjustments to the boning scheme of the original pattern from Butterick, mostly to the back panels, and with this I ended up with 56 boning channels. Since there are a few gaps between channel sections, this would be considered a half boned stay that was typical of the later portion of the 17th century.

This marked piece was then baste stitched to my dyed fashion fabric before completing all the seams. I stitched the seams as a generous 5/8″ since I would be attempting to use the seams for a few of my boning channels. This is a practice used a lot in Victorian style corsets which have more panels and thus more seams than my simple stay.

I wanted to press my seams open so badly, but would have to wait for that satisfying moment until I had my channels sewn. All of my markings were done with pens I have with which the ink vanishes with ironing. I love them, but they make sequencing difficult sometimes.

A decision I hadn’t anticipated needing to make was the thread color for the boning channels. Since my stitching would be visible on the outside, the color was a bit more critical than I had anticipated, especially since I was using a patterned fashion fabric. I pulled every thread I had on hand that was either a matching color to the pattern or complemented.

I then stitched straight lines on a scrap piece of the dyed material running both parallel and perpendicular to the lines of the pattern. This would allow me to see how the colors would either blend or pop against the base fabric and the red velvet embossing.

Of the five options I whittled down to, I was between burgundy and tan since they blended best. In the end, I opted for the tan since it matched the base fabric almost perfectly.

Now, I could start the tedious, though satisfying process of adding the channel casings. I opted to use 1/2″ 100% cotton twill tape rather than the two layer method since I had so many channels and it was easy to work with. I initially bought a few rolls from Hobby Lobby but kept running out and instead ordered some for quick delivery from Amazon (*gasp*, it was a tragedy to do and I feel dirty doing so, but I was on a roll and could get 1-day shipping). The original tape from Hobby Lobby was decent, though it had a bit more give than I would have liked. It was much better in comparison to the Amazon twill tape, which was strong but a bit thin and warped.

Please enjoy a satisfying time-lapse of stitching the boning channels (my apologies for the pajamas, but there are cats at the end!)

After completing the channels, I carefully cut my synthetic whalebone to length for each channel. Each length needed to be pressed into submission since they were wrapped tightly in shipping. To do this, I used an iron on high heat with medium steam and covered each piece with scrap coutil. The straightened pieces were then easily slipped into their channels and closed with prick stitches.

Keep reading on The Goose Girl Part 3: Bodice Finishings and Flare for the final steps in the stay construction:

  • Lining
  • Binding
  • Eyelets
  • Lacing