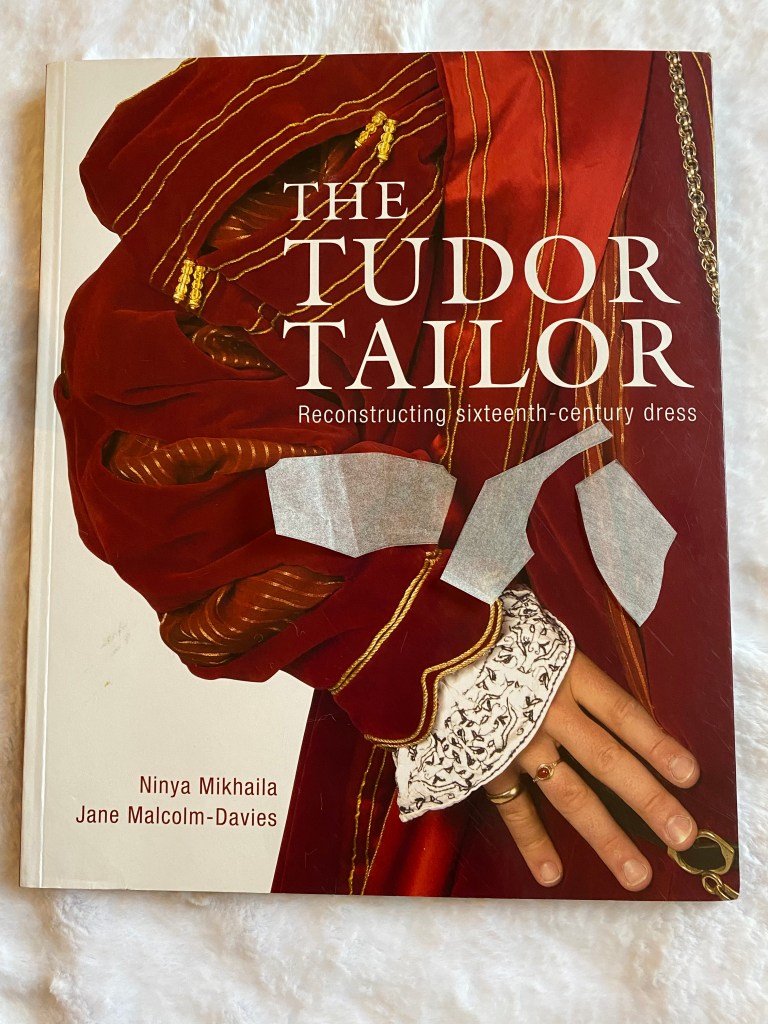
If you’ve followed along on this series, we’ve finished work on the kirtle, outer gown, and foresleeves. Now, it’s time to indulge in all things dramatic and sparkly and wonderful: the plaquette. The plaquette is a stiffened panel that attaches to the front of the gown to hide the center front lacing of the gown while creating the smooth front characteristic of a Henrician gown.
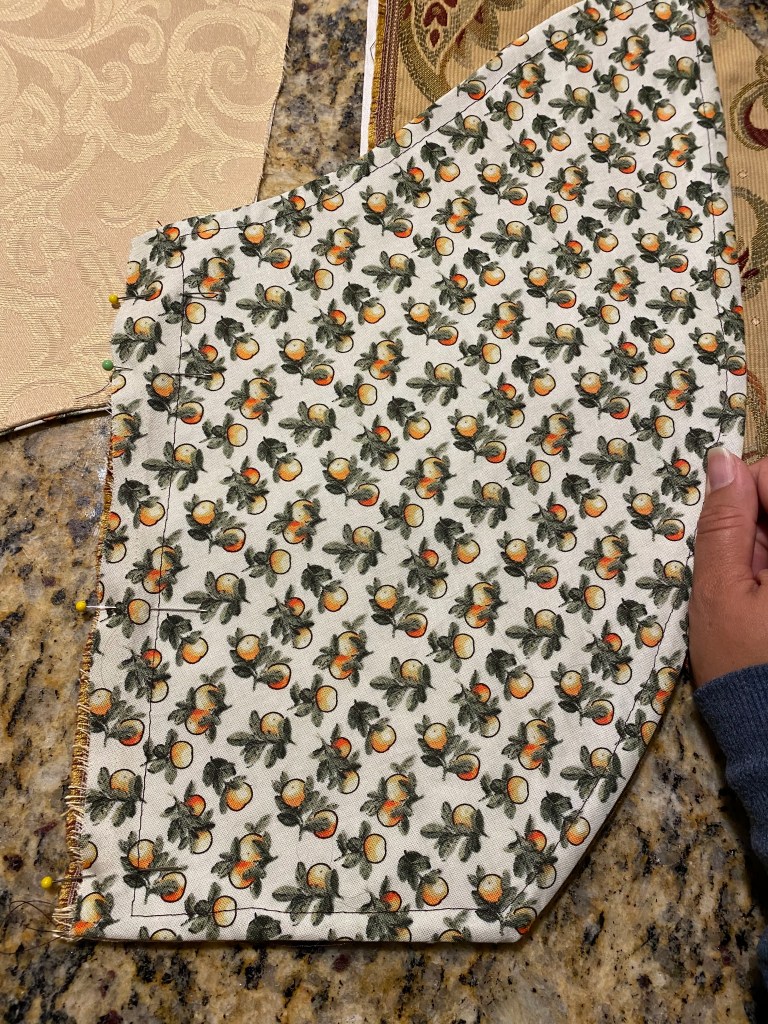
The plaquette has a rounded shape on top and a pointed shape at the bottom and the sides should line up near the side seams of the gown bodice. It requires stiffening lengthwise to hold its general shape but needs to be moldable or soft widthwise to hug around the front body. Ideally, the kirtle and outer gown are providing all of the body shaping. So though the plaquette is stiffened, it’s for decorative purposes in the end.
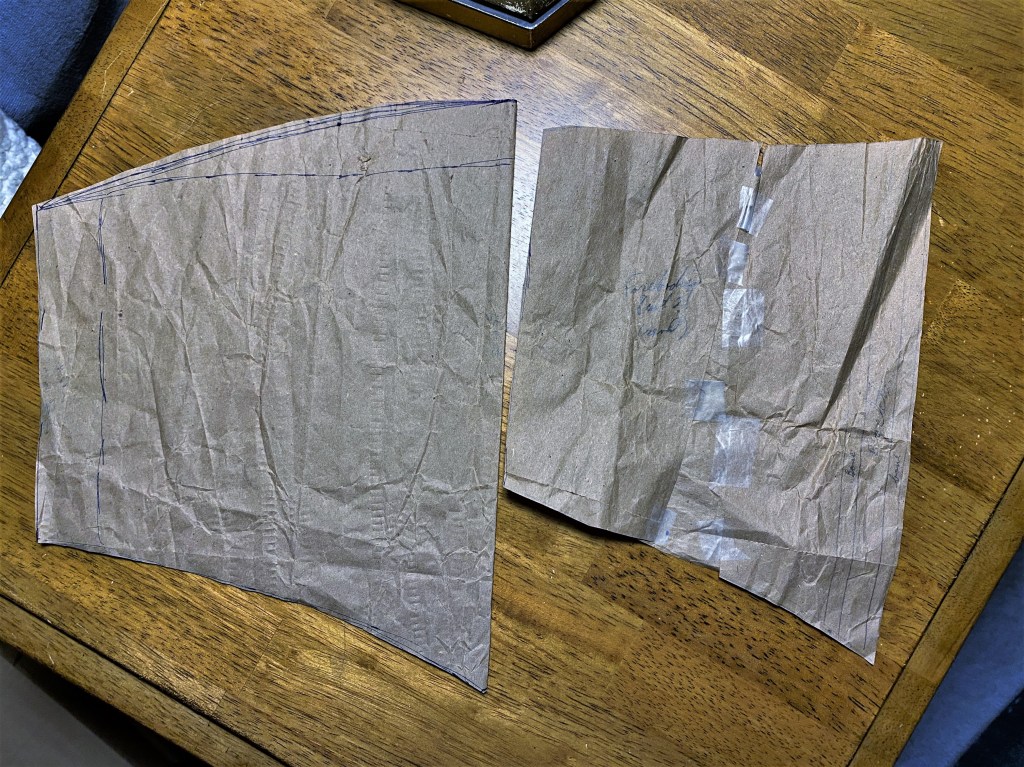
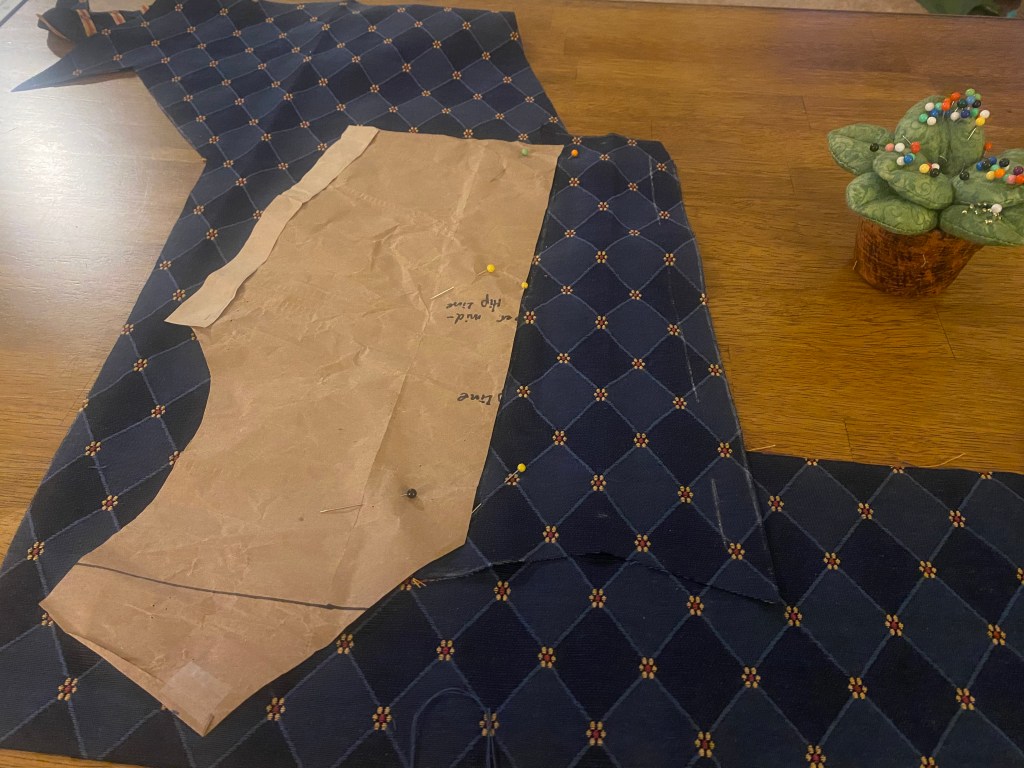
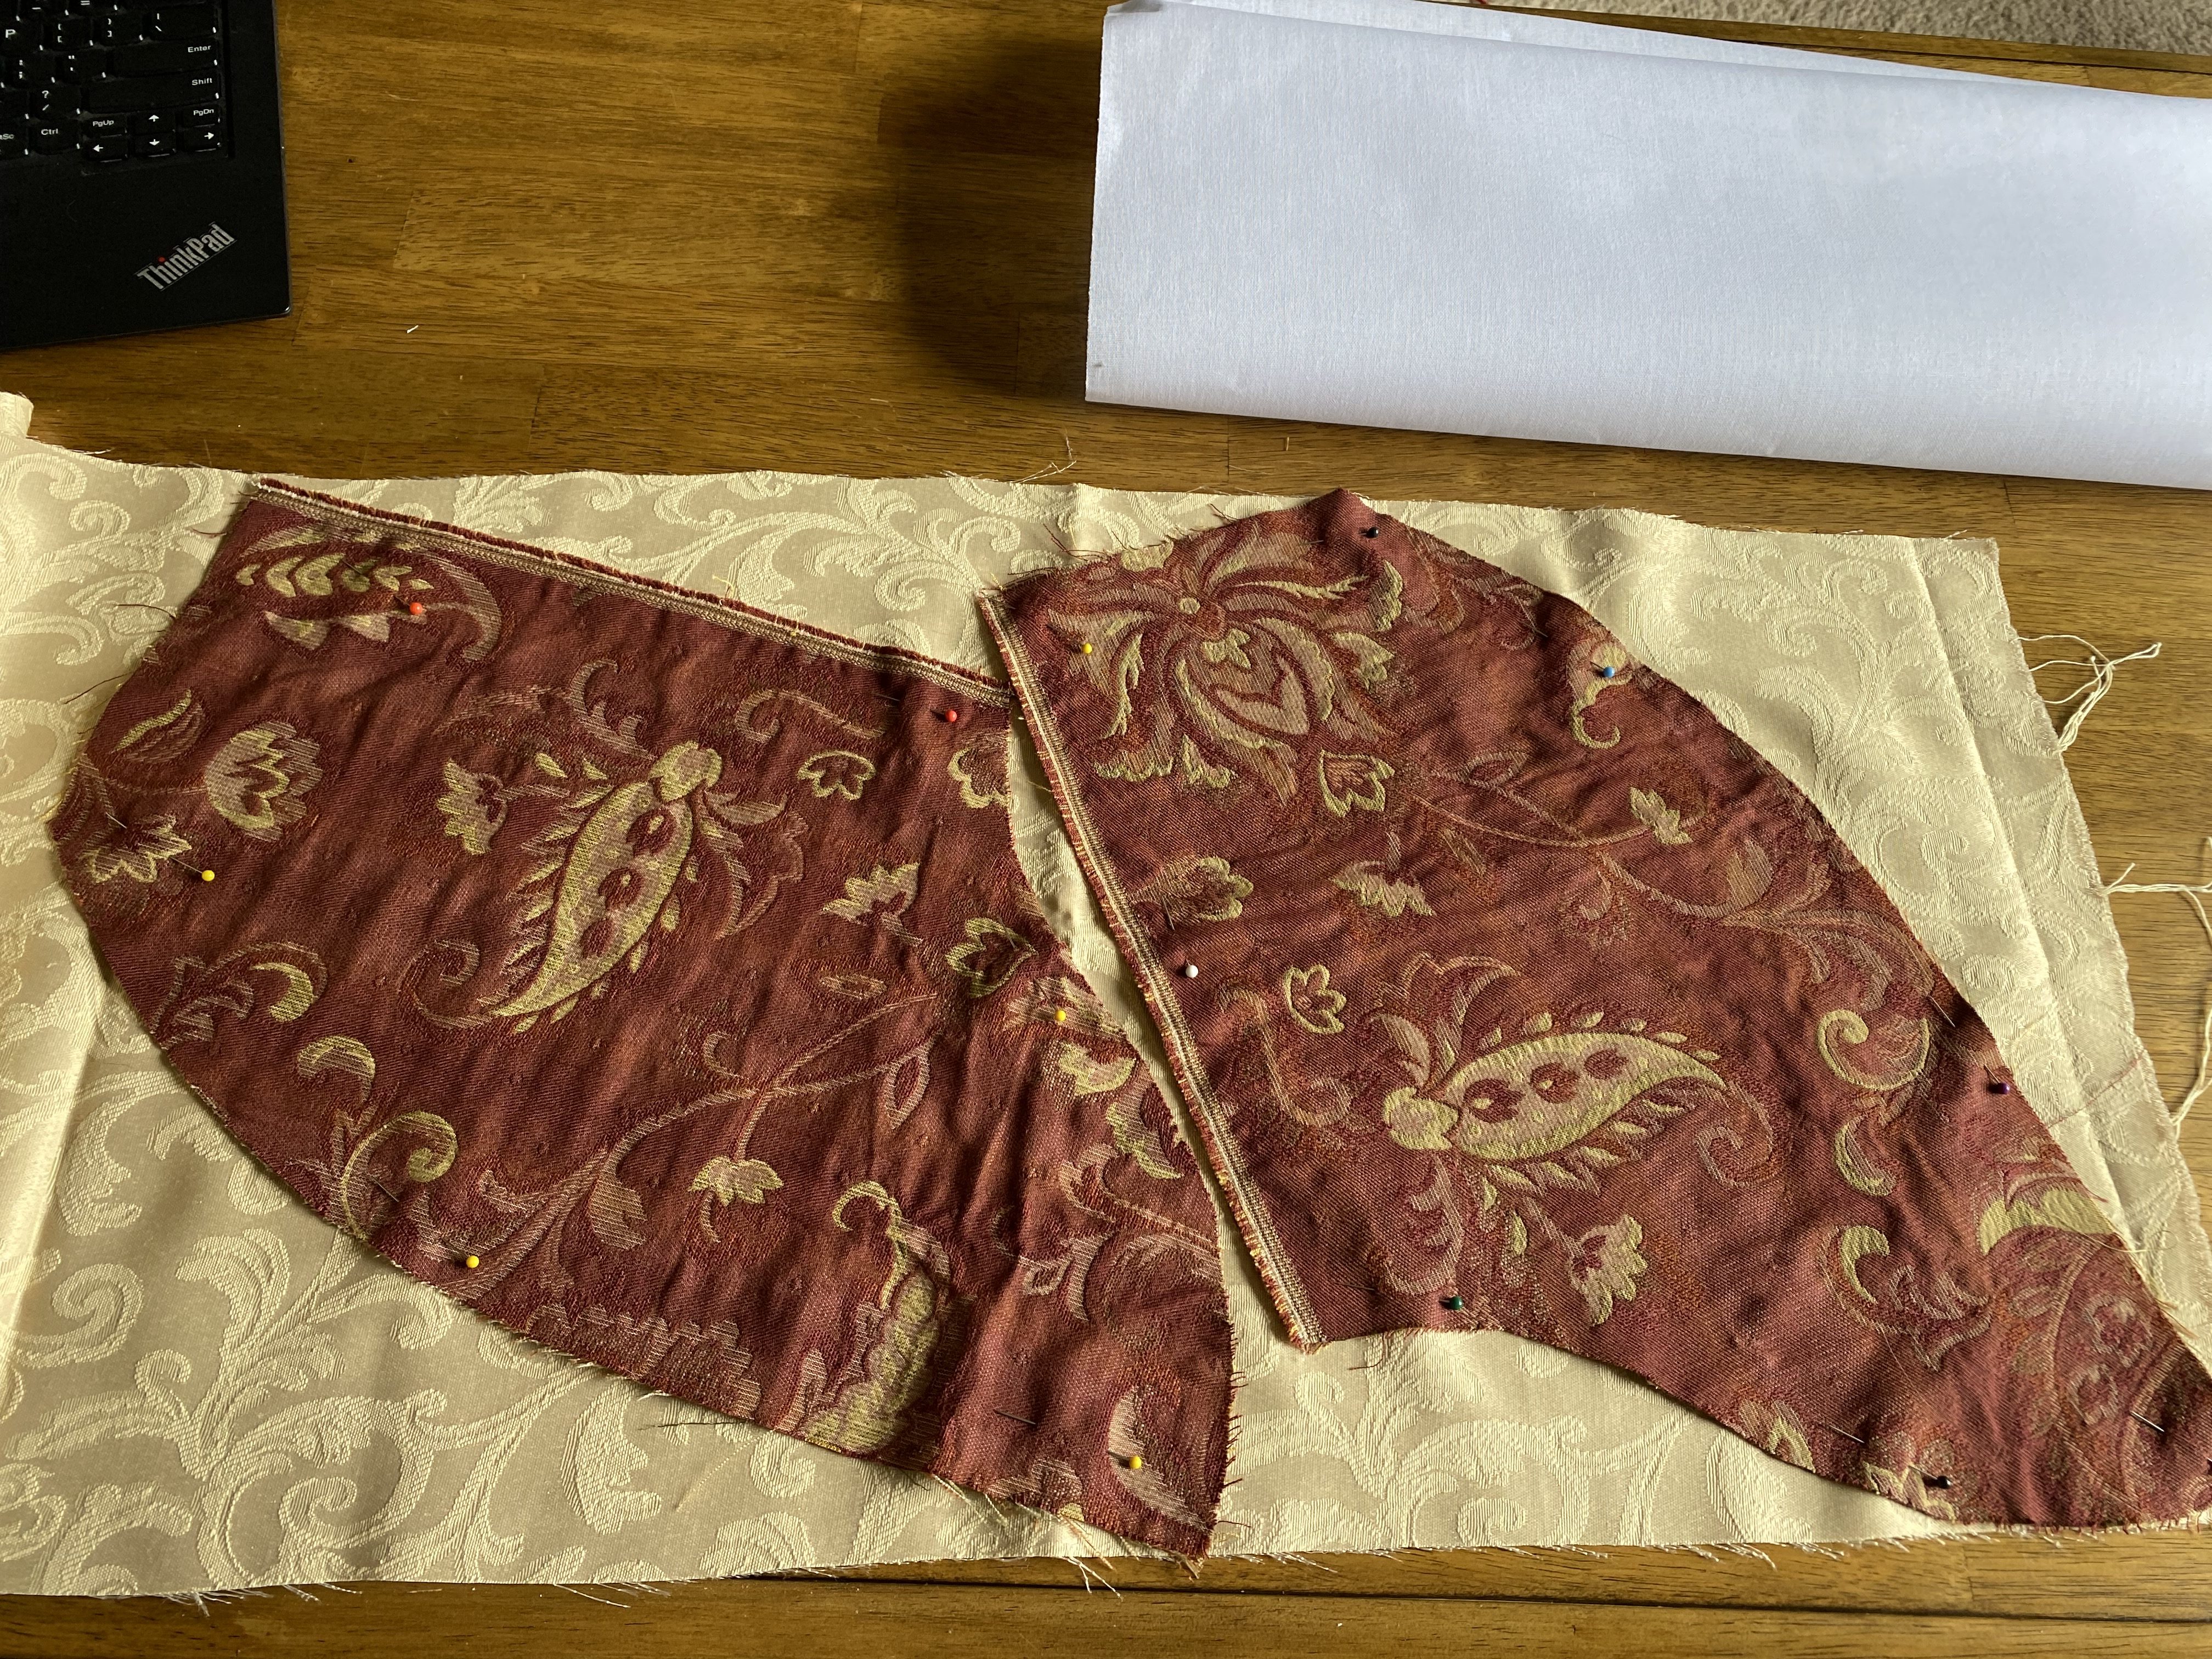
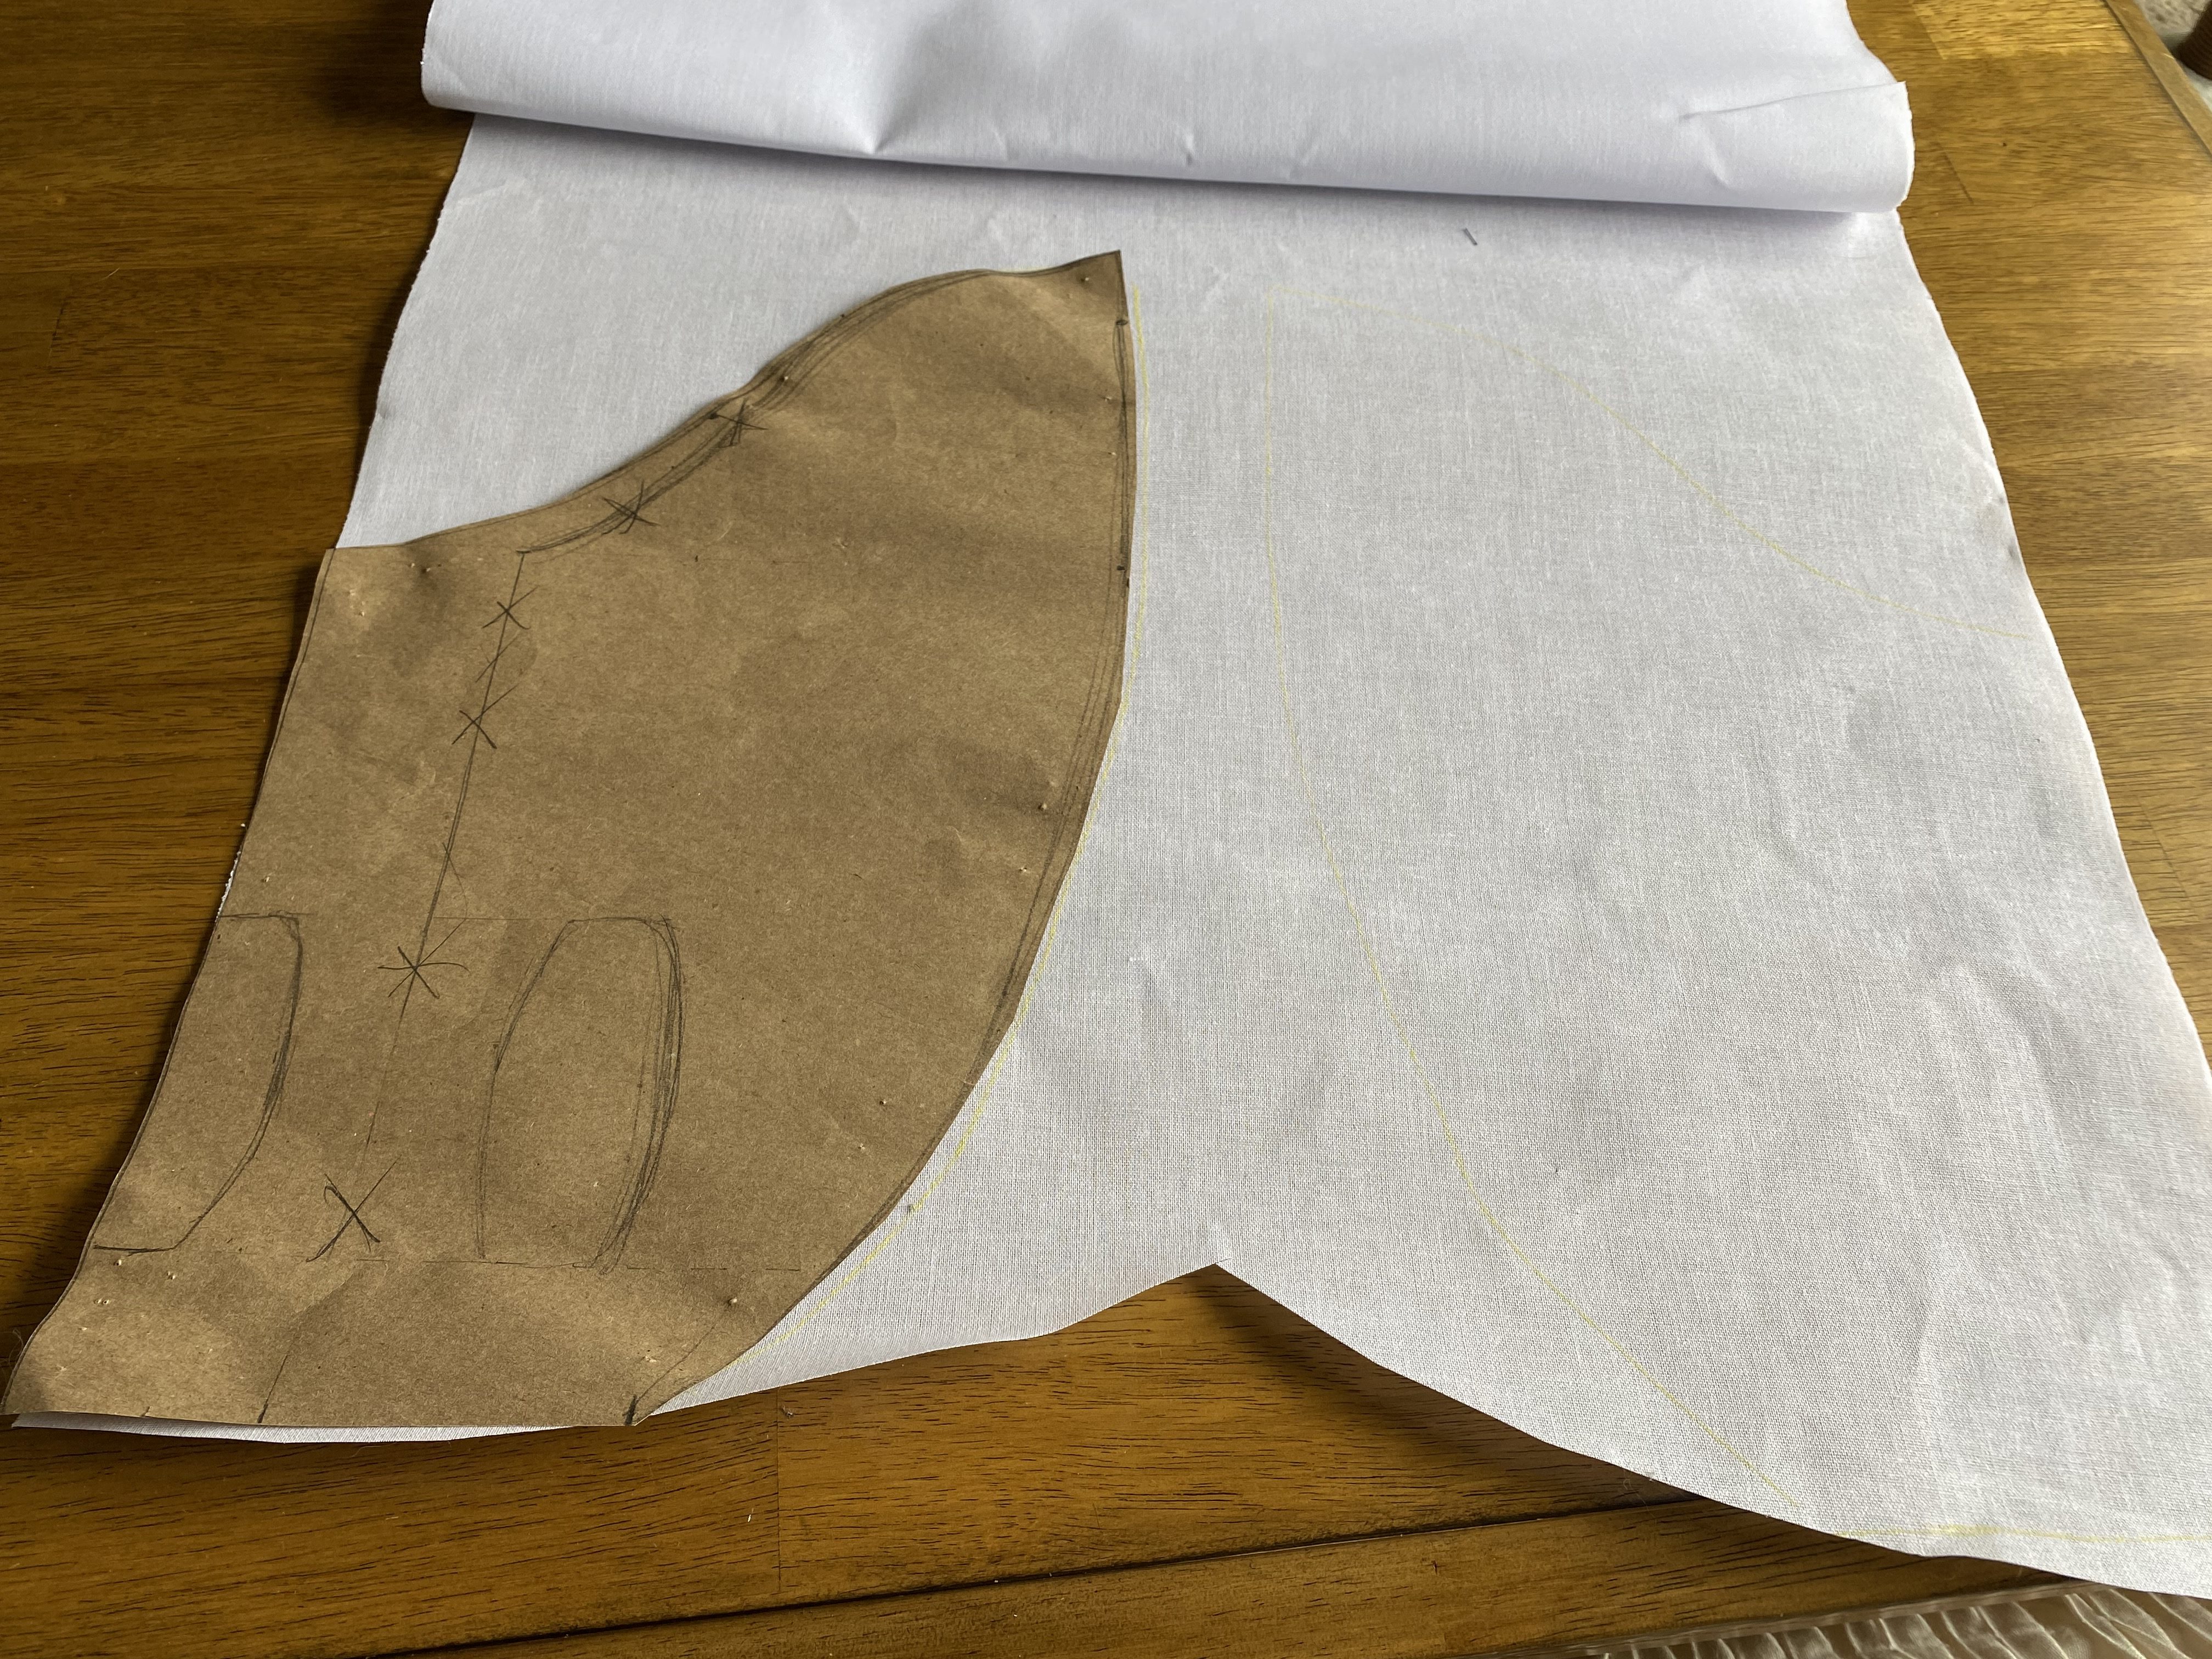
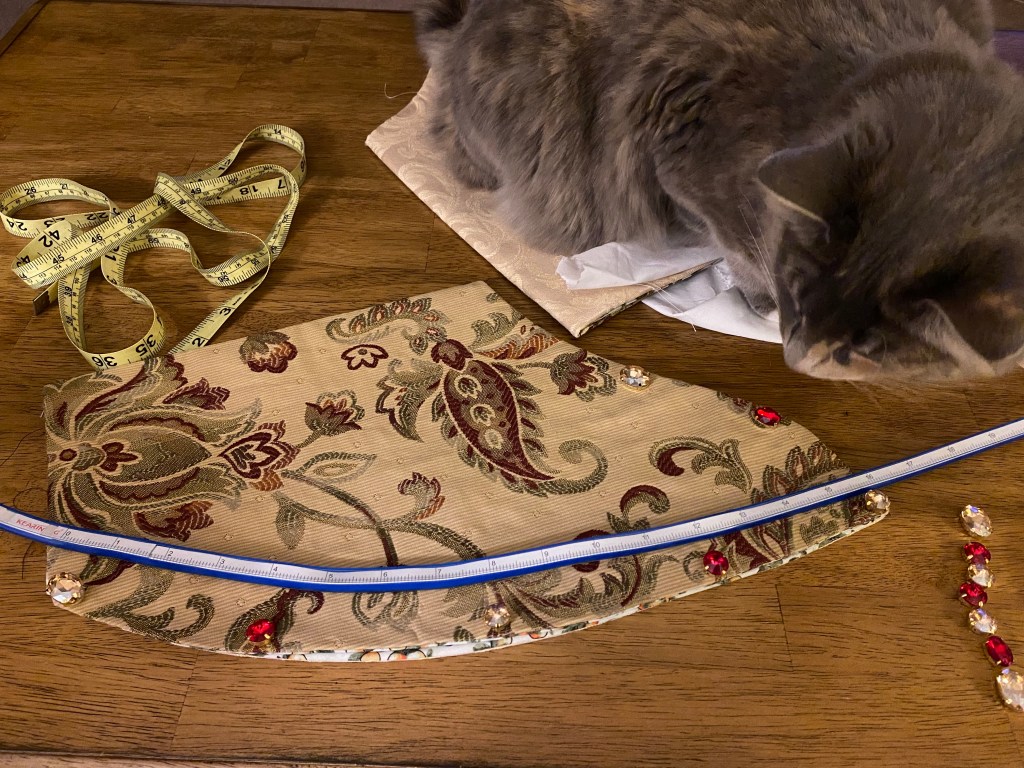
The plaquette pattern is based on the bodice panels with the addition of 1″ at the center front, curved to either side to match the original side lengths. Additionally, the bottom is extended 1″ in order to overlap with the forebodies panels and elongate the torso.
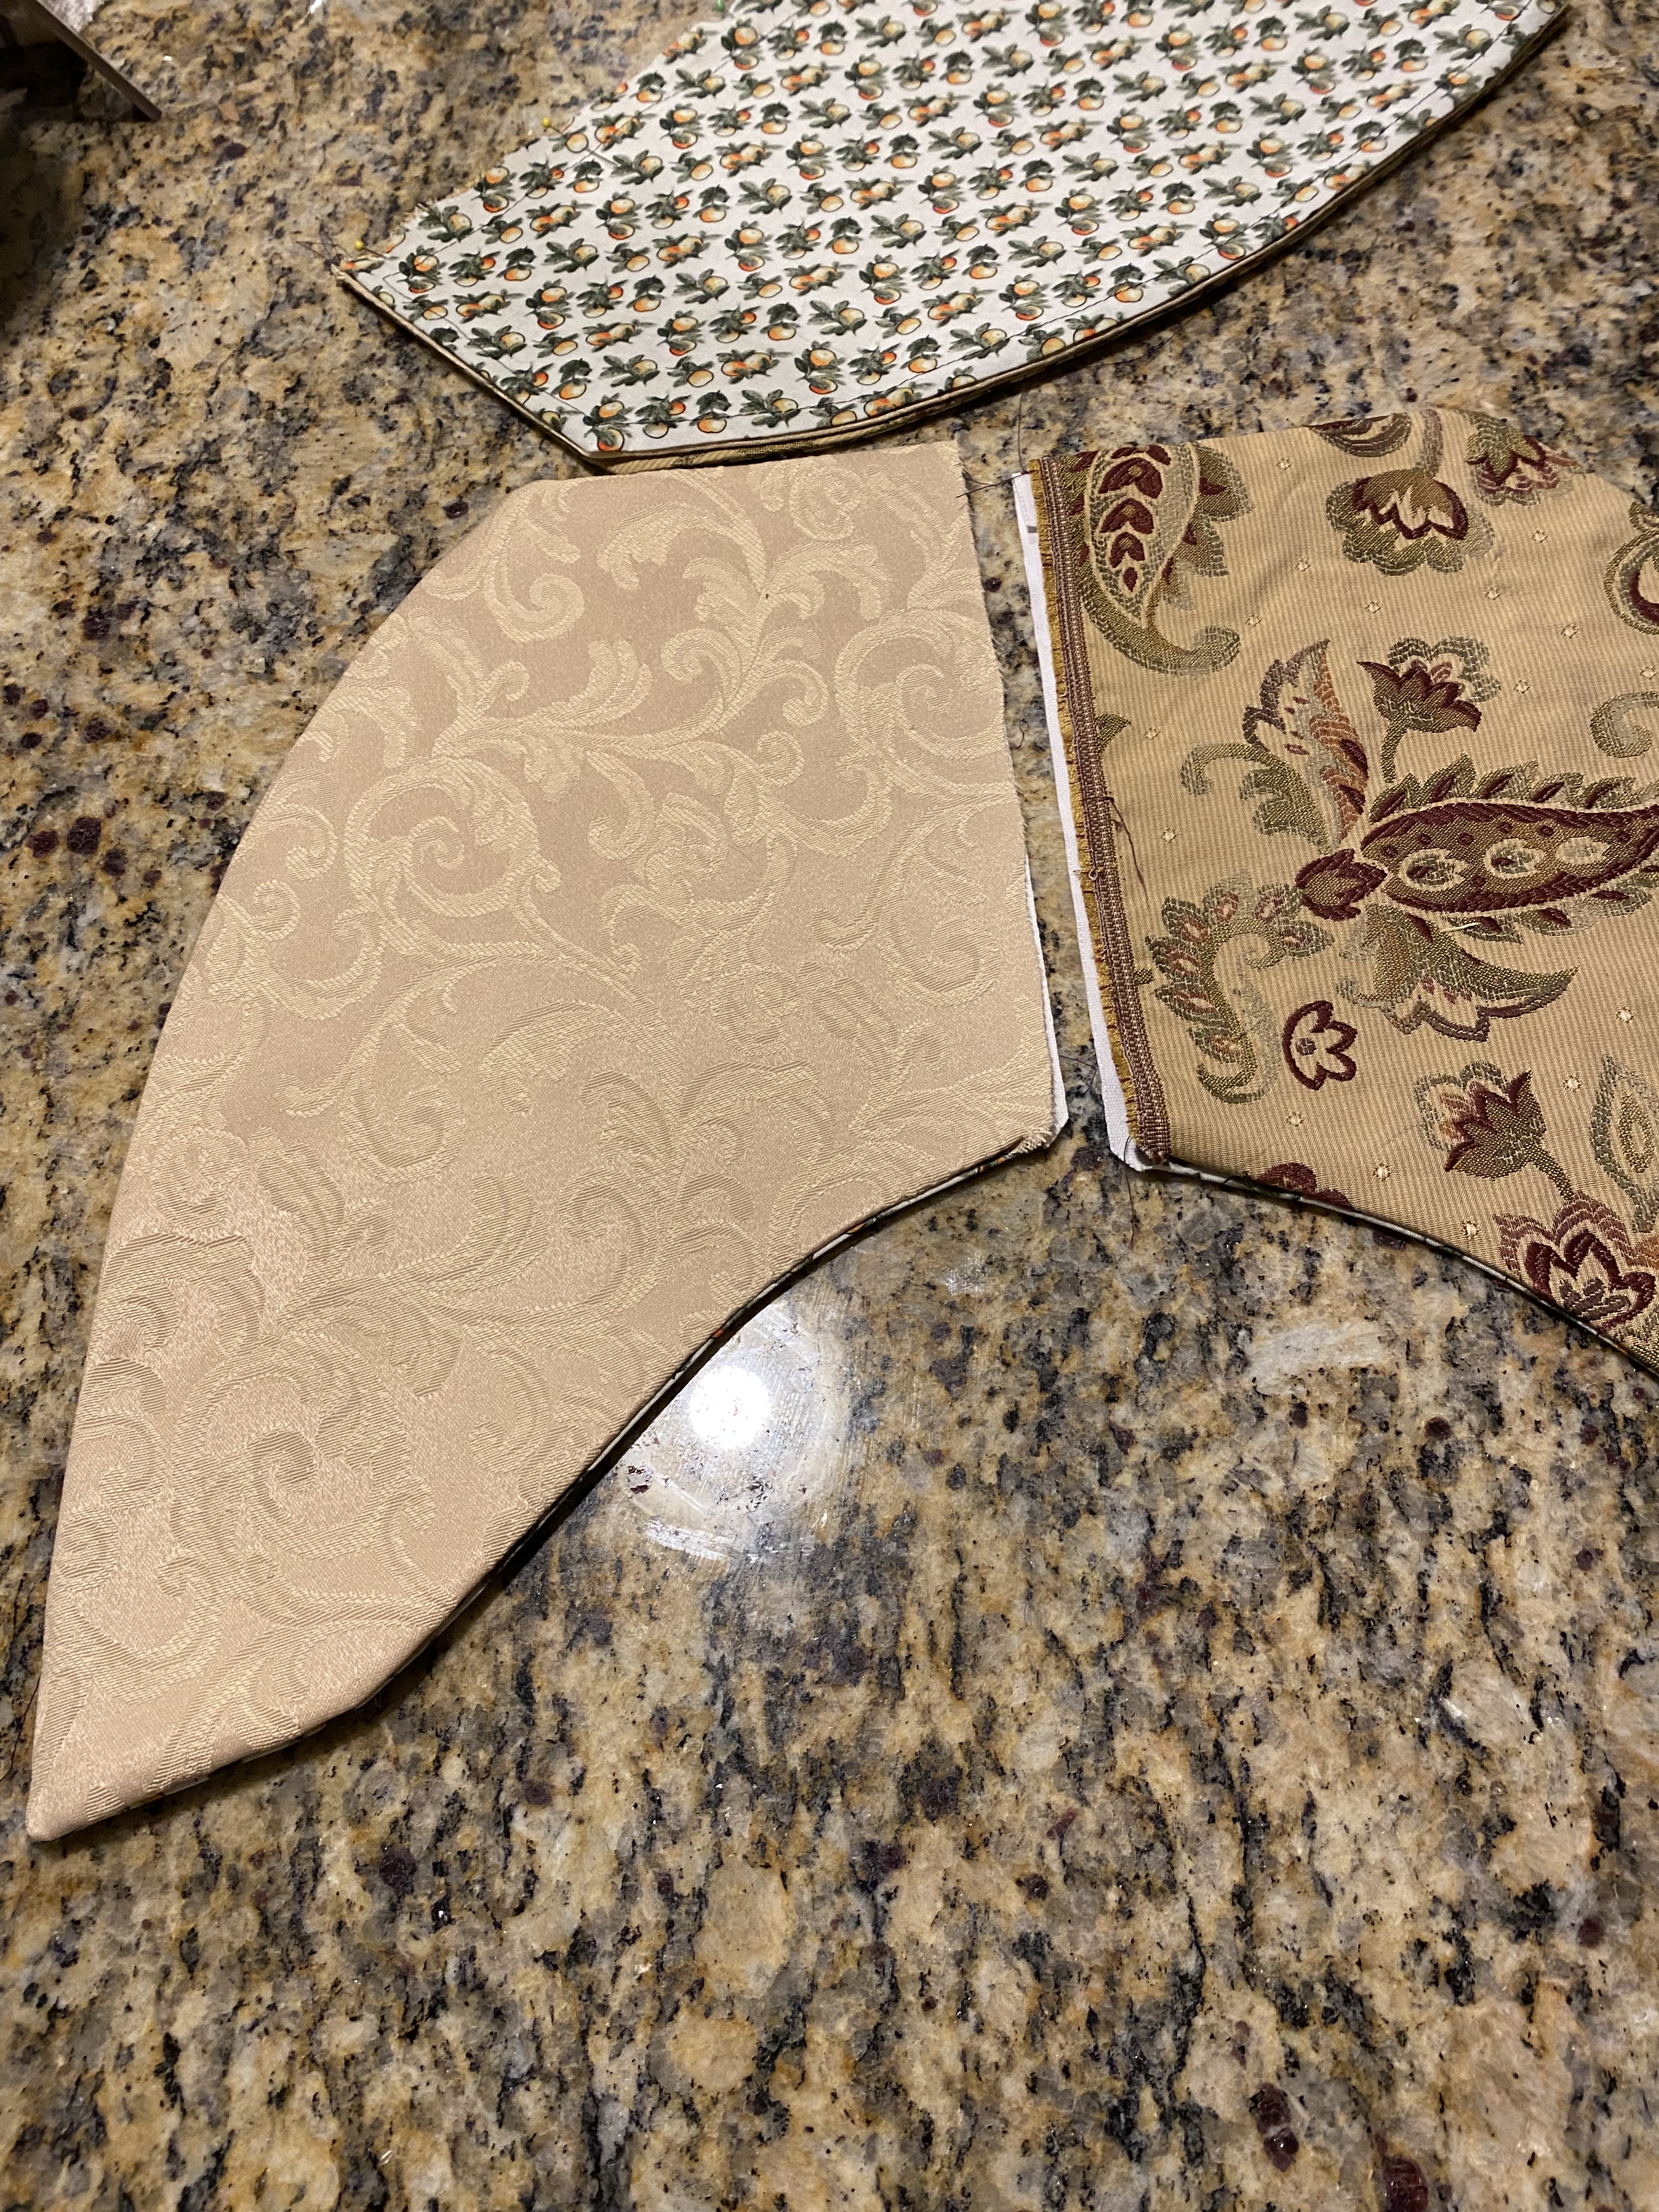
A comparison of the plaquette (left) and forebodies (right) pattern pieces
It can be simple and smooth, elegantly embroidered, or heavy as heck with diamonds and rubies. I opted for a blend of all three. Because why not be extra?
In my mind’s eye of design, I initially wished to create the plaquette with embroidery with details of seed pearls and beading. Yet, the lace and embroidered pieces that were available to me at my local stores were far too modern for the design I wanted. I thought about teaching myself to embroider or commission a panel of embroidered material specifically, but I’d already far and above blown the project budget on the sheer yardage required gown. I couldn’t justify buying MORE material, no matter how much I wanted to indulge the desire for gorgeous fabric. Instead, I would use items I had in my stash for the project already.
You see, when I get an idea for a project, I turn into a crow. If I see something in passing that is even remotely related to the project on sale, clearance, or just THE perfect color, I buy it and stash it away in one of the many many baskets that take residence around my all-in-one living room/dining room/sewing room/guest room (basically the only room in the apartment besides my bedroom). Once the basket contains most or all of the inspirational materials I need, I start. Often this means I have more inspiration items than I need or use, but it leads to a wonderfully sorted creative process.
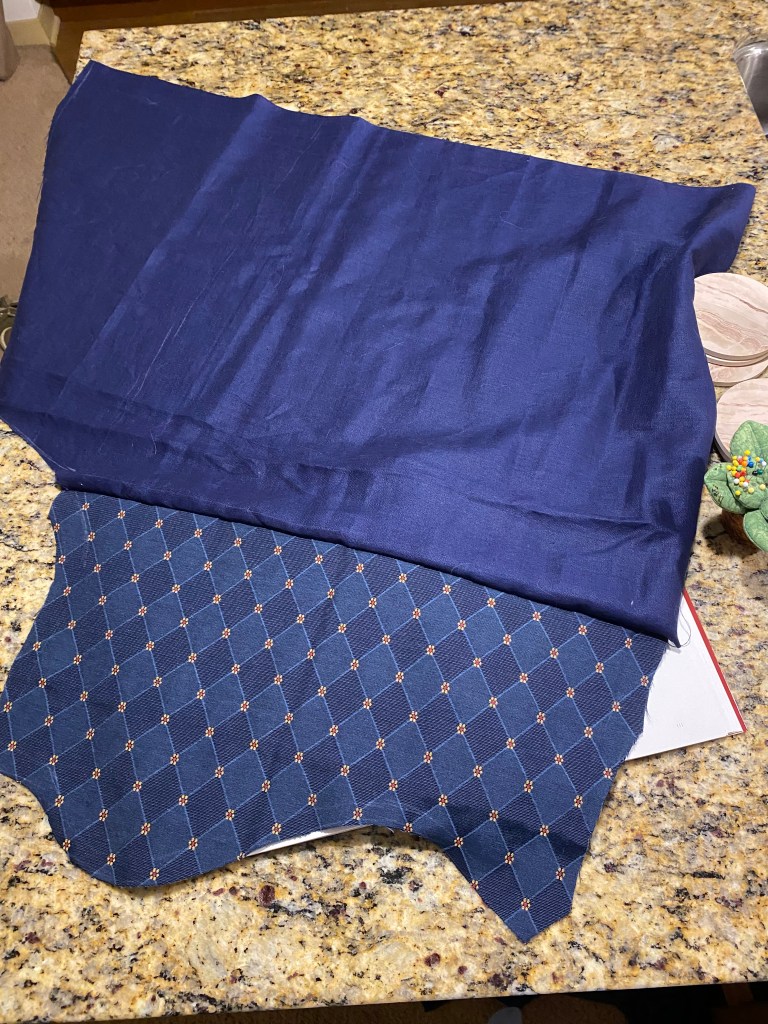
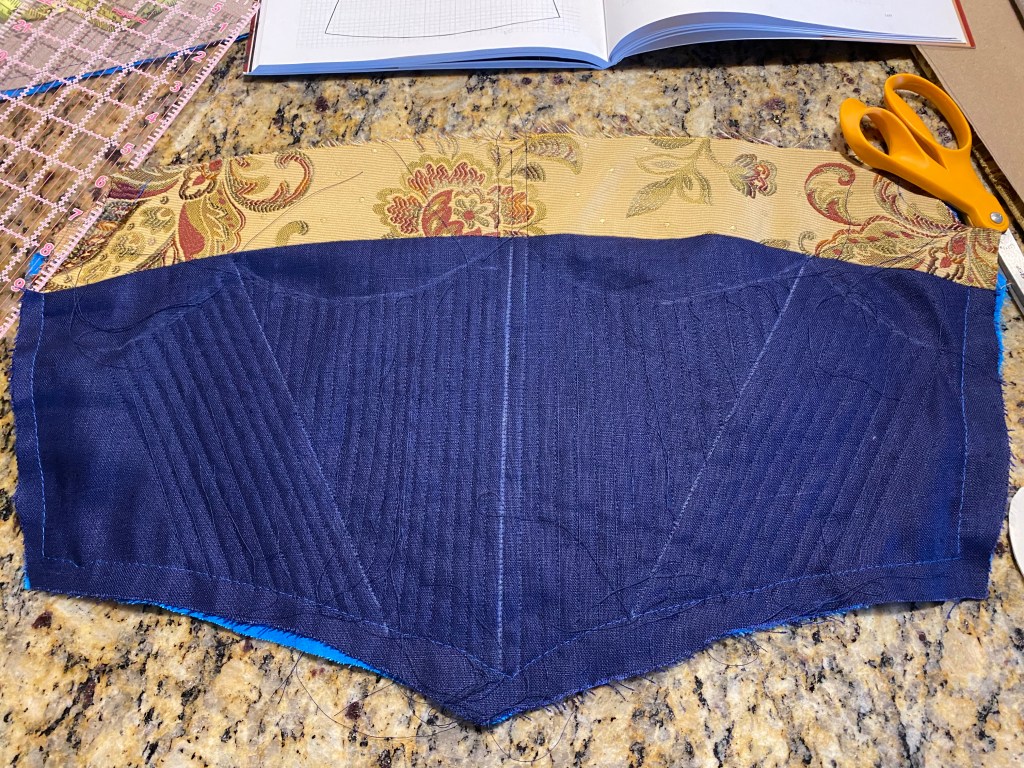
To build the plaquette from these materials, I start by deciding on the fashion fabric and structural layers. In all, I used four layers: the outer/front layer from blue velvet remaining from the outer gown construction, thin white muslin interlining, coutile, and blue linen for the lining.
The layers used in the plaquette from left to right: blue linen for the lining, coutile interlining, muslin interlining, and blue silk velvet front.
Now, a bit of explaining on the layers. I didn’t come to this arrangement naturally, nor does it seem necessary in hindsight. To start, I actually had a layer of buckram in the middle at one point too. I attempted to use that layer to provide the structure necessary to give the smooth shape and hold up the gems I planned to add. However, on the trial run of the layers (baste stitched together), the buckram buckled and folded weirdly with any movement. It was…too stiff. So I eliminated it and planned to add a few bones to the plaquette to support instead.
Since I planned to add boning to the center (essentially acting as a busk) and following the top curved seam, I added the layer of coutil which would give me a base to add twill tape boning channels while preventing any stretching of the plaquette overall. We’ll come back to this thought.
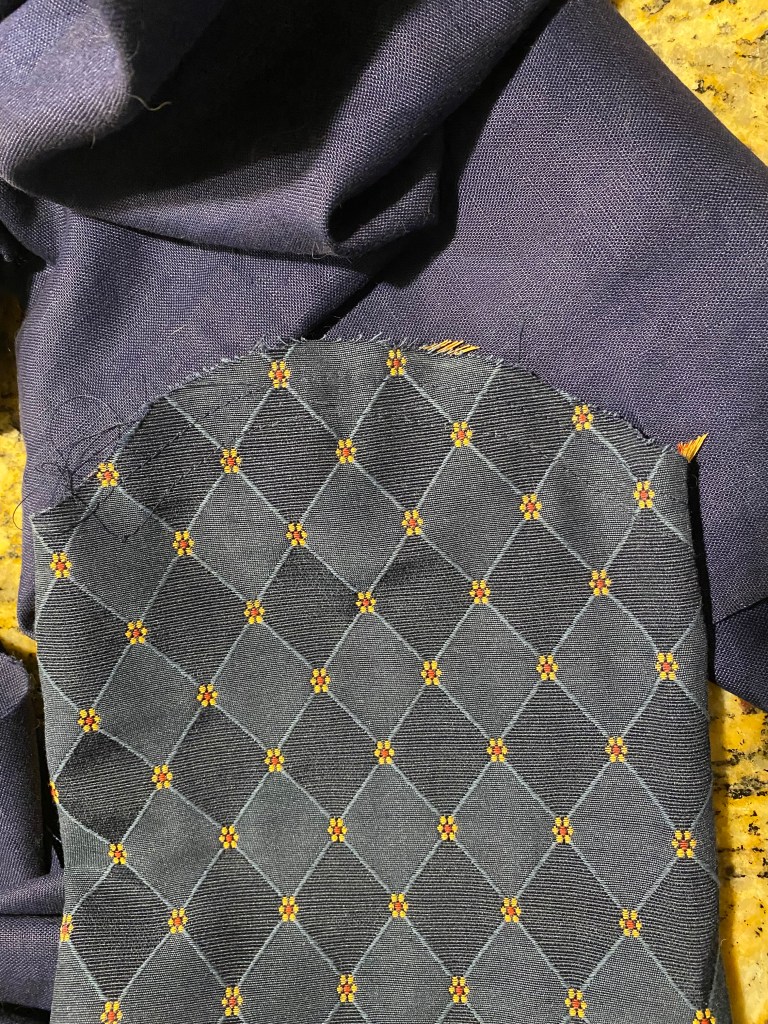
The muslin layer is added for a lining structure for the thin weave and delicate silk velvet to be mounted on while I added trim, embroidery, beading, or whatever creative embellishments I landed on. I baste these two layers together first and can begin the embellishment process.
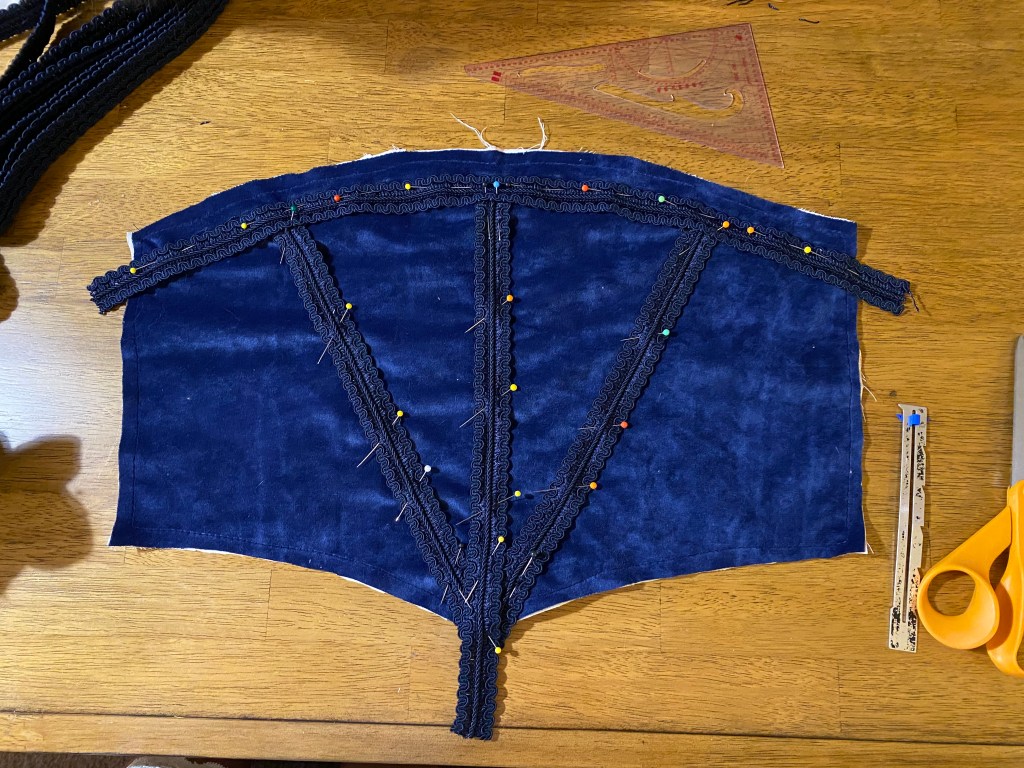
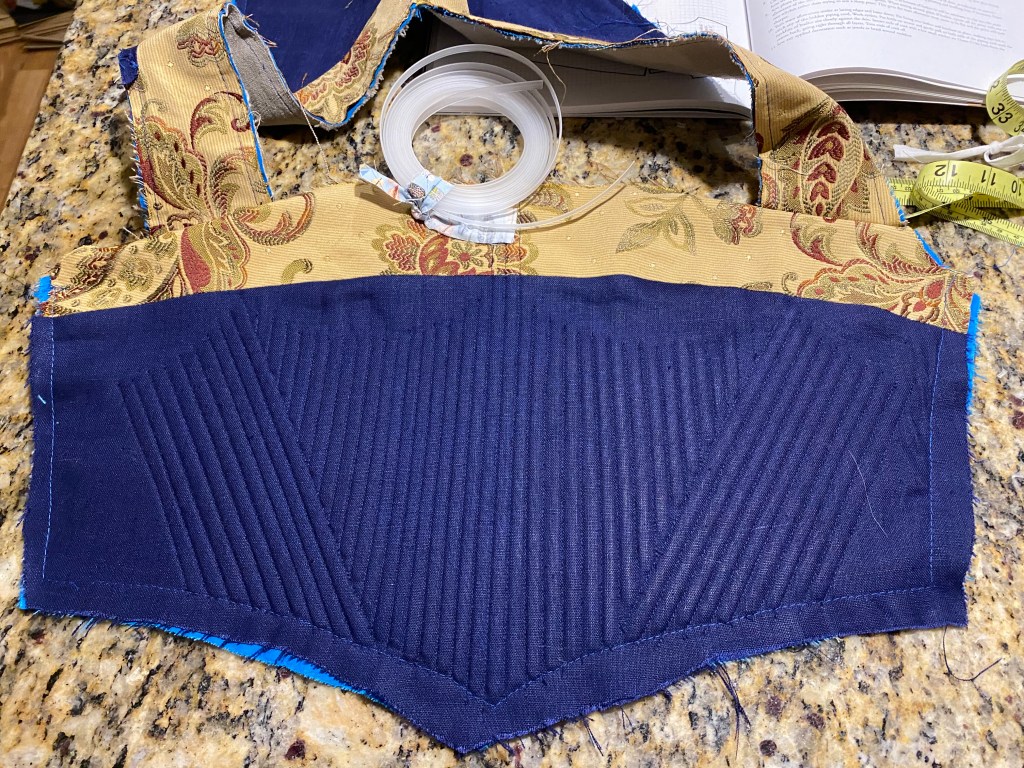
The first item I pull from my stash basket is a navy trim I purchased on clearance from Joann’s. I thought to use it to create geometric style lines to meld with the diamond patterns on the outer gown. I fiddled around with it for a while, pining in places, holing it up to myself in the mirror, and adjusting until I was happy with the effect. In the end, the shape creates a triangle or v-shape mimicking the point on the plaquette as well as the diamond effects.
The final placement of the trim on the blue velvet. It ended up being at a 30-degree angle from the center trim piece and was quite flattering.
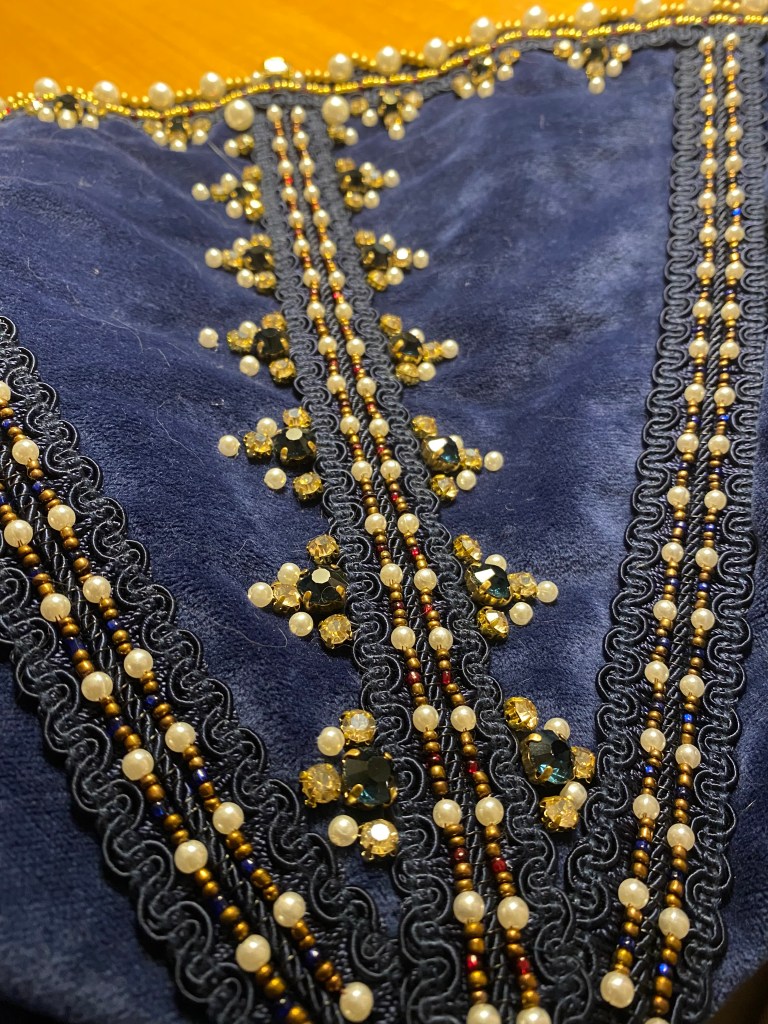
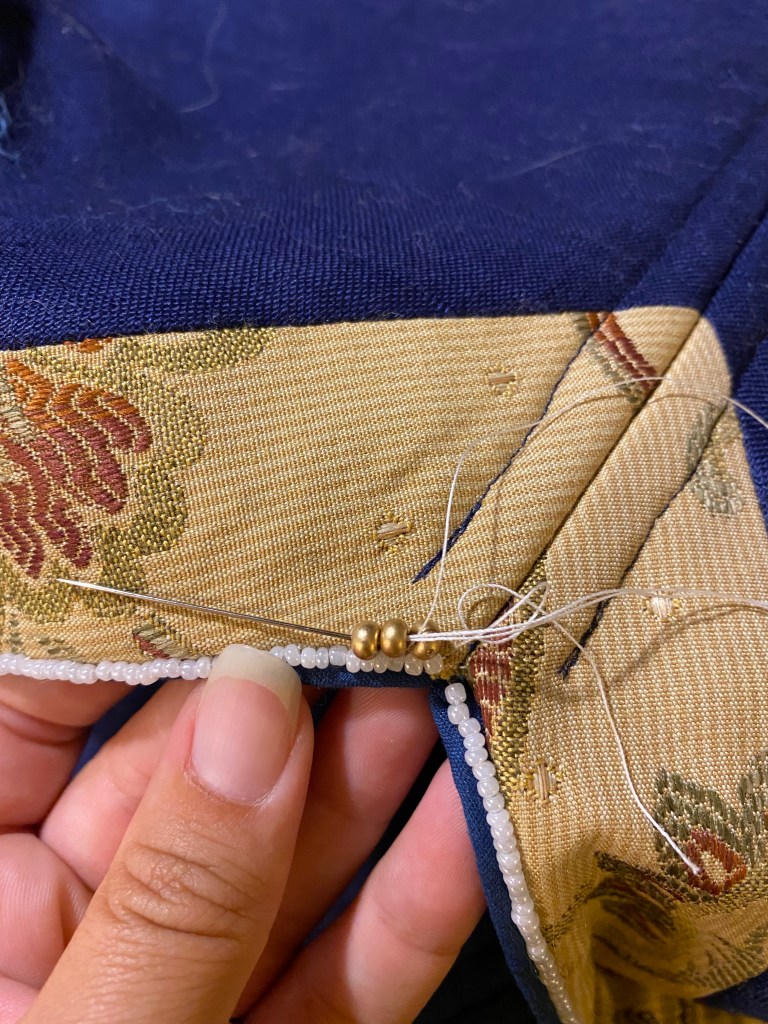
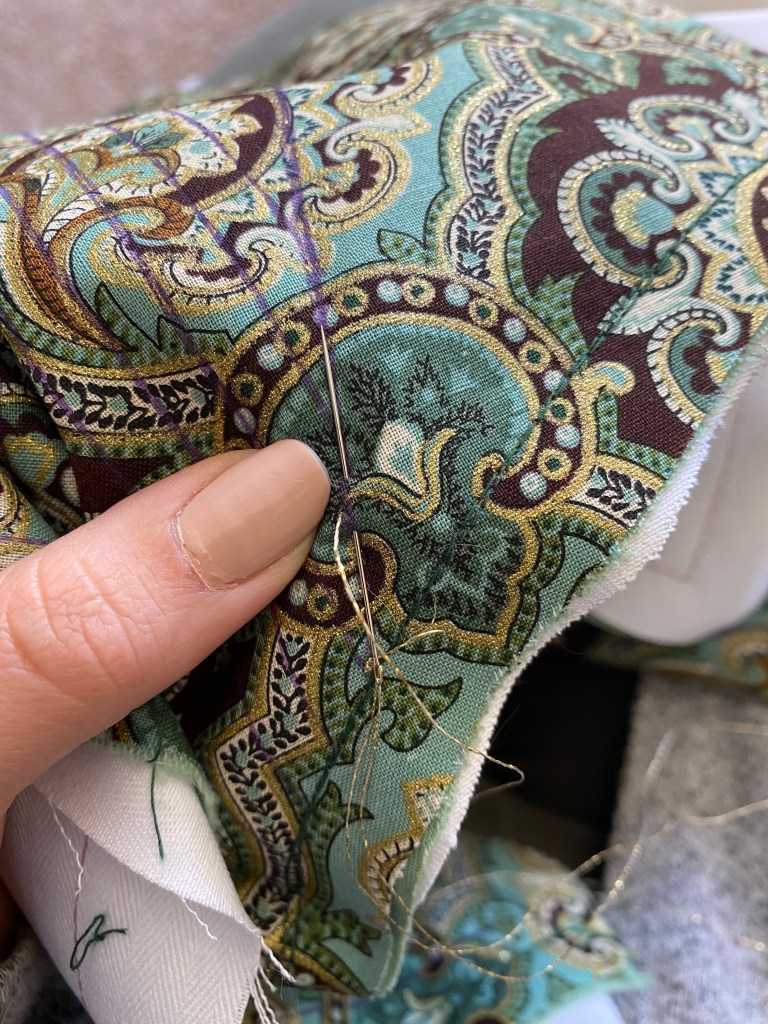
Finally, was the most fun part of adding beads on beads on beads and gems and more gems! Unfortunately, I don’t have a lot of photos of the beading process since I was so excited and playing with it as I went that I just kept stitching and didn’t record any. Looking back though, my process started by sorting through the beads I had available and having any that coordinated nearby, then testing how certain patterns of beads would look in sequence. I took a sequence that I liked from the seed beads and couch stitched them in parallel along the center raised section of the trim.
For this pattern, I used a mirrored pattern of 1 4mm pearl, 2 copper seed beads, and 1 sapphire seed bead at the center
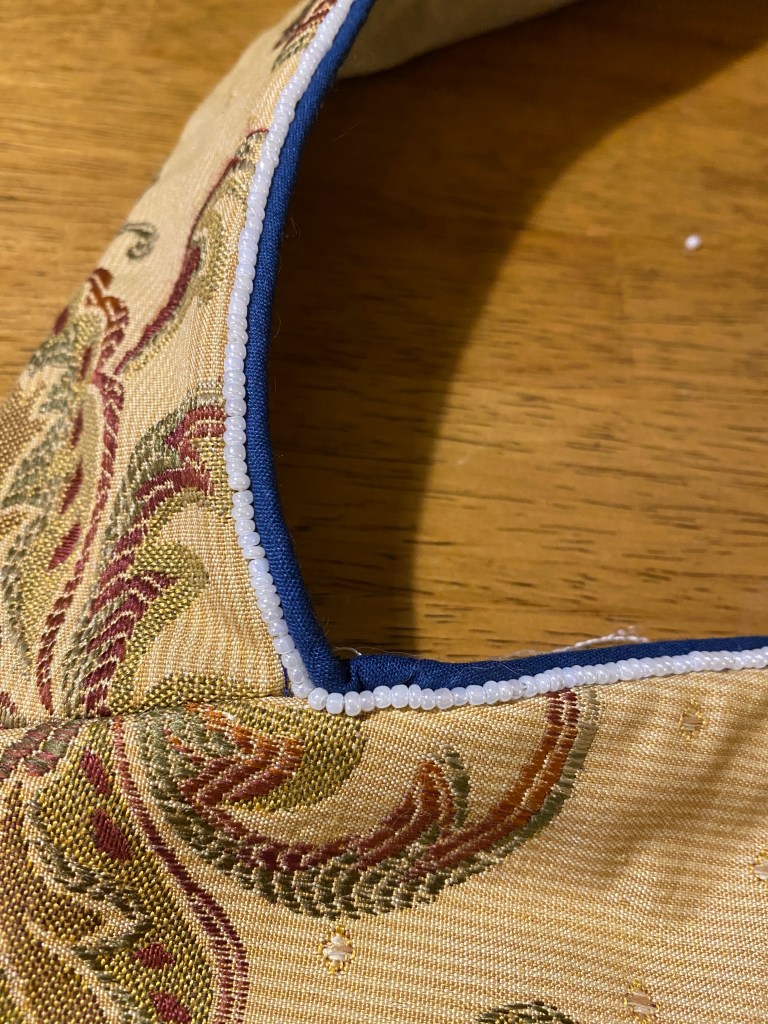
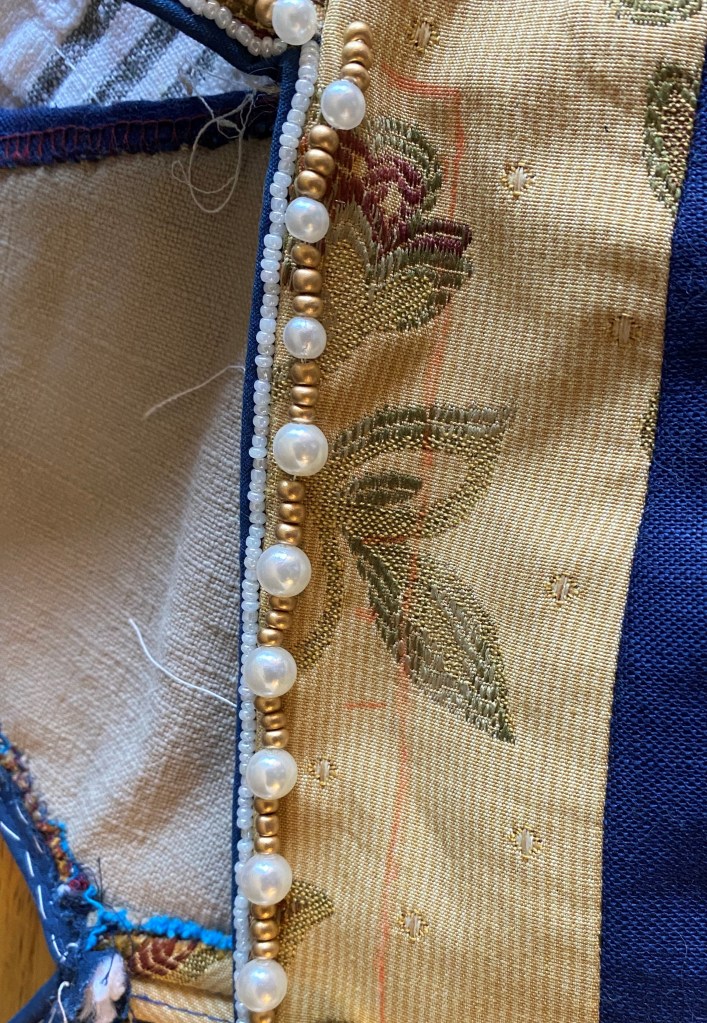
Then because I loved the pattern so much, I used a similar style for the top curved edge with a mirrored effect of 4 gold seed beads and 1 red seed bead. The topmost line of beads then uses 8mm pearls to create a crowning effect that should meld with the gemstones and pearl pattern on the kirtle.
And of course, I want crazy using gems to my heart’s content. Again, this was a process of trying patterns to see what I liked and what I had enough glass gems for to have a cohesive pattern.
The gem pattern I decided on is shown on the left of the panel. Though I did toy with the idea of adding a few red gems, it felt like I was approaching the color scheme of Snow White once the bright red gems were added. Plus they were way too bright in comparison to the more burgundy tones on the outer gown.
Before moving on beyond the beading, I’d like to take a moment to appreciate the backside of the panel because I find it simply fascinating
The backside of the plaquette after finishing all the beads. Large basting stitches are visible in blue from tacking the trim in place, then smaller blue stitches for all the gems which I could use larger silk thread for. You can also see the smaller stitches in brown beading thread that the dead beads were stitched with. Finally, white silk thread was used for the last extra pearls I added.
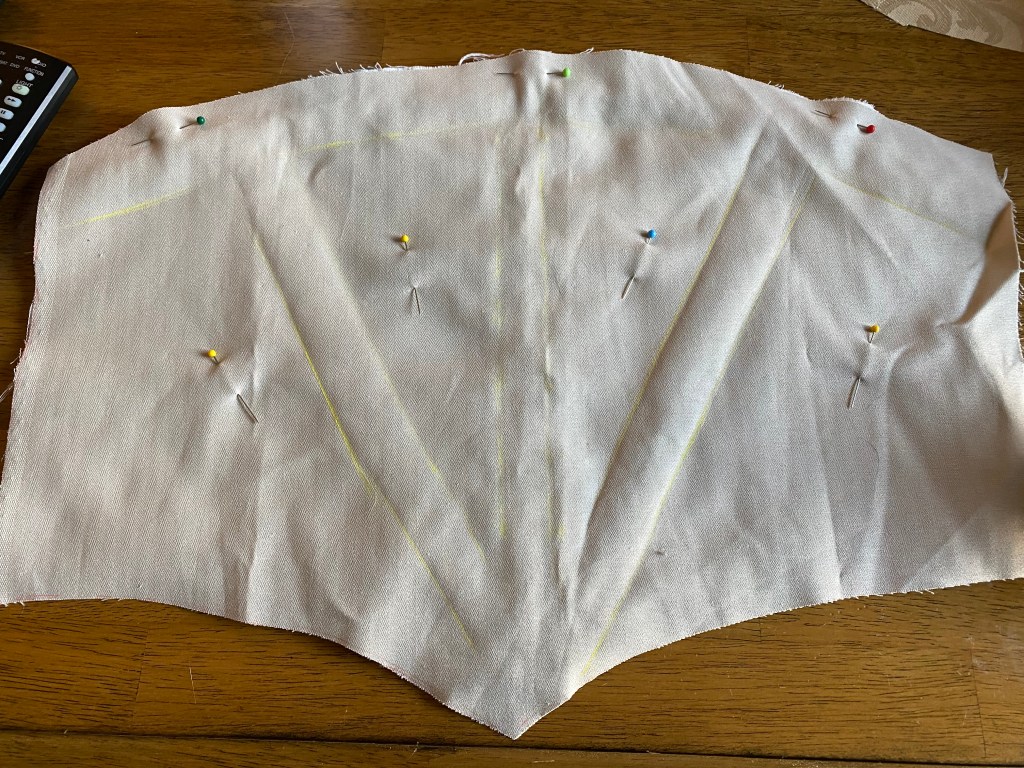
Embellishments aside, it was time to add the structural layers and finish the piece. I placed my coutile on top of the finished beaded panel and traced the lines of the trim/beadwork under which I would add boning channels.
Tracing the trim locations, marked with yellow tailors chalk
3/8″ twill tape is used to create 1/4″ boning channels.
[what boning made it to the final garment]
The lining and coutile layers are basted together for stability. With all layers finished, the lining layer and outer layer are stacked with right sides together and are stitched, turned outward, pressed, and slip-stitched closed for a final finish.
Basting the lining to the coutile
Interior of the basted coutile
all layers stitched with right sides together
After turning the stitched layers and prior to slip stitching the top seam.
The completed bead structure
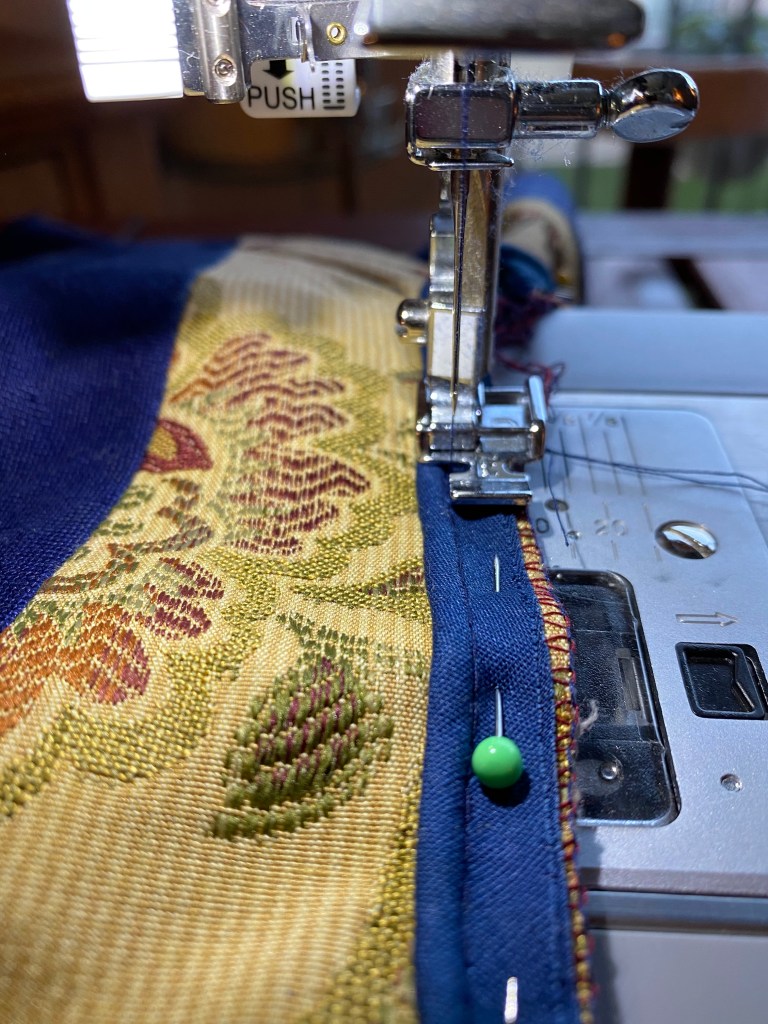
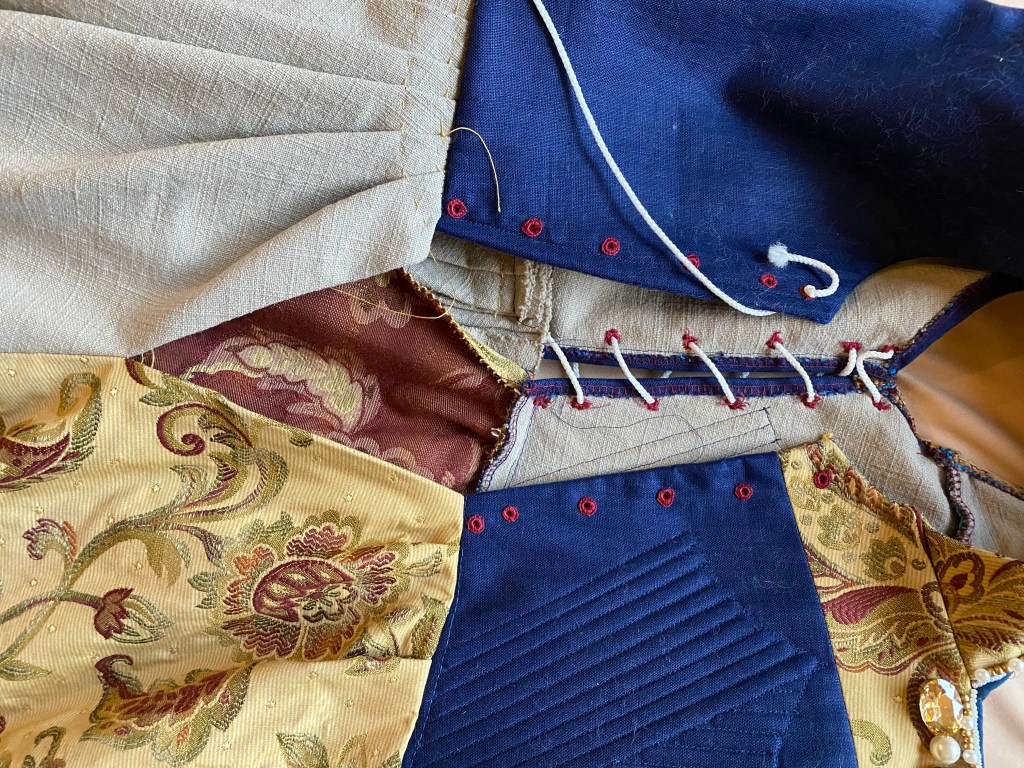
The last step is to create a way for the plaquette to attach to the gown bodice. Historically, this was achieved with the use of straight pins that a lady’s maid would have used in dressing a noblewoman. But, it’s just me, and I like convenience. So I use a strong home decor thread to whip stitch one side of the plaquette to the gown and add hook and eyes to the other side. This was a tad of a process since my initial placement of the plaquette was not tight enough across the gown front and caused the hooks to, well, unhook when I moved. But the second time was too far apart and forced me to pull the gown front panels together when hooking. Third time was the charm and achieved the right tension. So don’t worry if it takes a bit of finagling to get it right.
Marking the hook locations the back of the plaquette. I placed these about 1″ apart
The hooks in place. Be sure you have hooks at the very top and bottom so there is no gaping. The chalk line for final placement of the eyes is visible on the main gown.
I used pins to mark the locations to place the eyes based on the final hook locations.
There it is, the completed plaquette. And I adore it. Aside from the laughable weight of the outer gown, it’s my favorite part of the gown.
Crazy to believe, but we’re nearly complete with this project. Only one more item to build and she’ll be complete
After finishing the structure of the kirtle, I could begin the work of patterning and fitting the gown bodice. In terms of sequencing, I put some of the finishing and fancy work off for the kirtle to start the bodice. I like to do this so that I could have work in cutting, sewing machine, or hand sewing and switch between tasks depending on my mood at the time. For the bodice, I used the Henrician Gown pattern from The Tudor Tailor. The gown will require panels for the bodice including the center back, side back, side front, forebodies (center front panels that lace up), plaquette, large turn back sleeves including a contrasting lining, and skirt including the pleated front, side, and back panels. The bodice pattern is copied from the book and scaled (see my post here on how to scale book patterns) and I got lucky in that my measurements are fairly close to those of the pattern model, except for my waist measurement.
For the first mockup, I slashed the forebodies panel along where a waist dart would be and opened by 1 inch. I figured this would be adjusted with the mockup fitting but would give a good starting point for over the previously fitted kirtle. I also lowered the neckline on the forebodies and side front panels for the decorative panel on the kirtle which turned out wider than the original pattern.
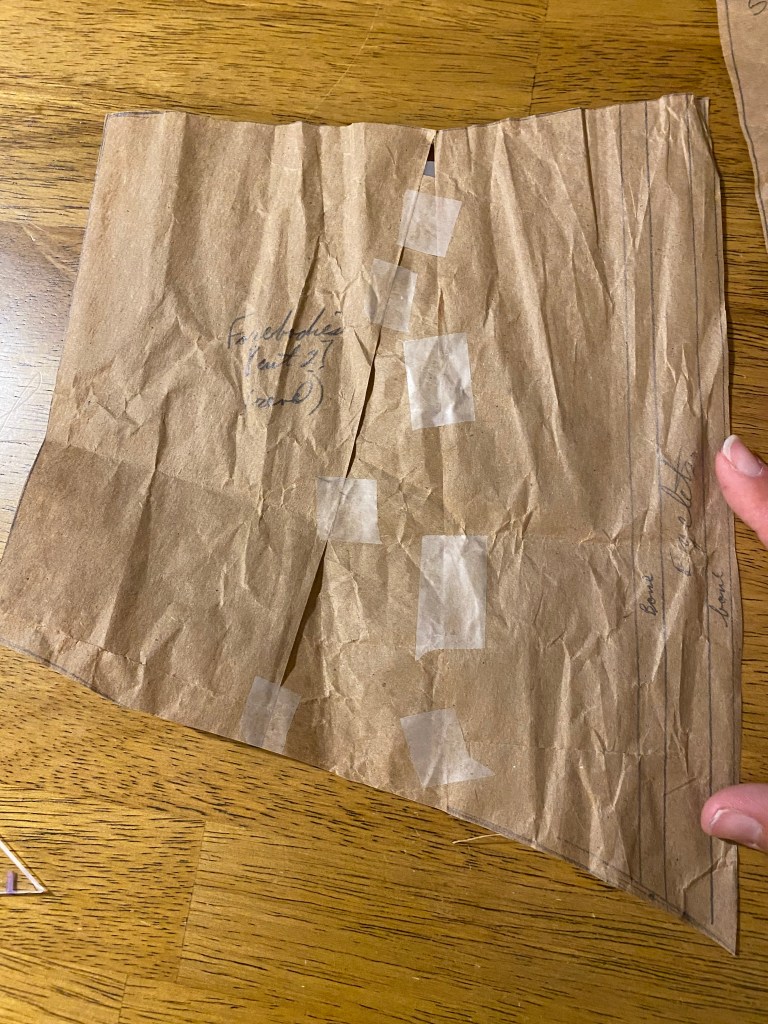
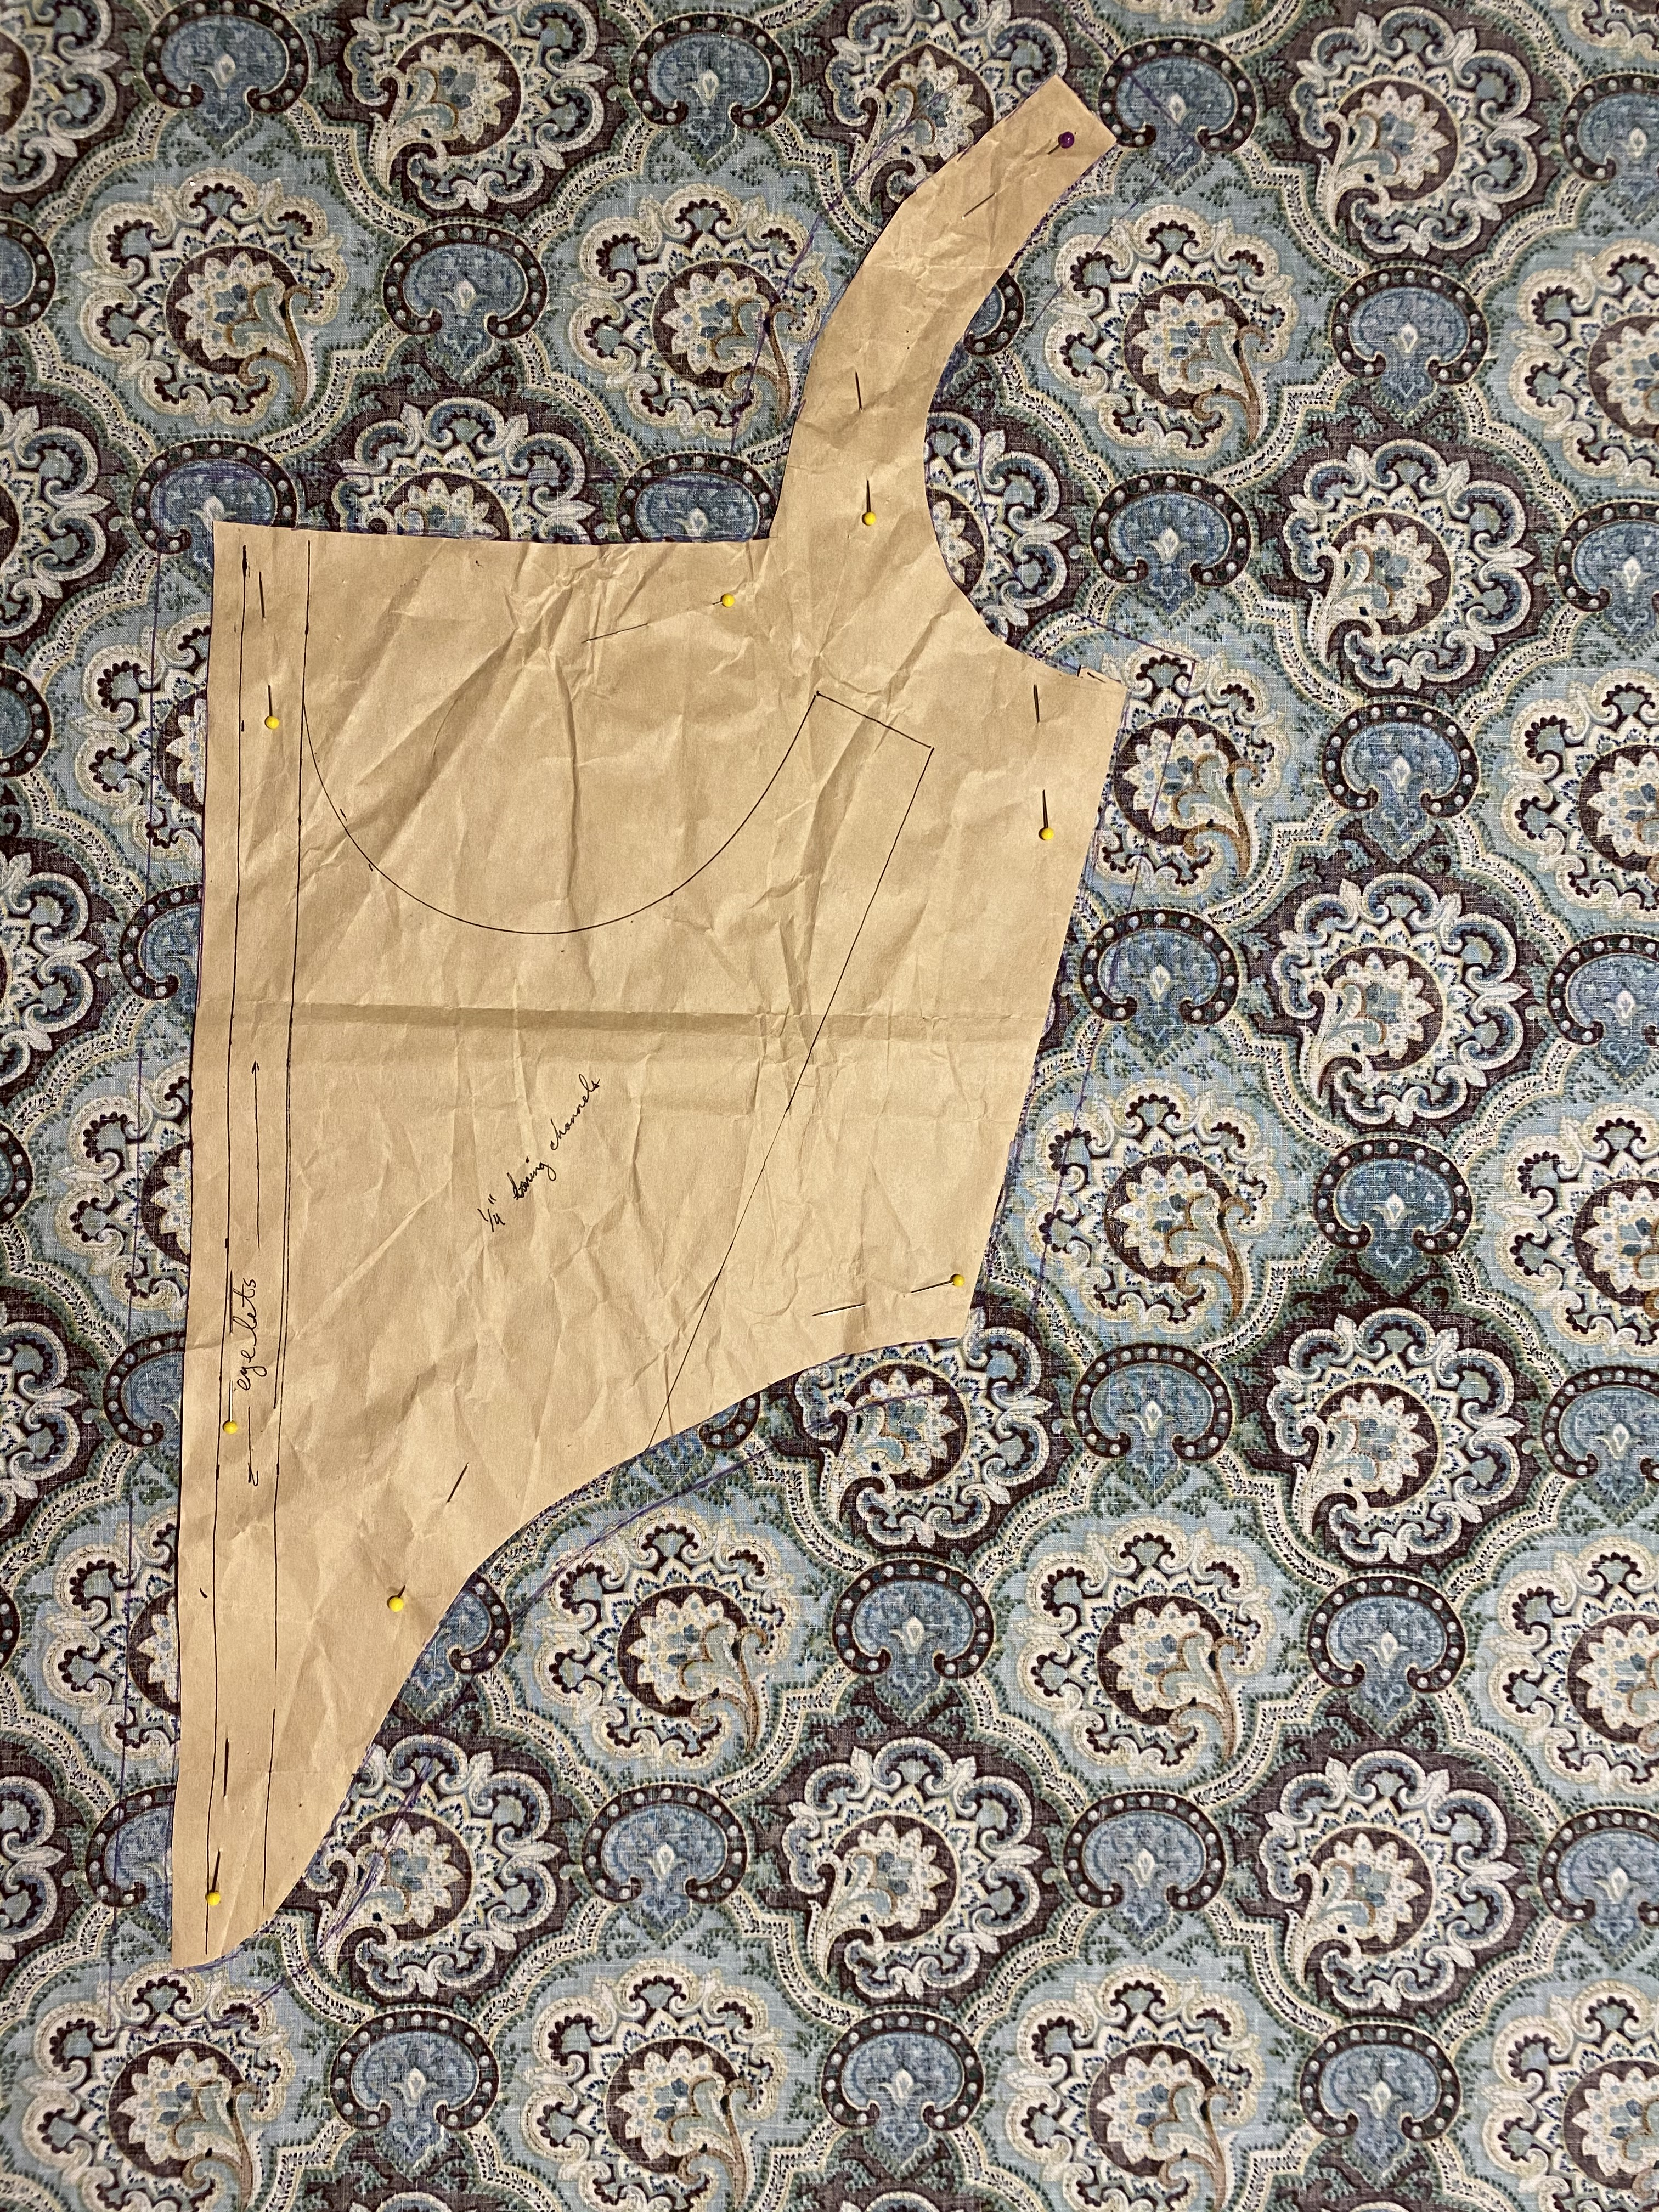
The forebodies panel with adjustments for my measurements. The forebodies will seam to the other bodice panels and lace at the center to close the gown. The lacing and forebodies are then hidden by the decorative plaquette over the top. NOTE: When cutting fabric, I’ll add 1″ at the center front to allow for the turnover for the boning channels.
The mockup actually when very well on the first attempt. There were only a couple adjustments I needed to make to the pattern, mostly related to contouring the opening to the waist, releasing the side seams a tad to open the armscye, and taking in at the shoulders. The most difficult part by far was the sleeves. Sleeves are the absolute devil and I went through 6 mockups of the sleeve caps to try and get the right shape that fits comfortably. To start, I could not seem to get the sleeve head to ease in without pleats or gathers while increasing the sleeve at the bicep to be unrestricted with a chemise layer underneath. I’m honestly still not happy with the sleeves but needed to move on.
For the skirt, there weren’t any fitting adjustments to make beyond reducing the length for my height. The model for the base pattern was about 6″ taller than me, so I opted to simply reduce the length of the skirt panels by 6″ and call it a day.
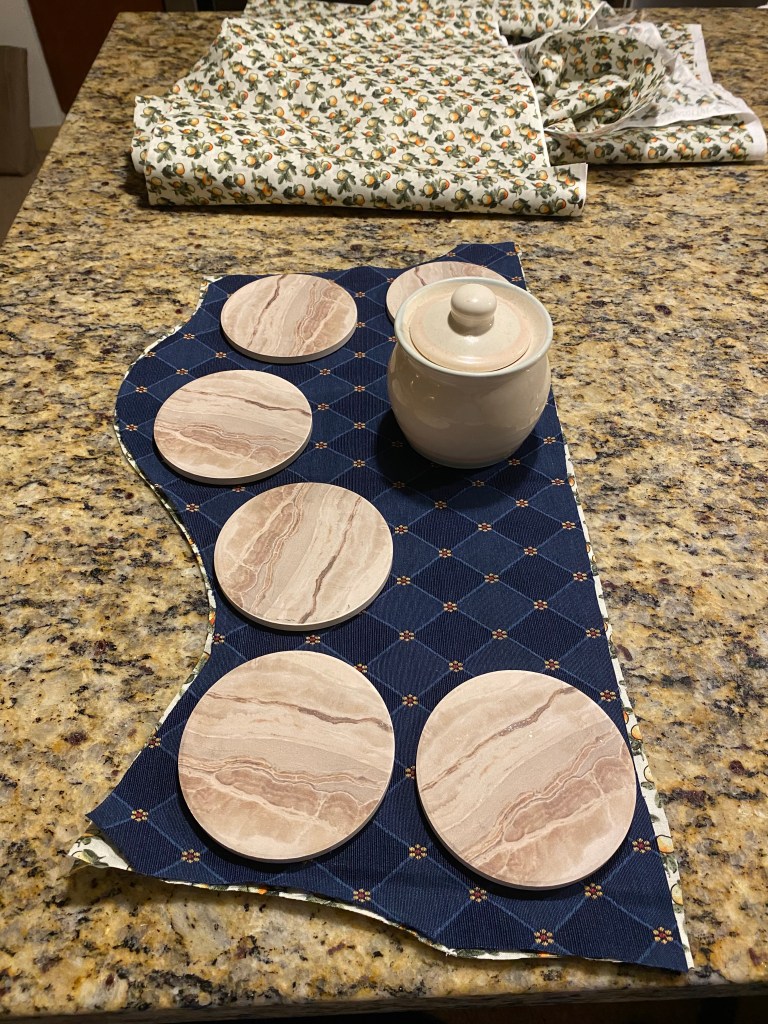
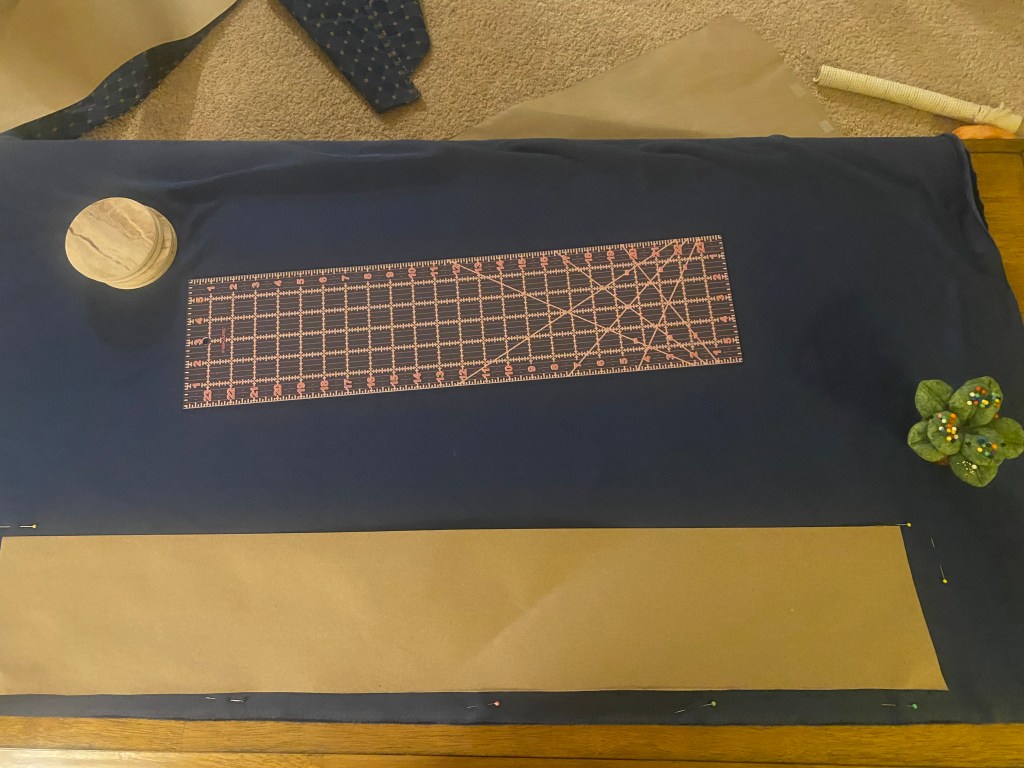
Final pattern in hand, I began the process of cutting out all the fabric. Here, things got a bit complicated. Now, The Tudor Tailor calls for 10 yards of material for making the gown (bodice, skirt, full sleeves, etc.). I meanwhile had 5 yards, but at 60″ width since it was a home decor fabric. In order to make it work, especially with a very geometric pattern to match, I got a bit creative. I start by laying all the skirt pieces out and using the match point at the waist on each seam for pattern matching. Right off the bat, I knew there was no way to have the skirts at their fullness of the original pattern with the amount of material available, even with the 6″ reduction in length for all pieces. To make it work, I adjust the skirt panels by:
The back skirt panel would only be the 60″ width of the material,
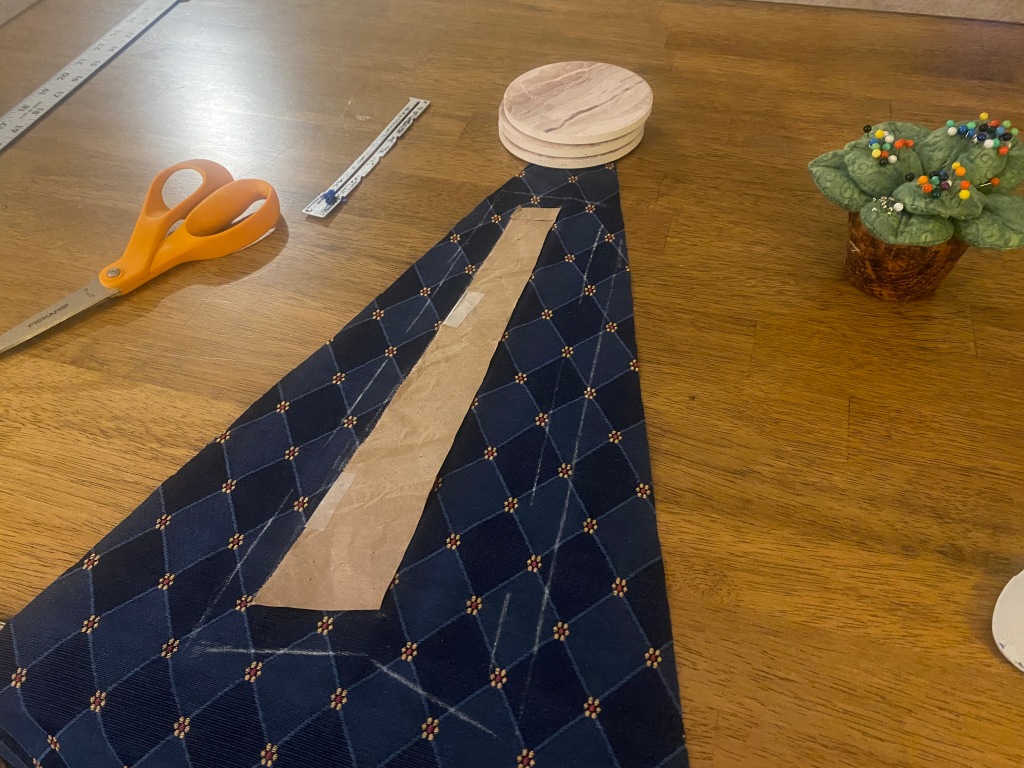
The side panels are slashed at three points and reduced with the side-back seam on the vertical of the fabric pattern (parallel with the selvage),
6″ width of the front panels would be supplemented by a 12″ strip of velvet and front-sides would not pattern match beyond the waist point match.
The slash and reduce method for the side panels is done by:
Marking three lines from the hem to waist as follows: one line parallel to the front-side seam, one line parallel with the side-back seam, and one line between the first two.
The lines are then cut from waist to hem, but not through the hem. I will often reinforce the scant paper left at the end of the slash with a bit of tape so it doesn’t tear through;
Pivot the slashed sections toward the front-side seam to close . . . . .
By reducing the volume of the side and front skirt panels, I give myself enough material to cut my bodice pattern pieces and part of the sleeves. The reduction of the side skirt panel at the waist line made me nervous that it would affect the historical shape of the skirt, but I actually really liked the reduced bulk at the hips. I’ll point this out in photos toward the end of this series.
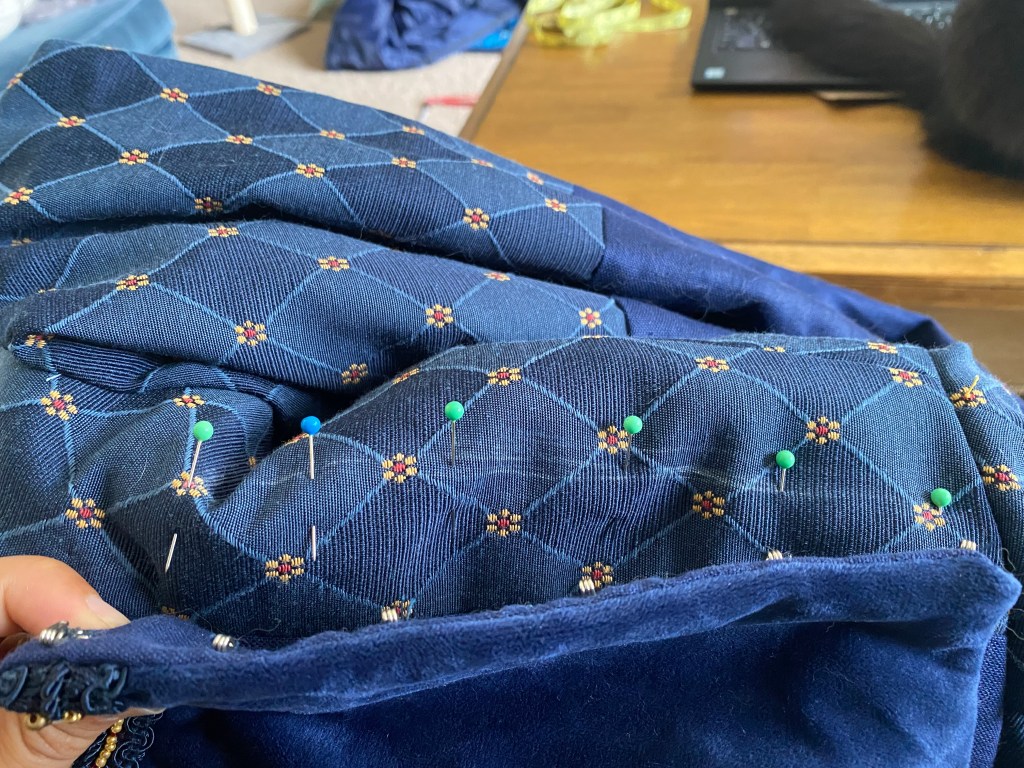
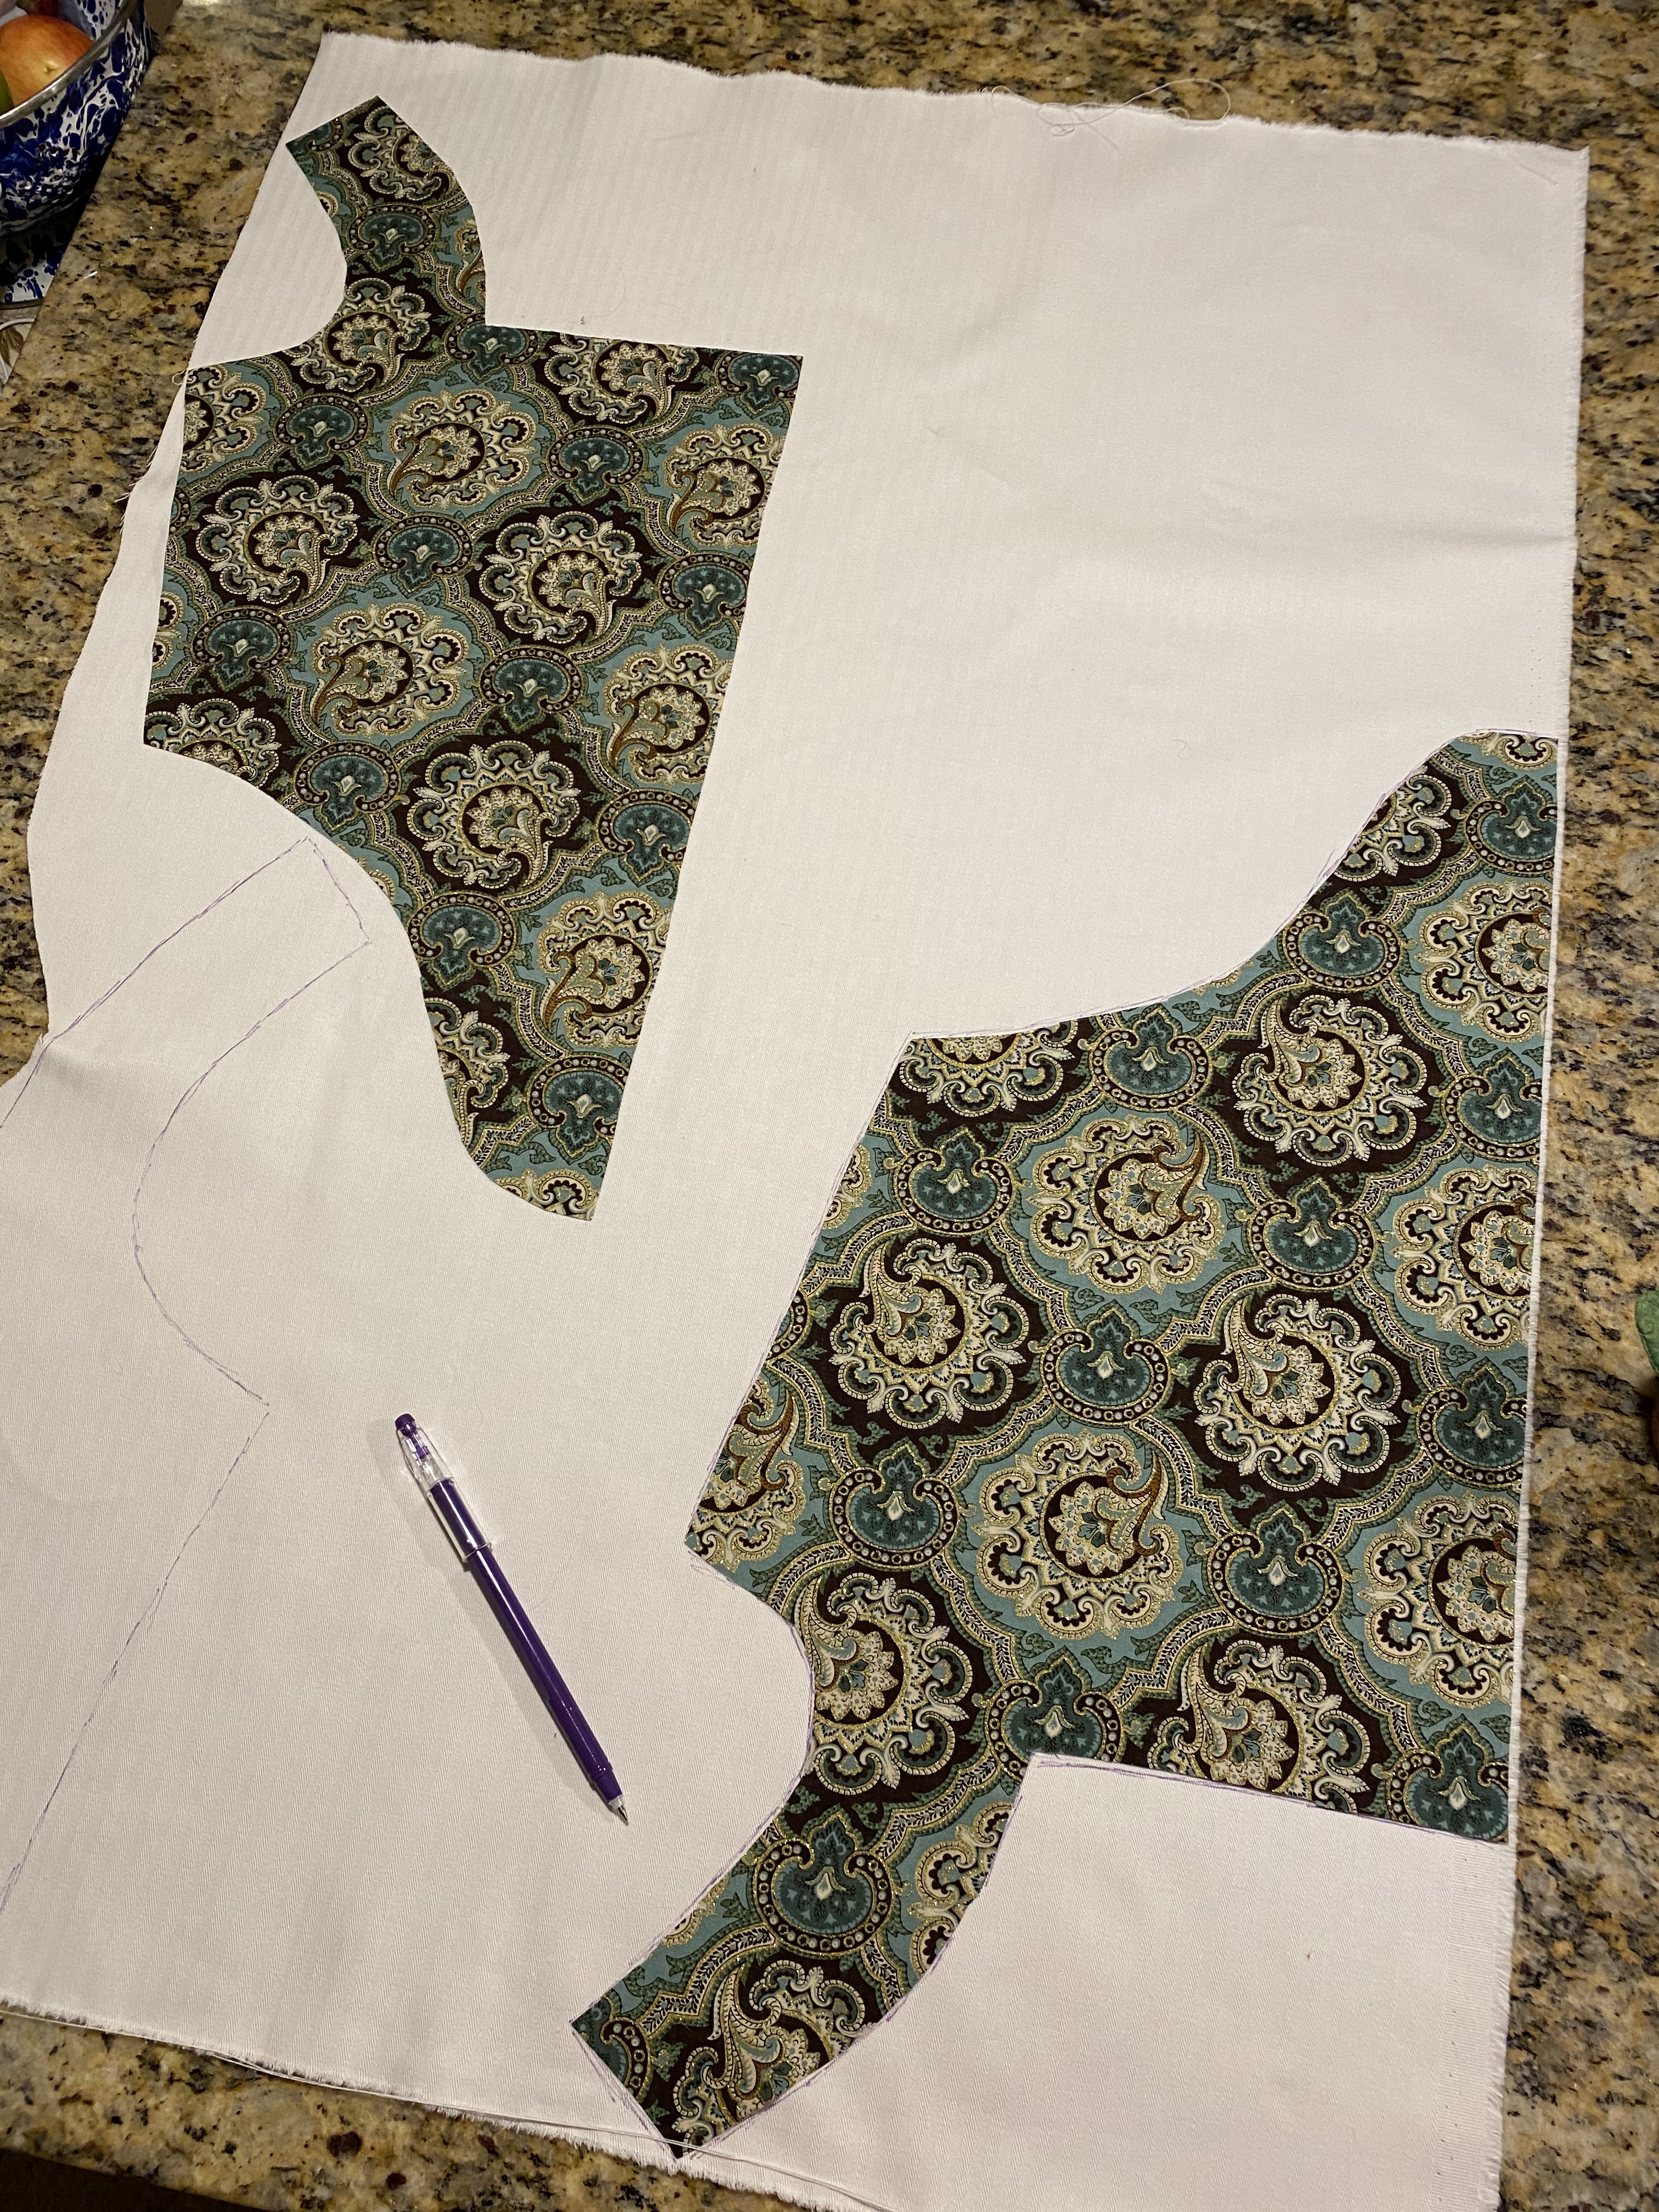
In cutting the bodice panels, pattern matching was much more critical than in the skirt. The matching process starts with the center back panel that I opt to eliminate the center back seam entirely. I mark the panel on the fabric, using the yellow and red dots at the center of the diamond pattern as my center backline. I then mark a 1/2″ seam allowance line around the entire panel.
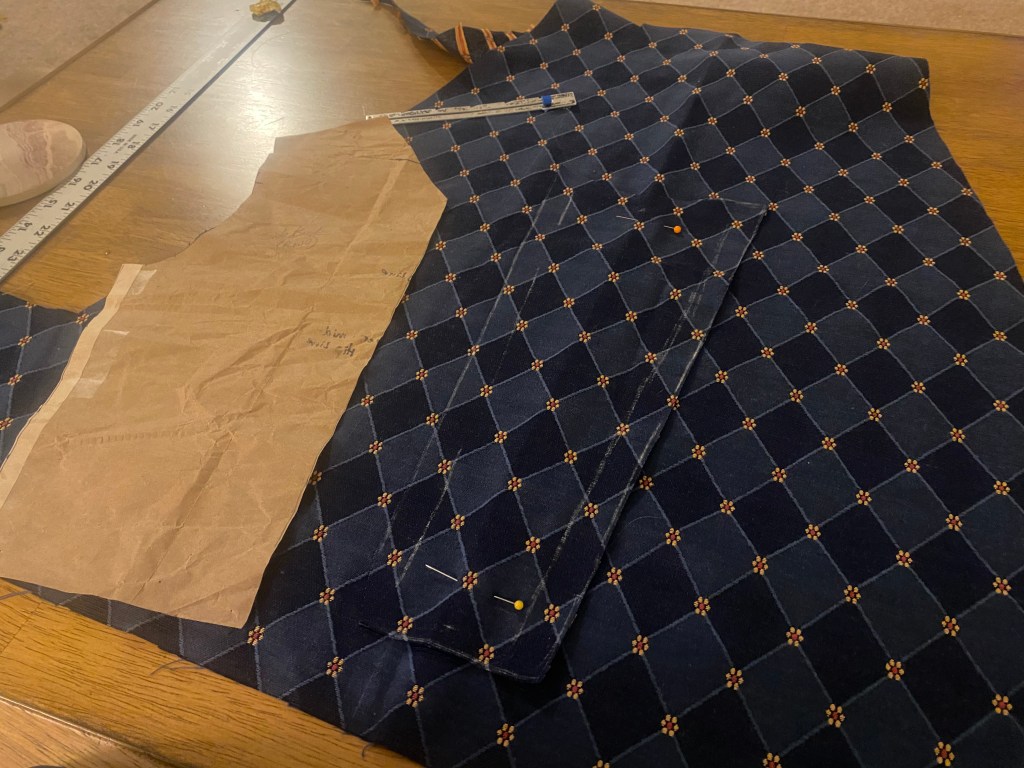
For the side back panel, I generally find an area of fabric large enough for the piece, with wiggle room for pattern matching and seam allowance. I then pin the center back panel to the fabric at the farthest edge and lay the side back paper pattern along the seam line. The paper is pinned in place here and marked with chalk, adding seam allowances. This gives me a perfect pattern match when stitched along the seam line precisely. Though, it was NOT easy with the limited material I had. I then had to repeat the process with even less fabric for the side front panels. This pattern matching and optimizing the fabric left for the bodice took me entire evenings. Plural.
The first try at pattern matching would’ve been easy to cut….until I realized that cutting here would leave me with nothing for the sleeves.
Subsequent rotating and shifting got to this point of pattern matching on the limited scraps for the side back panels.
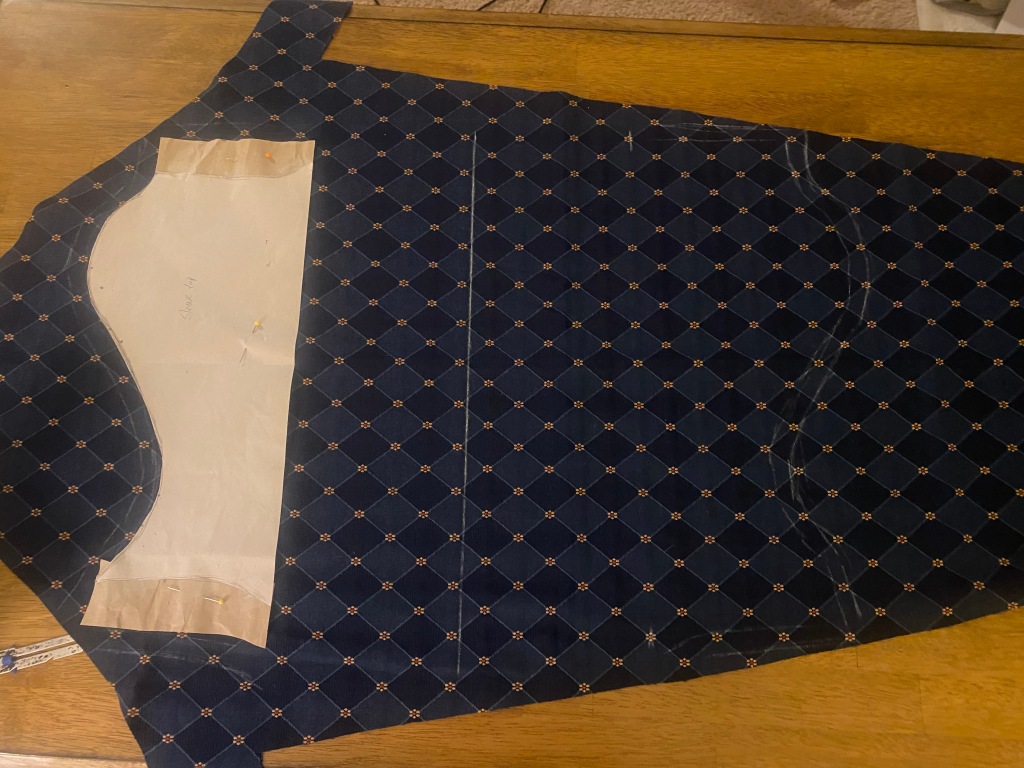
And of course, the sleeves again are the absolute devil. I knew there would be absolutely no way to have enough material to fully make the sleeves in the geometric pattern and after noodling on it a bit, it didn’t seem necessary to do so. Since the sleeves would be the full turnback style, most of the “outer” fabric would be tucked behind the contrasting lining. So I took the remaining large section of geometric fabric I had and cut the sleeves to I had the sleeve cap and the longest length possible. It ended up that the length ended right at the point where the sleeve would start to curve outward, so all for the best. The remaining outer sleeve was then cut from the navy blue linen that was used for the kirtle construction. I also opted to use this linen for the forebodies panels since they would be covered by the plaquette. I also cut lining for the bodice from a satin I had on hand.
The sleeve “tops” are marked on the fabric as large as possible. The addition to the original pattern at the sleeve seam is visible in the different colored paper. I had to add quite a bit of width to fit my biceps comfortably. In looking back, I should’ve slashed and opened the pattern rather than adding volume at the seam allowance, but I was also having trouble with the armscye being too small.
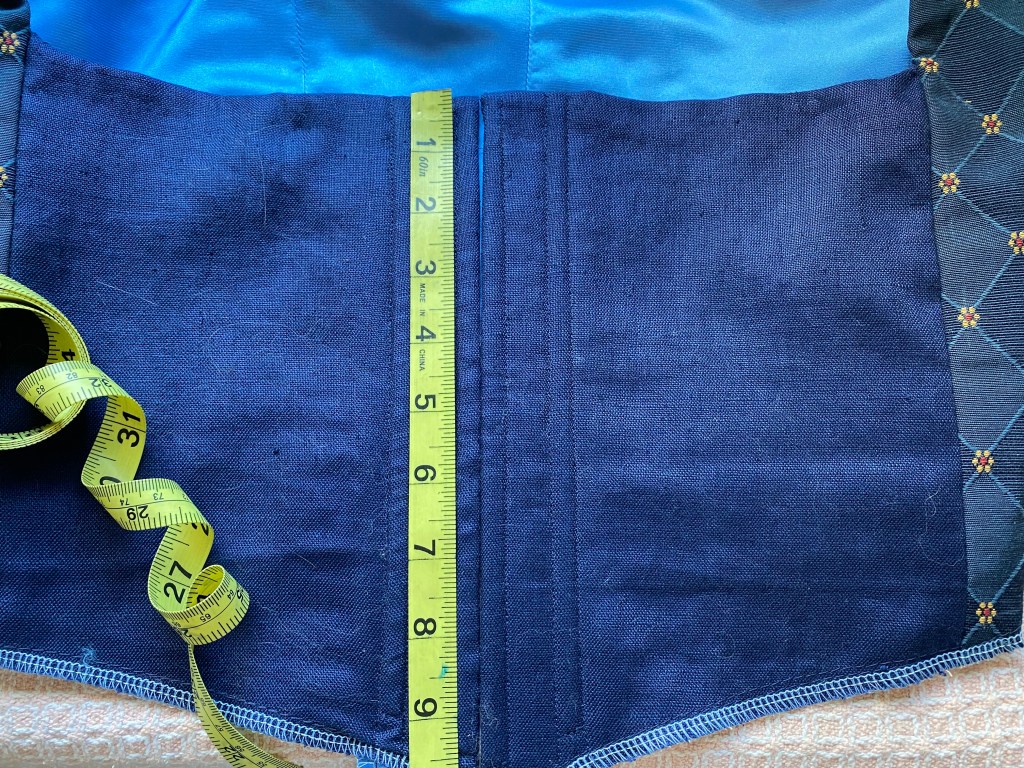
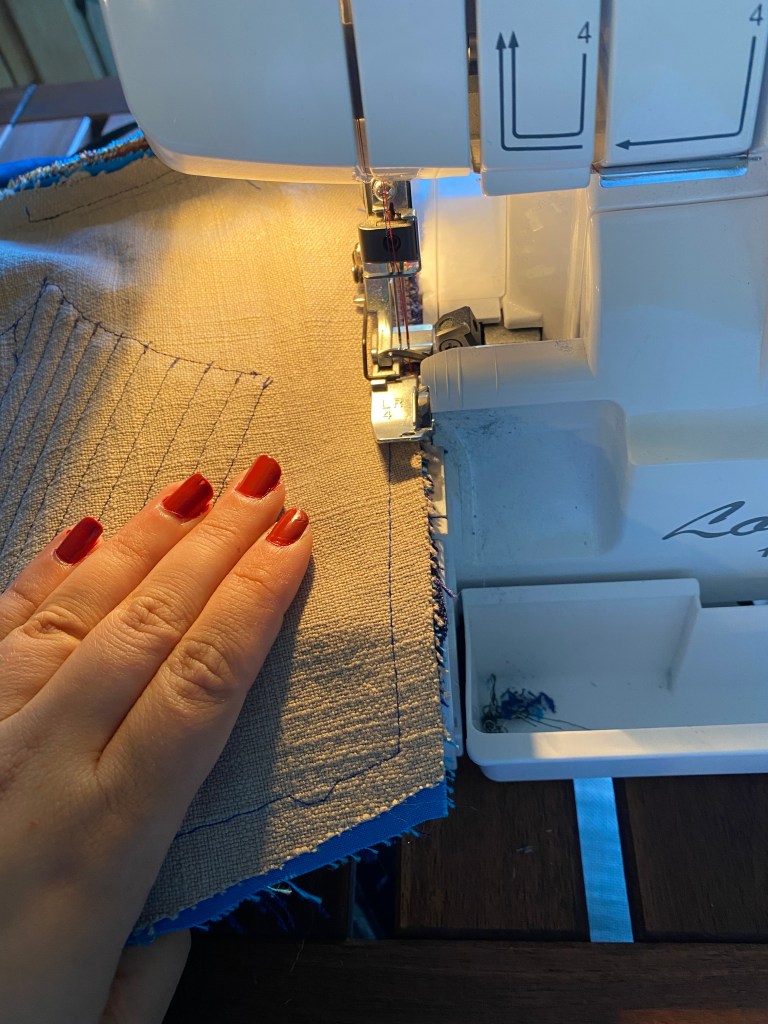
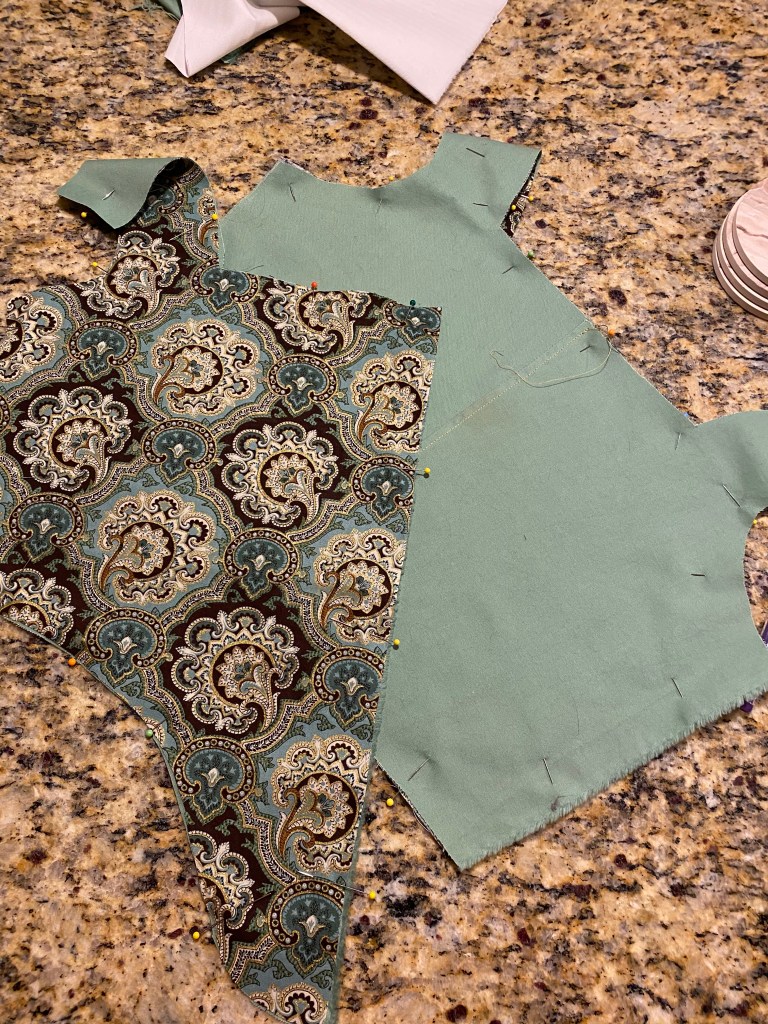
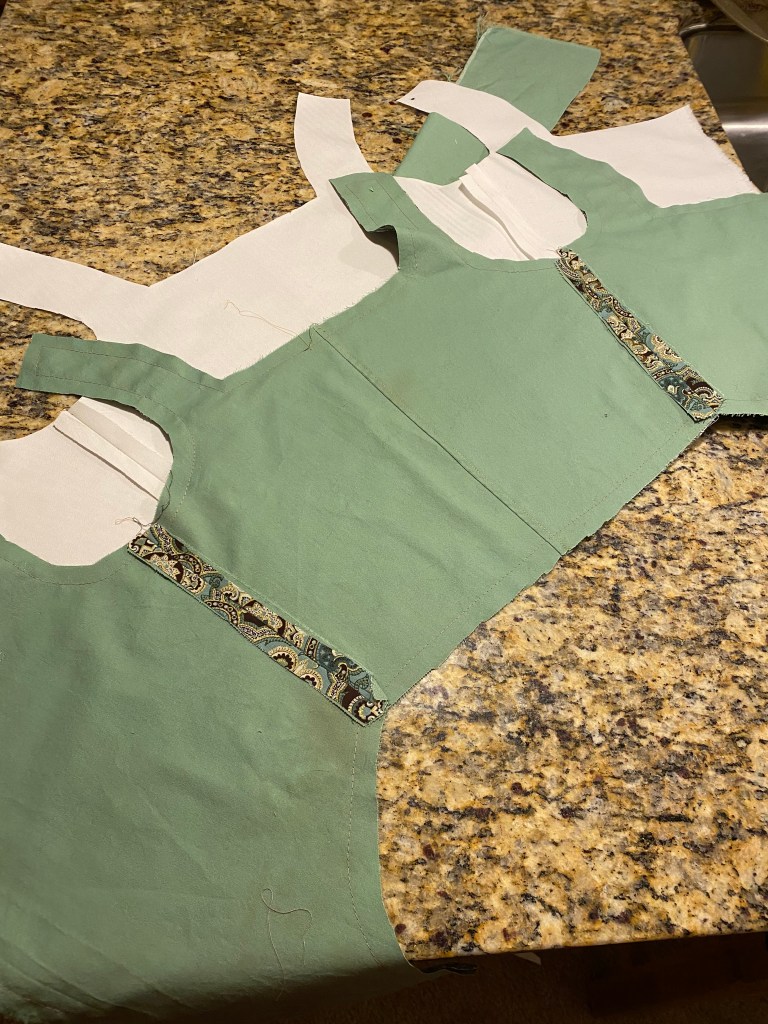
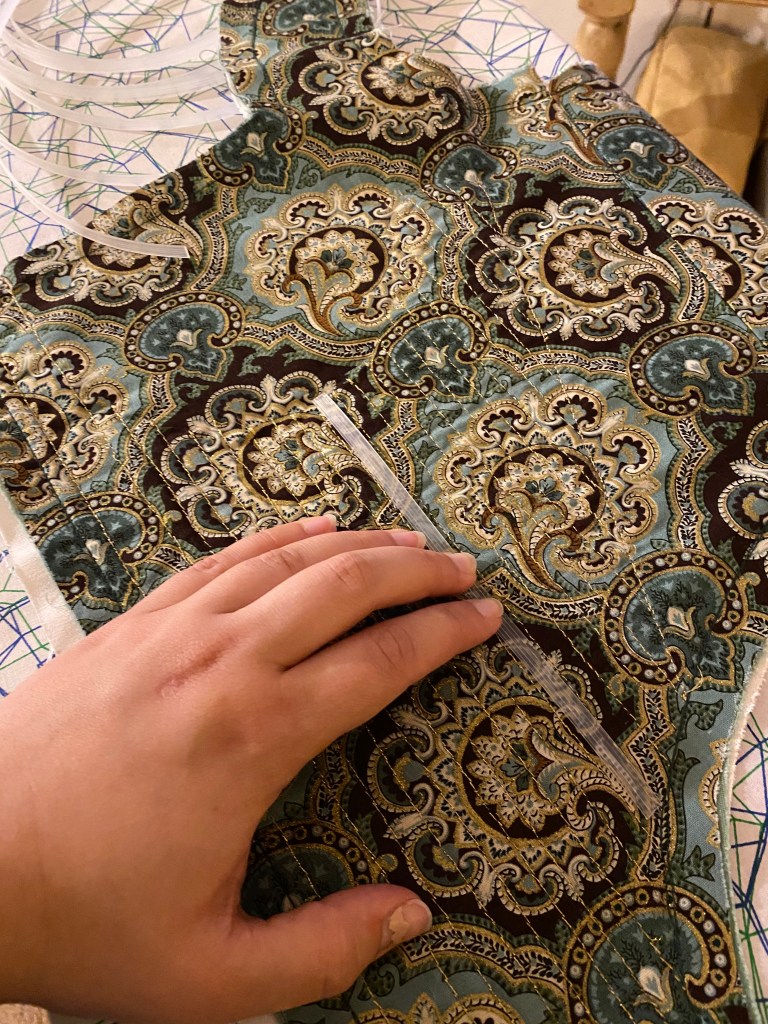
With everything cut (finally), I could begin the construction process. I start by flatlining all the panels using a basting stitch at 1/4″ from the edge and then finishing the edges on the serger. The panels are then carefully stitched together, checking the pattern match as I pin so that the hard work of pattern matching when I cut is not wasted. I stitched the panels from the center back to the center front. All in one piece, I can do a final fitting for the shoulder seams and move on to the eyelet closure. The 1″ excess at the center front is folded back, ironed, and pinned in place before stitching the boning channels. I am using 1/4″ synthetic whalebone (plastic) boning and thus stitch the first channel 3/8″ from the center front, move over 1/2″ for the eyelets, and then another 3/8″ for the second channel.
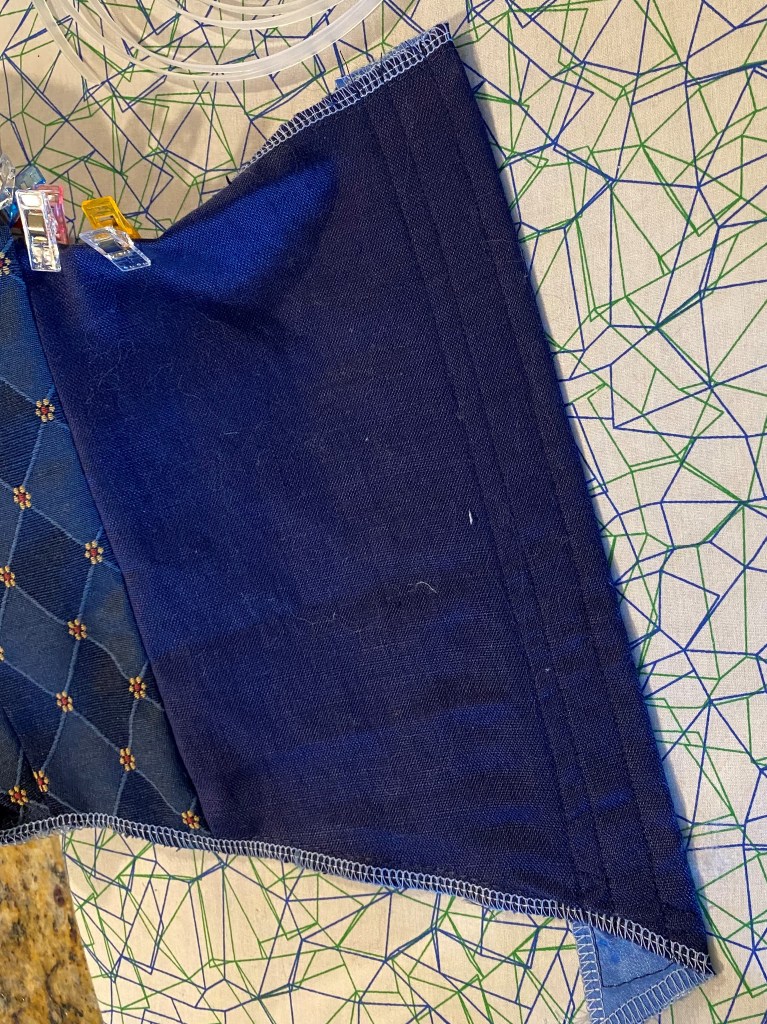
The first boning channel is stitched 3/8″ from the center front, then shift 1/2″ over for the second channel to allow for the eyelets.
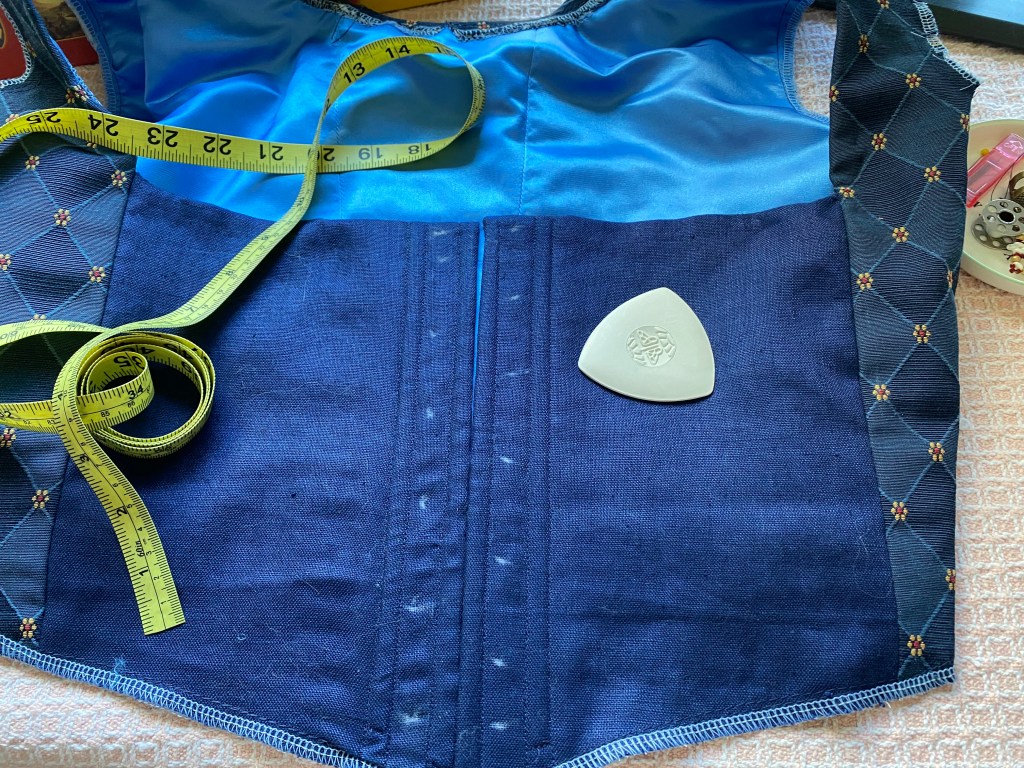
Both channels are stitched and ready for boning.
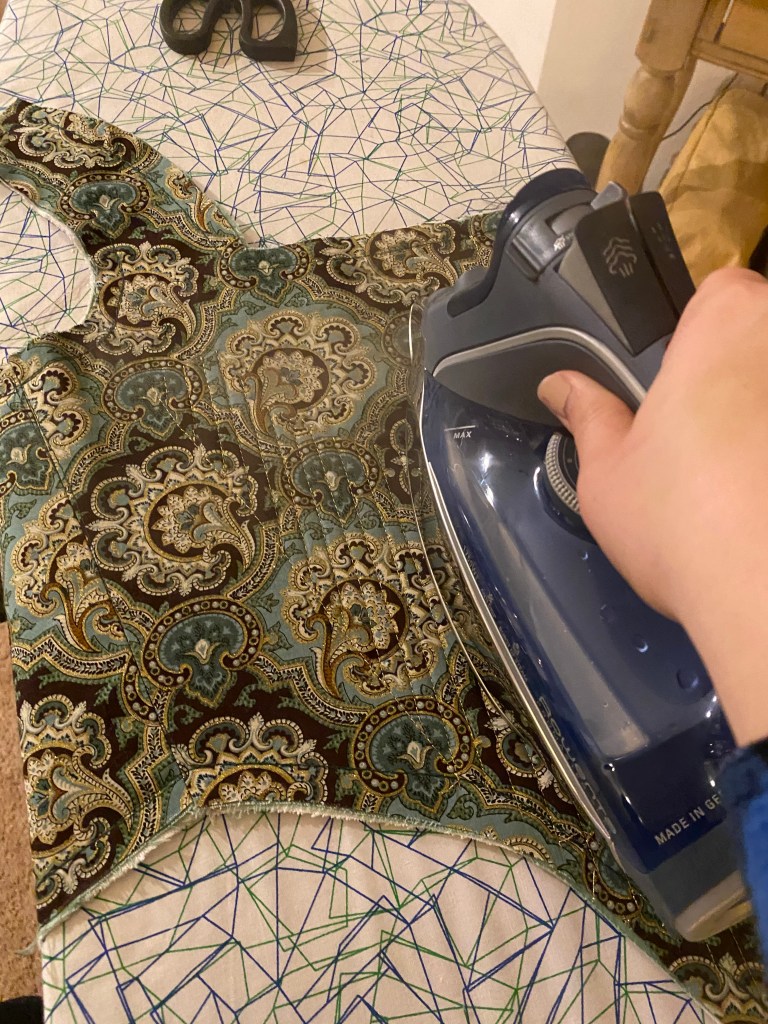
While using the iron to flatten the boning pieces, I also turn over the neckline seam allowance, iron, and clip to be sewn down by hand with simple whip stitches.
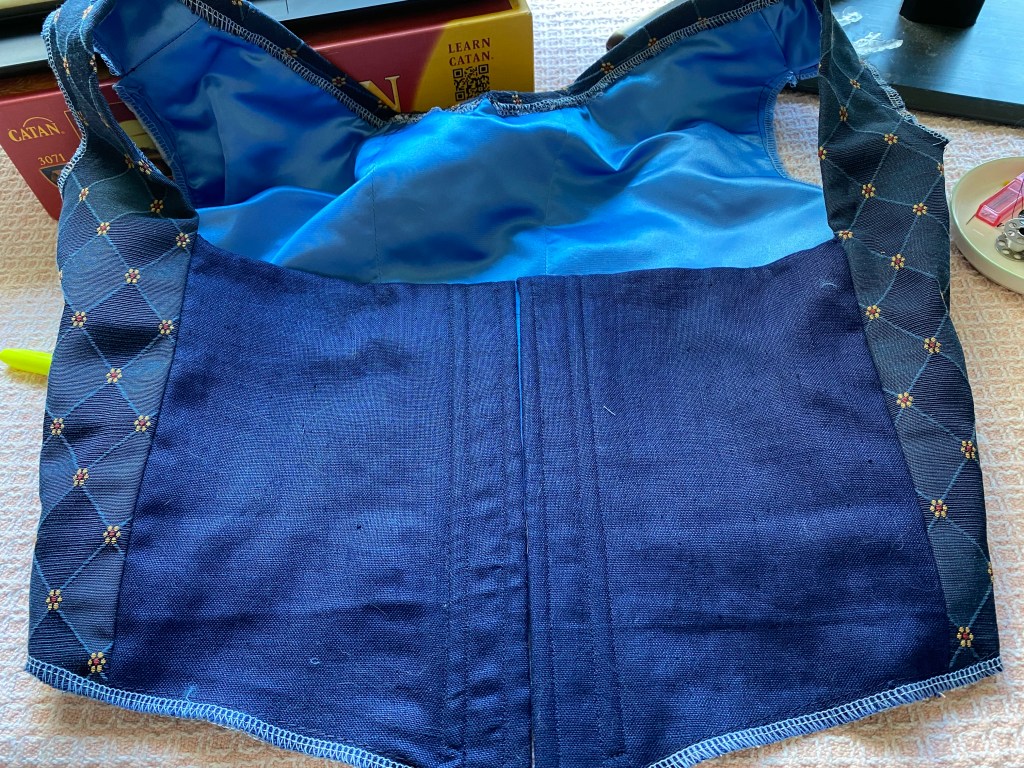
Here is the bodice with finished neckline and boning added. The satin lining is also visible.
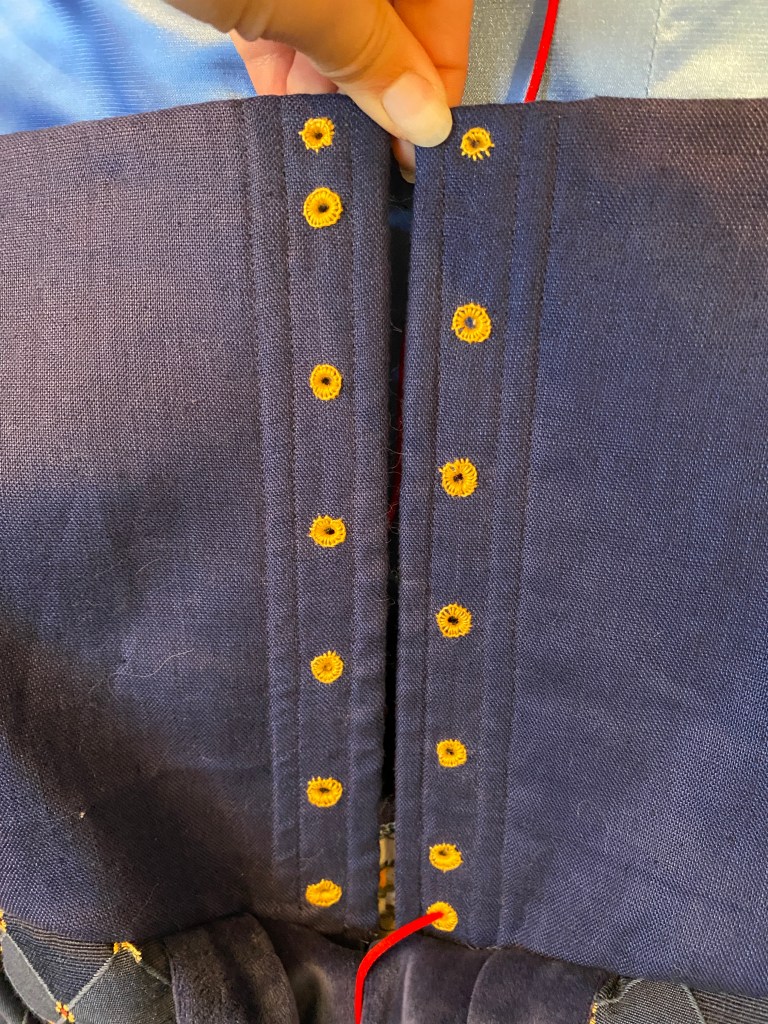
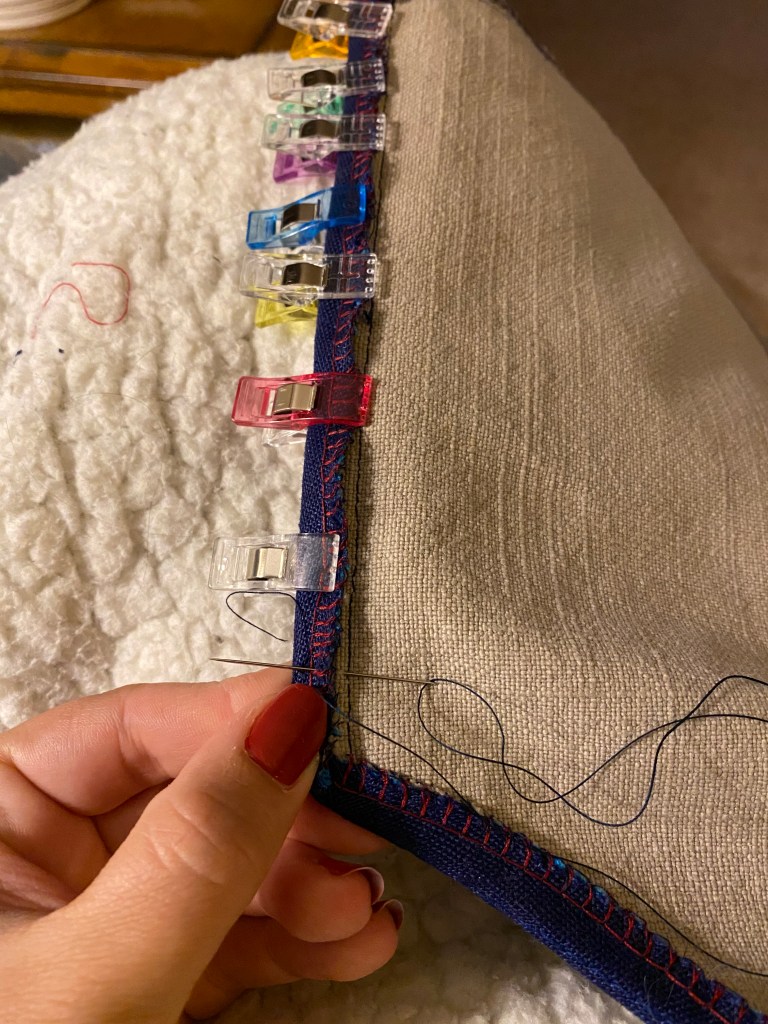
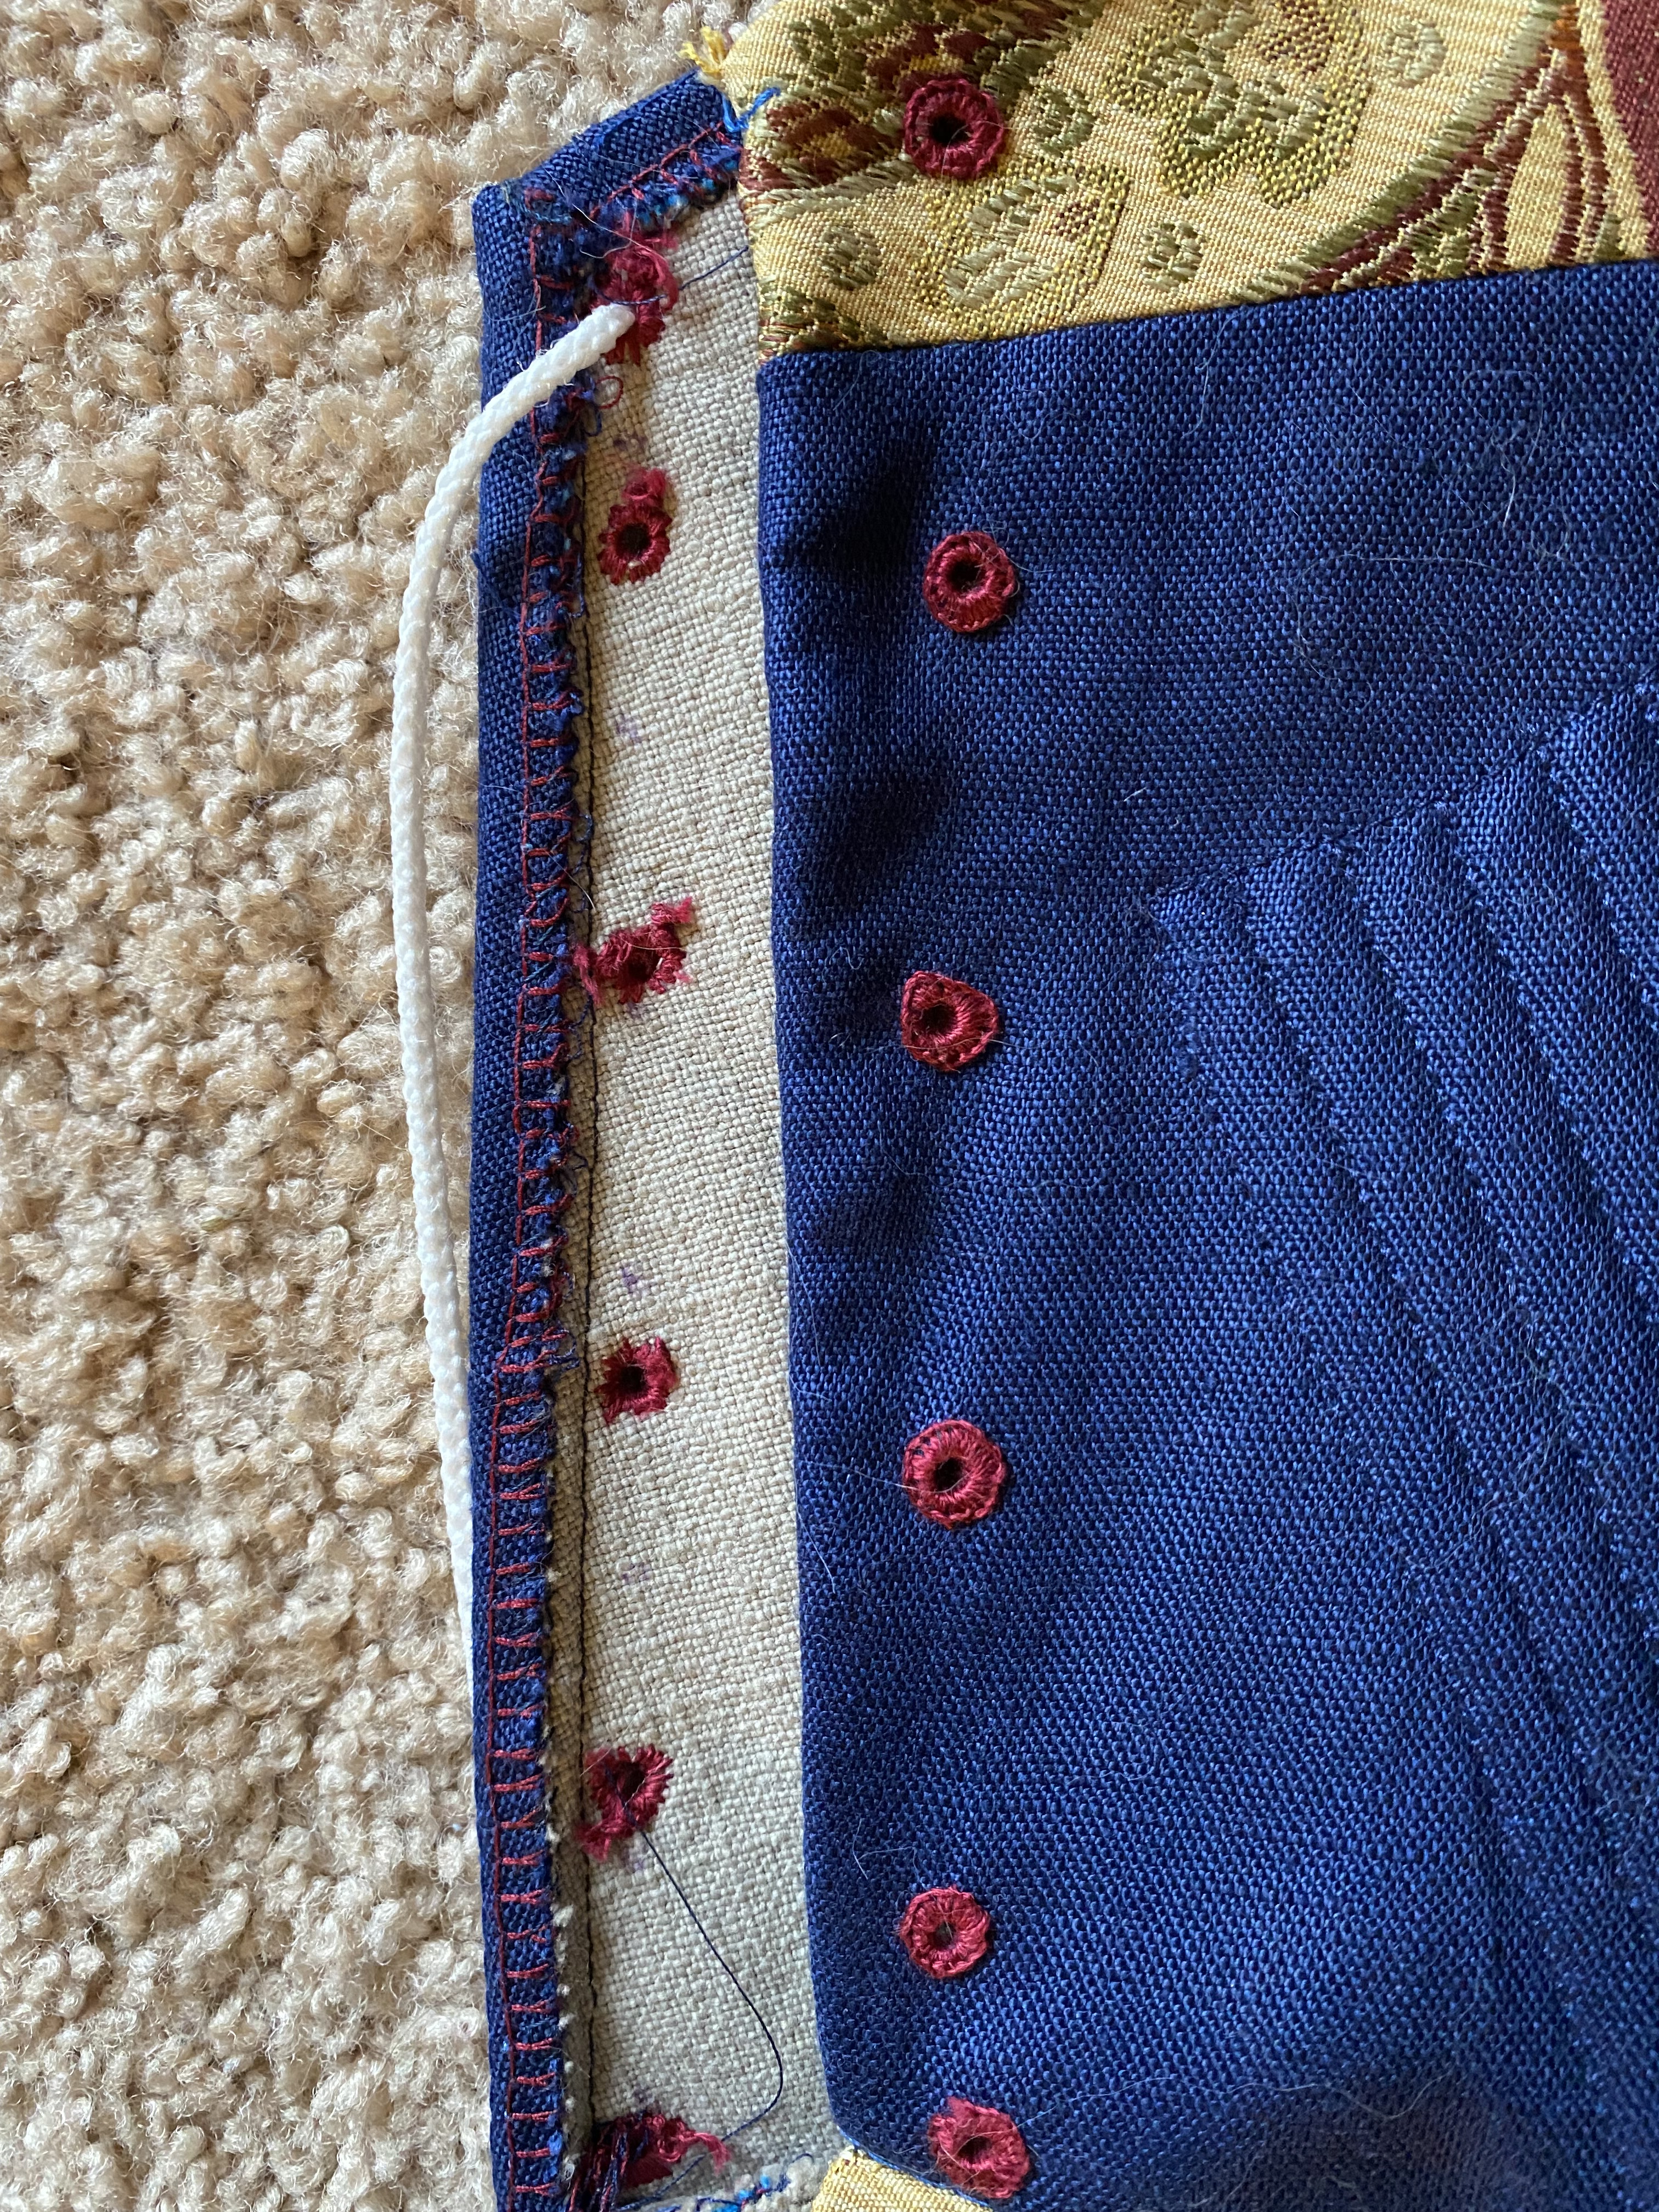
To make spiral lacing, the eyelet channel is measured and ….
eyelet locations are marked based on an offset pattern.
Completed embroidered eyelets
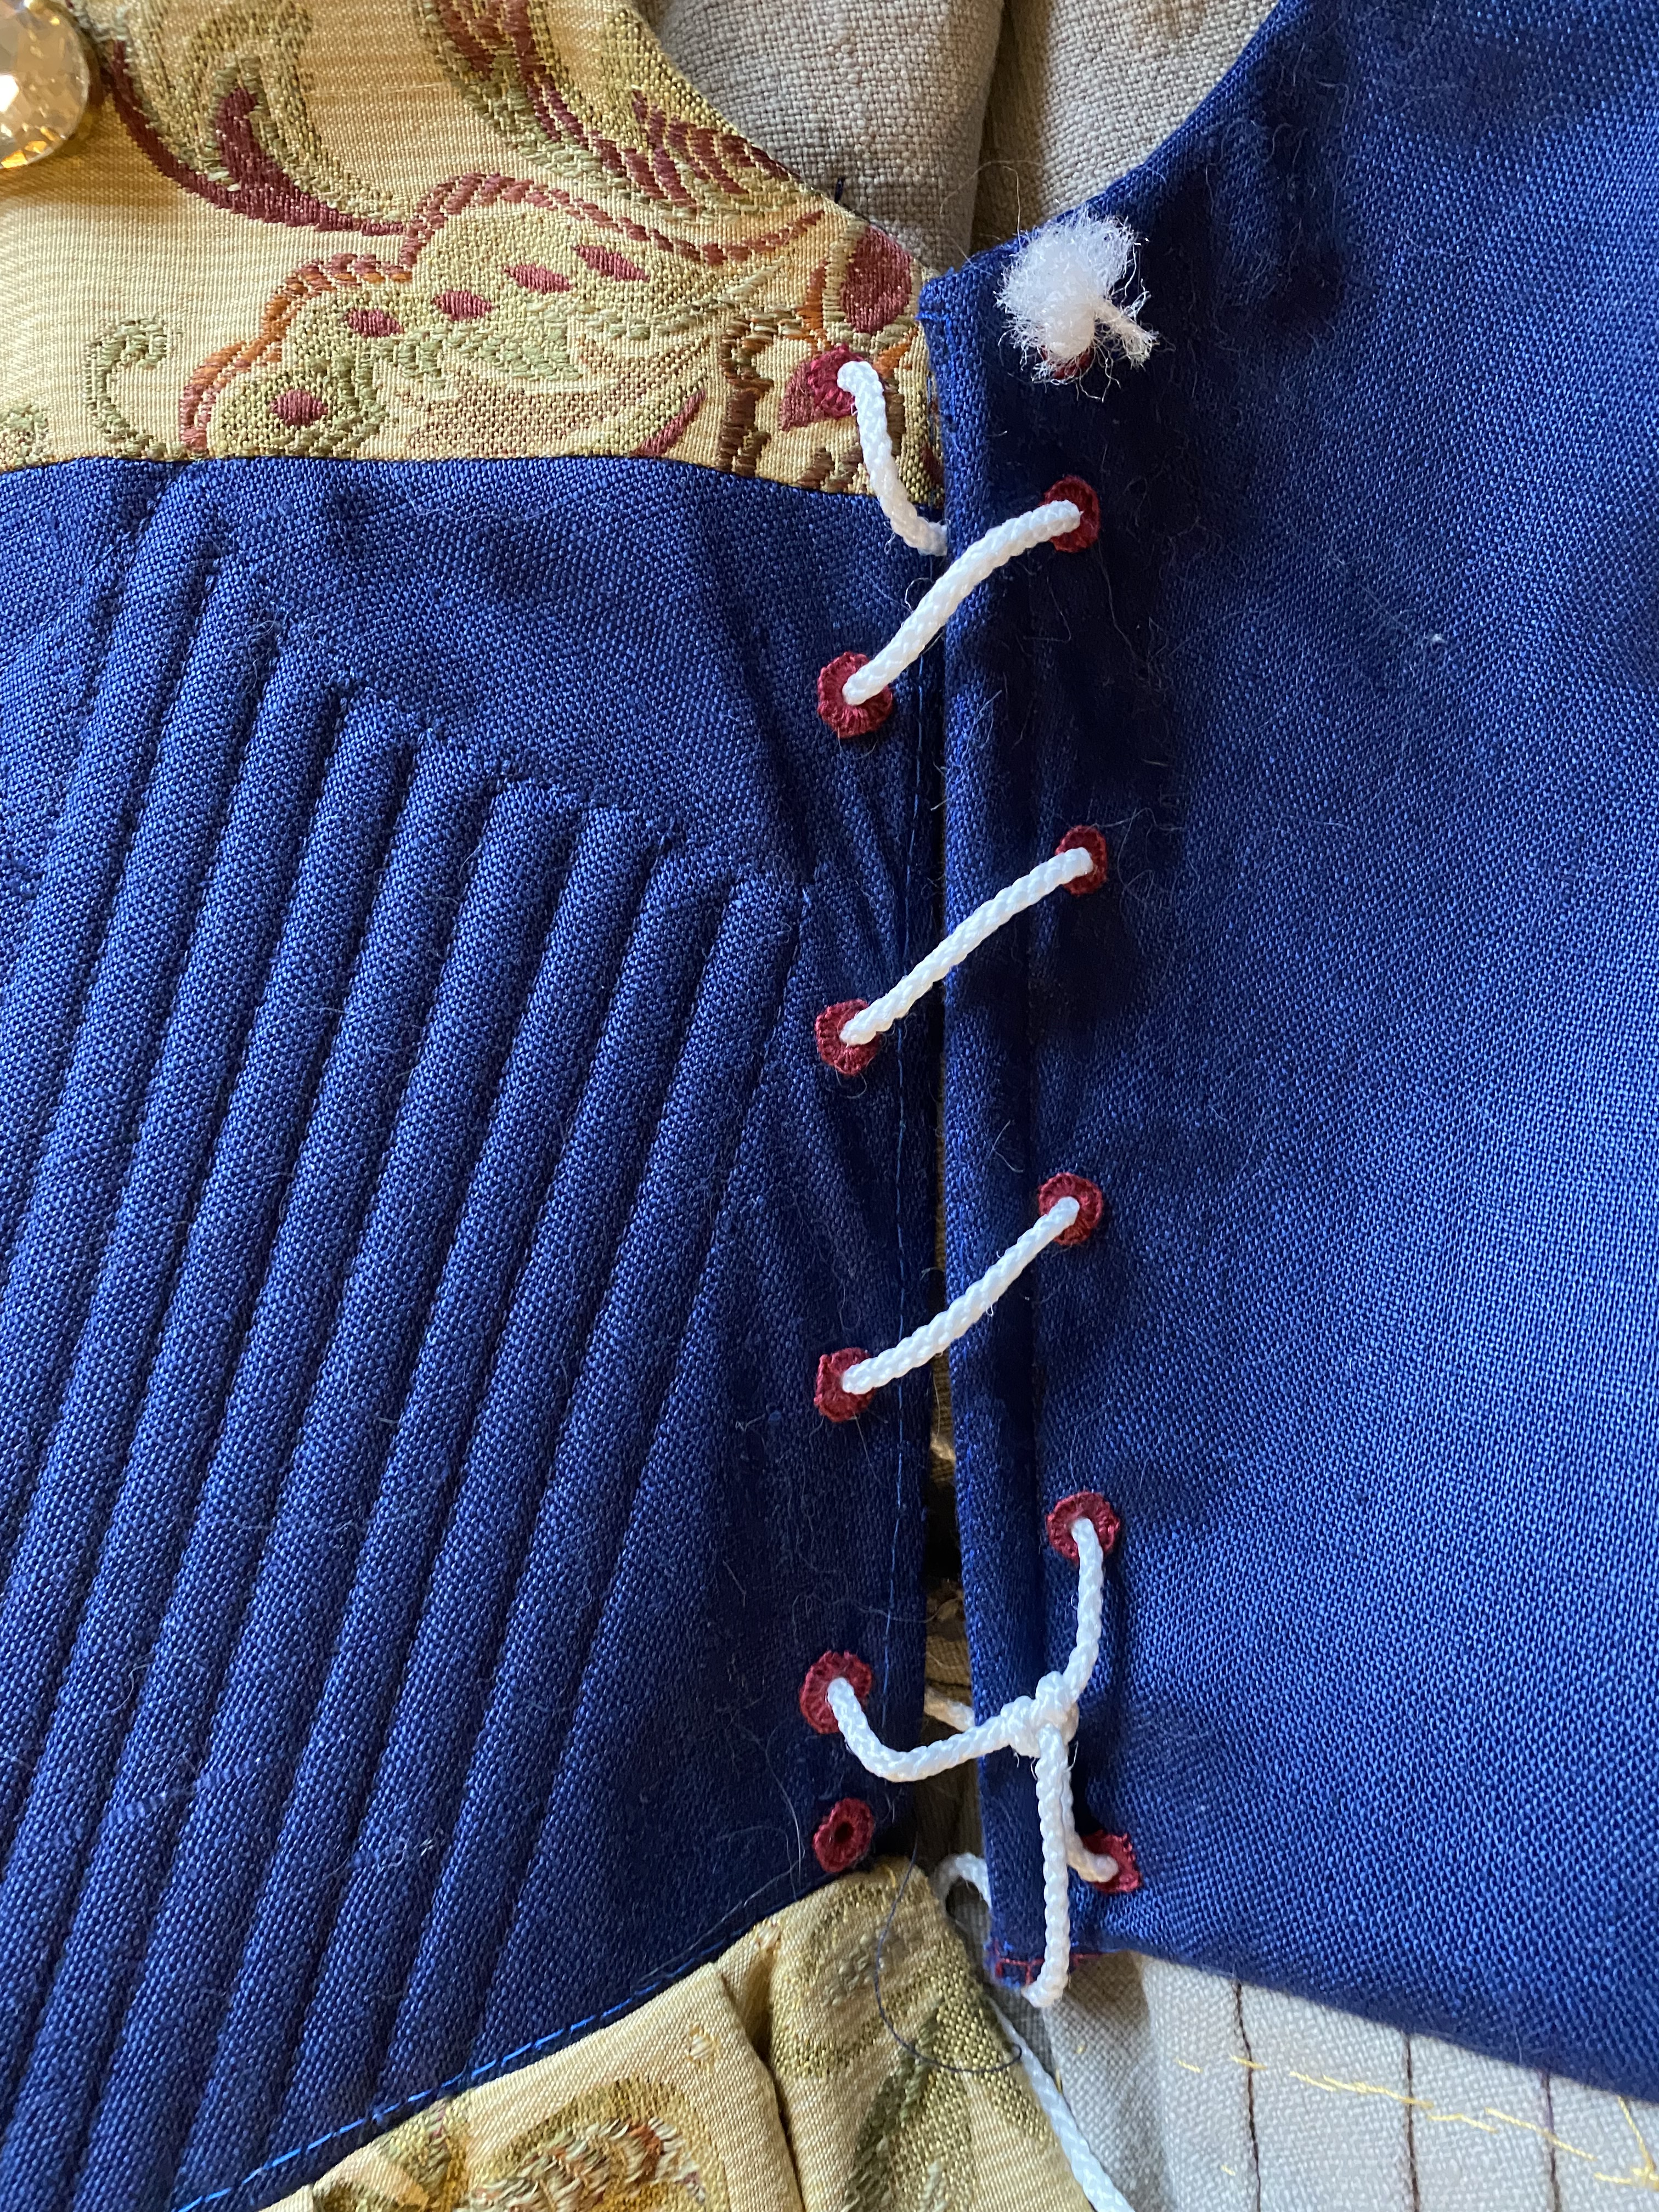
Addition of lacing
Sleeves
I used the top of sleeve cut pieces to also cut the lining from cotton and make a bottom of sleeve pattern for the remaining length. The bottom of the sleeve is cut from both the same blue linen as the forebodies and silk velvet. Though the linen is technically the outer layer and the silk is the lining, the sleeves will be folded back with the wrist at the elbow, thus hiding the linen and exposing the lush velvet. The velvet section is cut 1″ longer at the hem so that the velvet will fold over at the final hem rather than the seam being exposed.
Cutting the lining for the top of the sleeves pieces.
The bottom of the sleeve pieces is in linen and silk velvet. The linen fabric was not wide enough to fit the full pattern and had to be cut into two pieces, then stitched together. The extra 1″ of velvet length at the hem is visible in comparison to the lining. This allows the seam to be hidden as the velvet will fold over before the hem.
The linings pieces and outer pieces are stitched together, tops to bottoms, then individually stitched at the underarm seams. Once all four sleeve tubes are stitched, the lining and outer layers are stitched together at the wrist hem and turned out to form the sleeve.
The outer sleeve top and bottom are stitched together, prior to a good pressing.
Next came the agonizing task of setting the sleeves into the armscye. The armscye is prepped by a quick stay stitch (basted stitch length) around the armscye. The sleeve itself has two lines of gathering stitches at 1/4″ and 1/2″ from the edge. The bobbin end of the gather stitches is pulled to gently gather the sleeve cap to help with easing the sleeve into the armscye.
Two parallel ease stitch lines…..
…..slightly gathered at the sleeve cap…..
….to create an evenly gathered curve to set into the armscye.
The eased sleeve is pinned into the armscye using the markings from the original pattern for orientation. I hand-stitched the sleeves in place with small backstitches because I worried that forcing it through the machine would create puckers and tucks. Hand stitching takes longer but comes with a lot more control. The lining is then turned inward and also handstitched down at the armscye, encasing the finished sleeve seam.
The Skirt
The skirt panels were cut while preparing the bodice, but lining pieces also needed to be cut as well as the supplemental velvet. The supplemental velvet is cut to serve as both the 6″ reduction from the front panel as well as a lining. I am cutting a stip 13″ wide to allow for 1/2″ seam allowances.
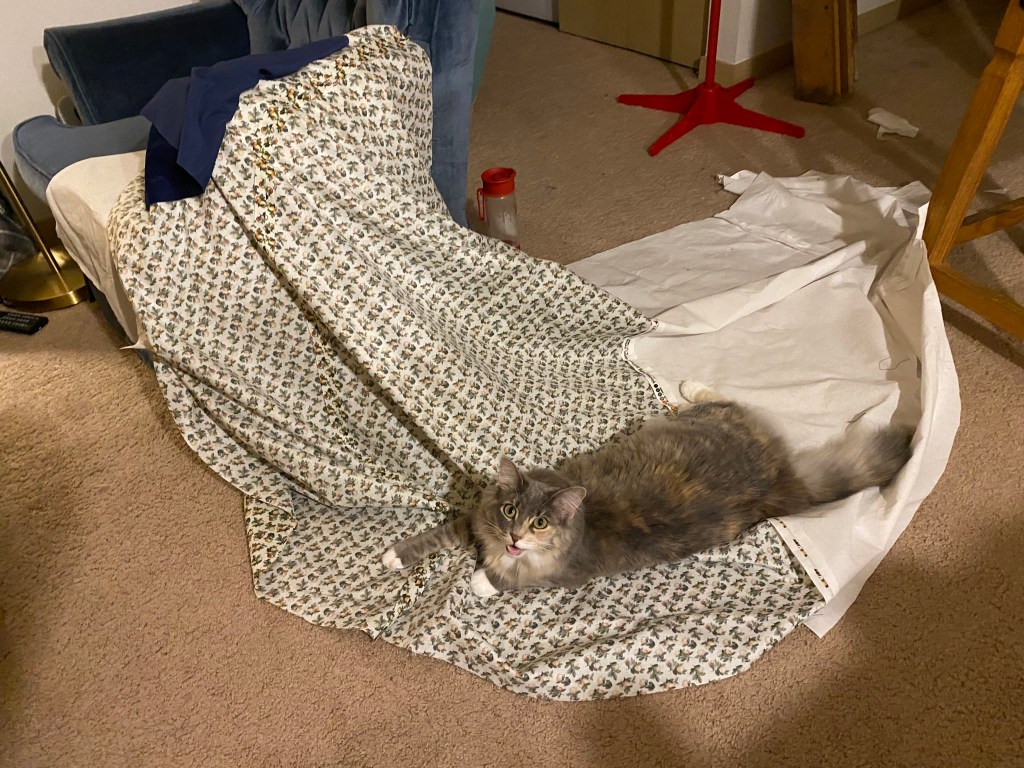
I am adding a lining for the skirt primarily because the home decor fabric has an odd back where all the threads from the red and gold stitching are exposed. Knowing my clumsy self, I would end up hooking those threads all the time if they weren’t encased. The lining is cut using the previously cut outer fabric pieces as pattern templates. I used a mixture of bulk white cotton (Ikea) and clearance patterned cotton (Hobby Lobby). In hindsight, I wished I had used only the patterned cotton to be consistent since any time the bright white is seen, it is quite a shock next to the deep, rich blues.
The lining pieces are stitched together and seams pressed open.
The white and patterned cotton lining (plus a demanding kitty).
As I was prepping the skirt panels to be stitched together, I realized I almost missed a golden opportunity: POCKETS. I quickly found a standard pocket pattern from another project and cut four pocket panels from the blue linen. I added these to the side-front seam edges of both the side and front panels and THEN stitched the full seams for the front, side, back, and front supplement pieces. Lastly, the velvet front panels are stitched to the front lining panels to create a full circle of the outer fabric and lining. The wrong sides are turned inward with both the hem and waist seams open. The waist seam for the outer and lining layers is pinned together, basted, and finished on the serger.
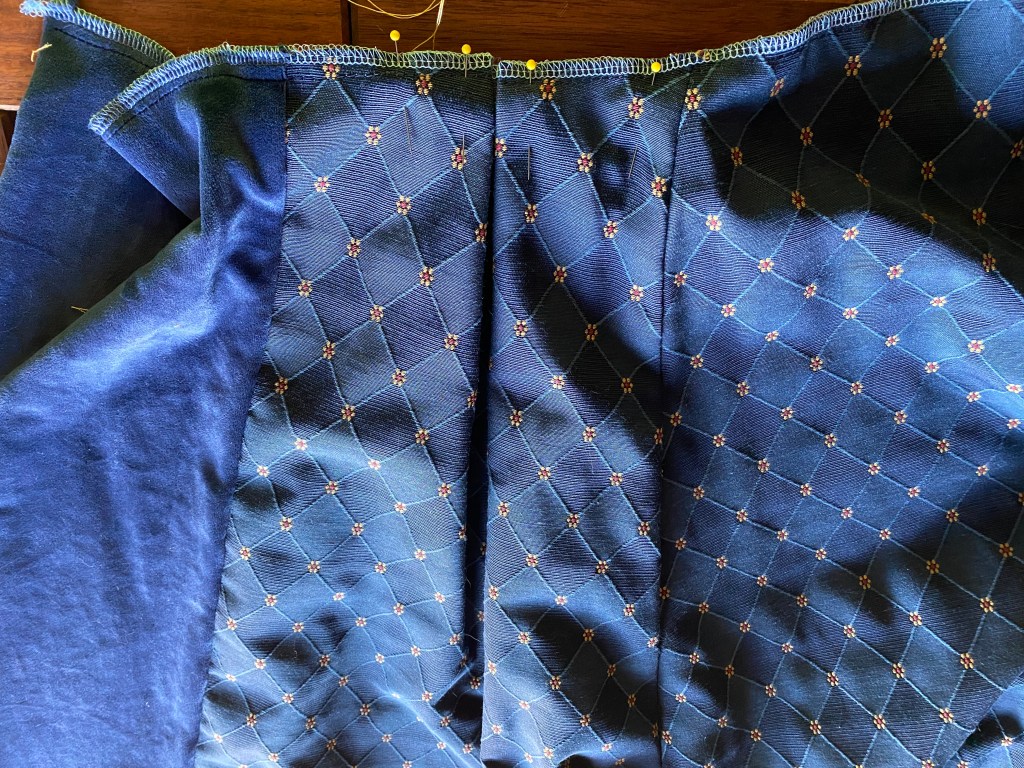
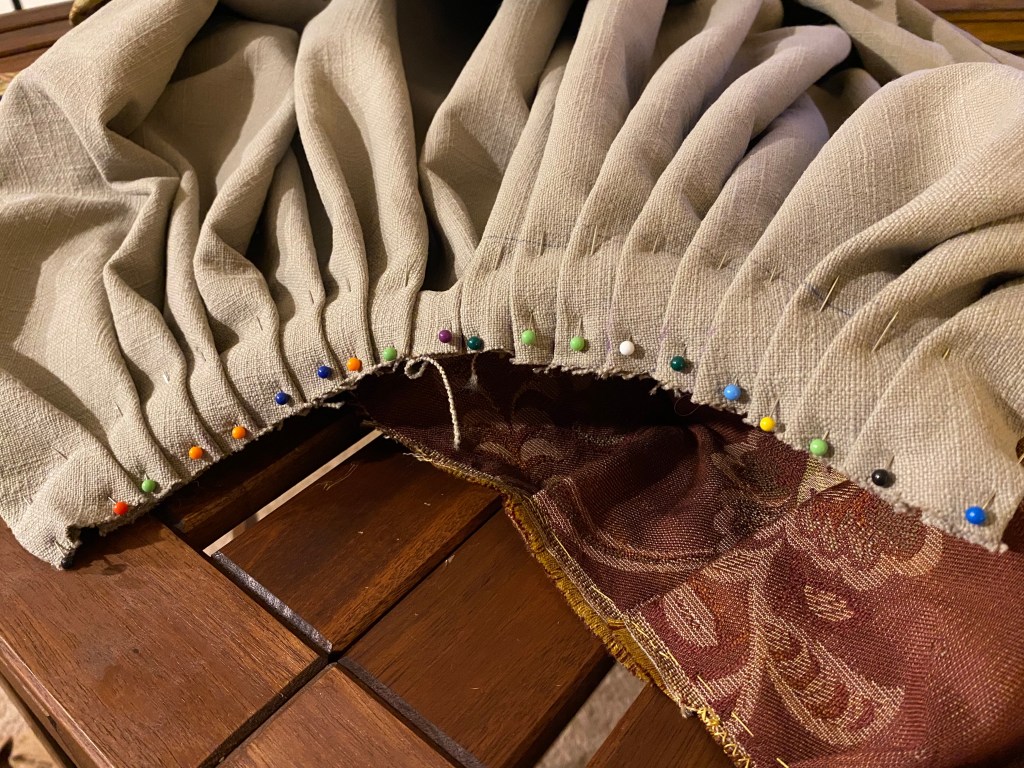
The Tudor Tailor pattern gives instructions for pleating and gathering the skirt waist, but I had to do a bit of adjusting due to my pattern reductions in the skirt and bodice alterations early on. I was able to follow the front panel pleats closely by marking the point where the pleats would meet based on The Tudor Tailor pattern, but then adjusted the starting point of the box pleats based on reducing the length to match the side seam on the bodice. I also added a small pleat in the velvet strip so that the box pleat wasn’t quite so extreme. This pleat is also marked in The Tudor Tailor pattern. The pleats were basted in place before stitching the bodice and skirt together from front to side seam. This seems counterintuitive to do before finishing the back pleats, but it allowed me to then place the bodice and skirt on a dress form and play with the back panel pleats to figure out the right ratio for the cartridge pleats.
The side and back panels of the skirt are gathered with cartridge pleats to give fullness at the hips and butt that were characteristic of the period. I used 1″ pleats at the sides and 3″ pleats at the back and then both were wiggled and squished to give an even appearance across the back.
The pleats are fixed to the bodice with small whip stitches using heavy-duty upholstery thread. Because my skirt is constructed of heavy home decor fabric and lined with a full cotton layer, is un-godly heavy and I worried that the weight would cause the waist seam to pull apart if I didn’t use small enough stitches.
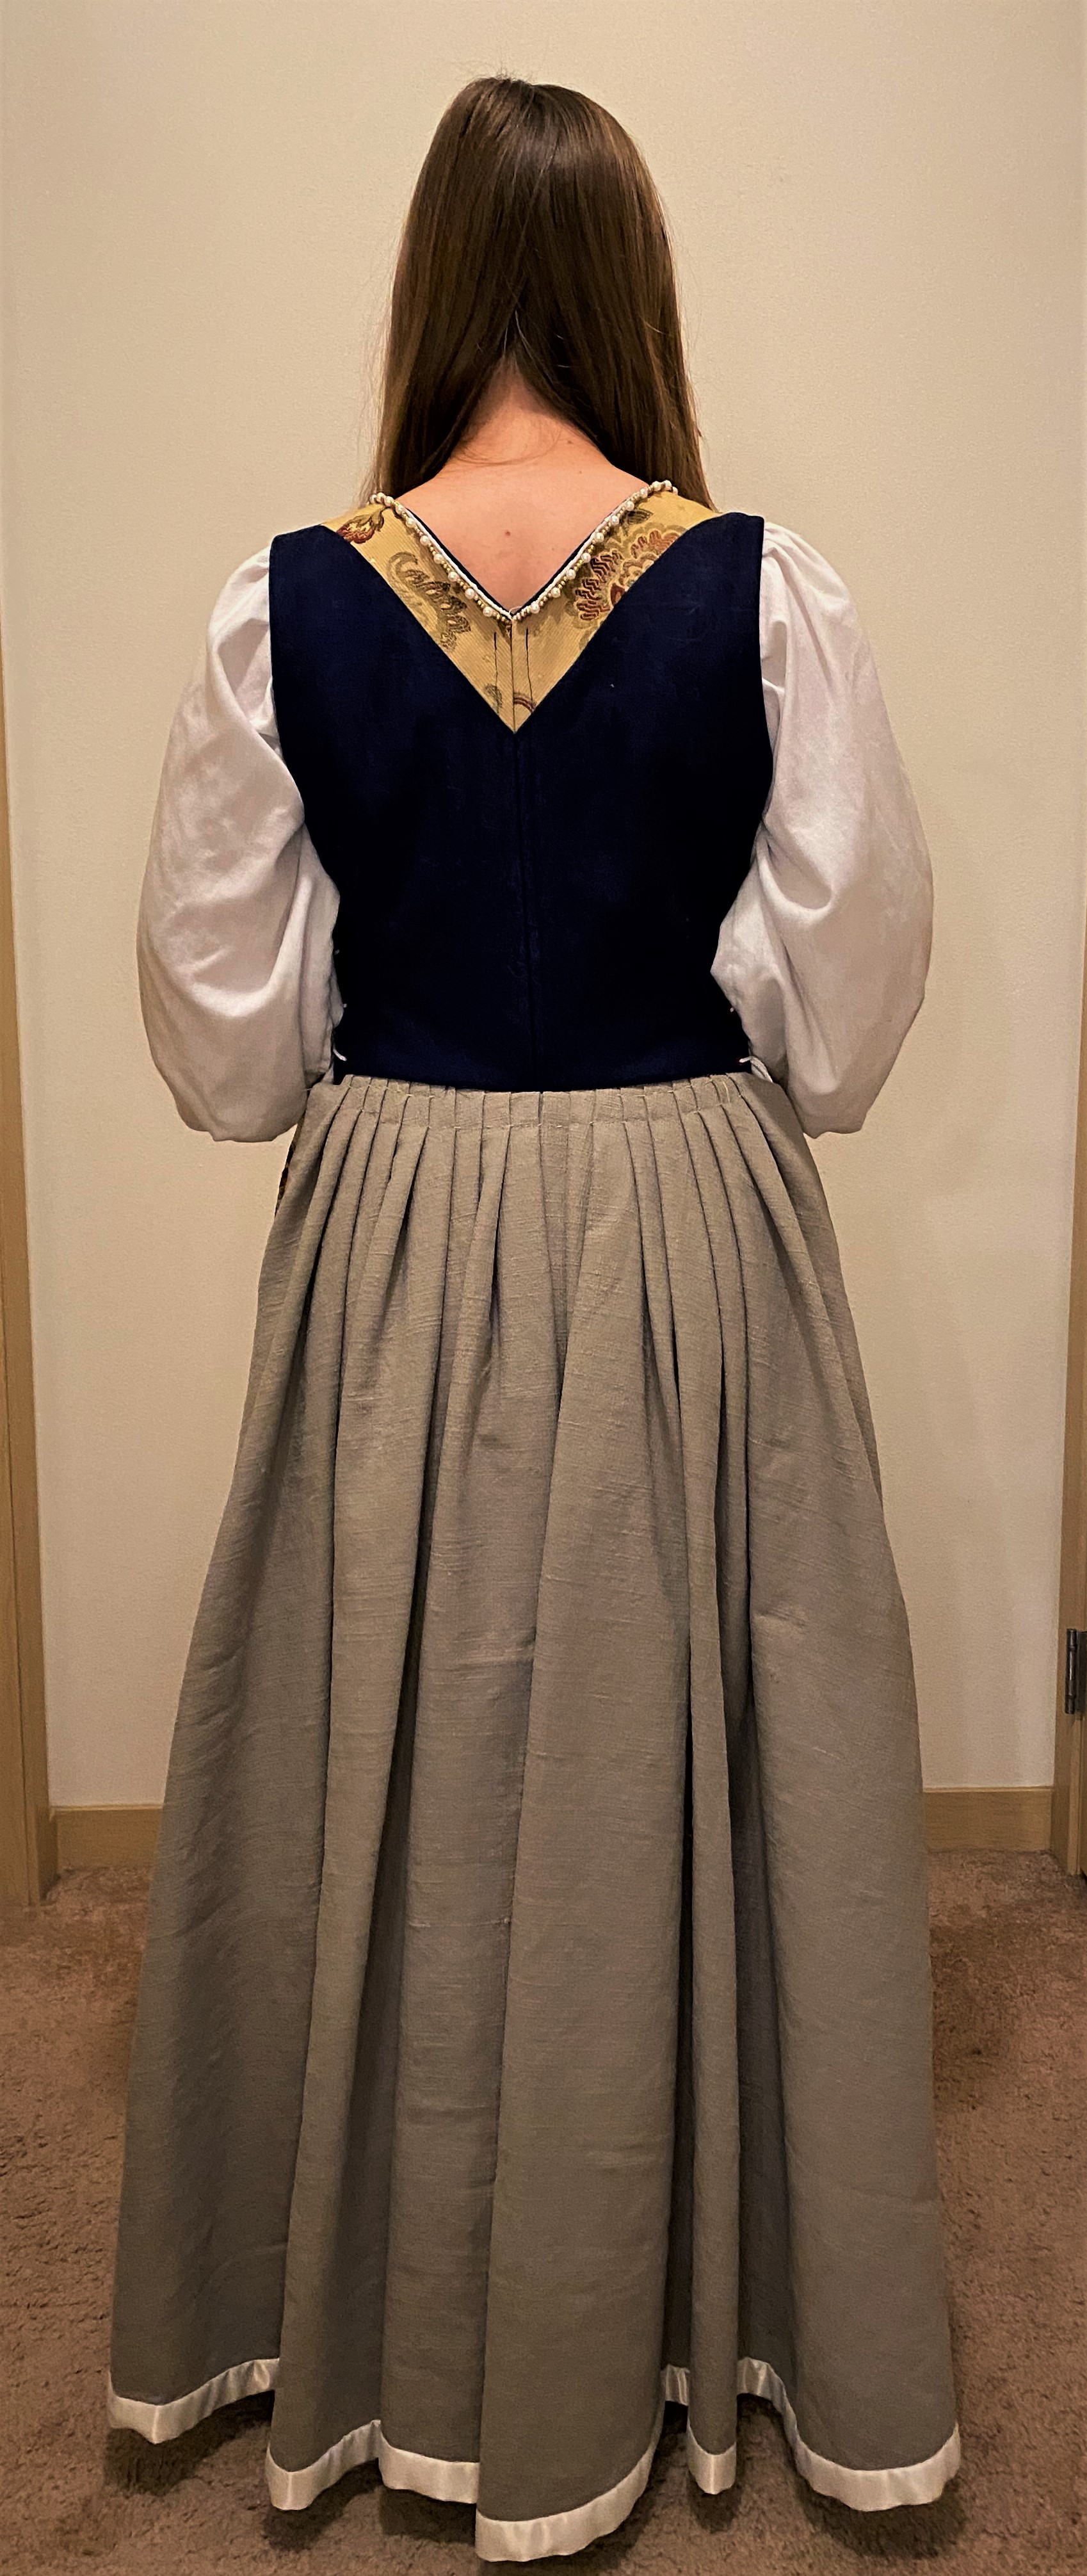
The skirt and bodice are stitched together at the back. Also, can we take a moment to appreciate that pattern matching?
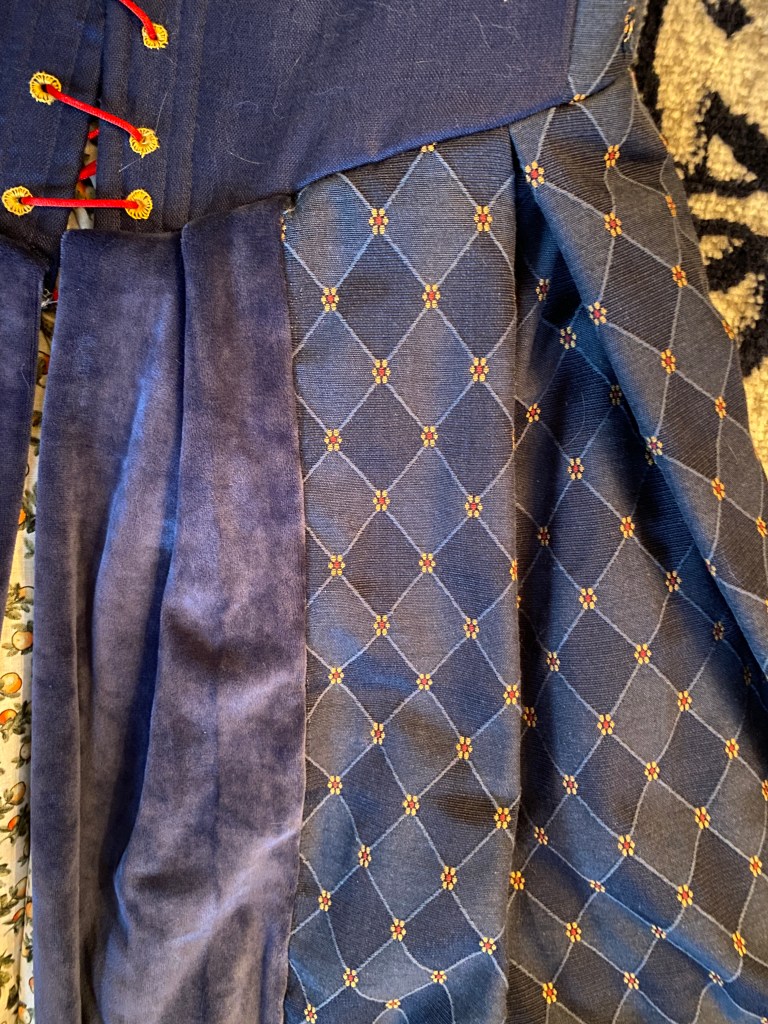
The front of the skirt and bodice are stitched together with knife pleats in the velvet and a single box pleat in the side front (geometric)
With the skirt fully stitched to the bodice, I placed the garment on the dress form adjusted it to my height, and leveled the front hem to skim just above the toes. Since the back skirt includes a small train, I only leveled the hem to the side-front seam. The side and back hem was just tidied up to match at the seams and left long for the train.
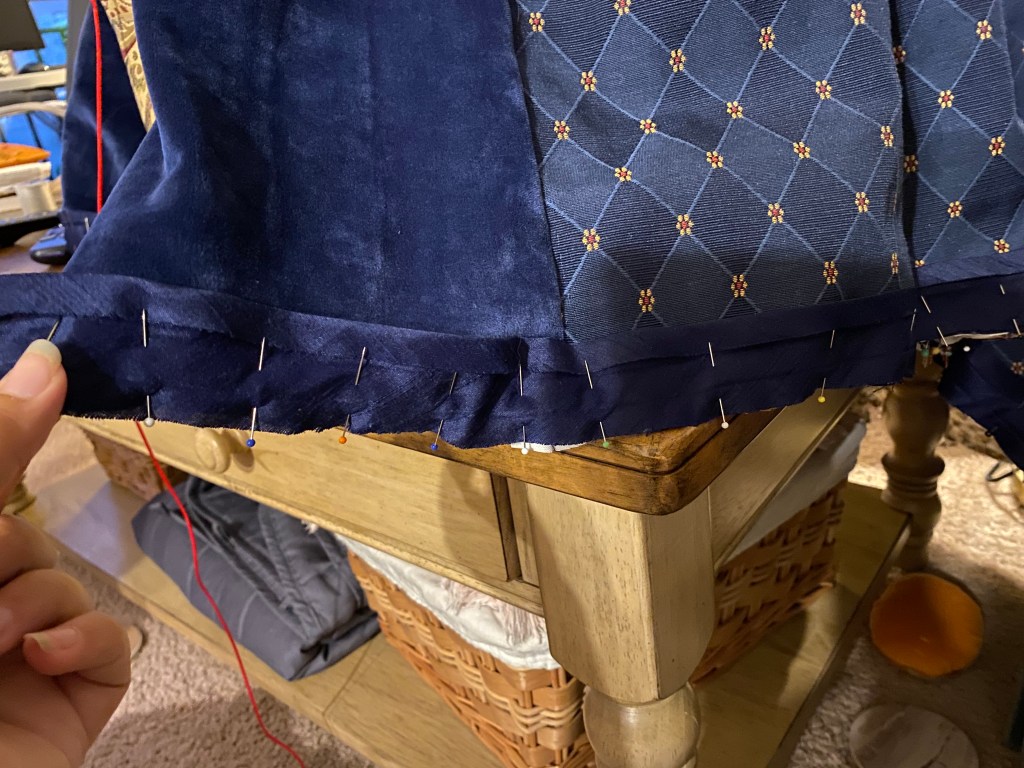
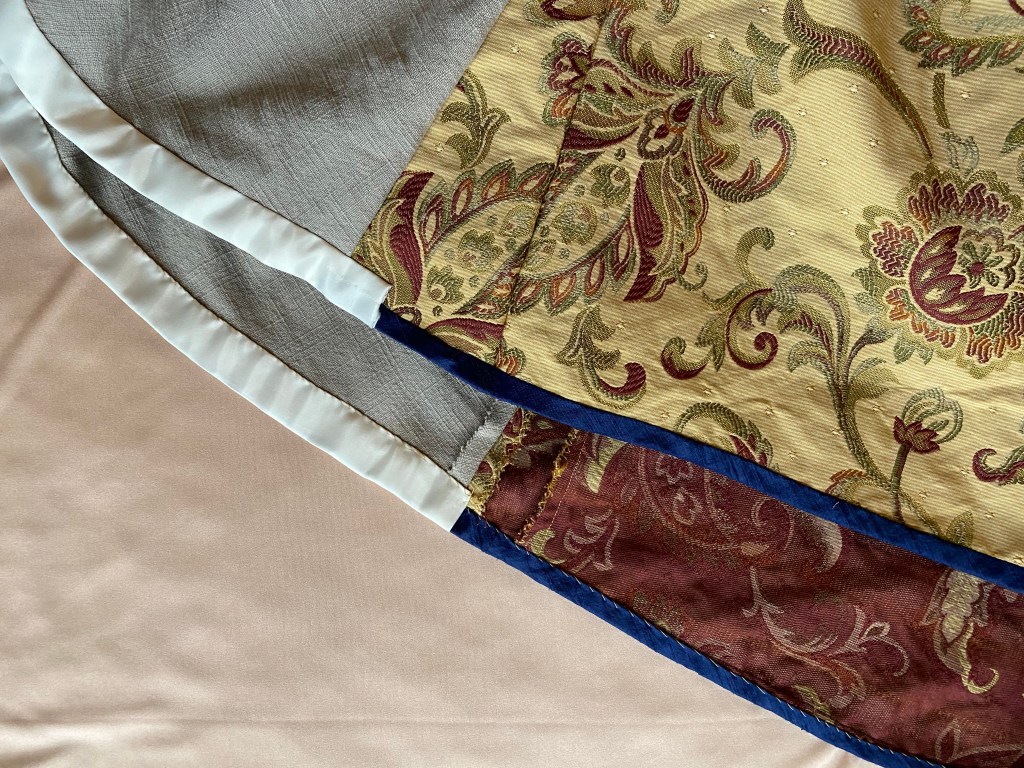
To finish the hem, I am using the same silk bias ribbon as from the kirtle hem, though needing twice as much length. I quickly make my bias tape, and pin it to the front of the skirt, being careful that the lining will be caught in the stitches and hang straight with the outer layer. The bias tape is stitched to the front using the machine, turned under, and hand-stitched to the lining.
This took so many pins, I couldn’t believe just how full this skirt hem was!
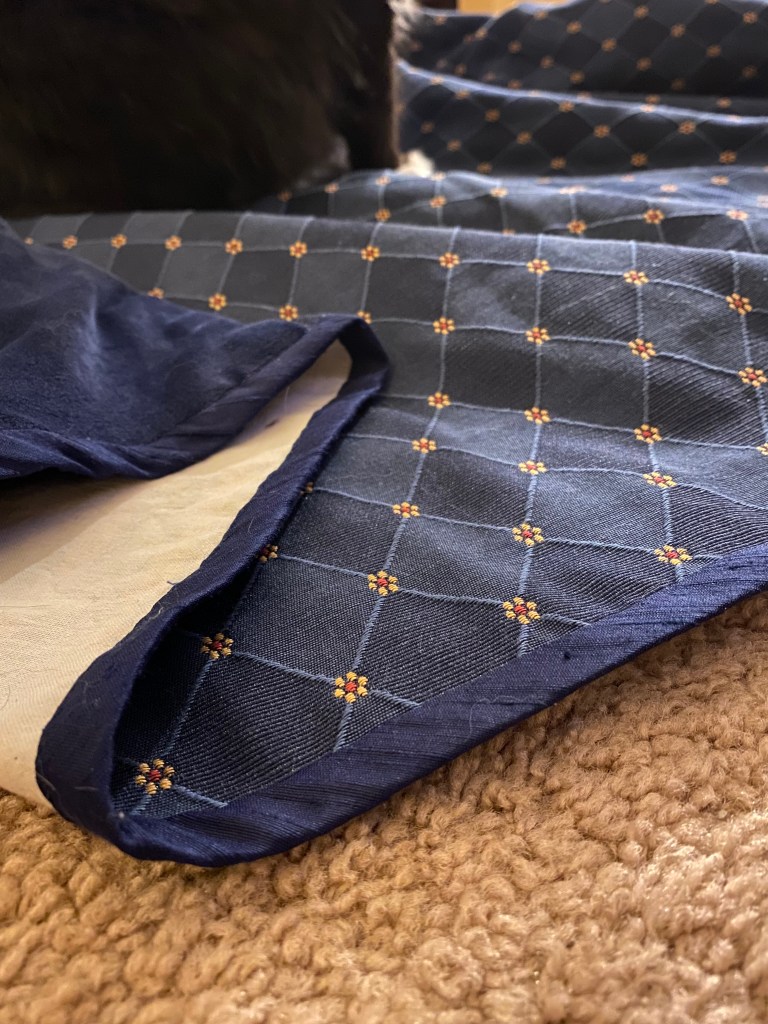
Just gonna say it, that is the sexiest hem I’ve ever done and I am so thrilled with how clean it looks! Get a peek here at the stark white contrast the lining makes that I am not happy with as discussed.
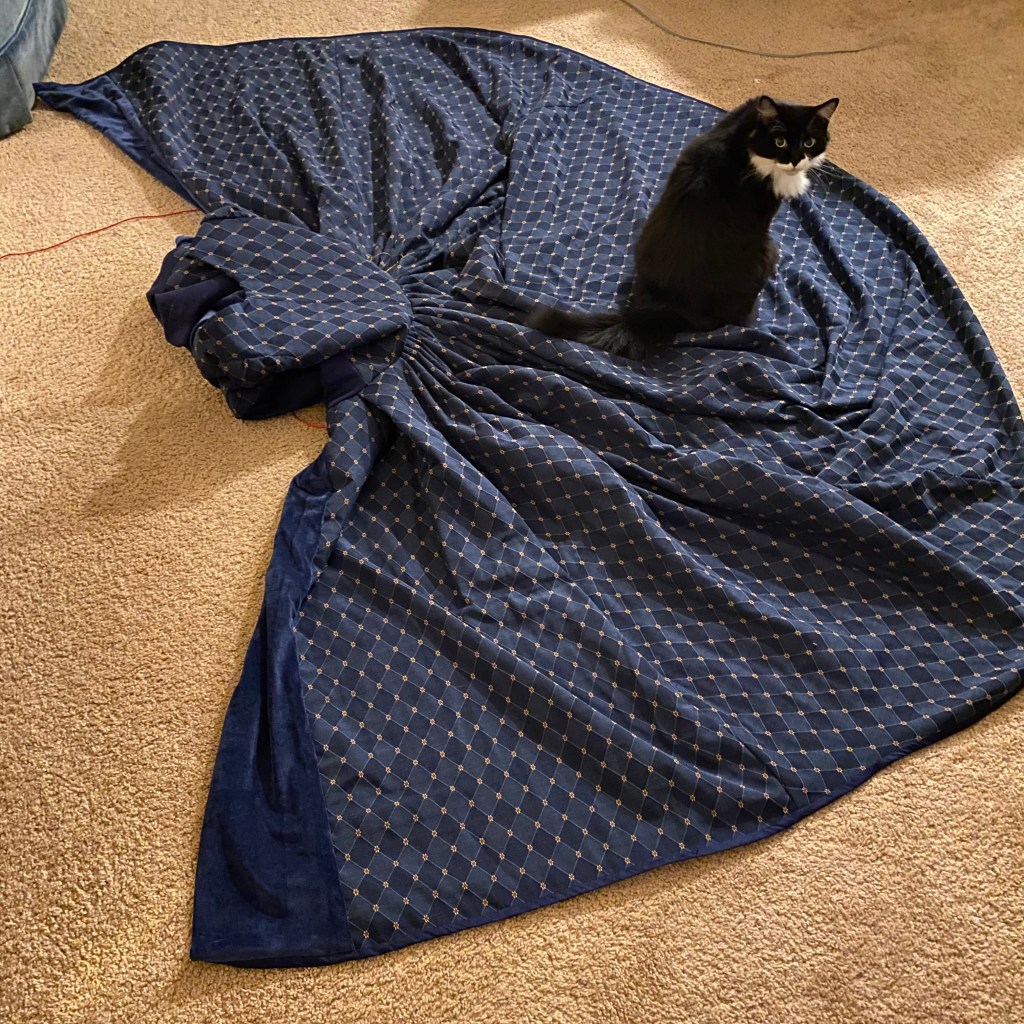
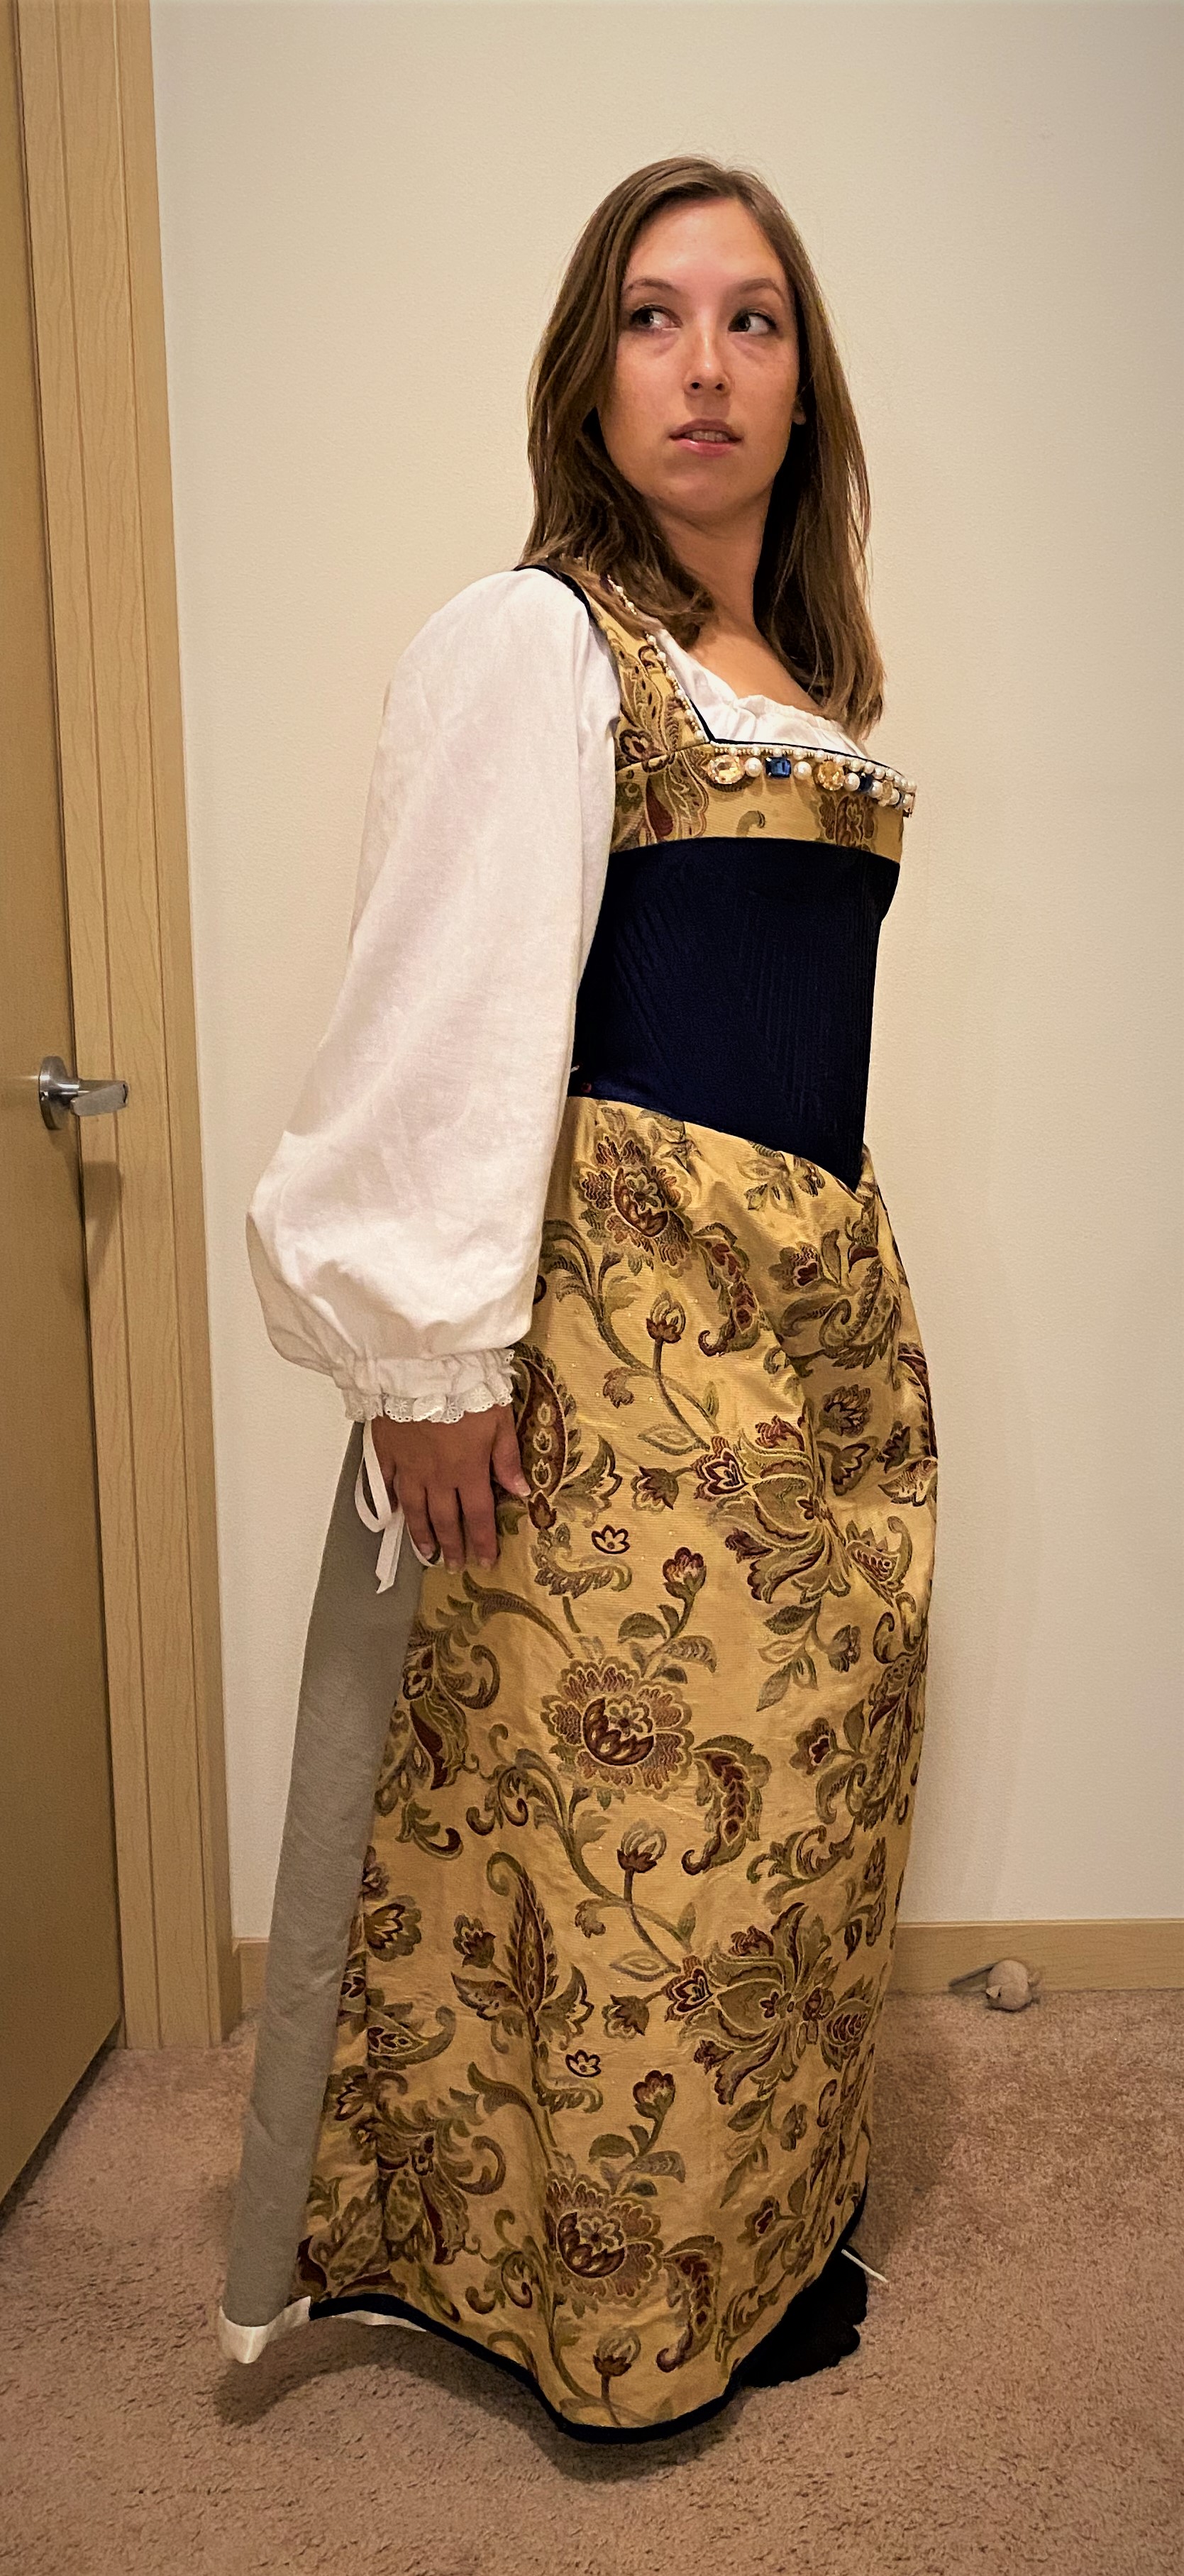
And there she is! The skirt in all her full glory
Plus a dapper kitty who loves to sit on any fabric as soon as it hits the floor..
It was so incredibly satisfying to see the outer gown come together. The construction was actually pretty quick once I had gotten past the pattern-matching finicky work. It is heavy as heck but by far one of the most well-done, professional-looking garments I have ever made. There is still the plaquette and accessories to finish, but it was such a wonderful moment to be able to see the full garment both on the dress form and then to wear it myself. At this point, the project has been ongoing for nearly a year and a half.
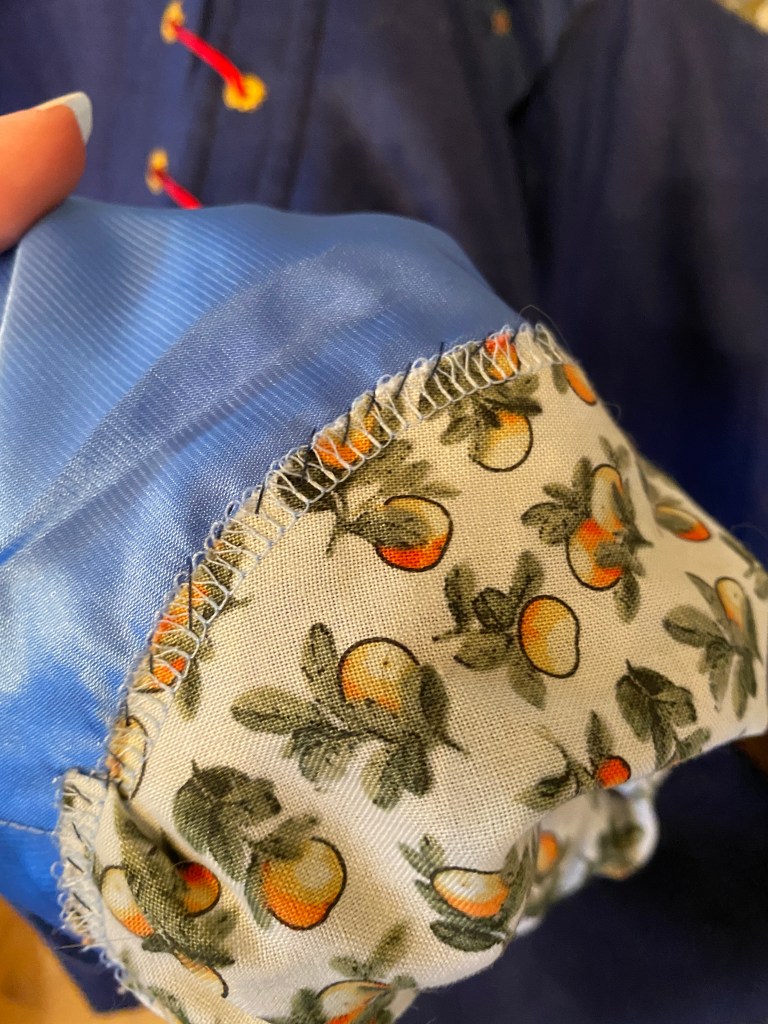
With the construction of the gown and supportive kirtle, work could begin on the accessories including the foresleeves and plaquette. The foresleeves are a type of false sleeves worn on the forearm that was often in a complementary or matching fabric as the main gown. The wing portion angles toward the turned-back sleeves of the gown and gives a smidgen of support to the draped sleeves to open them.
I am again using the pattern from The Tudor Tailor with only minor adjustments based on the length of my forearm. The mockup of the foresleeves alone was such an odd feeling. They reminded me of cosplay looks where the character has oversized bracers rather than a delicate, feminine accessory.
In constructing the foresleeves, I had very minimal fabric remaining that matched the contrasting fabric in the kirtle. It was thankfully just enough to cut two of the foresleeve pattern, but on a fold like the pattern requires. Instead, I cut the two with seam allowance at the top and then cut two more identical pattern pieces from other fabric I had in a similar color palette. Looking back, I wish I had instead used some of the navy blue linen leftover from the gown work for this, but I was stuck in the mindset of wanting the foresleeves to contrast the main gown.
The previously cut foresleeve pieces in the demask are used to cut exact copies in another complimentary fabric.
Since the foresleeves need a decent amount of stiffness to look right and the fashion fabrics used are light (cream supplement) and medium (yellow/red demask) weights, I opted to add a layer of buckram to the construction.
Buckram is a stiff mesh material that is typically used in the construction of hats and bonnets. Here, I am using is like an interlining for the additional strucutre. I cut it from the original pattern paper rather than the cut fabric panels since I do not need or want seam allowance on the buckram or it will cause my seams to be stiff and not turn nicely. I am applying one layer of buckram to each lining with a basting stitch a scant 1/8″ inside the stitching line.
The buckram/lining layers are then stitched with right sides together to the cream and floral fabrics. I only stitch along the front and two curved edges, the top edge is left open so the panels can be turned.
The corners and curves are clipped prior to turning and then all panels are well pressed after turning. One panel made from the cream material and one floral print panel are placed right sides together and stitched along the top unfinished edge. Once stitched, the edge is finished on the inside and pressed open nicely.
It was at this moment that I realized I’d made an error. The pattern, and historical reference, show the foresleeves to have multiple puffs of white linen at both the bottom and body of the foresleeves. I even have it marked on my pattern pieces to leave windows on the body for these puffs around the wrist area. But I had forgotten to cut them and had chosen to seam and turn the edges rather than using bias tape. If I had used bias tape, I could have cut the puff allowance areas and finished the oval openings with bias tape to match. But since I didn’t, I felt that it would look like a mistake. It was also at the point where I didn’t particularly care to add them in. Hence, I decided not to. Creative liberties!
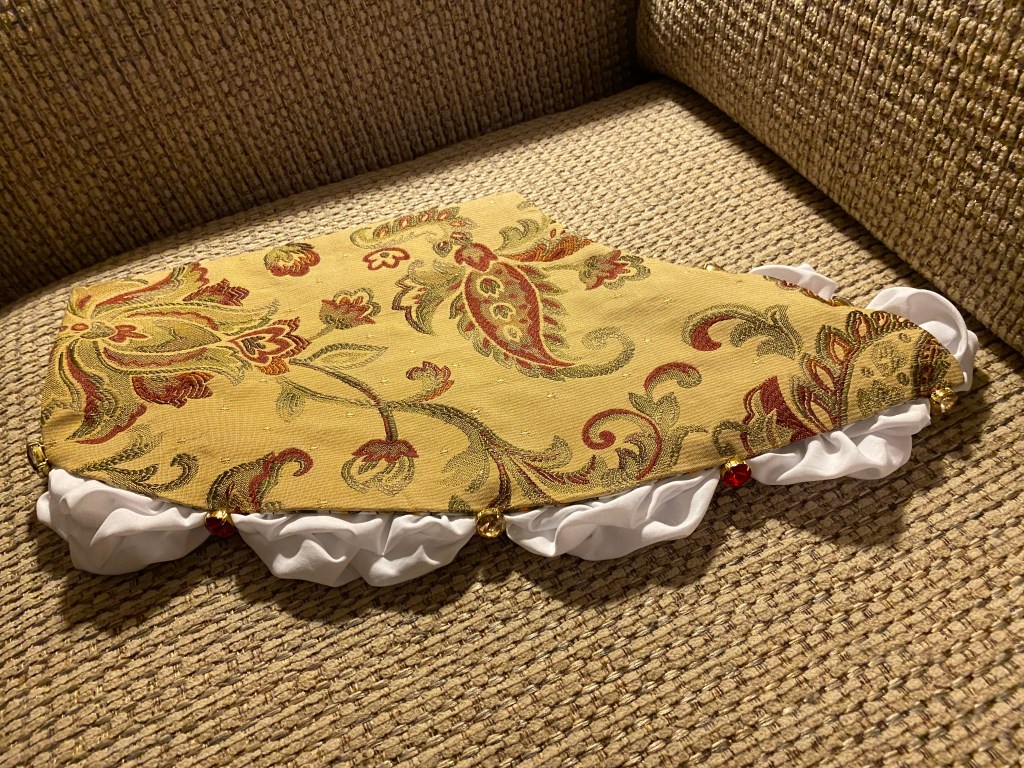
I did still add the puffs at the curved edge of the foresleeves since I had this plan throughout the process. For the puffs, two strips of white Lyocell scrap from another project. The strips measure 36″ by 12″, this is a bit more than what The Tudor Tailor recommends, but it used the full amount of the scrap pieces I had, and whatever could be wrong with a little extra puff factor right?
An attedote on Lyocell: I love it.
I had stumbled upon a bolt of lyocell at my local Joanns when searching for affordable white linen for a skirt I was making for a local theatre production and was blow away by the material. It is lightweight and floated dreamily, felt like the finest linen I’d ever handled if anything closer to a silk feel, but was still sturdy and opaque. It was a perfect material for said skirt and the offcuts I have treasured and used stingily since. I cannot seem to find the fabric locally since, but if I do, I will buy all of it.
Lyocell is a semi-sustainable fabric that can be used in numerous applications. It is produced from eucalyptus trees that grow very quickly and can be replaced easily. It is then processed and can be blended with other materials. Since it is from organic fibers of the eucalyptus tree, it is biodegradable and depending on the source, maybe carbon neutral. However, if it is blended with synthetics, it loses these properties. Hence, a semi-sustainable fabric.
Back to the puffs. I return to the foresleeves and visualize where each puff would gather with gems. This was primarily determined by optimizing how many gems I had remaining after the gown to work with. Of the larger gems, I had enough ruby and champagne-colored gems left to make seven gather/attachment points which translated to six puffs.
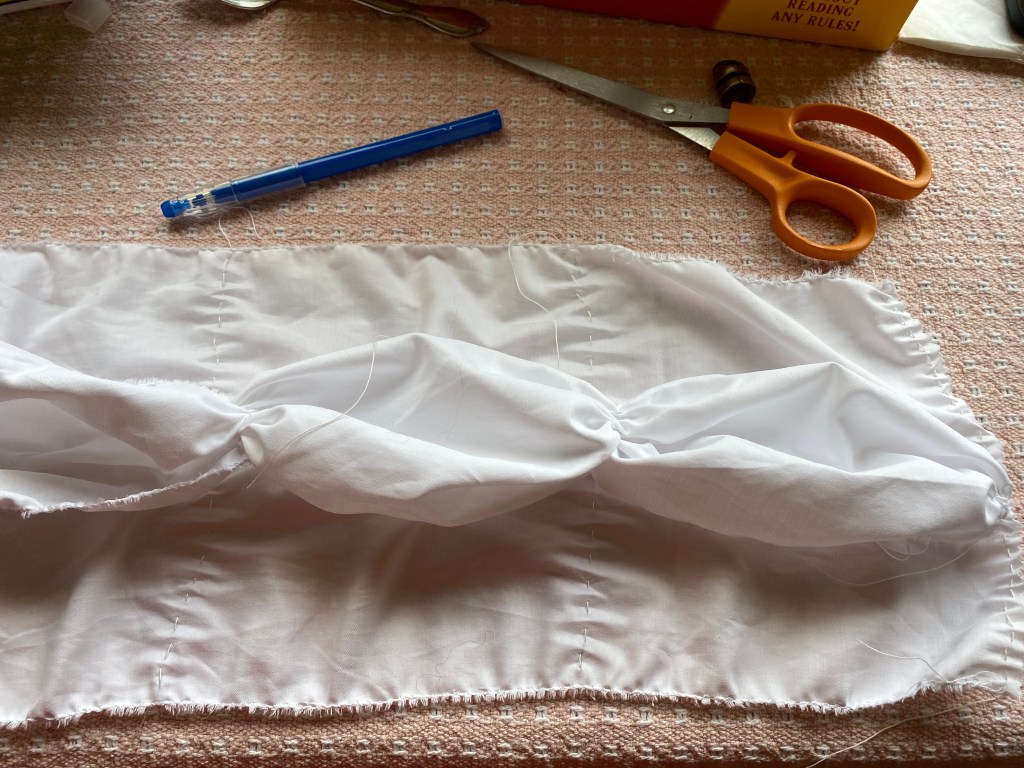
Six puffs would be beyond perfect too. Since my fabric strips were 36″ long, each puff would evenly measure 6″ in length. To prep, the lyocell strips are finished with a quick zig-zag stitch (my serger was broken, unfortunately) and then marked with each 6″ point. I stitch a course running stitch with heavy-duty thread at the gather points and leave long tails hanging so I could find them later.
Here is a comparison between the ungathered (bottom) and gathered (top) strips
To apply the white lyocell to the foresleeves, I pin the material to the interior of the foresleeves at each gathering point. The strips were a tad longer than the area they were to be placed in, so I did a bit of pin gathering between each gather point. To do this, I pull the excess material up from the lining it is to be pinned to, find the center of the excess, pin down to the lining, and repeat until all material is generally gathered and pinned in place.
The material is pinned to the foresleeve interior only at the gather points. Note that the ends of the lyocell are folded over to allow for finishing the end edges.
After rough gathering the remaining material, the white lyocell is stitched to the lining with a whip stitch 1/4″ from the edge.
Once stitched in place, the hanging gather threads are found, pulled tight, and knotted in place. Then the foresleeves are turned out. Using the excess thread from the gather points, I stitch the gathers tight and add the gems.
Here are the finished results!
There are quite a few other accessories still to go, so continue to follow along as we finish the gown itself and accessories:
The foundation garment for gowns in the 16th century, otherwise known as the Tudor Era, was the kirtle. The structured garment precludes the bodies that were characteristic of the Elizabethan Period, stays from the 17th century up until the advent of the corset in the 19th century onward. The kirtle can be a structured bodice coupled with a petticoat or underskirt that would serve as the window panel for dresses like the Henrician lady’s gown or fashionable French Gowns. In the case of the underskirt, the structured bodice and skirt were joined to make one garment.
Historically comprised of tightly-woven linen and whalebone, the structured bodice created the shape of the period: low, square neckline; lifted bosom; and straight, angled waist. For my kirtle, I use the pattern provided by The Tudor Tailor book.
I transferred the pattern pieces using parchment paper and then scaled using a 1:8 scale as instructed by the book. Fortunately for me, the provided pattern is nearly my base measurements already (bust, waist, hip) but I did end up taking the pattern in by 1″ at the side seams and adjusted the shoulder straps quite a bit from the mockups. I also noted that the pattern would be at least 6″ too long and would address that later when cutting the skirt.
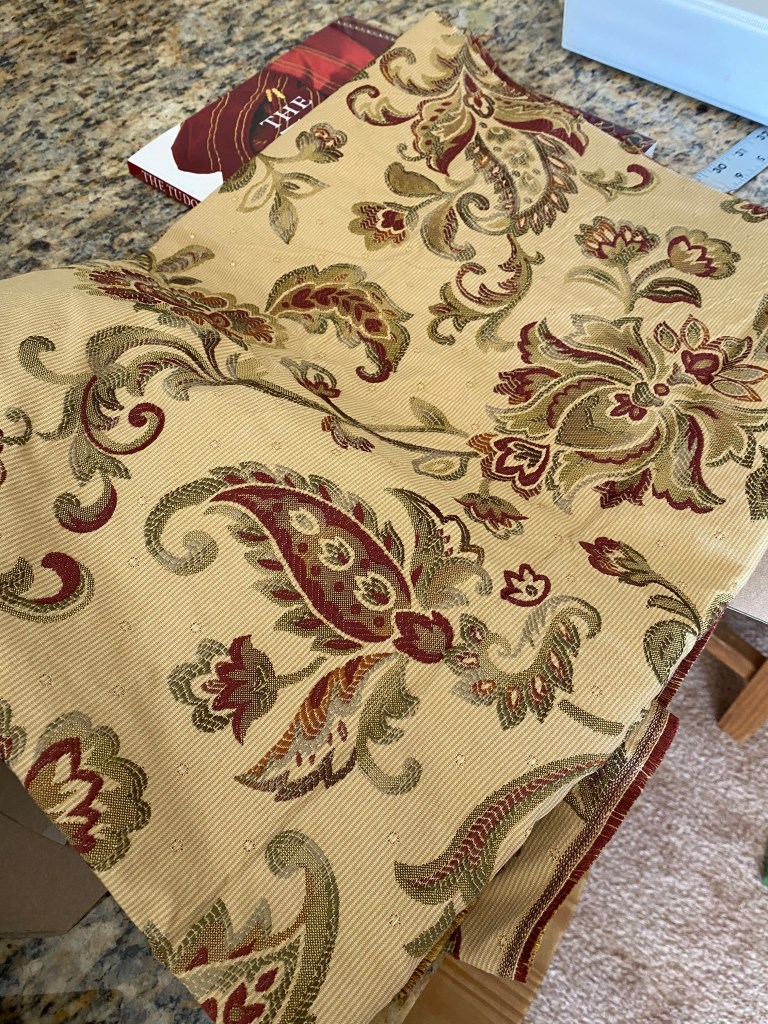
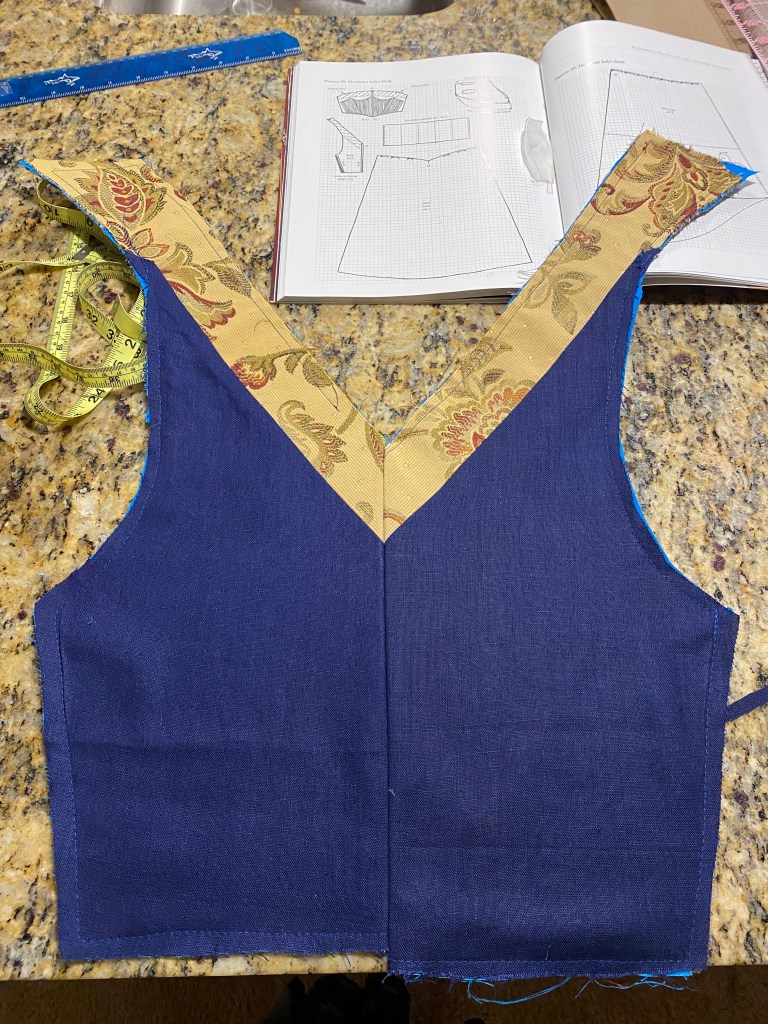
By this point, I had decided to use the navy blue, geometric fabric from the original project for the over-gown and wanted to combine this with a yellow and burgundy floral patterned upholstery fabric I had from a yard sale. The yellow/gold and burgundy/red in the floral pattern was the exact shade of colors as the center of the diamond pattern of the blue fabric and would complement nicer than the silvery gold geometric I originally planned to pair. In addition, the floral was close to being a damask pattern that would’ve been fashionable for the Tudor period. The only flaw in this thinking is that in most reference paintings for the project (see image above), the geometric pattern was usually in the window panel and accents while the floral/damask was used as the main fabric. I was really pleased with the combination though and planned to roll with it.
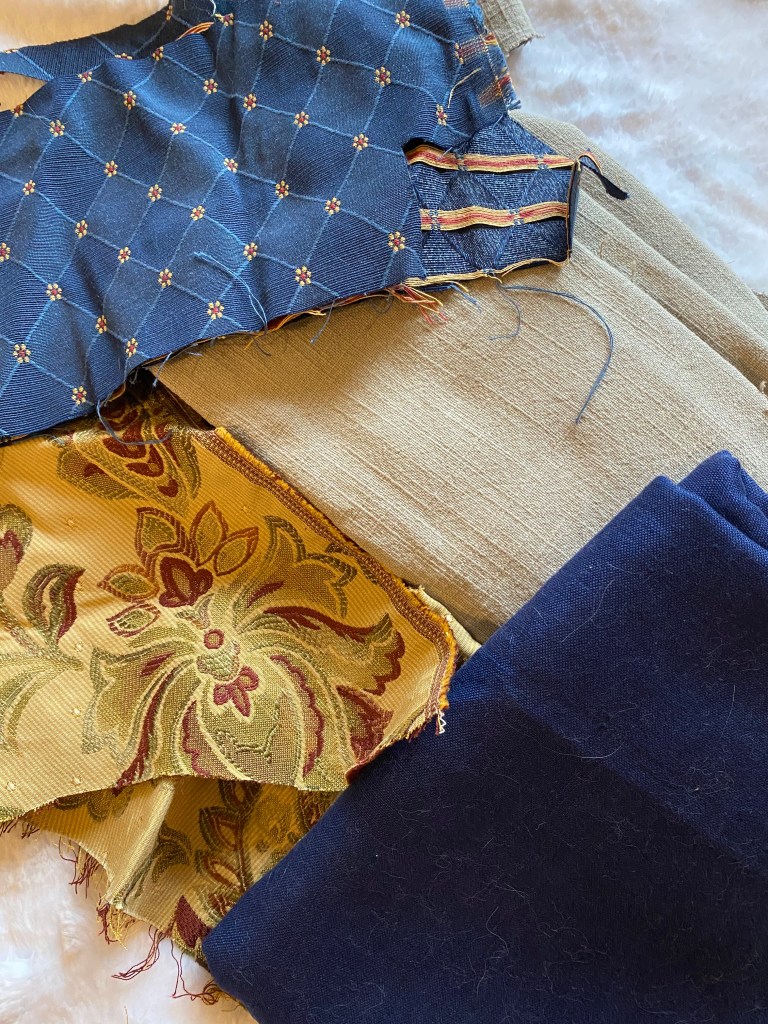
For the kirtle bodice, I used a mixture of fabrics to give the correct structure and look. The fashion side of the bodice is pieced with navy linen I had on hand ($6 for 6 yards at a rummage sale, score!) and the red/gold floral fabric at the neckline to match the window panel of the skirt. Since the linen was actually quite lightweight and I worried about the integrity of it once boning was added, I interfaced the pieces with scraps of tightly woven cotton. Finally, the interior of the bodice made use of heavy-weight tan linen from a drapery clearance.
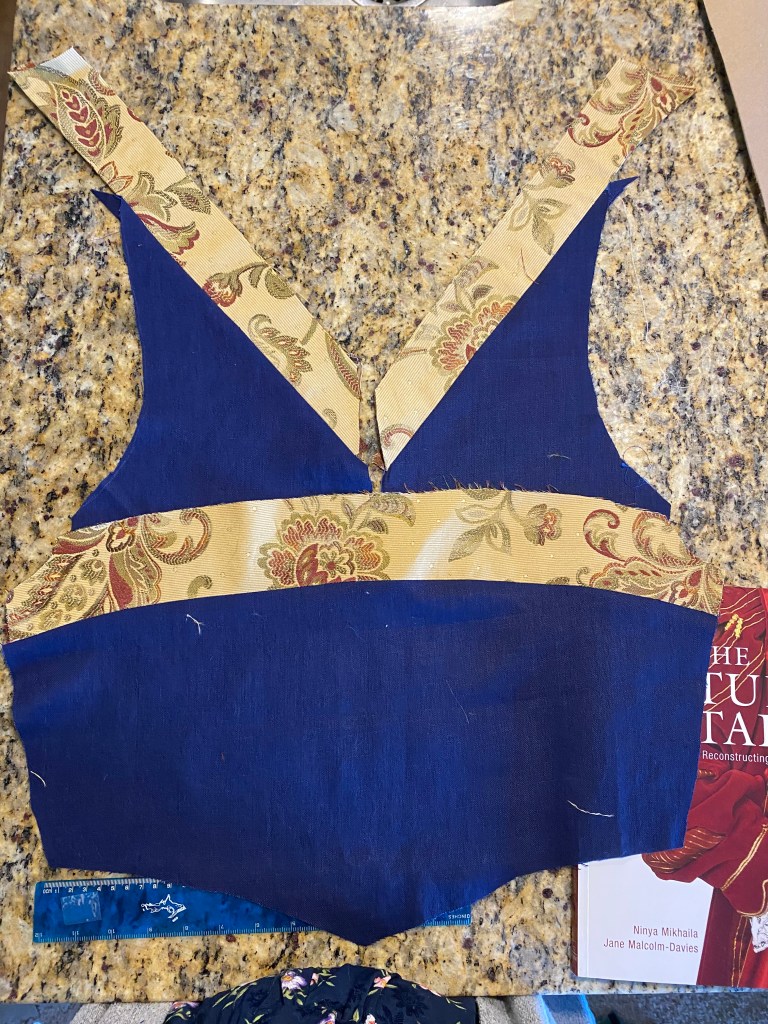
The bodice is constructed of a front and back with the straps extending from the back to the front. I opted for two side closures rather than a single back lace-up since it would allow me to lace myself into the garment. The side closures also will allow the garment to adjust size easier. I cut the panels in the blue linen, minus 2″ for the pieced neckline, plus 1/2″ for seam allowance. The 2″ strip of floral was then cut and stitched in place.
In this image, the back panel has been cut into two pieces with a center back seam. I felt this would be easier since I was adding the pieced neckline in the floral fabric. Stitching the floral to blue and then center back seam was MUCH easier than attempting a mitered seam if the back were all one piece.
Here is the back panel with the center back seam. My seams with the pieces got a tad funky and caused the center back to not line up exactly, but I had given myself a generous seam allowance and was able to just trim and blend between the two sections.
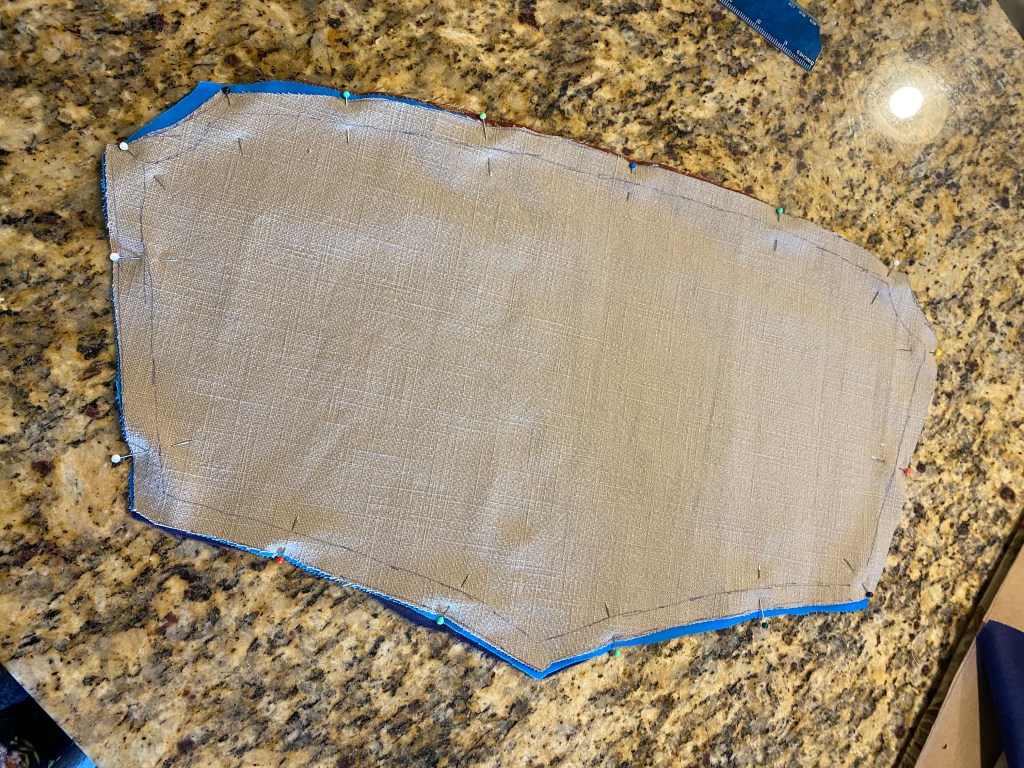
Both the front and back panels were interlined with cotton and flatlined with tan linen. I made sure to only stitch the sides and bottom, leaving the top open for insertion of the bones.
To finish off the back panels, two 1/4″ boning channels were added at the center back and one on each side seam to support the eyelets that would be added.
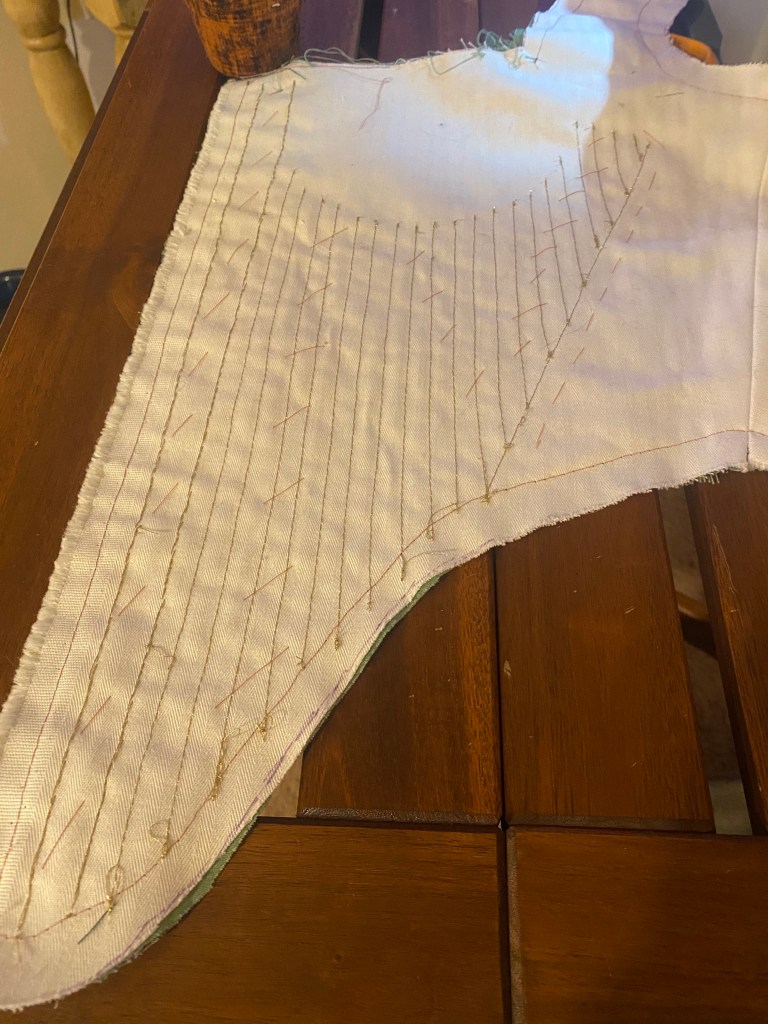
The boning structure on the front panel was a bit more complicated. The front is fully boned (or cord if you prefer) under the bust. I used the grid from The Tudor Tailor pattern to plot out the bust curve and edge of the boning sections by marking the center of the front panel and then marking outward equivalent to the ratio on the grid (1 grid = 1″). The grid was also used to determine the bottom location of the angle lines.
With the outlines in place, the boning channels were stitched based on a 1/4″ spacing offset from the center and two angles, creating three distinct boning sections:
Here it is with the ungodly amount of bones.
I was actually shocked by how flexible the bodice was with this method. Since all of the bones are vertical, or at a slight angle, the bodice wraps nicely around the front of the body. It provides a good stomach structure and bust support without feeling cinched in. Surprisingly comfortable!
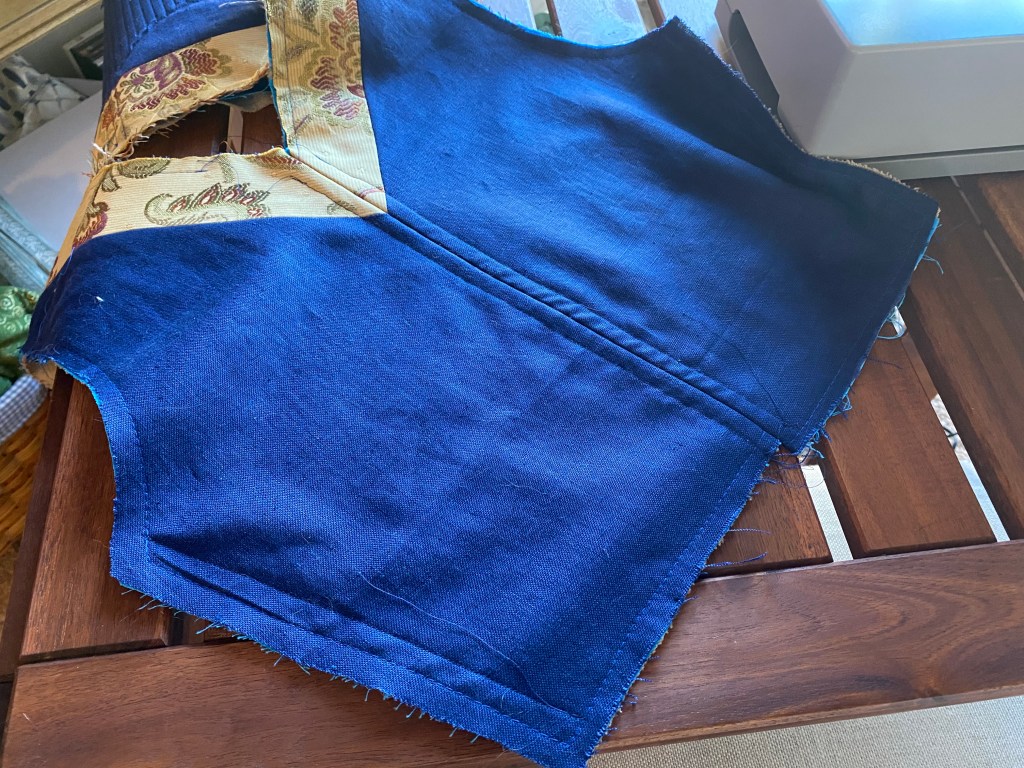
With the panels and boning finished, the straps were stitched to the front panel and all edges were surged to prevent fraying. There was a bit of finessing the fit of the straps when stitching in place and I found using a mannequin much faster than on myself. Nest, I added a strip of navy piping to the neckline edge before folding all the edges over and whip stitching down by hand.
Surging the edges with the cutting function on trimmed down all the fraying that developed while working the boning channels and gave a consistent cut edge with the multiple layers.
I use a zipper foot when adding piping. There is a specialty machine foot for piping, but I find this works just as well.
all the surged edges are turned in and pressed. I love clips for hems and finishing edges like this. They’re much faster to use than pins and don’t create ridges like pins do.
The edges are whip stitched (or felled) with silk thread.
The inner corners of the neckline were so hard to turn and stitch neatly. They had to be clipped in order to make the right angles and the clipping was so close to the edge it worries me that it’ll rip or start to fray. I added a ton of reinforcement stitches here and at the center back to prevent that.
The side seams have spiral lacing with 1/4″ embroidered eyelets. I spaced the eyelets 1″ apart and used bright contrasting burgundy embroidery floss for the stitches. Why not add a pop of interest, they would be covered by the overgown anyway.
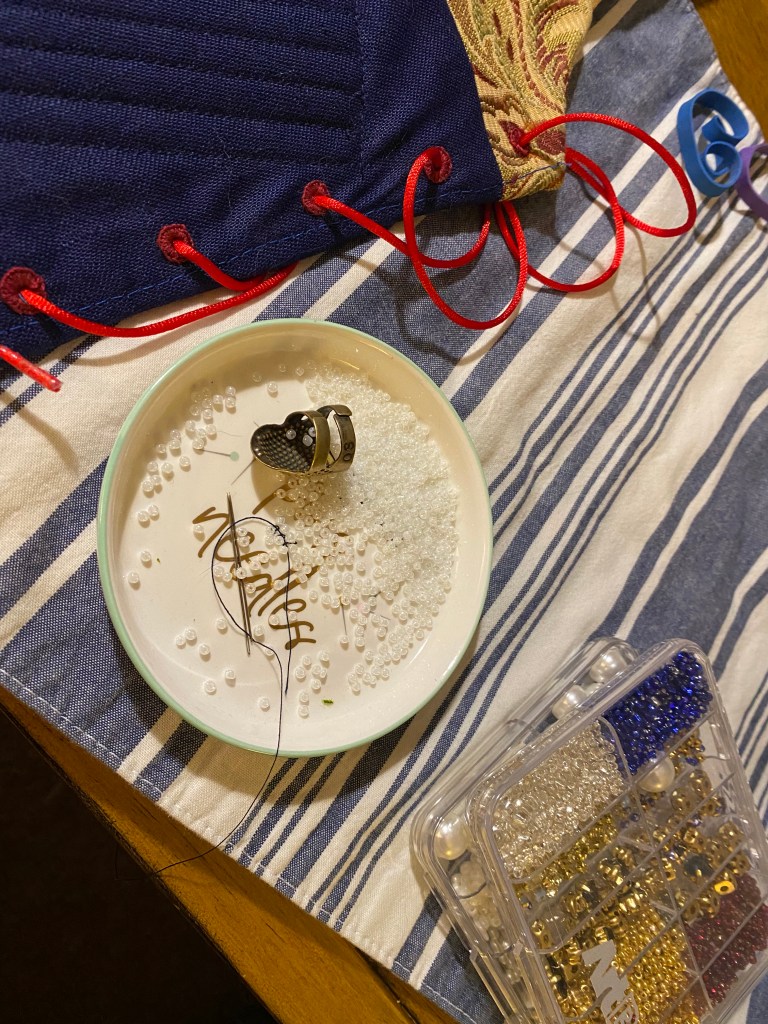
Structure completed, it was time to add some shine to the bodice. The area of the kirtle with the pieced floral fabric would be visible under the main gown. In paintings I looked at, the kirtle has a row of gems, pearls, or other embellishments along this area.
To start, I added a row of seed pearls along the edge between the material and the piping.
Then a row of alternating gold glass beads and . . .
…faux pearls! I used 6mm pearls alternating for the straps and 8mm pearls along the front neckline.
The neckline is finished with a row of large gems and pearls placed symmetrically
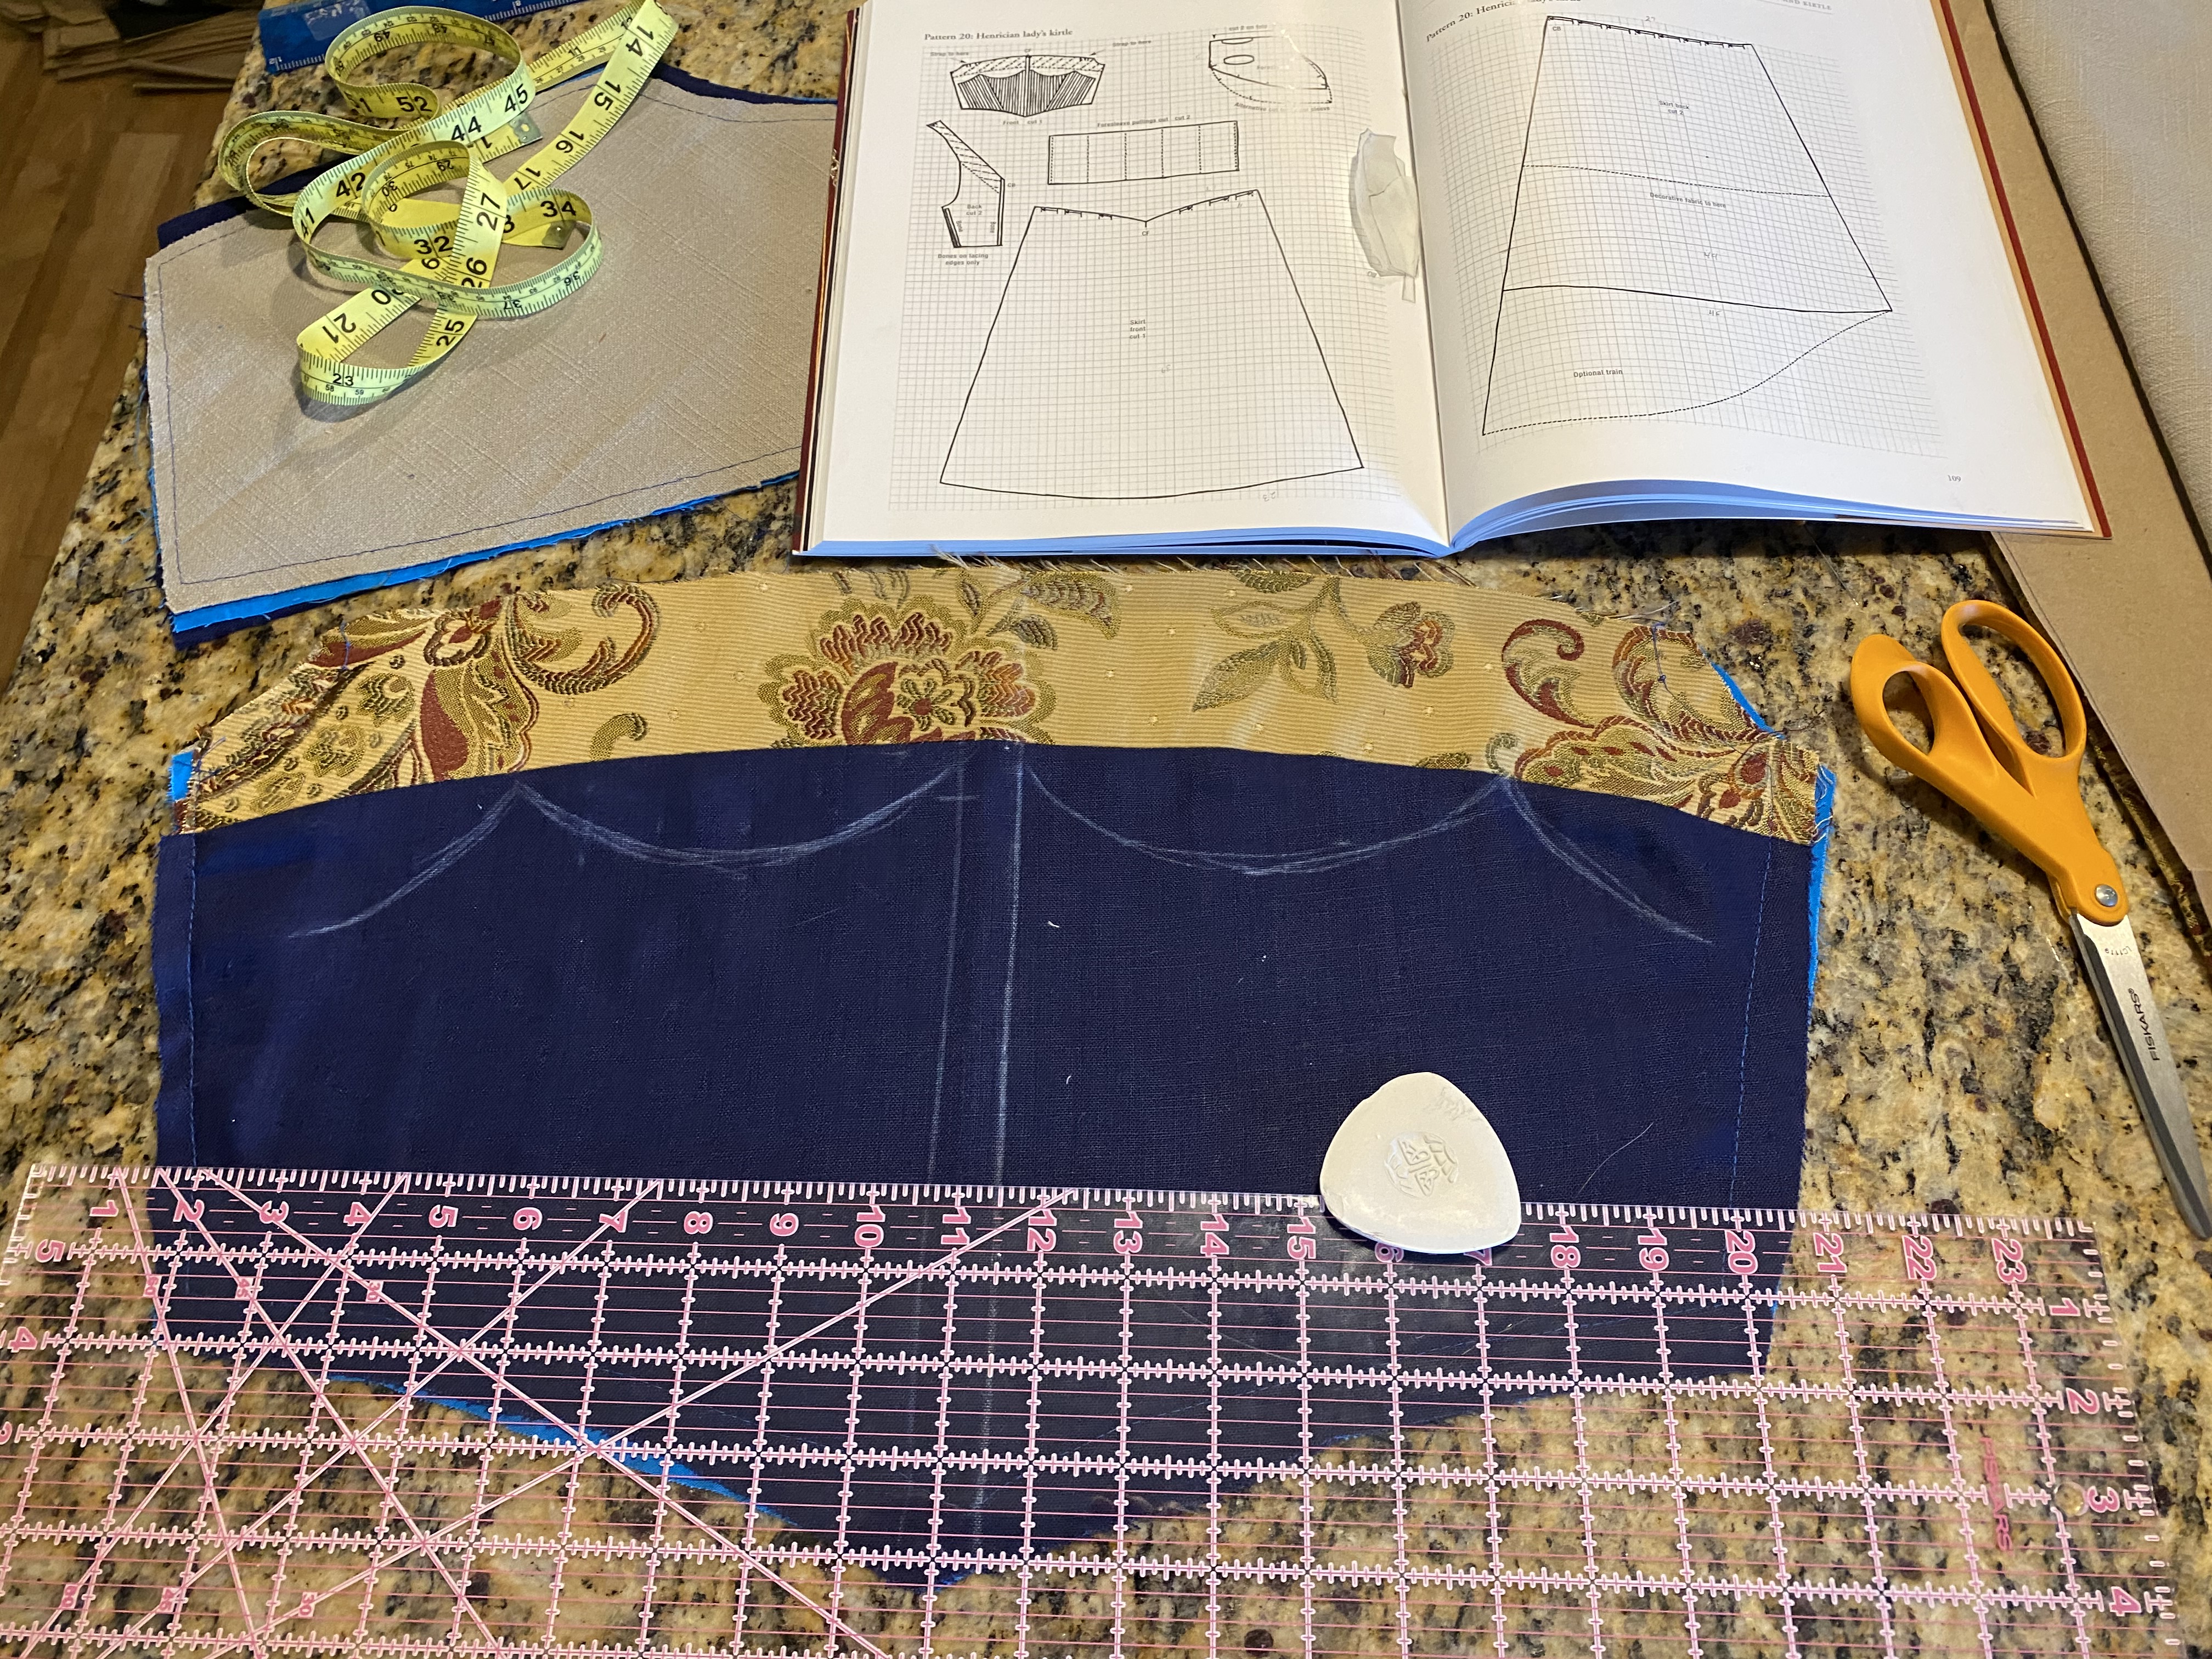
The skirt of the gown is relatively simple, and yet a place I made many errors. I had very little of the floral patterned fabric to work with; however, since I am short, I was able to cut back on the required yardage significantly. Perks of being fun-sized! I also did a bit of patching to make it work. Little did I know when cutting, that I had accidentally cut the piece on the fold with the fold going the wrong way. Luckily, the bottom hem is relatively square, but the seam with the bodice is not and this caused a lot of issues with how the skirt hangs. Even with cutting back to create the point, it still isn’t quite right. But, I only had just so much fabric and had to make it work.
An example of the piecing done on the skirt. This piece is at the bottom hem, side seam, and would be almost never seen, but less obvious.
The second major mistake was fabric choice for the unseen portion of the skirt. The yellow floral fabric is very stiff, and I needed something of similar weight so it wouldn’t get all funky. I chose a “linen-look alike” drapery fabric that I thought was on clearance at Joann. A lesson to check labels carefully. The roll I had grabbed was on sale, but the backup the sales associate grabbed when the first roll ran out, was not. I ended up paying full price on not-so-great quality fabric. It did its job, but certainly didn’t look or feel as good as it should’ve for the price. I often use fabrics not for their intended purposes (upholstery for apparel for example), but they are usually similar enough and the only way to get the look I want at the price point I can justify. I should’ve taken my time and found the right material rather than settling for the first thing that was slightly doable and then regretting it as soon as I cut it out.
Overall, the fabric was too heavy. Stitching the two fabrics together was no problem, but once the back of the skirt was pleated, stitching to the bodice was a hand-breaking nightmare.
To make the knife pleats, I measured and marked the pleat lines from the pattern and drew arrows to remind myself which line would be pulled where. My pleats were about 2″ each with 9 pleats on each side of the center back.
Once marked and folded, each pleat is pinned in place and basted with sturdy upholstery or buttonhole thread. The basting stitches can be seen on the front panel in yellow. I made three rows of stitching for the back panel due to the weight and amount of handling I knew would be necessary for attaching to the bodice.
The front and back panels are stitched together up to approximately 8″ below the waistline. The skirt and bodice are stitched together by machine using heavy upholstery thread again to support the weight of the skirt. The areas left open on the side seams of the skirt allow the wearer space to get in and out of the gown as well as the addition of pockets in the future.
Skirt stitched to the bodice, the garment is hung on Molly the mannequin and the hem is leveled to hit at the ankle bone. This is a bit high for the period, but my reduction in height and forgetting to account for seam allowance at the waist brought my hem higher than brushing the toes. In the grand scheme, this is likely for the best since I’ll be less likely to trip on the front hem now. To finish the hem, I create bias tape from a navy silk ribbon found at Joann’s on clearance. It is probably the most expensive bias tape I’ve ever used in my life, but it looks absolutely flawless when applied. To conserve the use of this material, I switch to a polyester satin blanket binding for the hem along the tan linen section of the skirt.
And that is it! After some careful pressing of the waist seam, surging of the last unfinished seams and lacing up the side seams, the foundation garment is complete. With this, the over-gown can be fit tested and work can start there!
My sewing journey began because I wanted to make my own costume for Rennissance Faire and then grew and developed to be a lifelong skill I am developing with each project. But this project is one I envisioned wanting to do since I brought home my first sewing machine: a Tudor Gown.
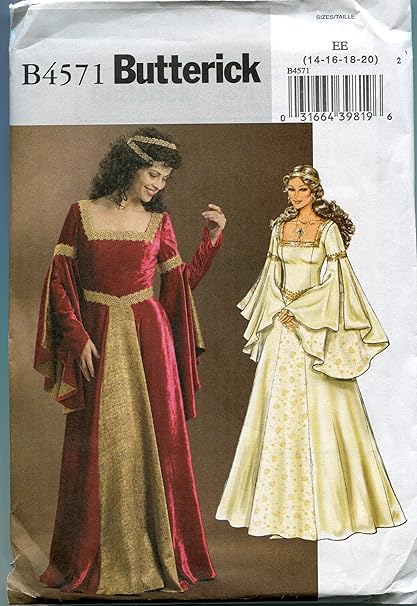
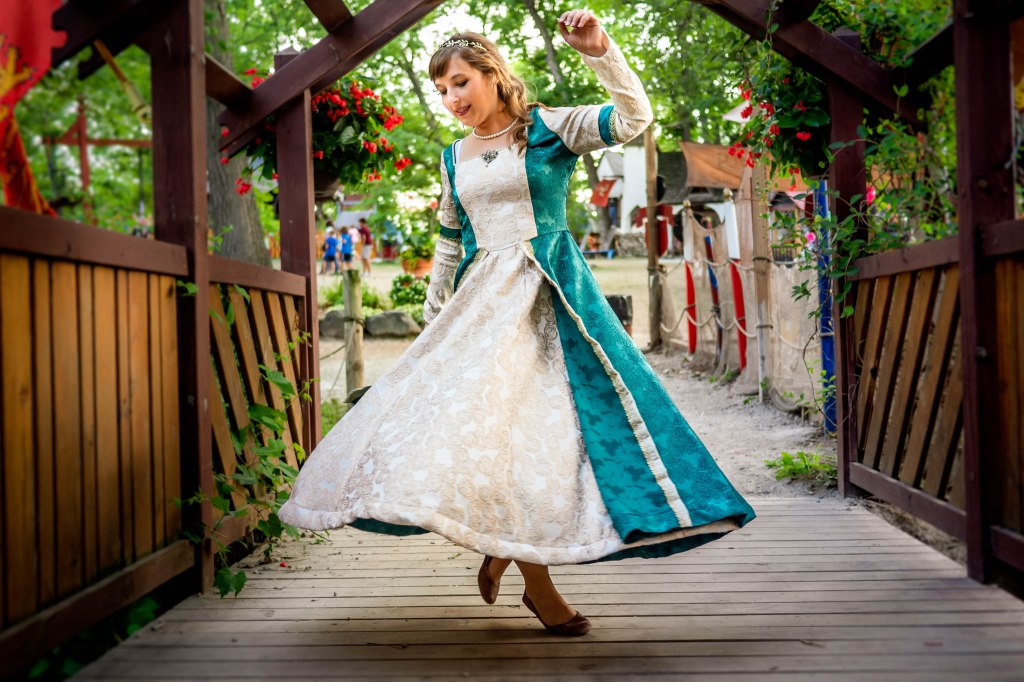
I LOVE historical dramas for the stories, the drama, and of course the costumes. After watching The Tudors, I really wanted to wear the sumptuous gowns from the show. This initially materialized as my first attempt in a green gown following Butterick B4571. Not a terrible pattern to learn from, I made this gown in 2016/2017 and was only my second full garment. But looking back, its a terrible construction and mockery of the true gown design I was craving.
The green and rose gold jaquard gown made from the Butterick pattern made its debut at my second RennFaire in 2018
At the time, I loved the gown. I loved the amount of spin, the color, the fabric (all clearance from JoAnn’s or Hobby Lobby!), the fit. But I look at it now after a few years of learning and laugh. It was a step though, and I was proud of it then, that’s all that matters. First off, it’s all one garment. No underlayers, overskirt, chemise, nothing. Again, an easy pattern for theatre or Halloween costumes, but not to par with what I wanted.
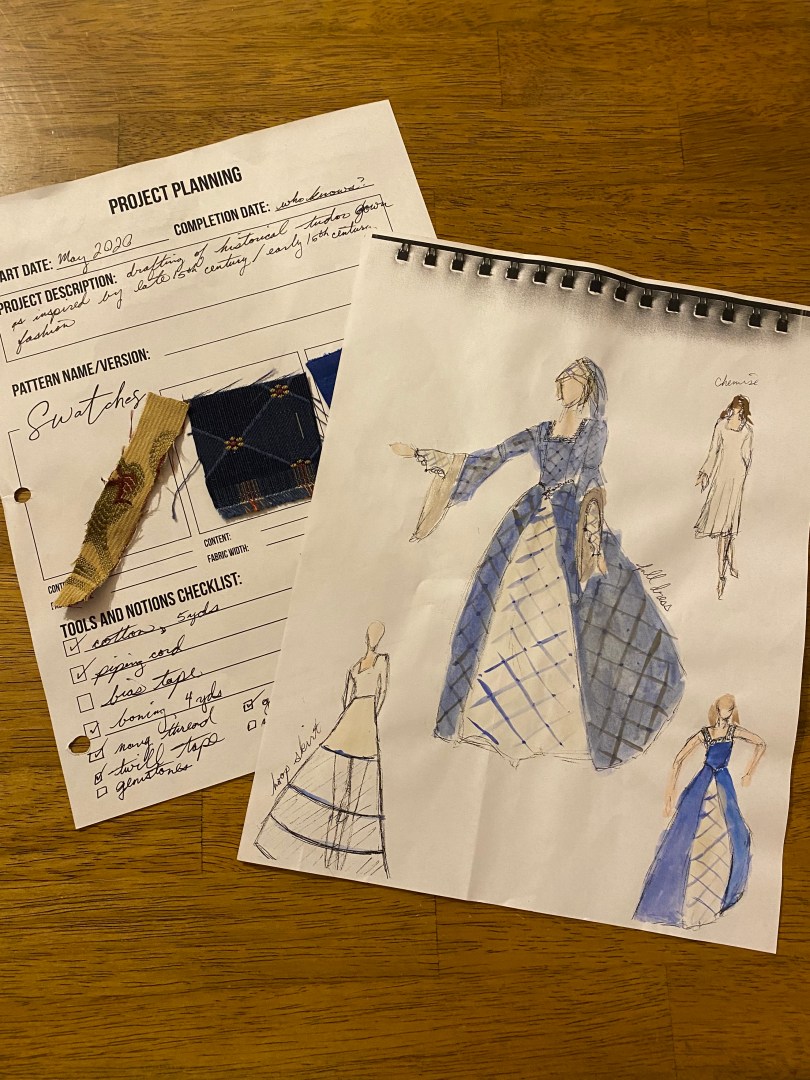
Fast forward to January 2020. I had moved to a new town less than 45 minutes from the Bristol RennFaire and I desperately needed a costume upgrade. I found a blue, geometric pattern upholstery fabric from Hobby Lobby on clearance for $4 a yard, began designing, and purchased a cheap theatrical costumes textbook to pull a pattern from.
I was a bit skeptical on the book since it included only three sizes to start from, but it was at least a place to start after some research. In reading other blogs and watching CosTube videos, I plotted out that I would need at least 4 layers:
Chemise
Kirtle or Bodies
Underskirt
Gown
I also was deciding on if I would like to include a hoop skirt or use added fullness. I decided to draft an elliptical hoop skirt in case I wanted to give it a try.
I’ll save everyone the overkill explanation of drafting these patterns, building three iterations of the bodice mockup, and building the kirtle using cheap polyester satin taffeta. In summary, it was a fit and quality failure.
The bust was too tight, the waist too large; the shape did absolutely nothing to highlight my figure or give the correct historic shape; the neckline was too high, but also too wide; and the material felt completely wrong. But I had stubbornly kept working at it trying to make it work. I added gems. I adjusted the fit. I tried adding a corset underneath to promote the right shape. Nothing was right and I was throwing money at a project I wasn’t prepared for.
And then the pandemic hit. All festivals were cancelled. And I lost every ounce of motivation to fix it. The pattern, fabric, and failed kirtle were shoved in a basket and thrown in a closet to be forgotten.
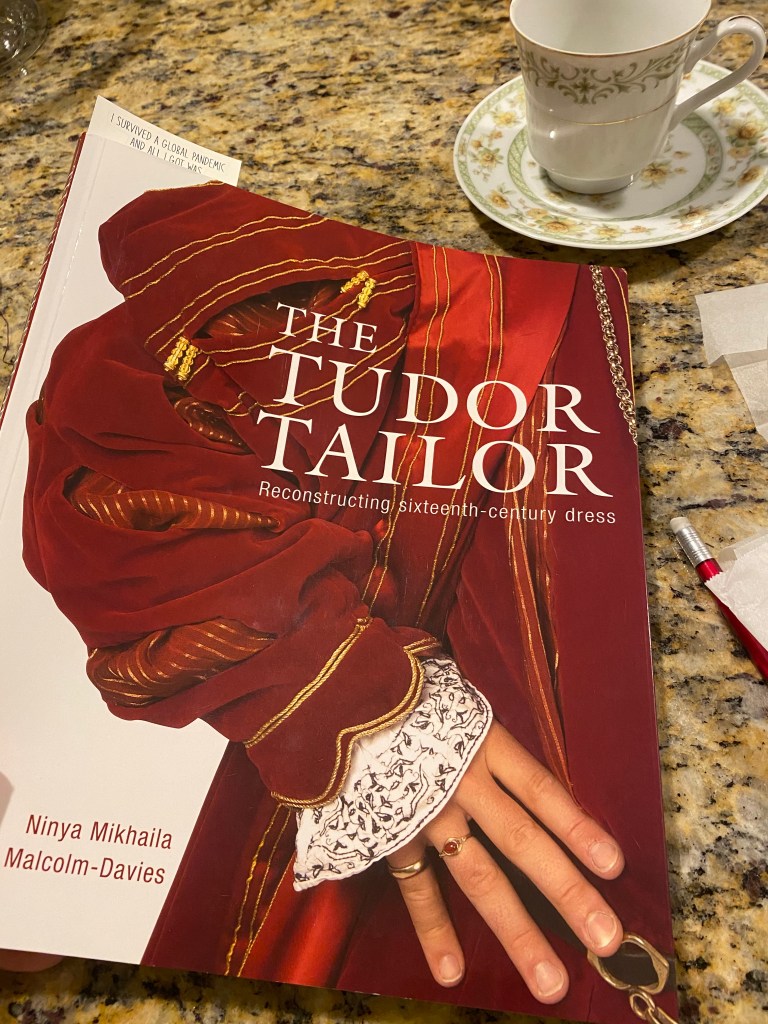
It took a year before I began working on this dream of a project again. In the meantime, I started this blog, I made The Goose Girl, I developed my skills, and most importantly, I took the time to read, study, and research. The best resources I found in restarting the project was the book, The Tudor Tailor. I 100% credit them for everything that this project became and the confidence that I had to try again.
In reading the book, all in a blissful winter night in January, I had a better understanding of the style lines and materials that were appropriate to recreate the designs in portraits from the period, not just what I’d seen on TV. I went back to the drawing board and purchased new materials for all the elements of the kirtle and gown. It also helped that by then I had successfully built a set of stays, bodies, and corset and was thus much better prepared for working with boning and structure that was needed for the kirtle.
The new design would be build from the Henrician Lady’s Gown pattern from The Tudor Tailor, would be supported by a kirtle, and finished with a French hood. I initially planned to skip the hoop skirt and go for fullness instead.
The original sketch from 2020 included a hoop skirt that I opted to skip for the 2021 version.
With a renewed spark of inspiration and passion to see the garment come together, I successfully patterned, fit, and constructed all parts of the design and am excited to share them here over the next few posts. Each layer of the garment will have its own dedicated post, but you can reference back here for links to them as they are published. I may split the gown up between a couple posts since it had the most elements and construction factors, but we will see.
Please join me on this wild ride of a second attempt that went from wrinkled fabric in June to a wearable garment in September.
While working on a Tudor era gown, I was struggling with fit issues on an unstructured gown. The key there is “unstructured”. My modern body technically fit the gown, but my posture and shape wasn’t quite right for the historical bodice. I opted to make a pair of bodies (pre-cursor to stays which were the pre-cursor to corsets) in an attempt to give the proper historical shape.
There are people out there who have studied costume history who are much better prepared to explain why and how different body shapes were created throughout history. But I highly recommend The Tudor Tailor for explanations of the slight variations of fit and structure throughout the Tudor period of historical dress. The book is fabulous, both for the many patterns included and the details pertaining to fabric, cut, and period techniques. For this project, I am using the Dorthea Bodies pattern from The Tudor Tailor which are reproduced from museum garments from the Elizabethan period.
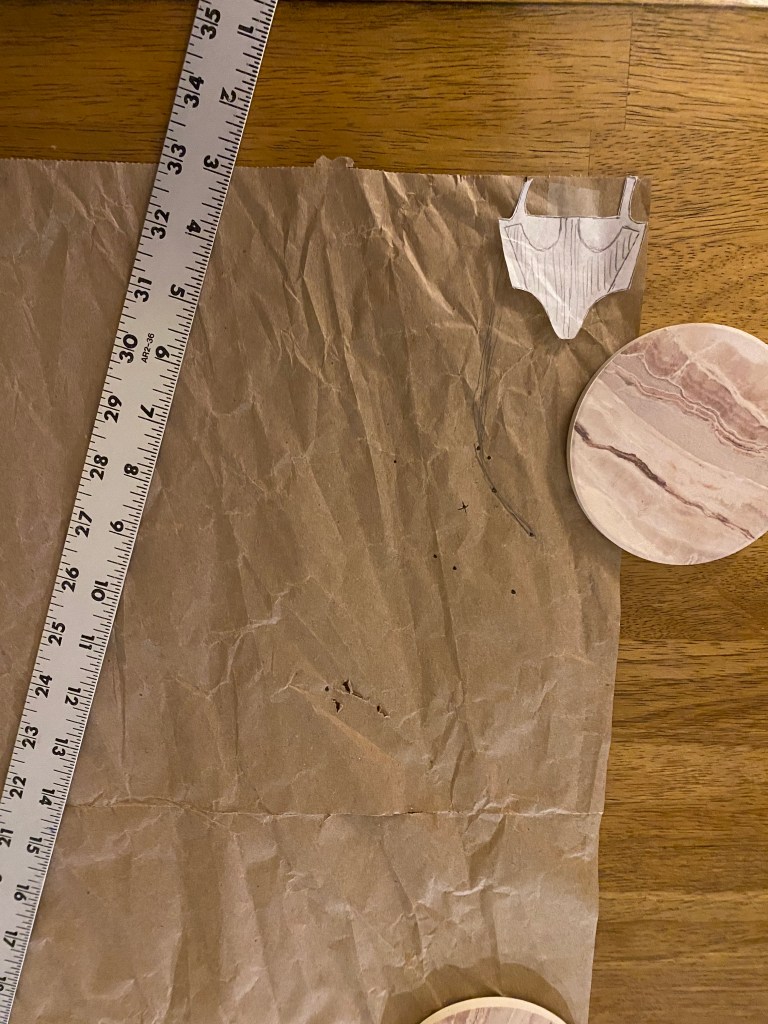
The first step was to trace and scale the pattern so I could begin making mock ups and fitting. This pattern is on a 1:8 grid which means that 1″ on the book page is equal to 8″ for the full scale pattern. This can also be thought of as 1 square on the book page was equal to 1″ for full scale. I like to use the radial method of scaling where I trace the pattern, tape it to my final pattern paper, and mark points for the final pattern from one point in the corner. I use a tape measure and yard stick to do this by marking points along a straight line equal to the tracing paper measurement times 8.
To start, the traced piece is taped to a corner (I like right angles) and markings are made along straight lines radiating from the corner equal to the distance from the corner to the point on the tracing paper x8.
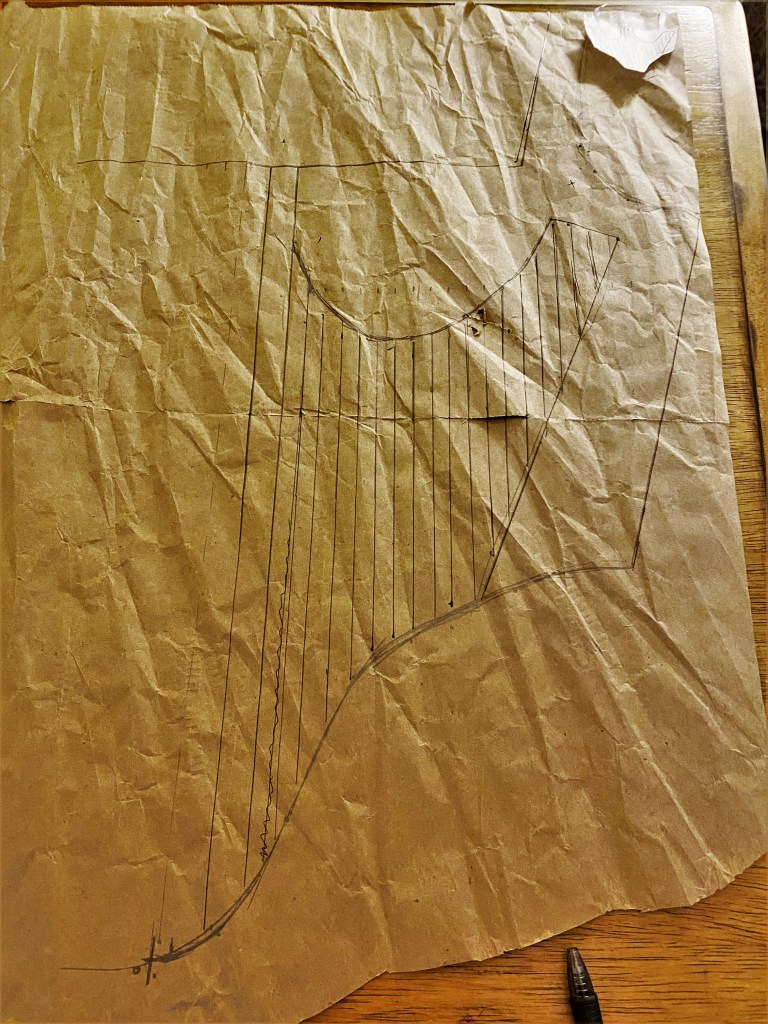
As the outer bounds of the pattern are marked and connected, the interior details can be added.
Scaling a pattern using this method is like creating a giant connect the dots. It takes quite a bit of focus, especially on areas with curves. I make enough points to accurately mark my lines and will then go back to the book pattern and count squares to confirm the pattern is correct. You’ll want to start in pencil since you will make mistakes and then go back later in pen and marker for the final pattern.
The interior details, in this case the boning channels, are made by completing the outline of their placement and then filling in the boning channels based on the size of bones you are using. I planned to use 1/4″ synthetic whalebone (plastic) and mark my channels as a scant 3/8″.
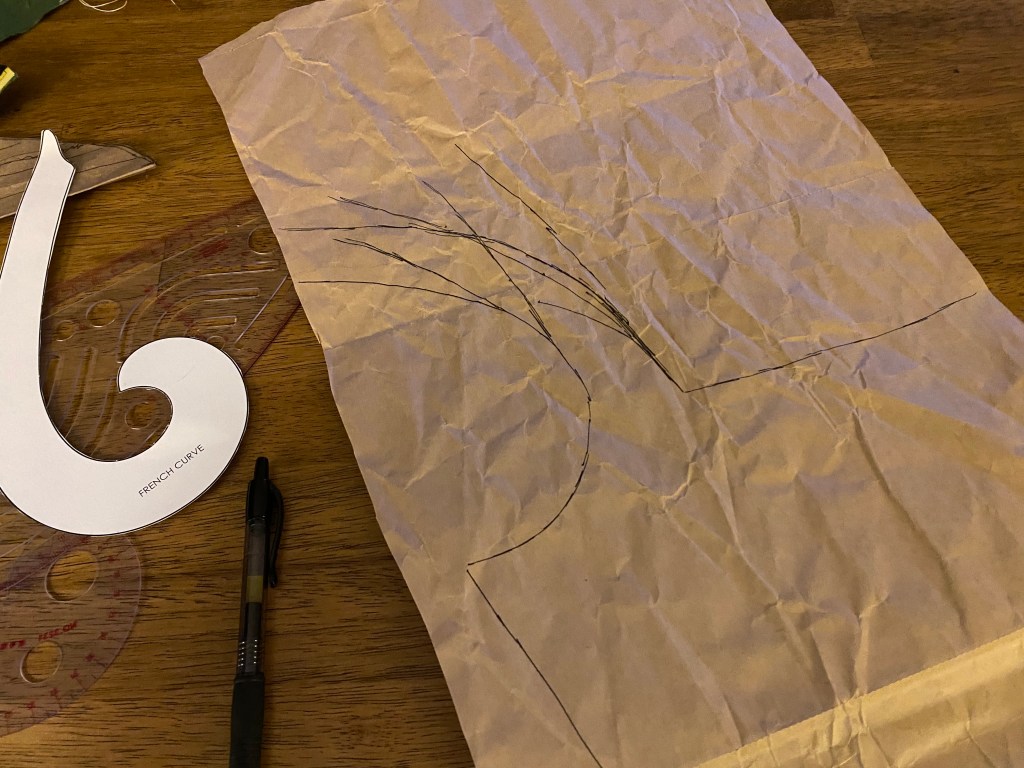
Once the pattern is is drafted, I started on the mockups and fittings. I am lucky in that my measurements were close enough to the pattern model to start from the book pattern without adjustment initially. The first mockup confirmed my suspicions that the bust needed adjusting (typical for me) and that the straps were too long, and too straight. For the second version, I used a french curve to adjust the strap curves so they sit farther on my shoulder points.
This process took THREE mockups to get right since my first attempt made the straps too curved and then not enough on the second try. Third time was the charm. With the third mockup, I also swapped the eyelet closures to be at the front rather than the back since I prefer front lacing. Back lacing is too difficult for me to lace myself that if I can avoid it, I do.
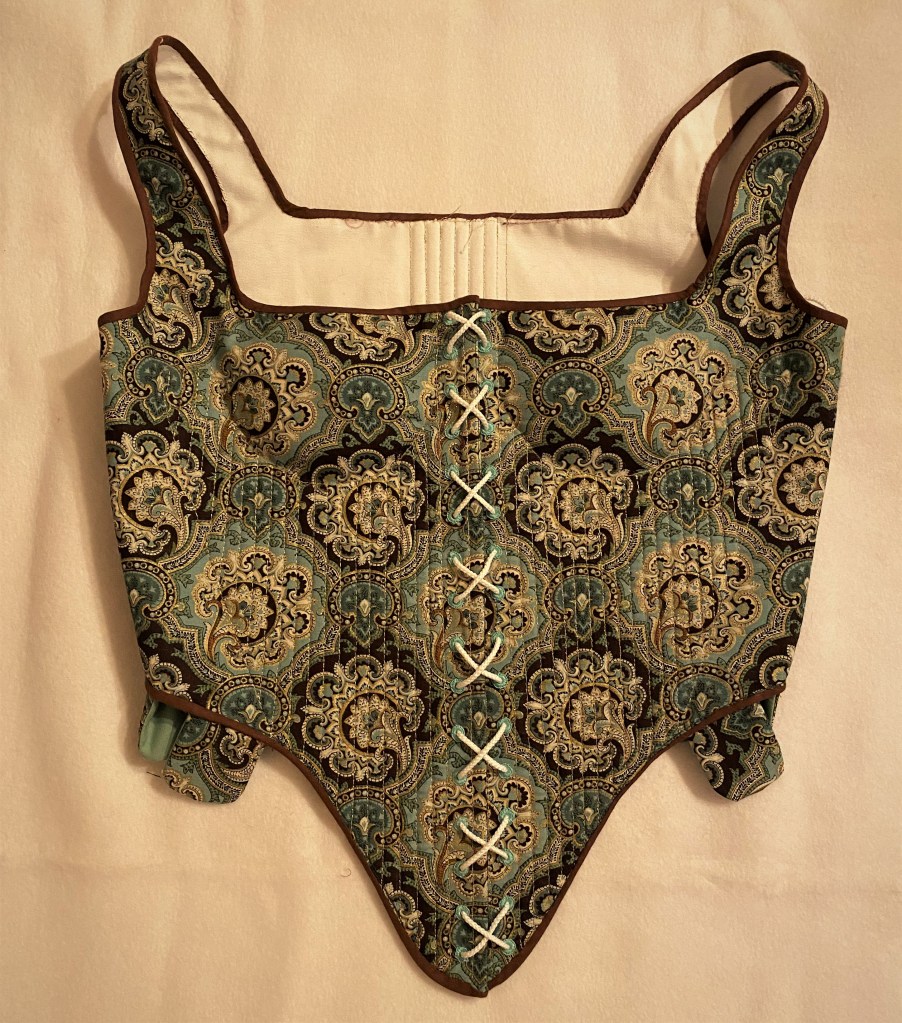
Pattern finished, I could cut my fabric pieces. I planned to use the sandwich method for making my boning channels since all the channels are parallel straight lines. The sandwich method also meant so I would not need a lining or twill tape. In the end, I used three layers: coutil, cotton, and fashion fabric. The outside (fashion) fabric I chose is a brown and teal cotton, but wasn’t strong enough on its own for the boning channels. I used a scrap green cotton as interlining to add structure to the fashion fabric for the boning channels.
Next, the outside fabric and cotton interlining are basted together before stitching the side seams for the basted layers and coutil. The side seams are pressed open and boning channels are marked. I make all my pattern markings after pressing seams since I use water soluble markers that disappear with heat and steam.
Here you can see the seam at the center back of the interlining. I only had 1/2 yard of the material and had to cut the back panel as two pieces and stitch together before flat lining with the outer fabric. Pretty easy way to conserve fabric, especially for patterns like this that have odd long sections (straps) that don’t fit well on yardage together for economic cutting.
With wrong sides together, the outer layer and inner coutil layers are basted together. I am leaving the neckline at the bust and center back open to allow for insertion of the bones. Since I shifted the lacing to the front, I adjust the boning channels to have 1 channel at the edge, 1/2″ space for the eyelets, and then back to the boning spacing. Adding a bone between the eyelets and the center edge gives structure and prevents the eyelets from stretching individually.
The boning channels are marked both on the inside and outside of the garment since I would be attempting to hand sew the channels with metallic thread.
Prior to stitching the channels, I added a few pad stitches throughout the channel area to ensure the fabrics didn’t shift or bunch while making the channels. I did these in a bright thread for easy removal later.
The outline of the boning channels is stitched with a backstitch for strength at the bottom of the channel which take excess strain. The channels themselves are also backstitched, but with a much longer stitch length for speed.
The interior of the bodies with basting stitches and final boning channels stitched.
I order plastic boning in 25 yard rolls and cut each section based on the individual channel length.
Ends of bones are rounded using a sharp scissors (not fabric scissors though) to prevent the bones from cutting through channel stitching.
I like to insert the bones into the channels and iron each in place rather than straightening the entire 25 yard roll. I find this more manageable.
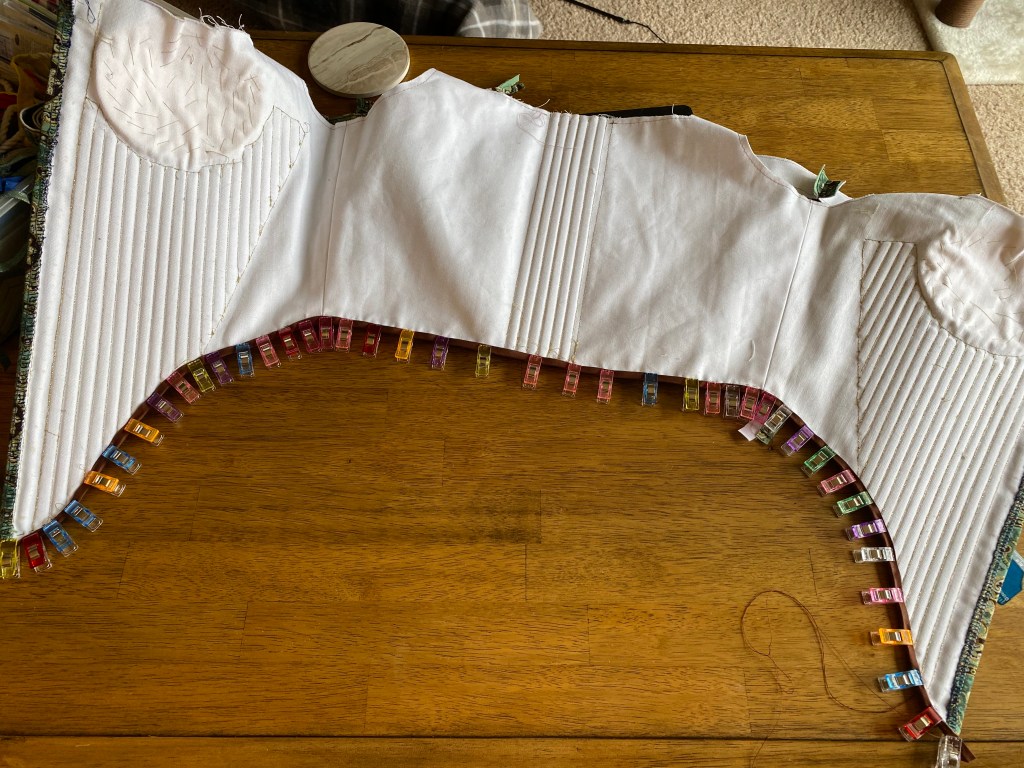
One half completed with bones!
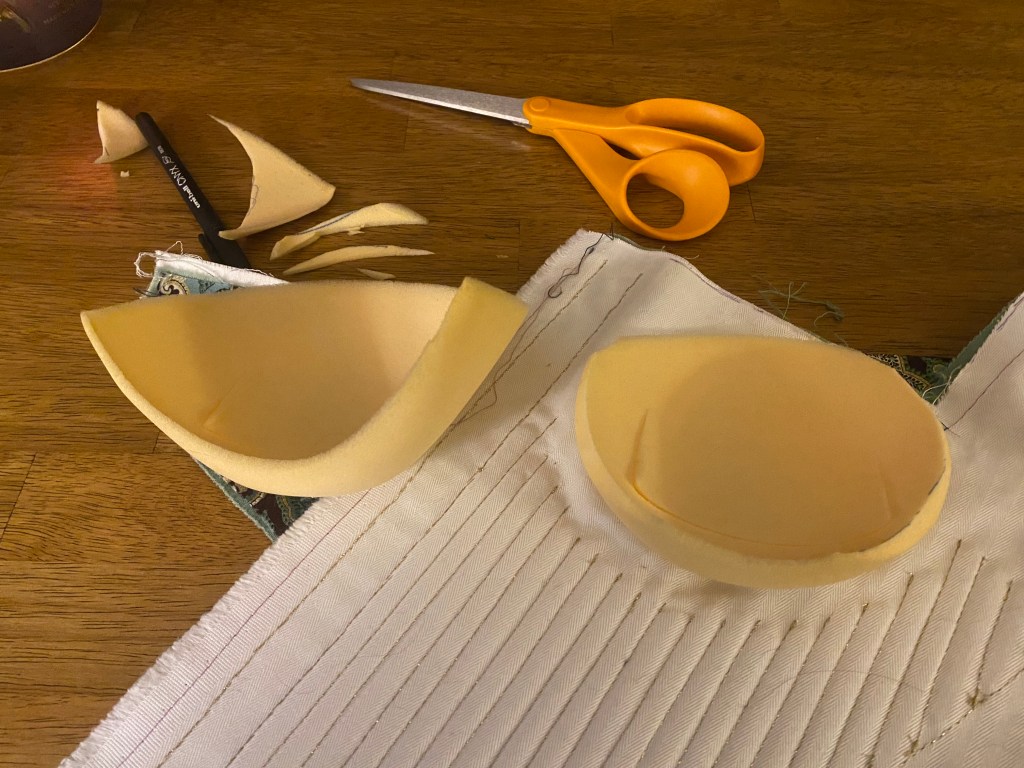
As I’ve said, I often struggle with fitting the bust of garments and one of the major problems with the unstructured gown the bodies were intended to go with is that the bust is too large and cannot be easily modified due to beadwork. Since the bodies have the underbust supported by bones and bust soft, I left the excess material and padded it to assist with the right shape for the gown. I had a pair of shoulder pads on hand from a clearance rack and trimmed these to use as padding. They were honestly super for this purpose since the shoulder pads are tapered to have more padding on one edge and less on the opposite. I fudged the trimmed shoulder pads so that the thicker side would be at the bottom of the cup, providing support.
The uncut shoulder pad on the left and trimmed piece to the right.
The top of the boning channels are backstitched to prevent the bones from popping out and the pads are roughly pad stitched to prevent the coutil from gapping.
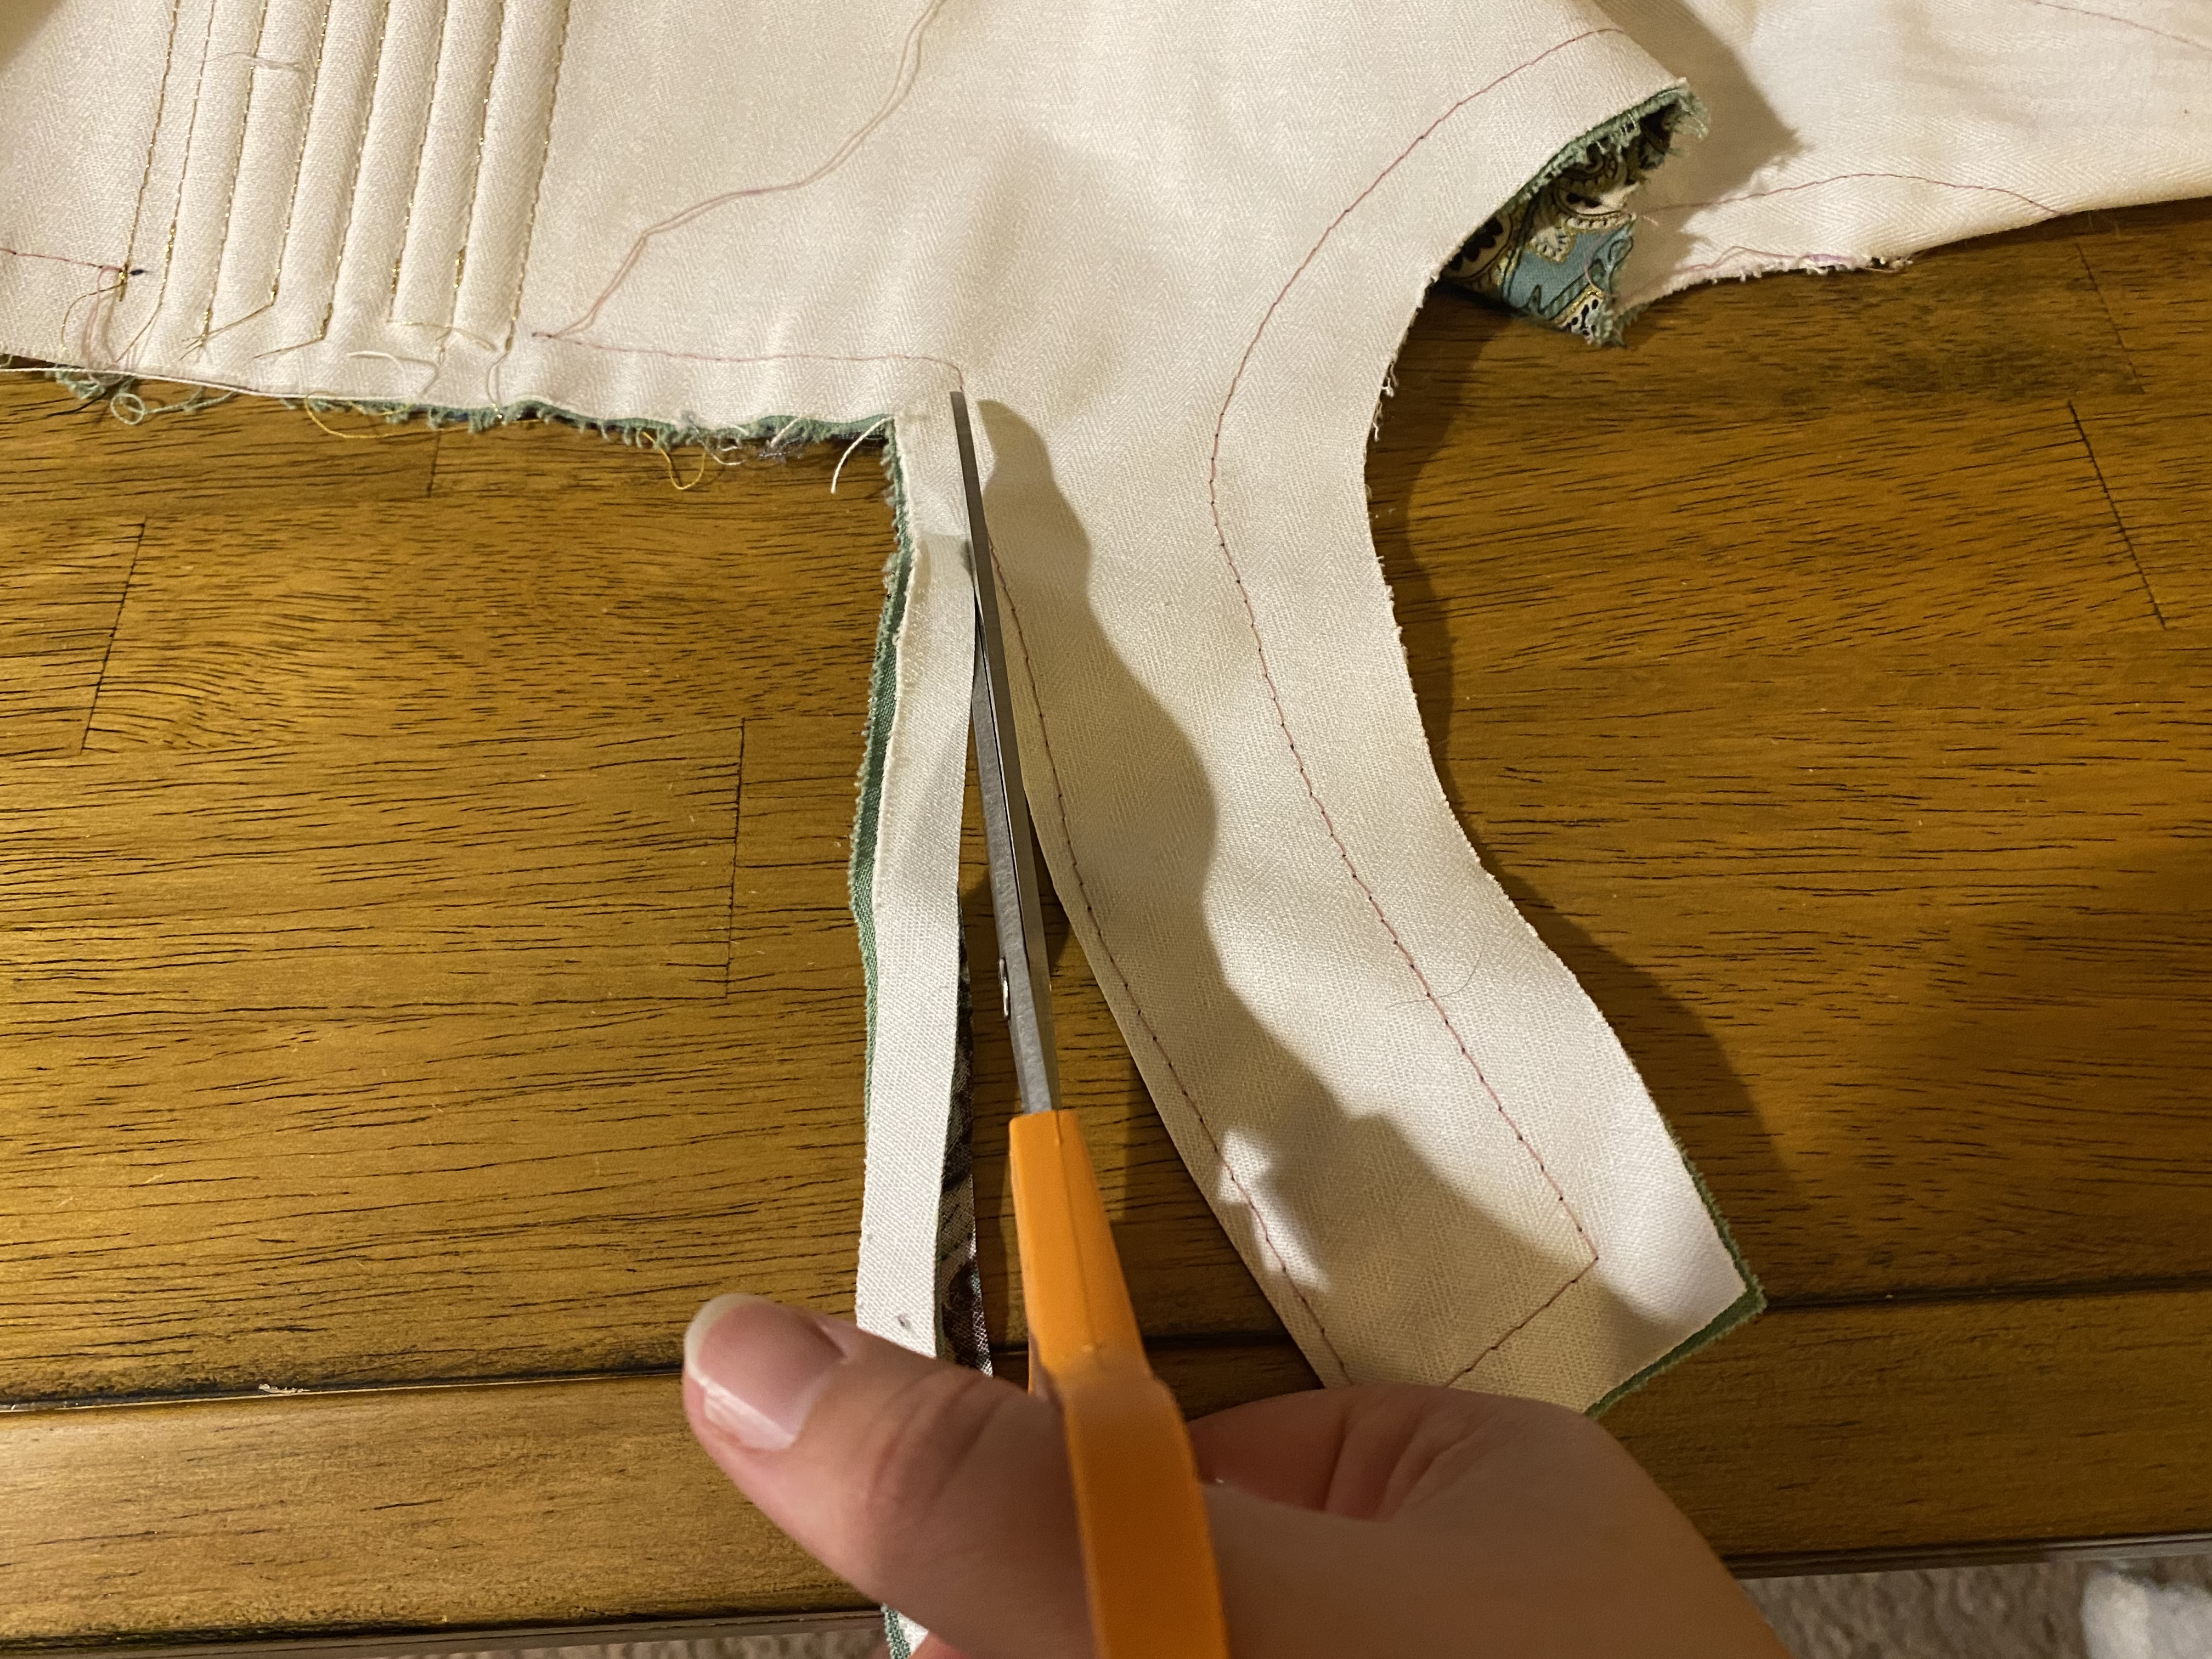
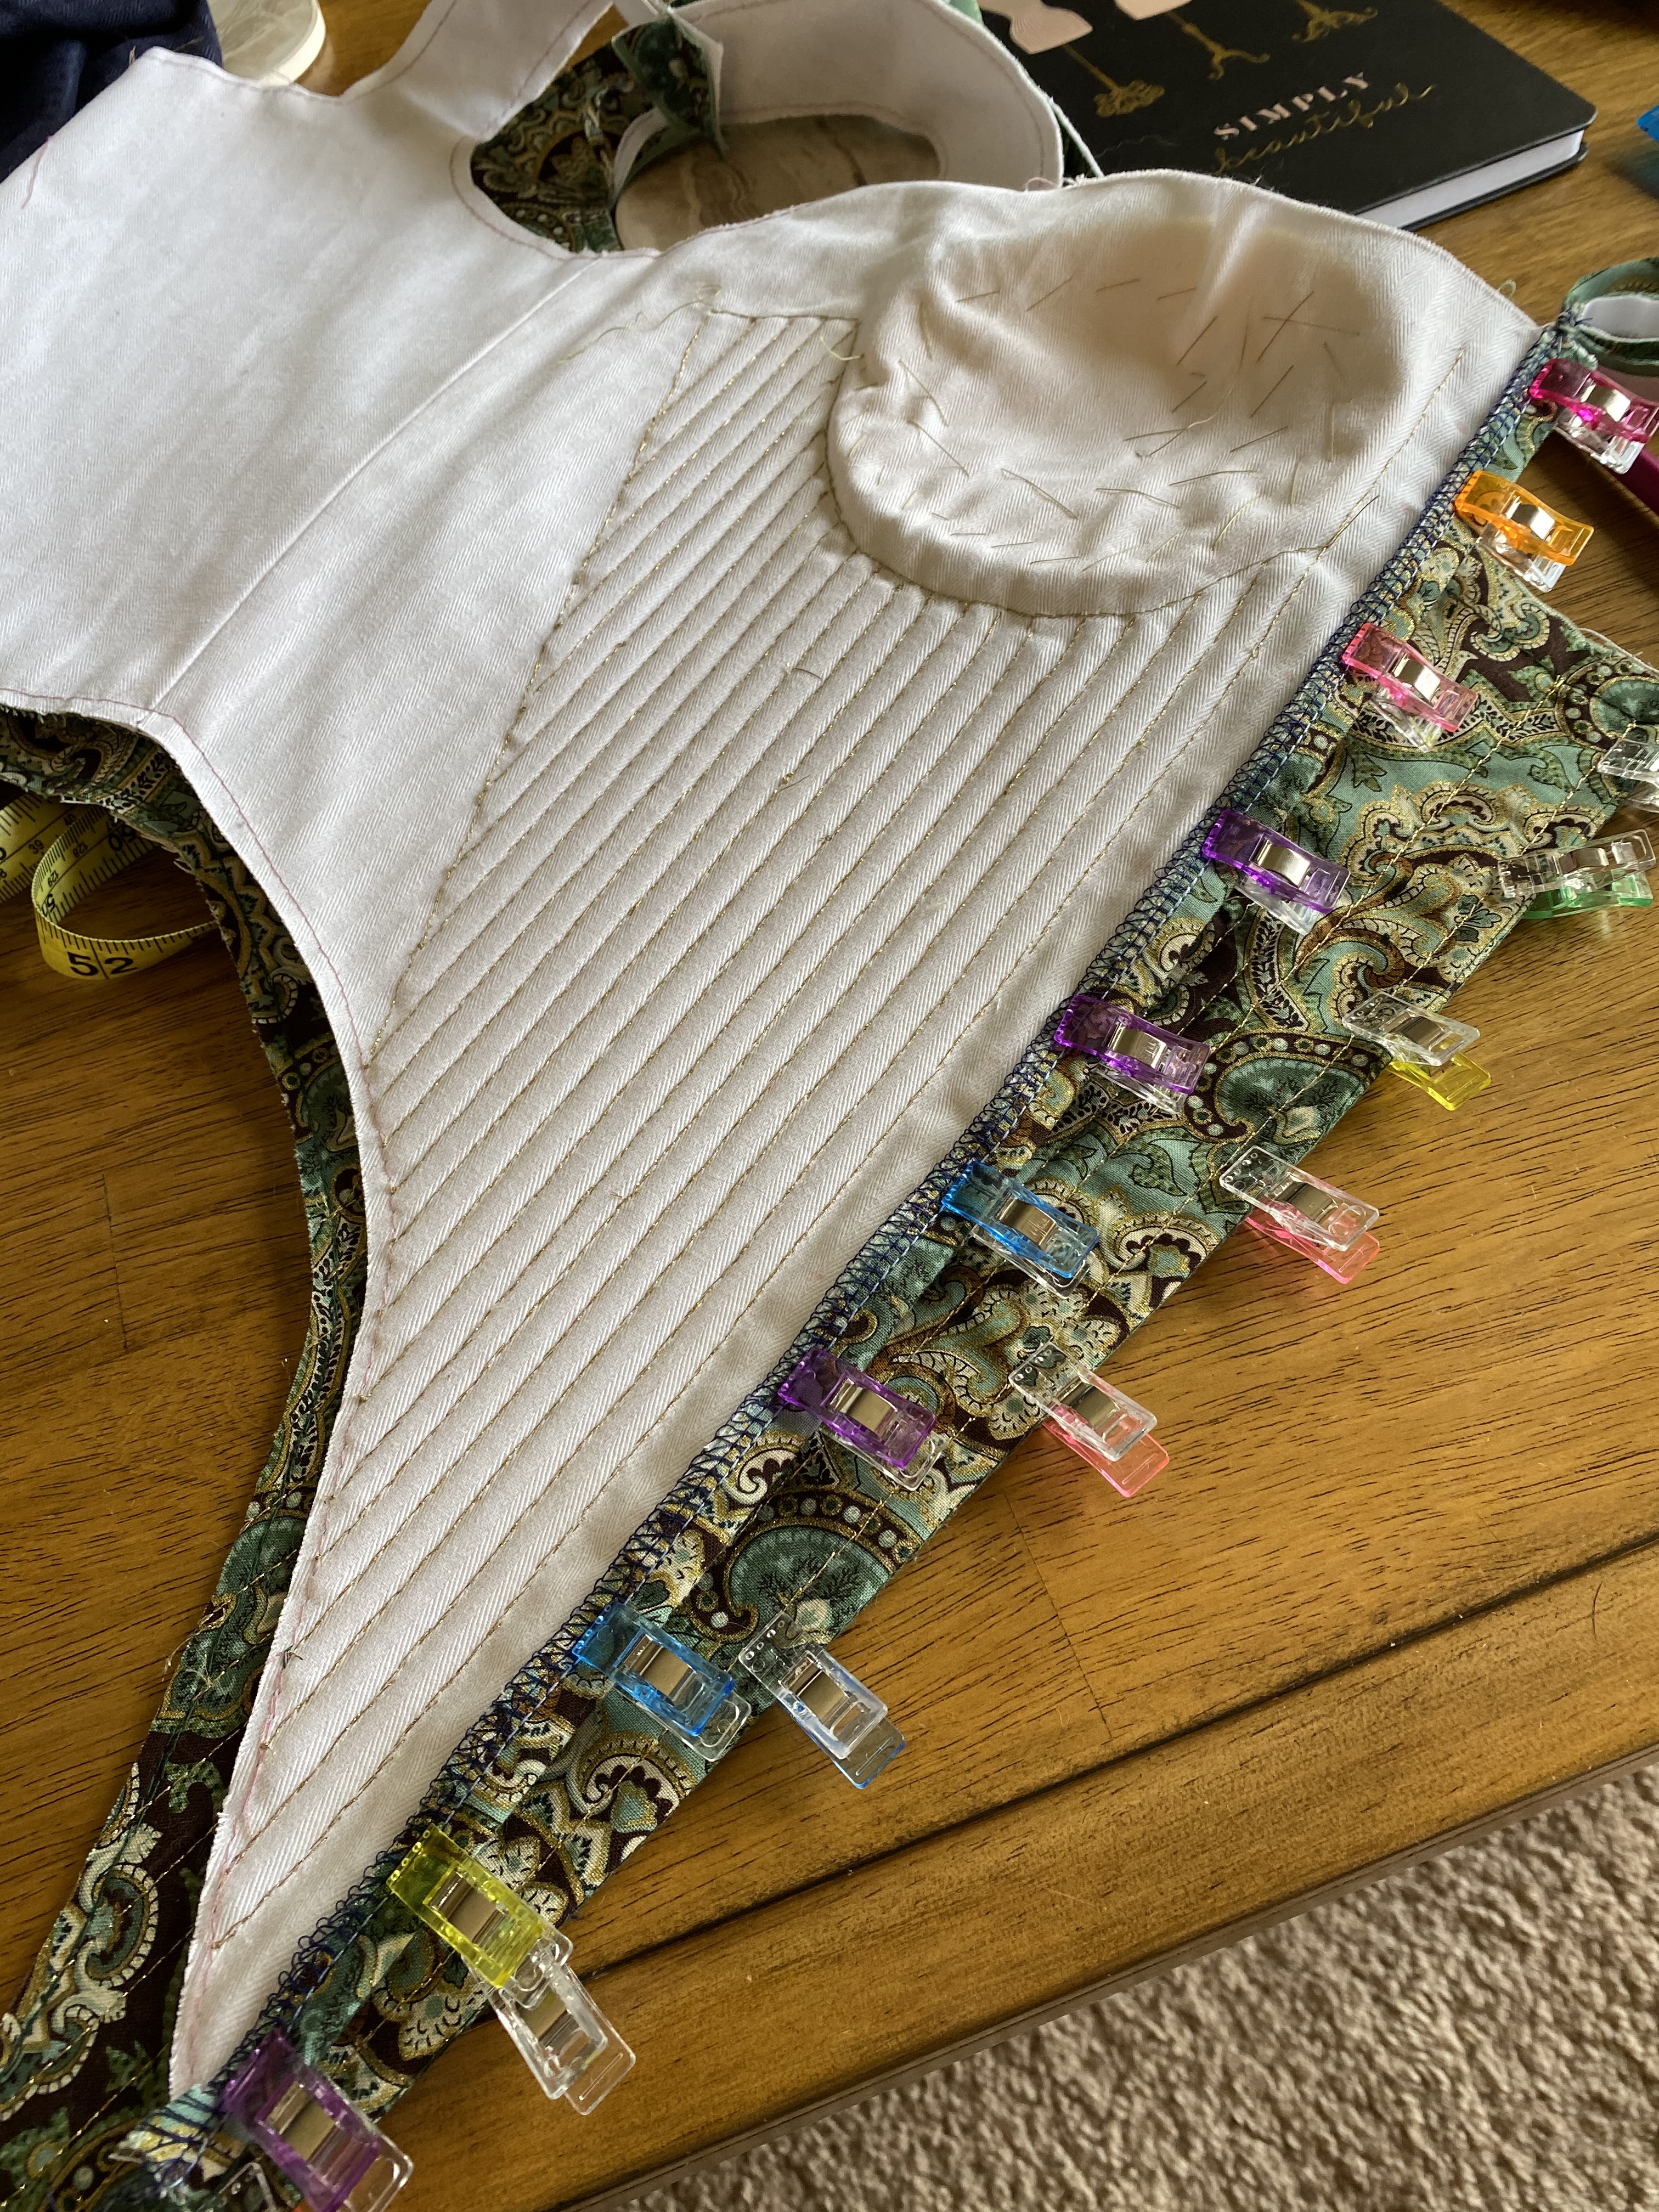
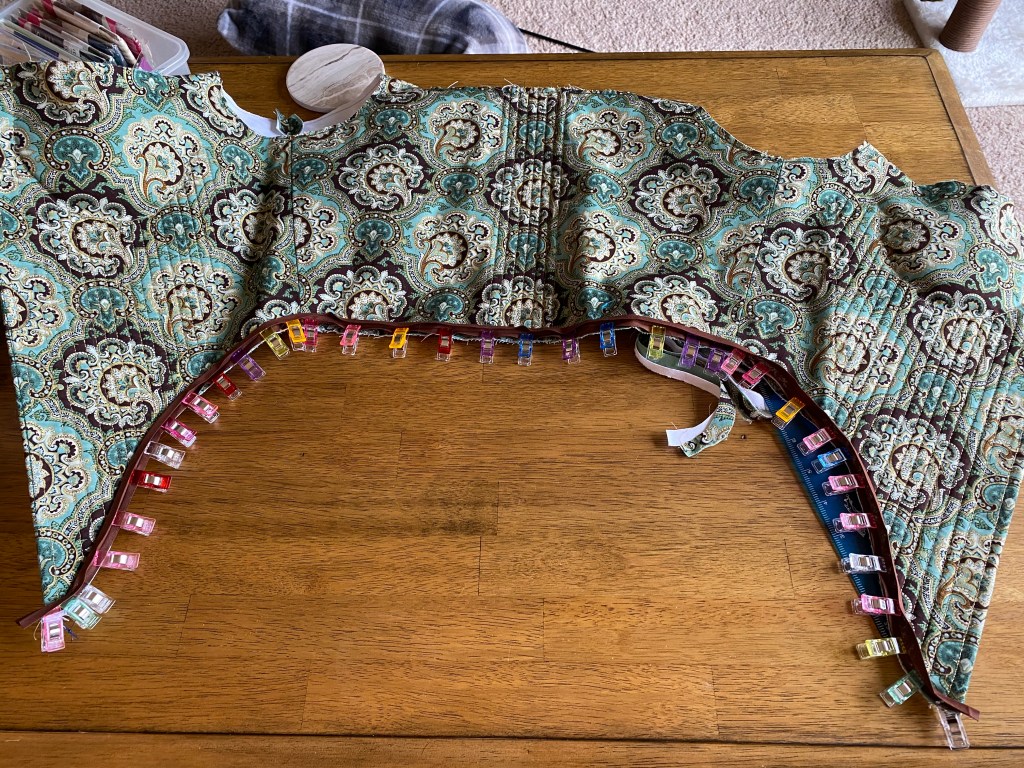
The edges are finished by trimming away the seam allowance to the basted stitching lines and application of bias tape along the neckline and waistline. The center front was surged and folded back rather than having bias tape interrupt my hard work to pattern match the center front.
1/4″ double fold bias tape is used in a complementary chocolate color.
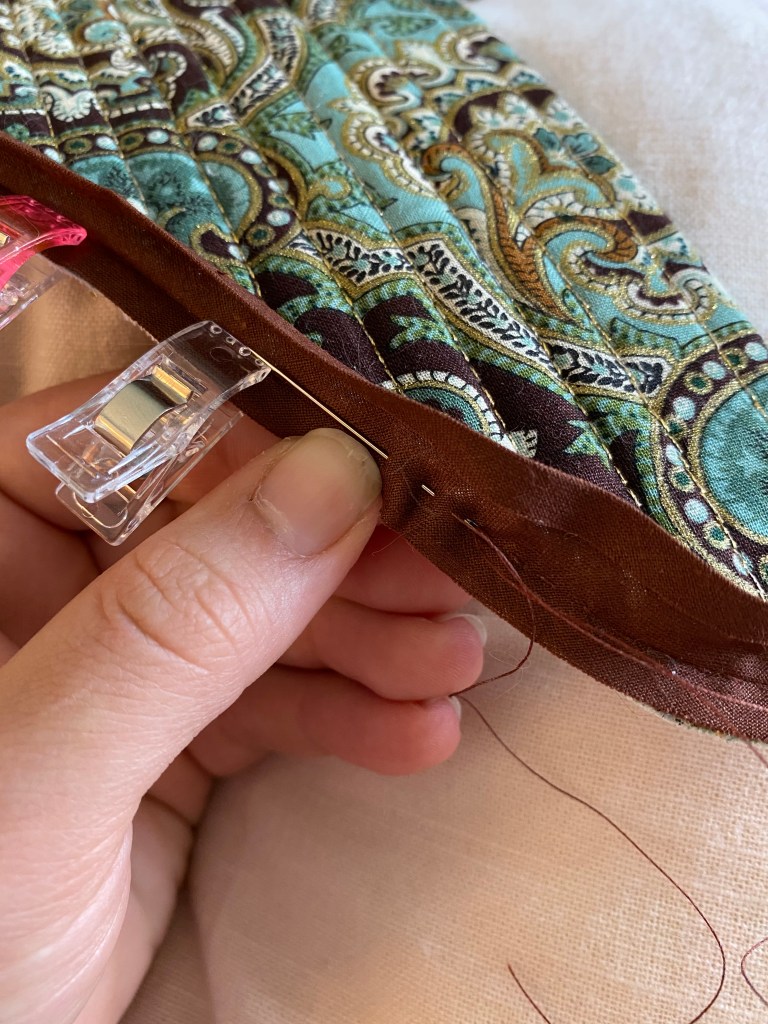
The bias tape is stitched to the front along the interior fold line with a running back stitch (2 running stitches, followed by one back stitch)
The bias tape is folded to the back and whip stitched in place.
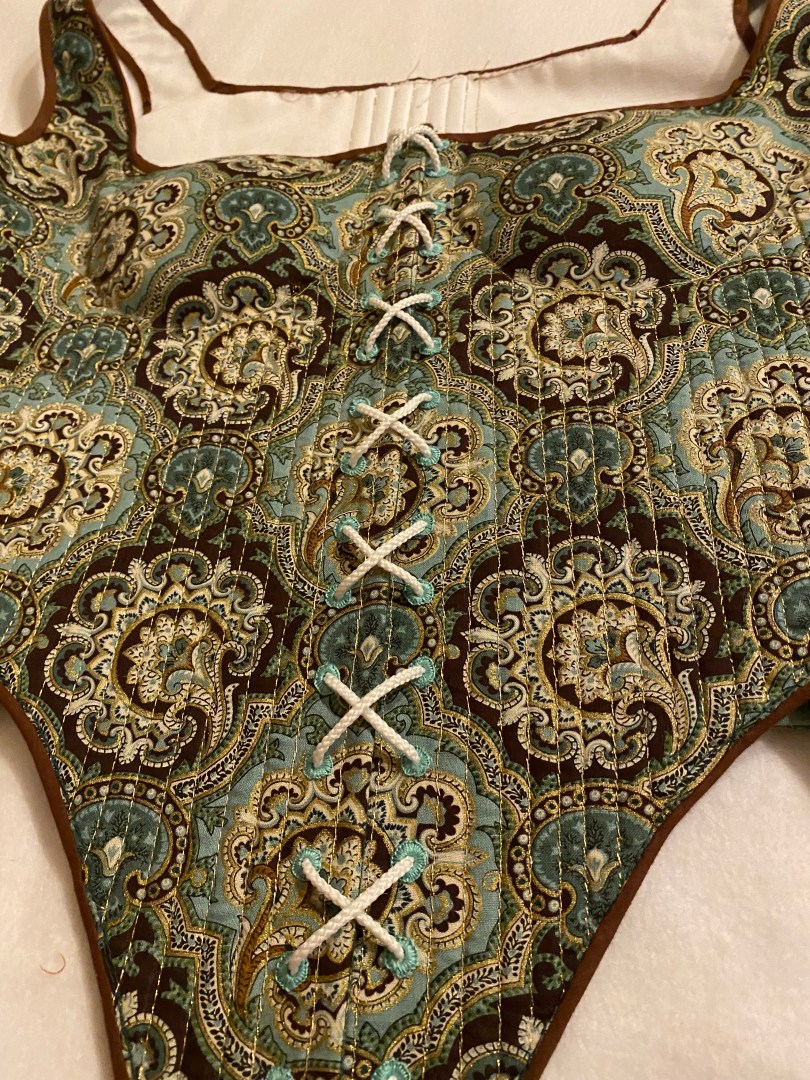
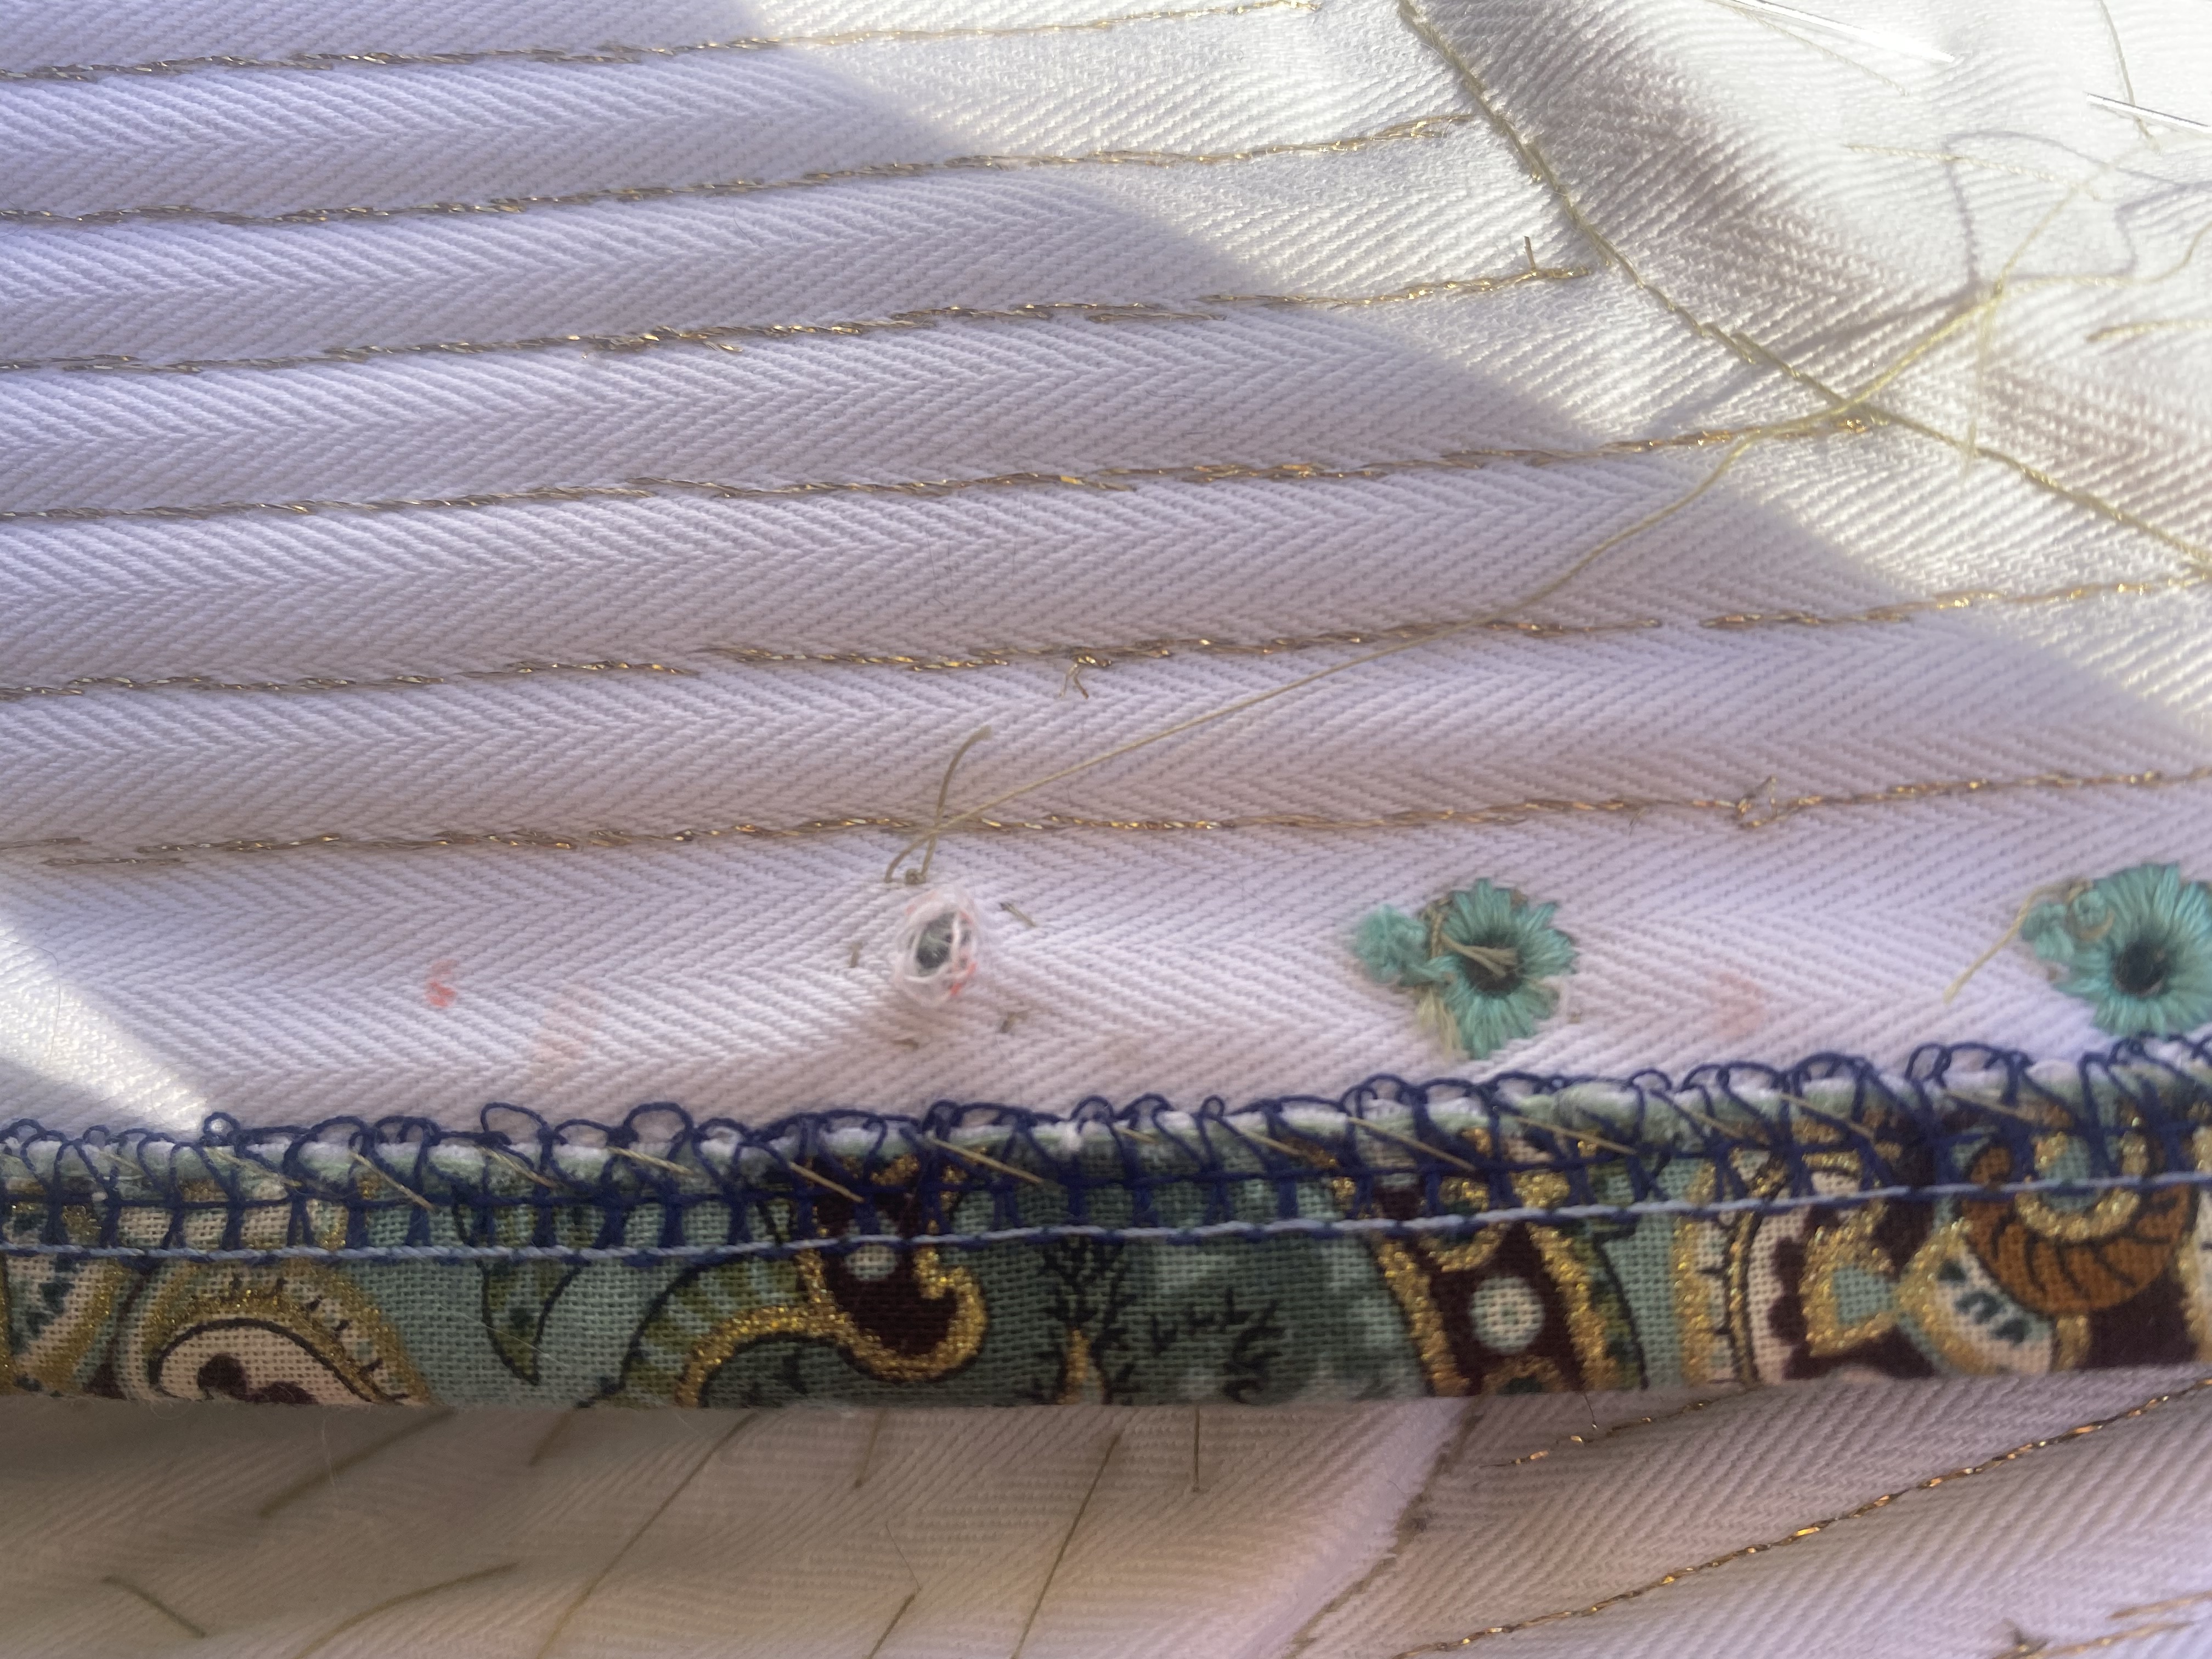
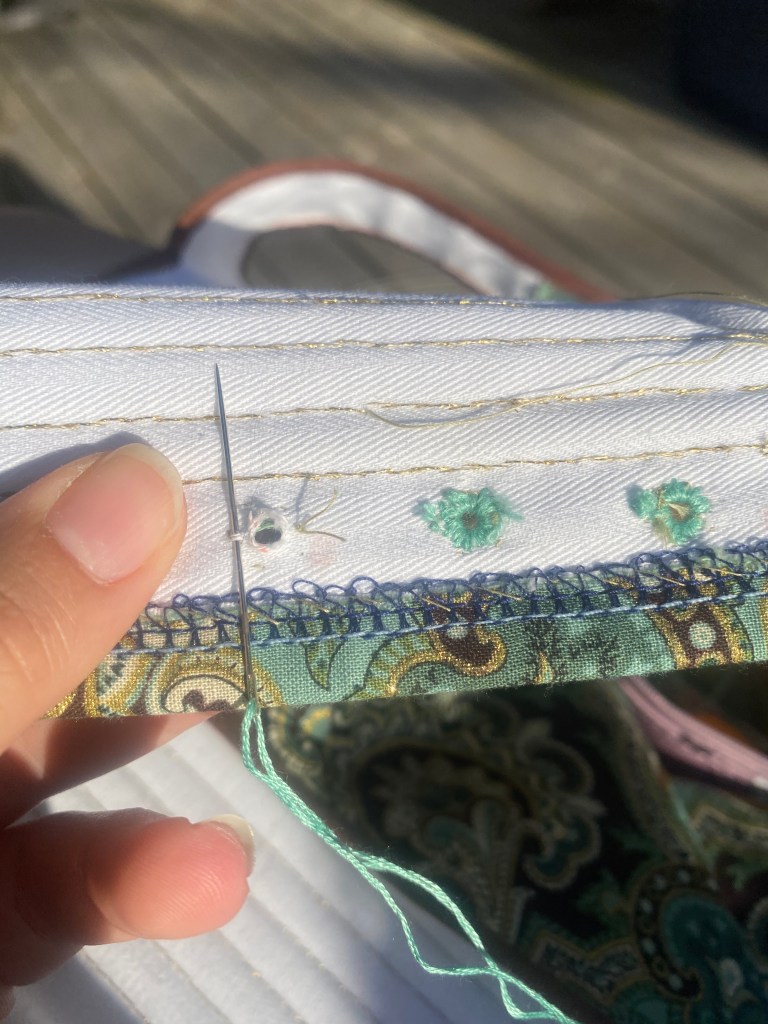
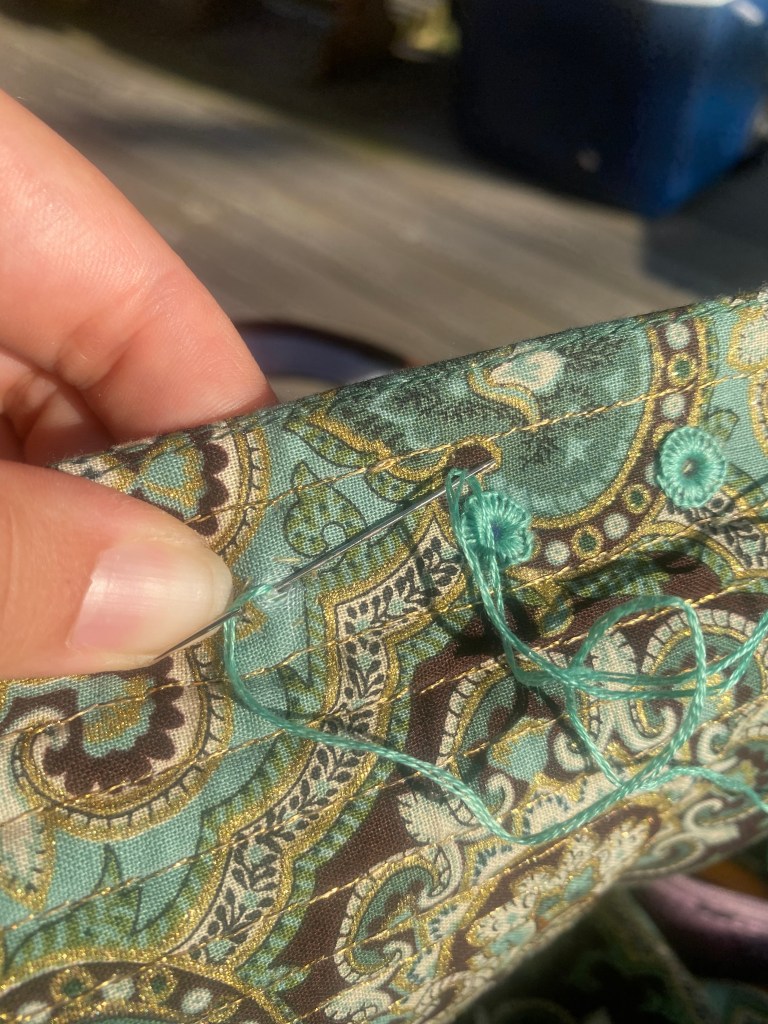
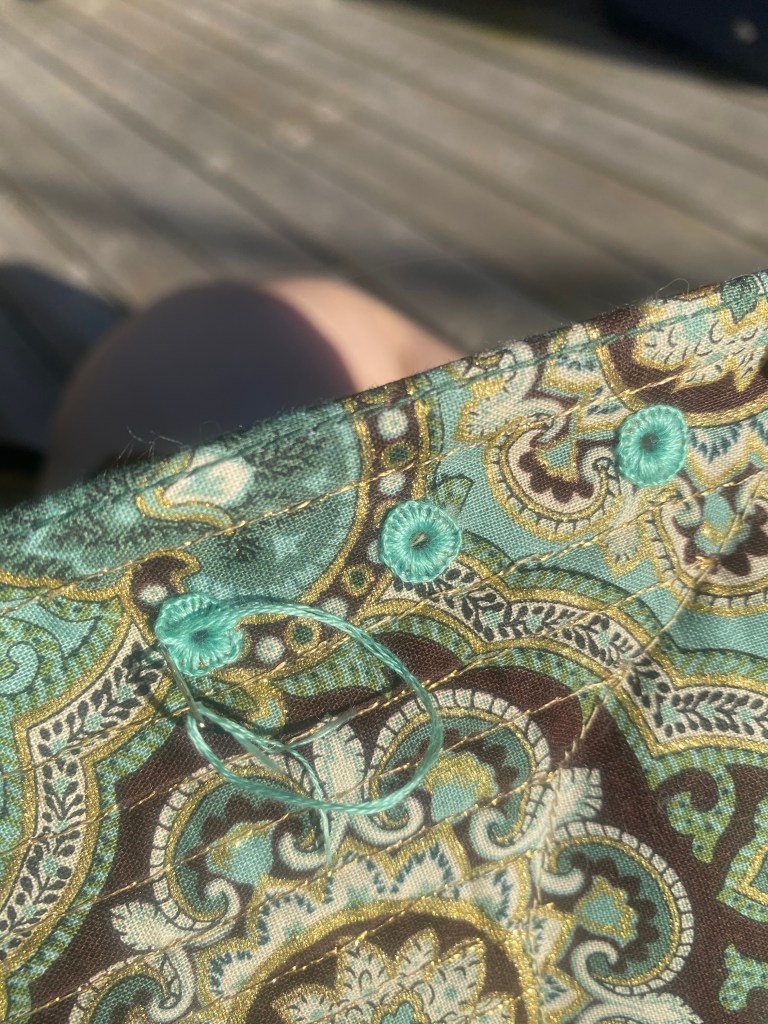
Edges finished, the last steps were to embroider eyelets to the center front closure and add the tabs to the waist. For the eyelets, I decided on a criss-cross style rather than spiral lacing because . . . math is hard and I just could not make spiral lacing work. For this, the eyelets are placed parallel to each other. To embroider them, I create the holes with a tailors awl, baste stitch a guide circle around the opening with regular thread, and then stitch them with two strands of embroidery floss. Stitches start from the back with a knot, then wrap up through the opening to the thread is through, but the needle passes back down the hole and out the fabric (from inside out) at the guide stitch line. The embroidery thread wraps around the needle point before being pulled through to make a nice, neat, stitch. This continues around the opening to create the finished eyelet.
1. Baste stitched guide circle in contrasting color
2. Start the embroidery thread at the inside with a knot
3. Thread the needle and 3 strands through the opening to the front.
4. With thread length at the front, stitch from inside to outside, looping the thread around the needle point.
5. Continue loops around the opening and finish by stitching from front to back and knotting at the inside.
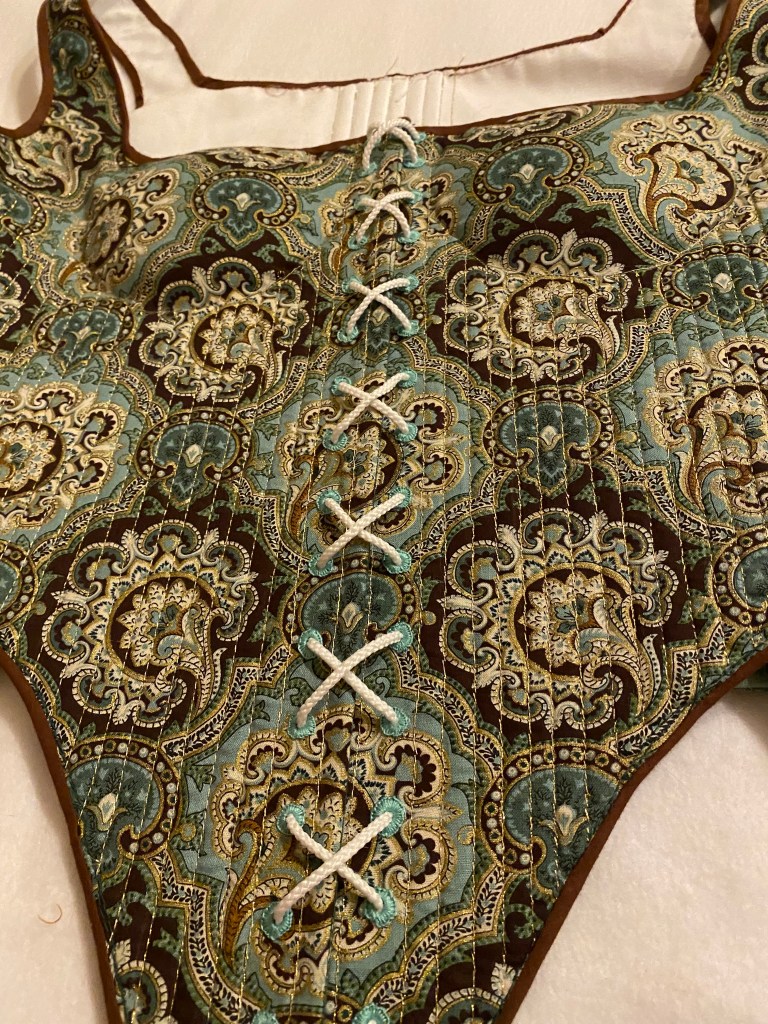
Finished eyelets at the front of the bodies, laced with white paracord (because it’s cheap!)
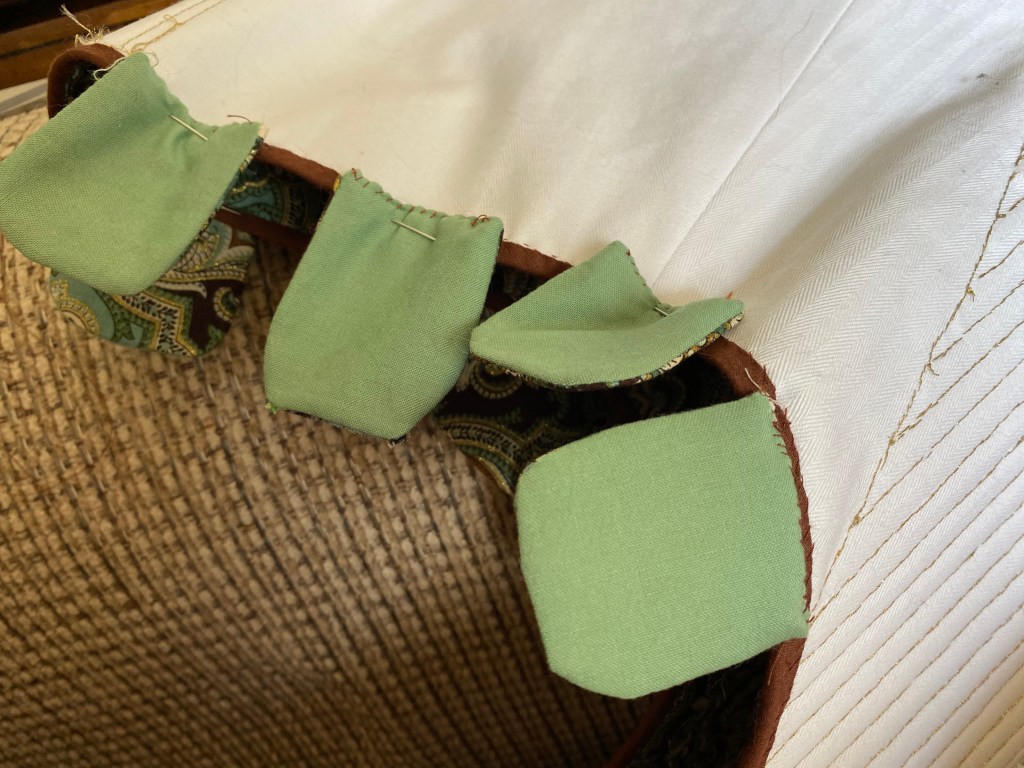
I deviated from the Tudor Tailor’s instructions a tad for the tabs. Rather than binding them, I cut my tabs with seam allowance and stitched the front and linings with right sides together, clipped the seam allowance, and turned them out with the top edges raw. This isn’t necessarily right or wrong, but I was to the point of wanting to move faster and get the project done, and this was quicker. I also added a layer of scrap home décor fabric sandwiched between the layers to give structure to the tabs. I whip stitched the top edge of tabs with the raw edges turned in for a quick finish. With 8 tabs in total, I generally spaced 4 on each side area of the waist and stitched in place to finish.
The finished tabs with whip stitching at the top.
Arranging the tabs was a tad of a process. Looking back, because I adjusted the sizing of the bodies themselves for my waist, I should’ve made more tabs or widened them to fit the final garment better. It’s not a great finish with gaps between them, but they’re done.
Lovely shape and relatively straightforward process, I am quite pleased with how these turned out and how surprisingly comfortable they are. I attempted to wear them with the unstructured gown in question and unfortunately did not see an improvement in the fit or shape. I’ll still wear these for other garments in the future and am proud of how they turned out, but they did not fulfill the intended purpose.
Honestly, I’m really not pleased with the odd fitting garment for more reasons than just the fit. Since I’ve had the last year to improve my skills and have now read The Tudor Tailor, I plan to restart the overall Tudor gown project with a new pattern in hopes that a second go, with the right materials and skills, will lead to a better outcome.