Amidst the darkness of the past year with theatres and events canceled, I was blessed to receive the vaccine and be able to join a small theatre group on their first in-person production. Though the show would be filmed and shown virtually, the cast met in person for safe distance rehearsals. I was cast as Mrs. Juno in the short play Overruled by George Bernard Shaw, a passionate woman who has taken a vacation from her husband with her lover only to find herself at the same seaside resort as him and his new lover. It is a silly little comedy of manners set in Edwardian England.
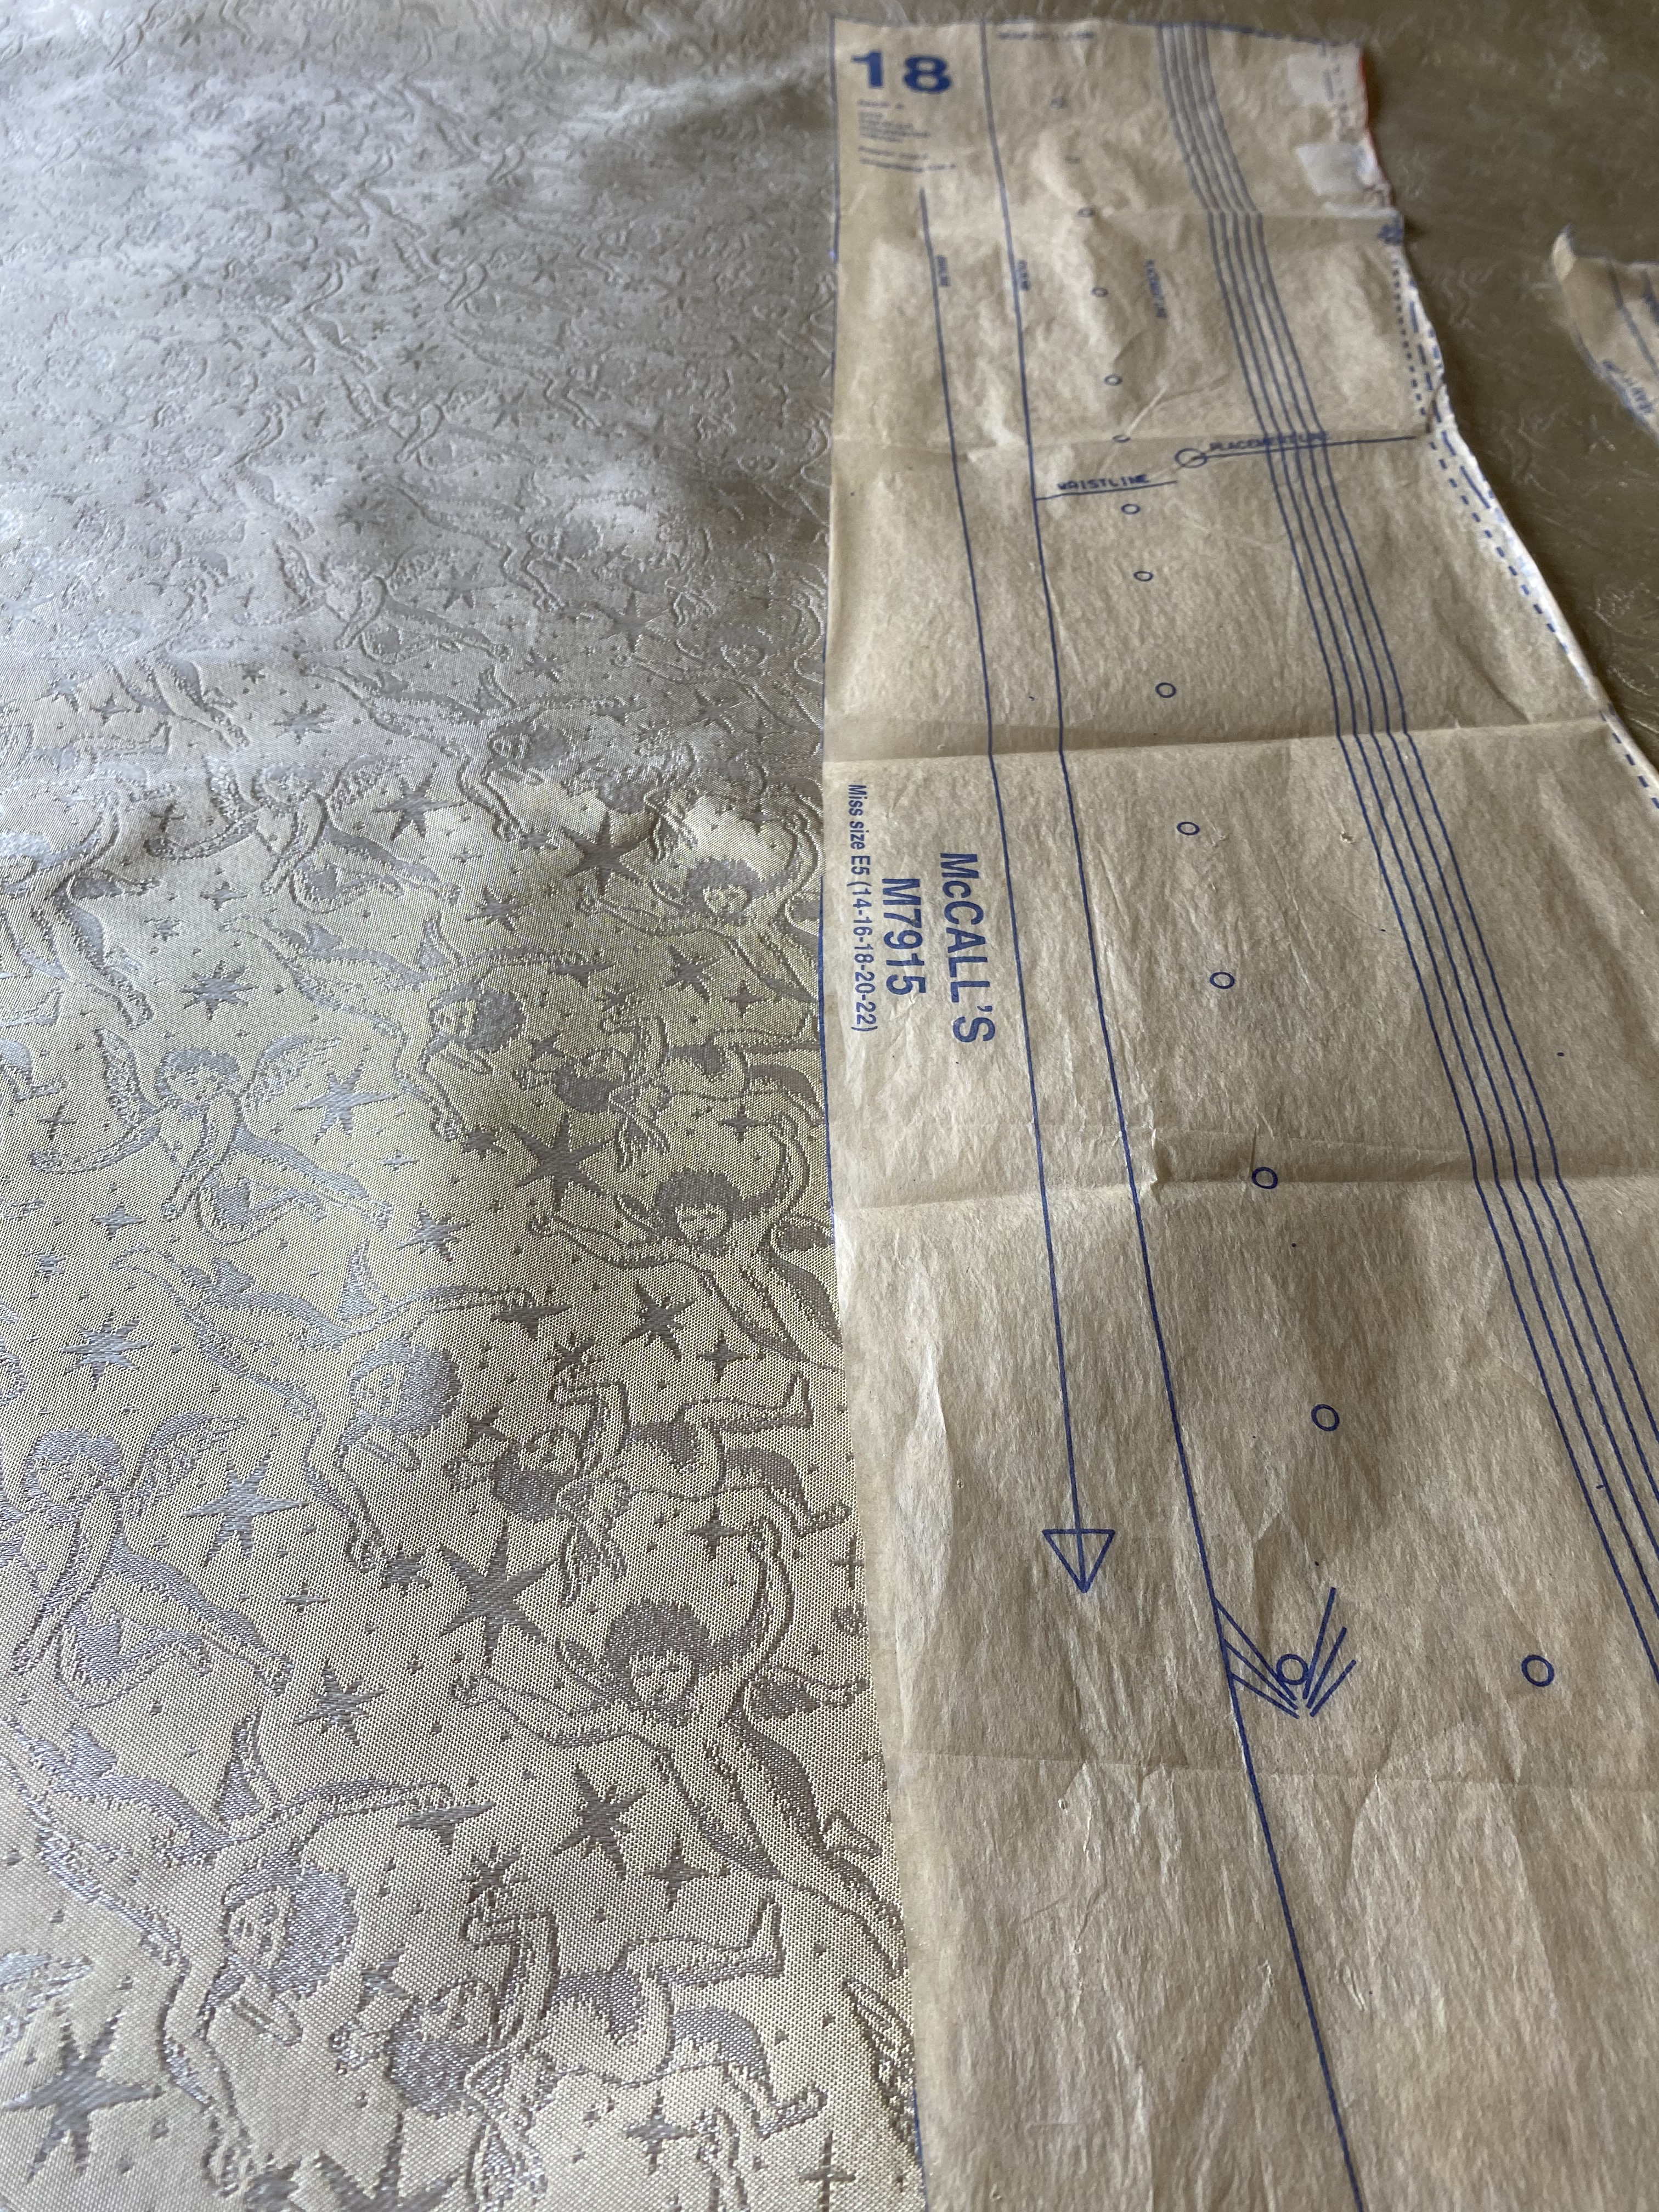
The costume designer informed us that we would need to purchase corsets for the production. I was between sewing projects at the time, knew I had all the materials I would need to build a corset in my stash, and asked if I would be able to build my own rather than purchasing. Thankfully, they trusted me to take on the project! The costumer gave me a few suggestions of the style they were recreating from 1911 images and directed me to start with McCall’s pattern M7915 from Angela Clayton’s collection.
She also followed up with the suggestion I also make the dress for the costume, but more on that later!
I fortunately already had the pattern in my stash from a $1.99 pattern sale and was able to start work right away.
The Chemise
For the chemise, I followed the pattern relatively closely. I did, however, take a few liberties when it came to the lace portions and skipped much of the handwork that would have given the garment the delicacy that Angela has in her original design. With the timeline in mind, I went for speed and comfort over precision.
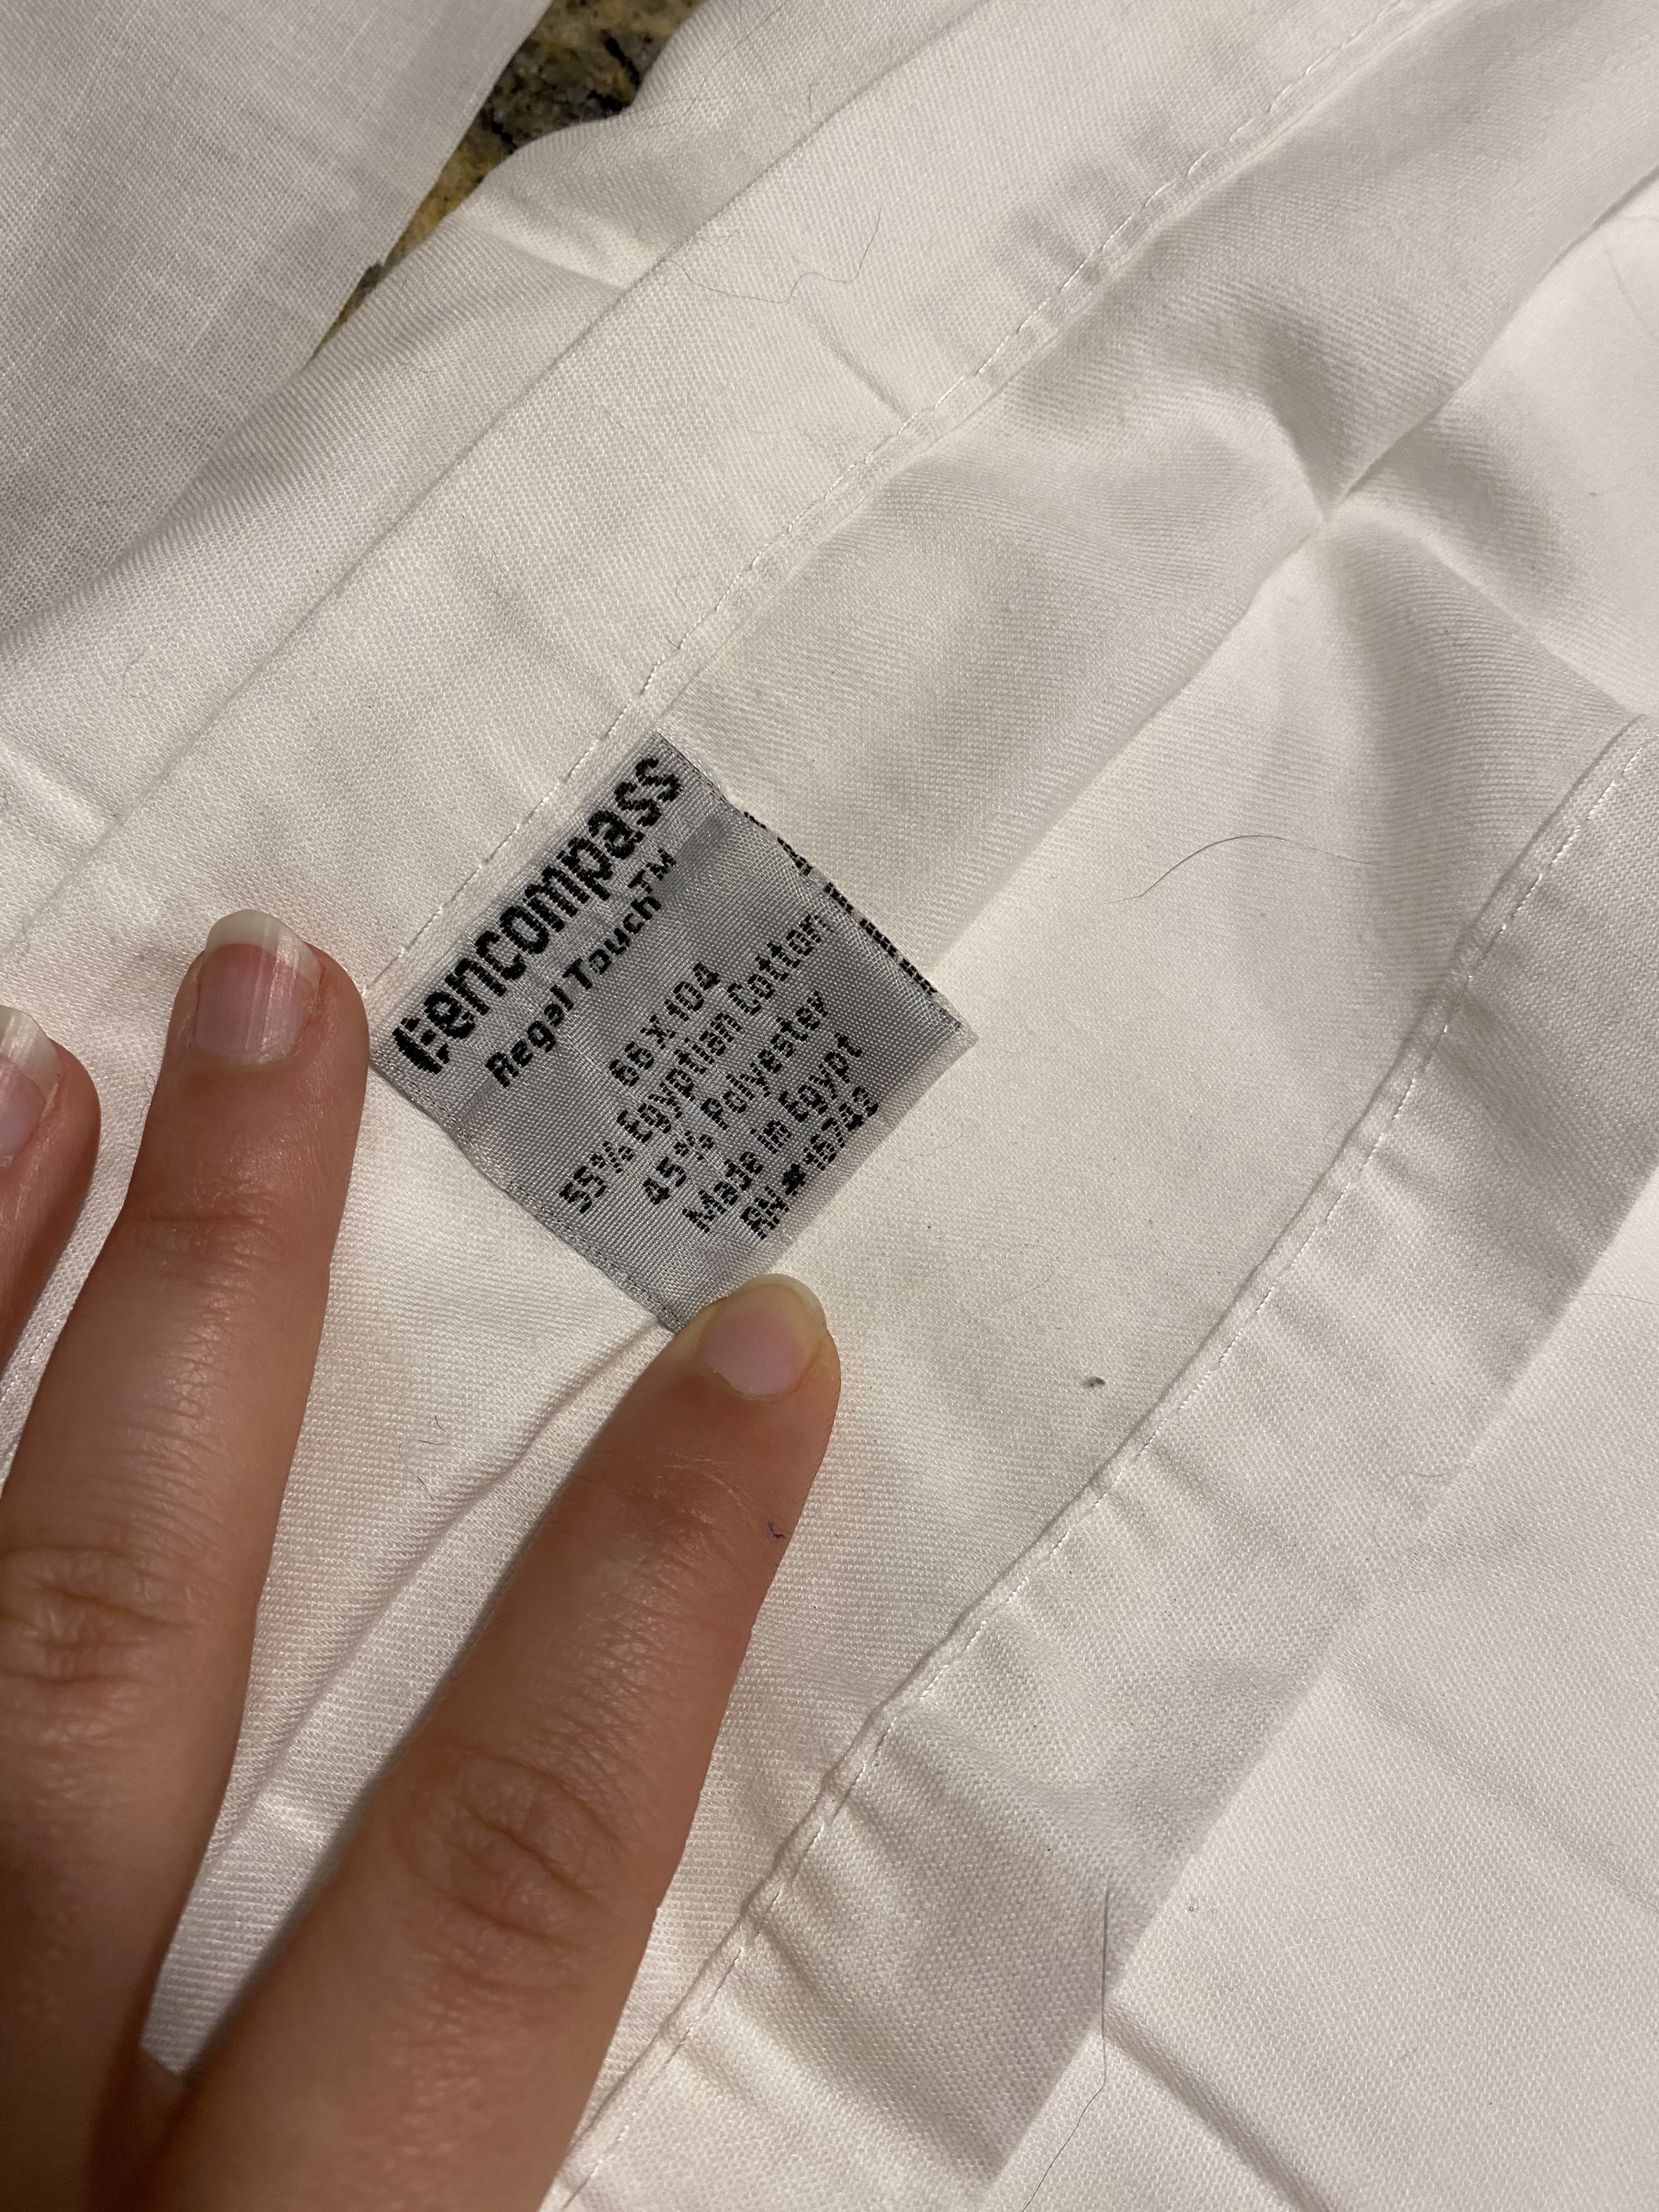
The chemise is constructed of Egyptian cotton, scavenged from a set of white, full-sized sheets. I had this material with my cotton, squirreled away from some relative, for future use as mockup material. Until this moment, I hadn’t realized how fine the material was. It has a spectacular softness while being able to pleat and iron nicely to give crisp seams.
Divine chef’s kiss
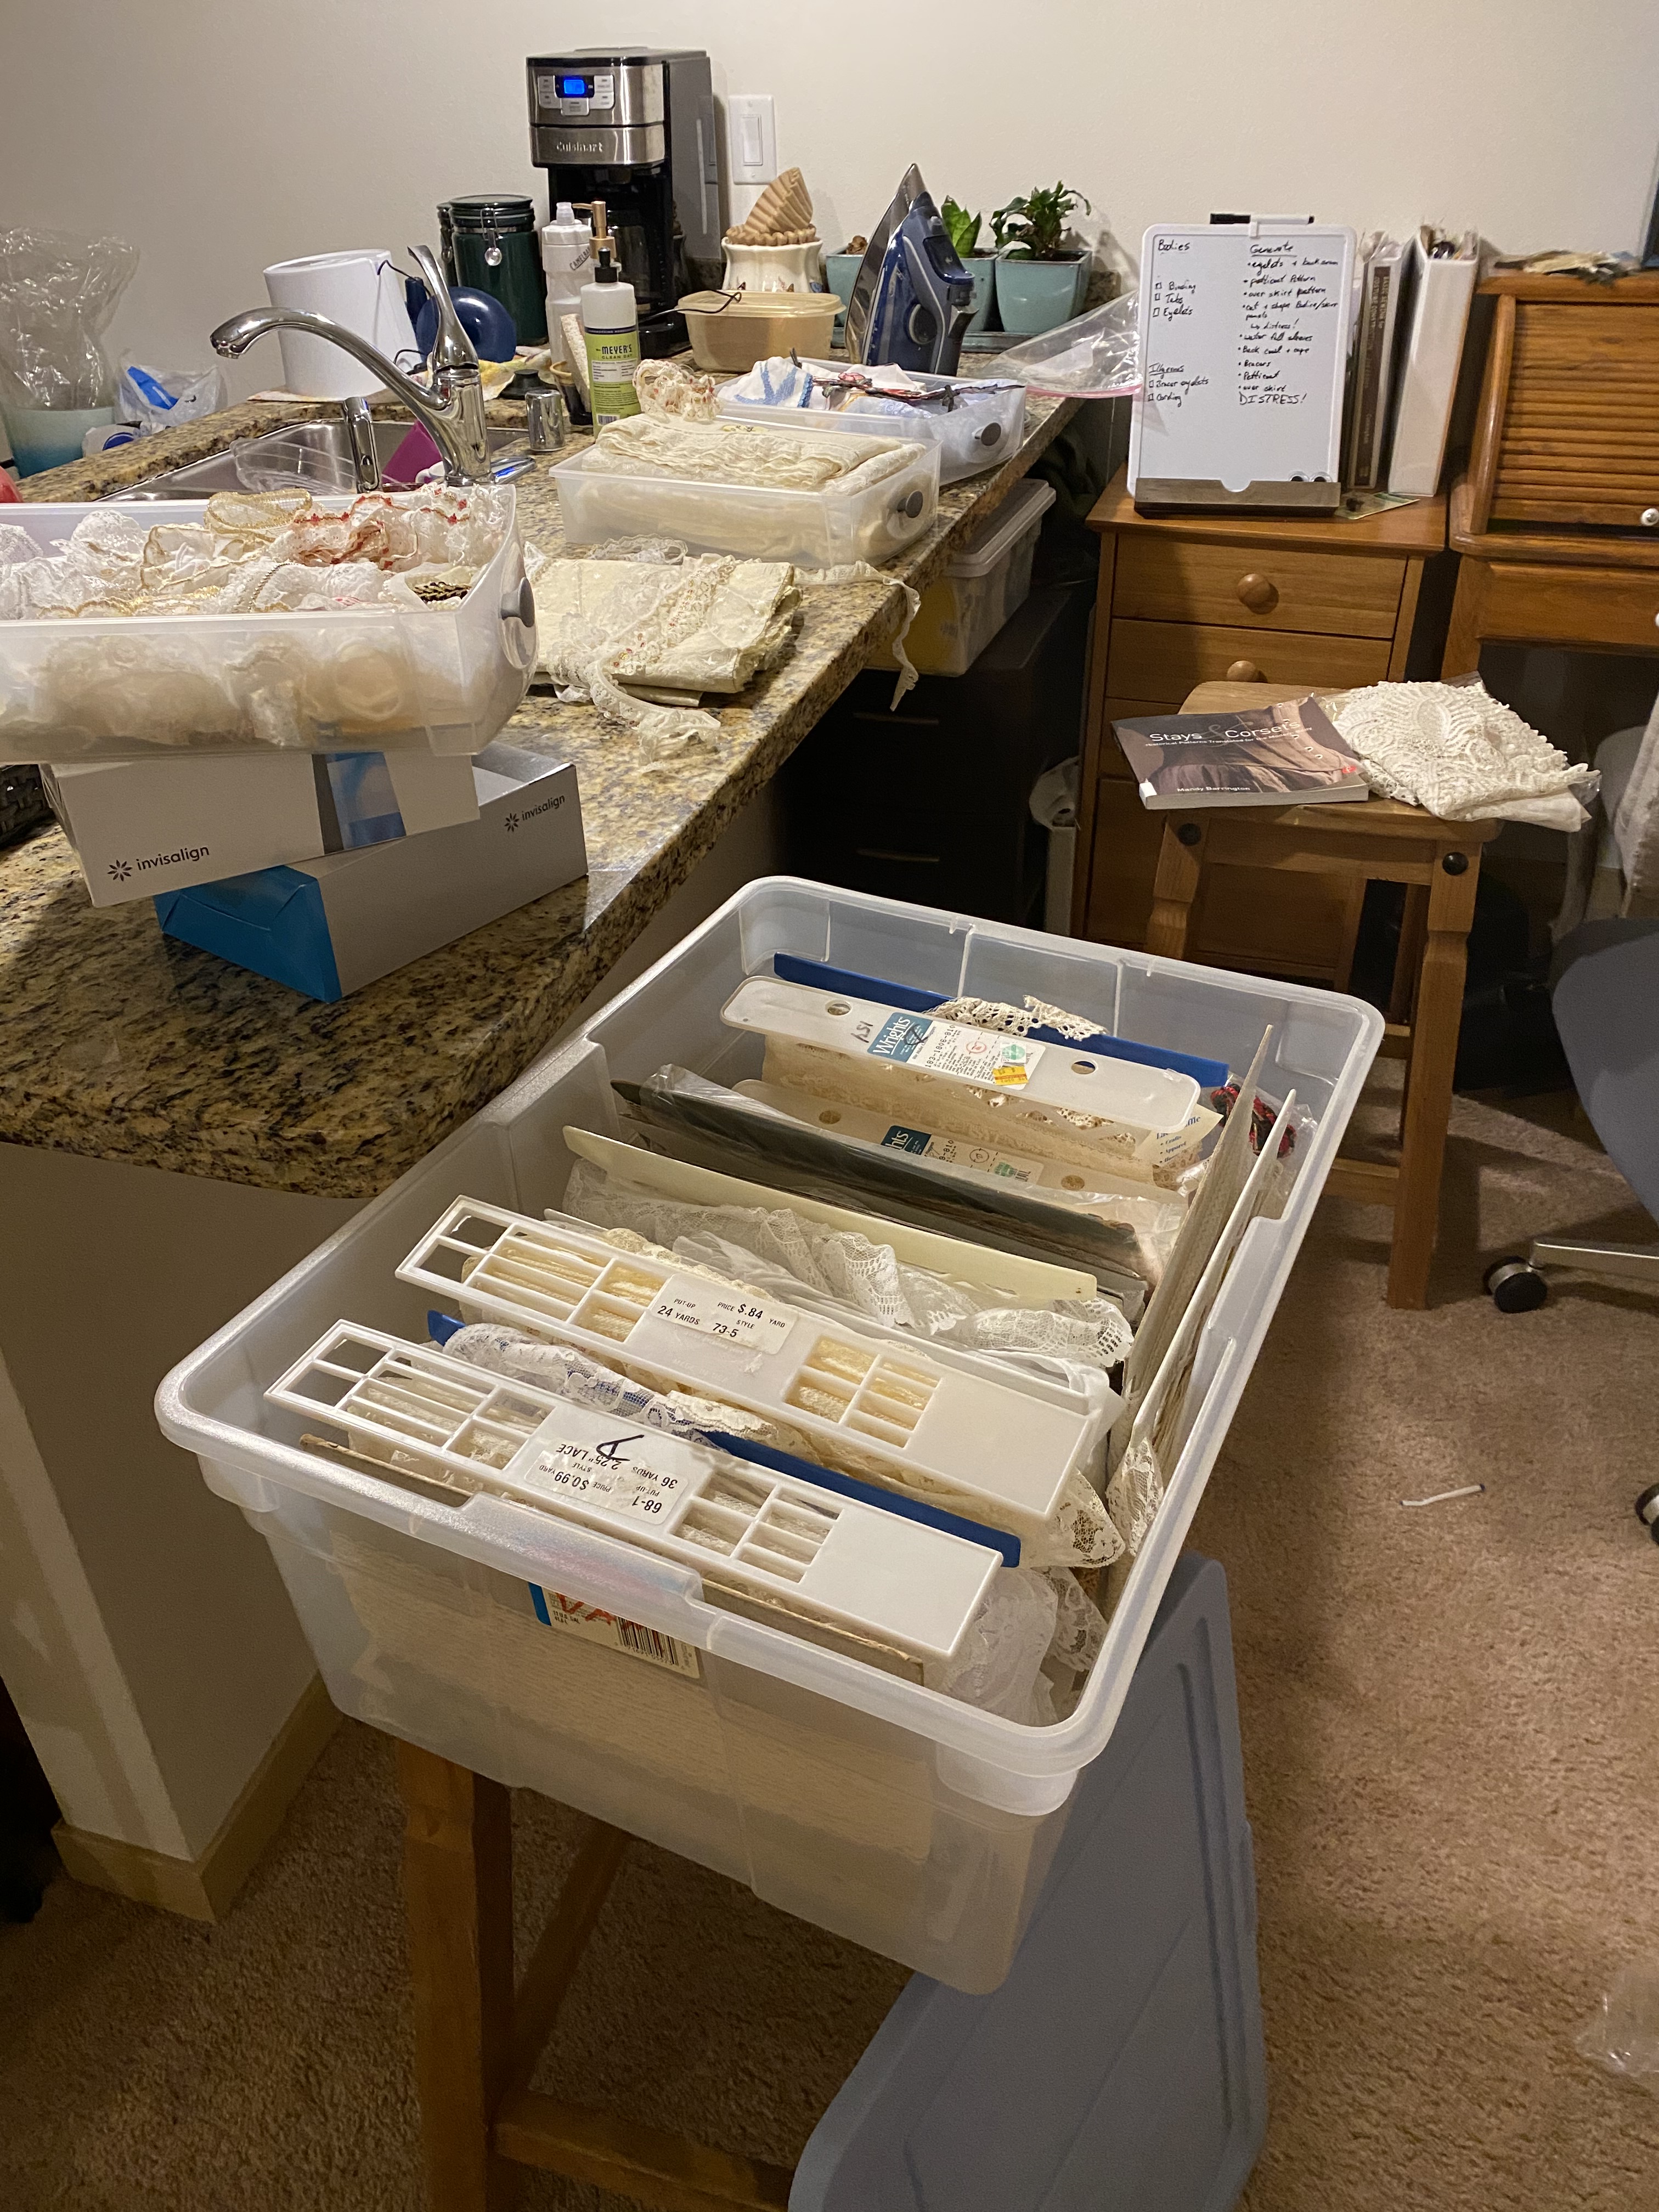
Along with the cotton, I selected a collection of complementary bright white lace to use as needed throughout. I wasn’t planning this project as much as I normally do. I instead grabbed lace that looked pretty while still being soft and ran with it. The process was strangely freeing, but in the end, not as clean as I would have liked.
I deviated from the pattern in the application of the laces which should be done as insertion style. For speed and since no one but me and you, reader, would see the garment, I opted to simply apply the lace either as applique style, tucked into seams or between pleats. This gives the illusion of the insertion lace from Edwardian times but is not done very cleanly. The waistband is the only place with insertion lace which was added to prefinished seams (bias tape bound) rather than the insertion method.
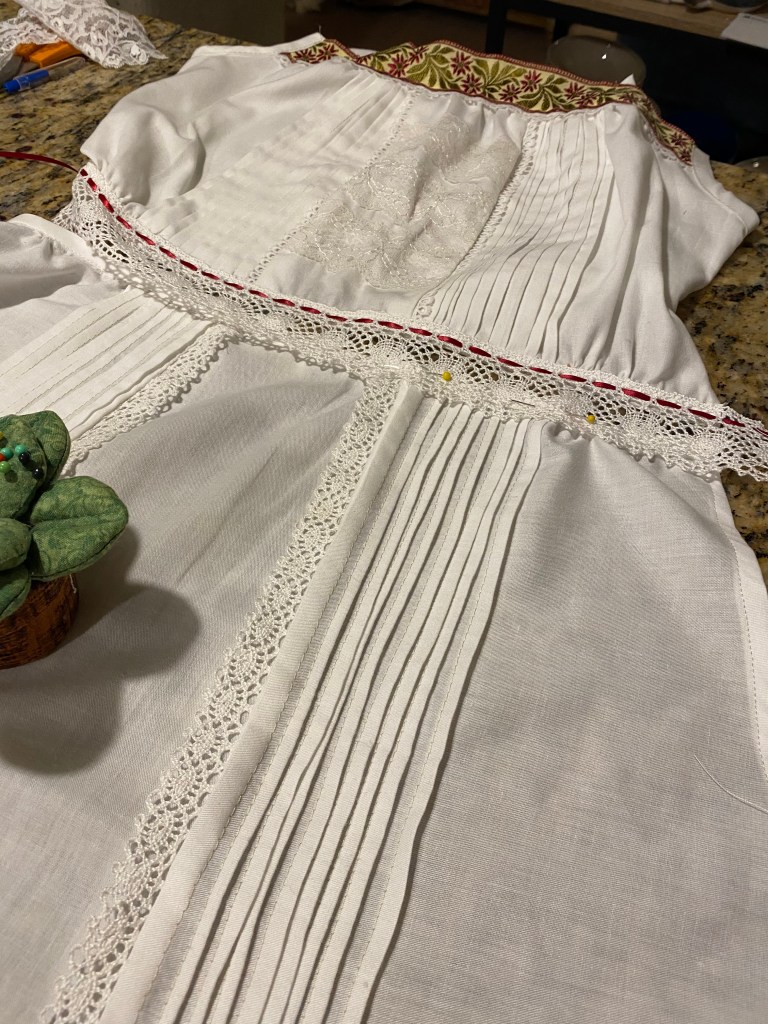
For a pop of color, I used jacquard ribbon at the neckline of the chemise and wove red satin ribbon into the waistband lace. The red satin ribbon also had the wonderful purpose of acting as a tie and adjustment point for the tightness of the waistband.
I’m proud of how the garment turned out as a whole and how comfortable it is, but I’m not very proud of where I cut corners for time’s sake (bias tape instead of rolled hems, lace applique rather than insertion, etc). I plan to attempt this pattern again with more care in the future and make a sweet summer lace and cotton dress with true insertion lace technique.
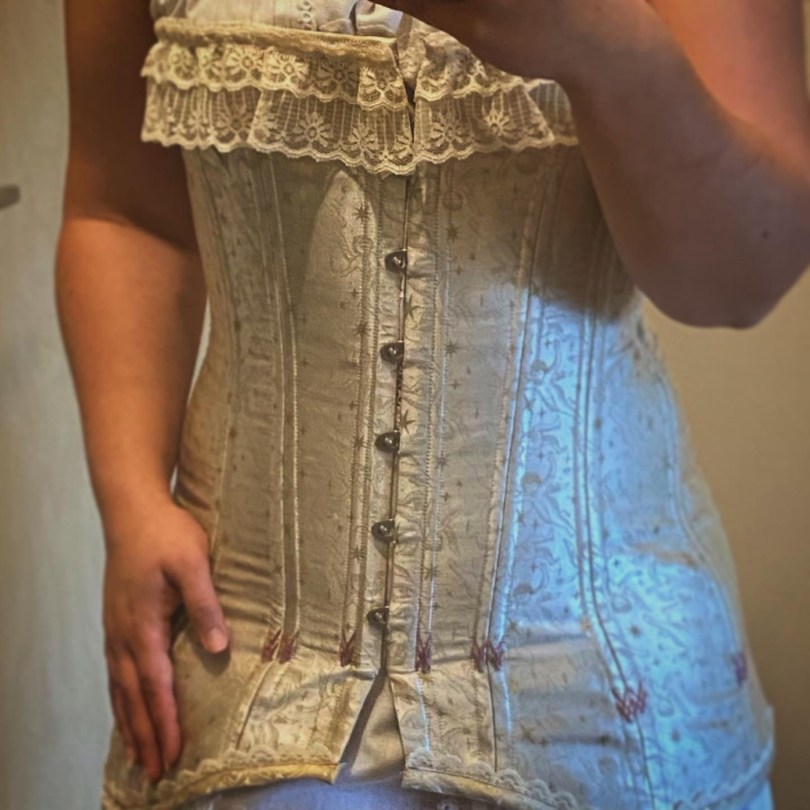
The Corset
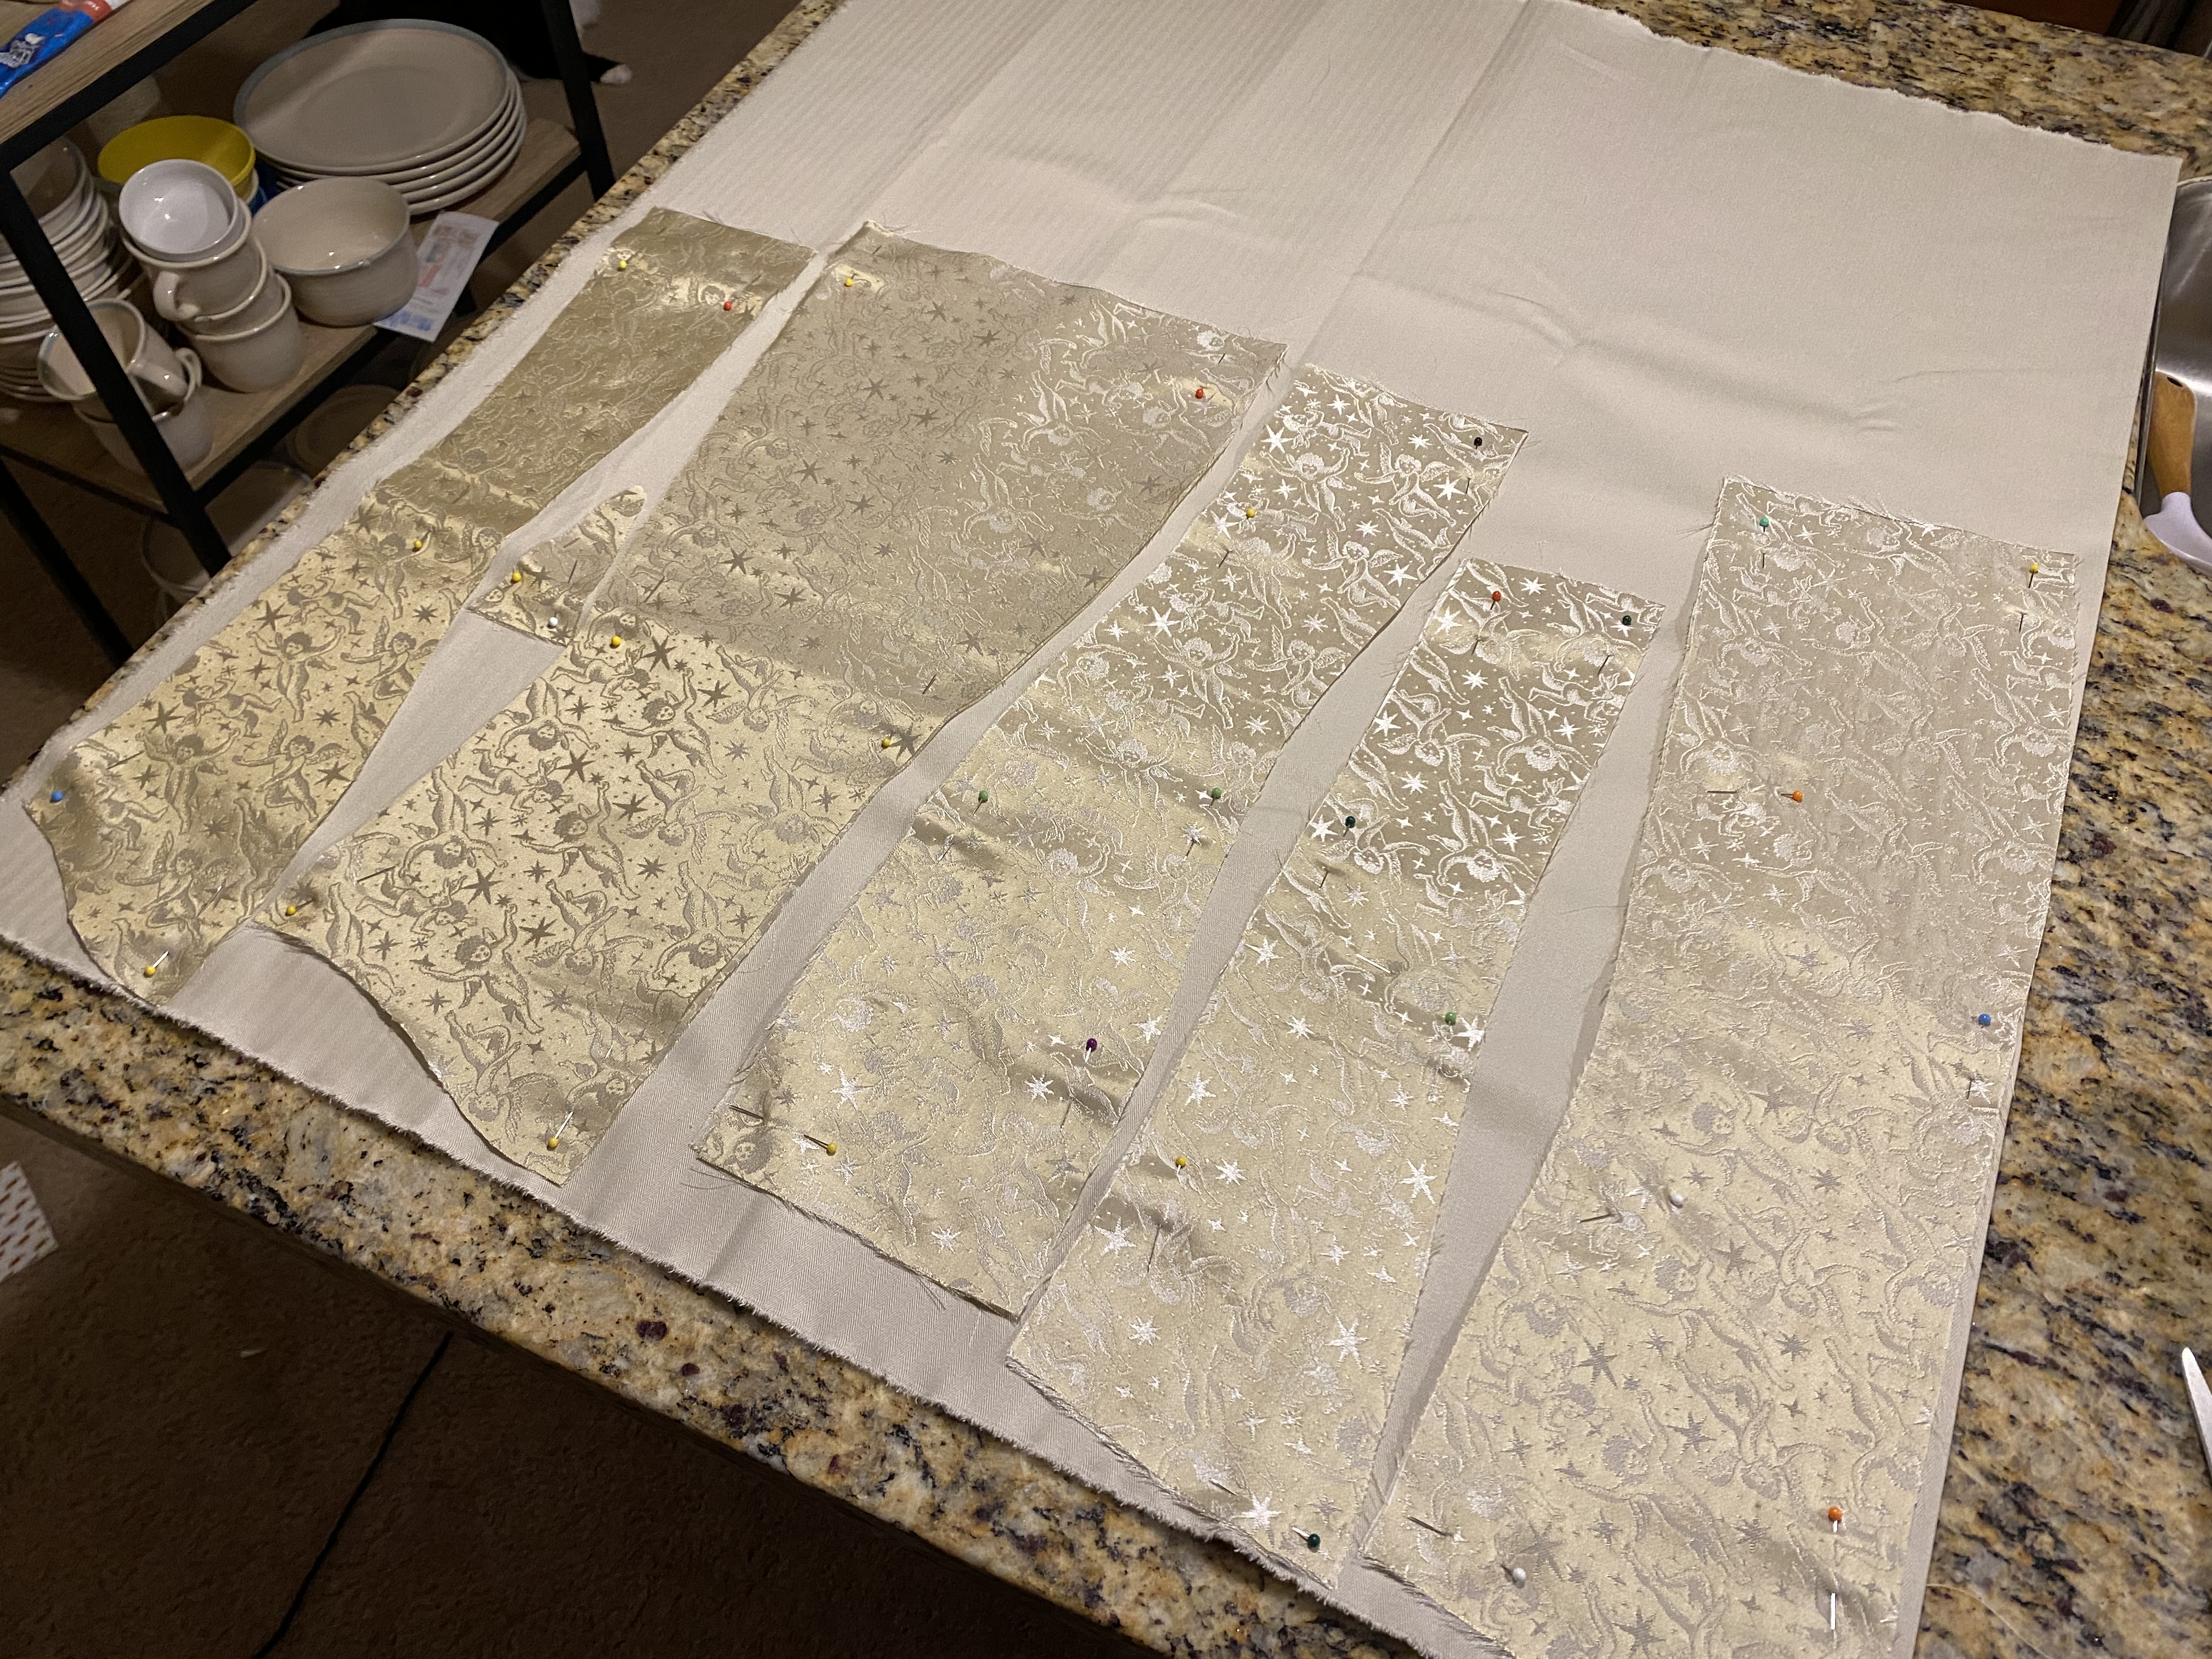
I struggle with self-fitting corsets and knew I’d need a decent amount of time to adjust the pattern to my measurements. I cut the tissue pieces based on my waist, bust, and hip measurements which required me to blend between the three different sizes I am for each while cutting. Not a particularly precise process, so I erred on the side of caution towards the larger sizes as necessary.

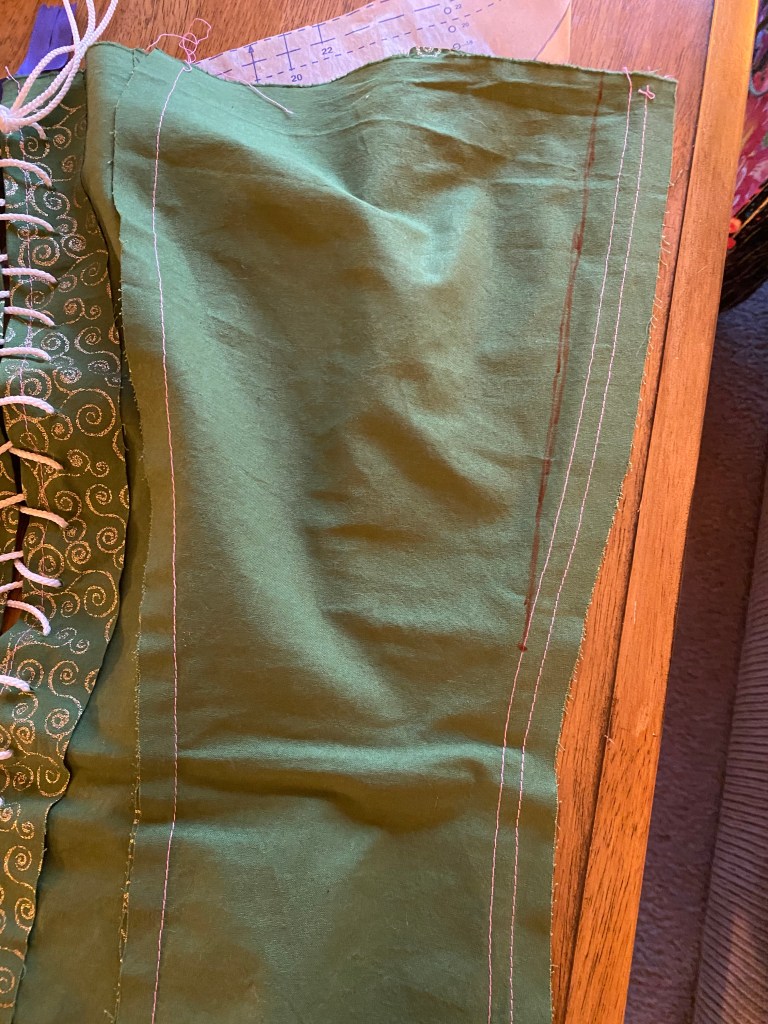
My first mockup was cut from tightly woven cotton so I could make the first check on general fit. It stretched a bit of course but was a quick and cheap way to figure out the major issues right away. Rather than spending time inserting a busk with each mockup, I used a standard zipper for quick fitting.

Overall, the pattern needed to be taken in at nearly every seam in some capacity. This tells me that the pattern allowed for ease rather than the cinching effect of a properly made corset. This makes for comfortable wear or costume for a modern wearer, providing the illusion of shape, but wouldn’t give me the support and cinching I needed for the full torso corset style of the period. I made the initial adjustments to the pattern tissue and recut a mockup from outdoor fabric which I buy on clearance at the end of seasons since it doesn’t stretch in any direction and can give a better mockup fit.
There were a few more adjustments to be made here, primarily because I forgot that the pattern tissue has specific seams that call for 1″ seam allowance rather than the standard 5/8″ that I missed when sewing quickly. These are here since the pattern calls for 1/2″ steel boning and the channels would be created by the seam allowance, but as someone who sews fairly quickly, I prefer for the seams to all be consistent and to make boning channels from twill tape. That is a personal preference though. I also planned to use 1/4″ synthetic whalebone rather than steel boning since it was what I had on hand.
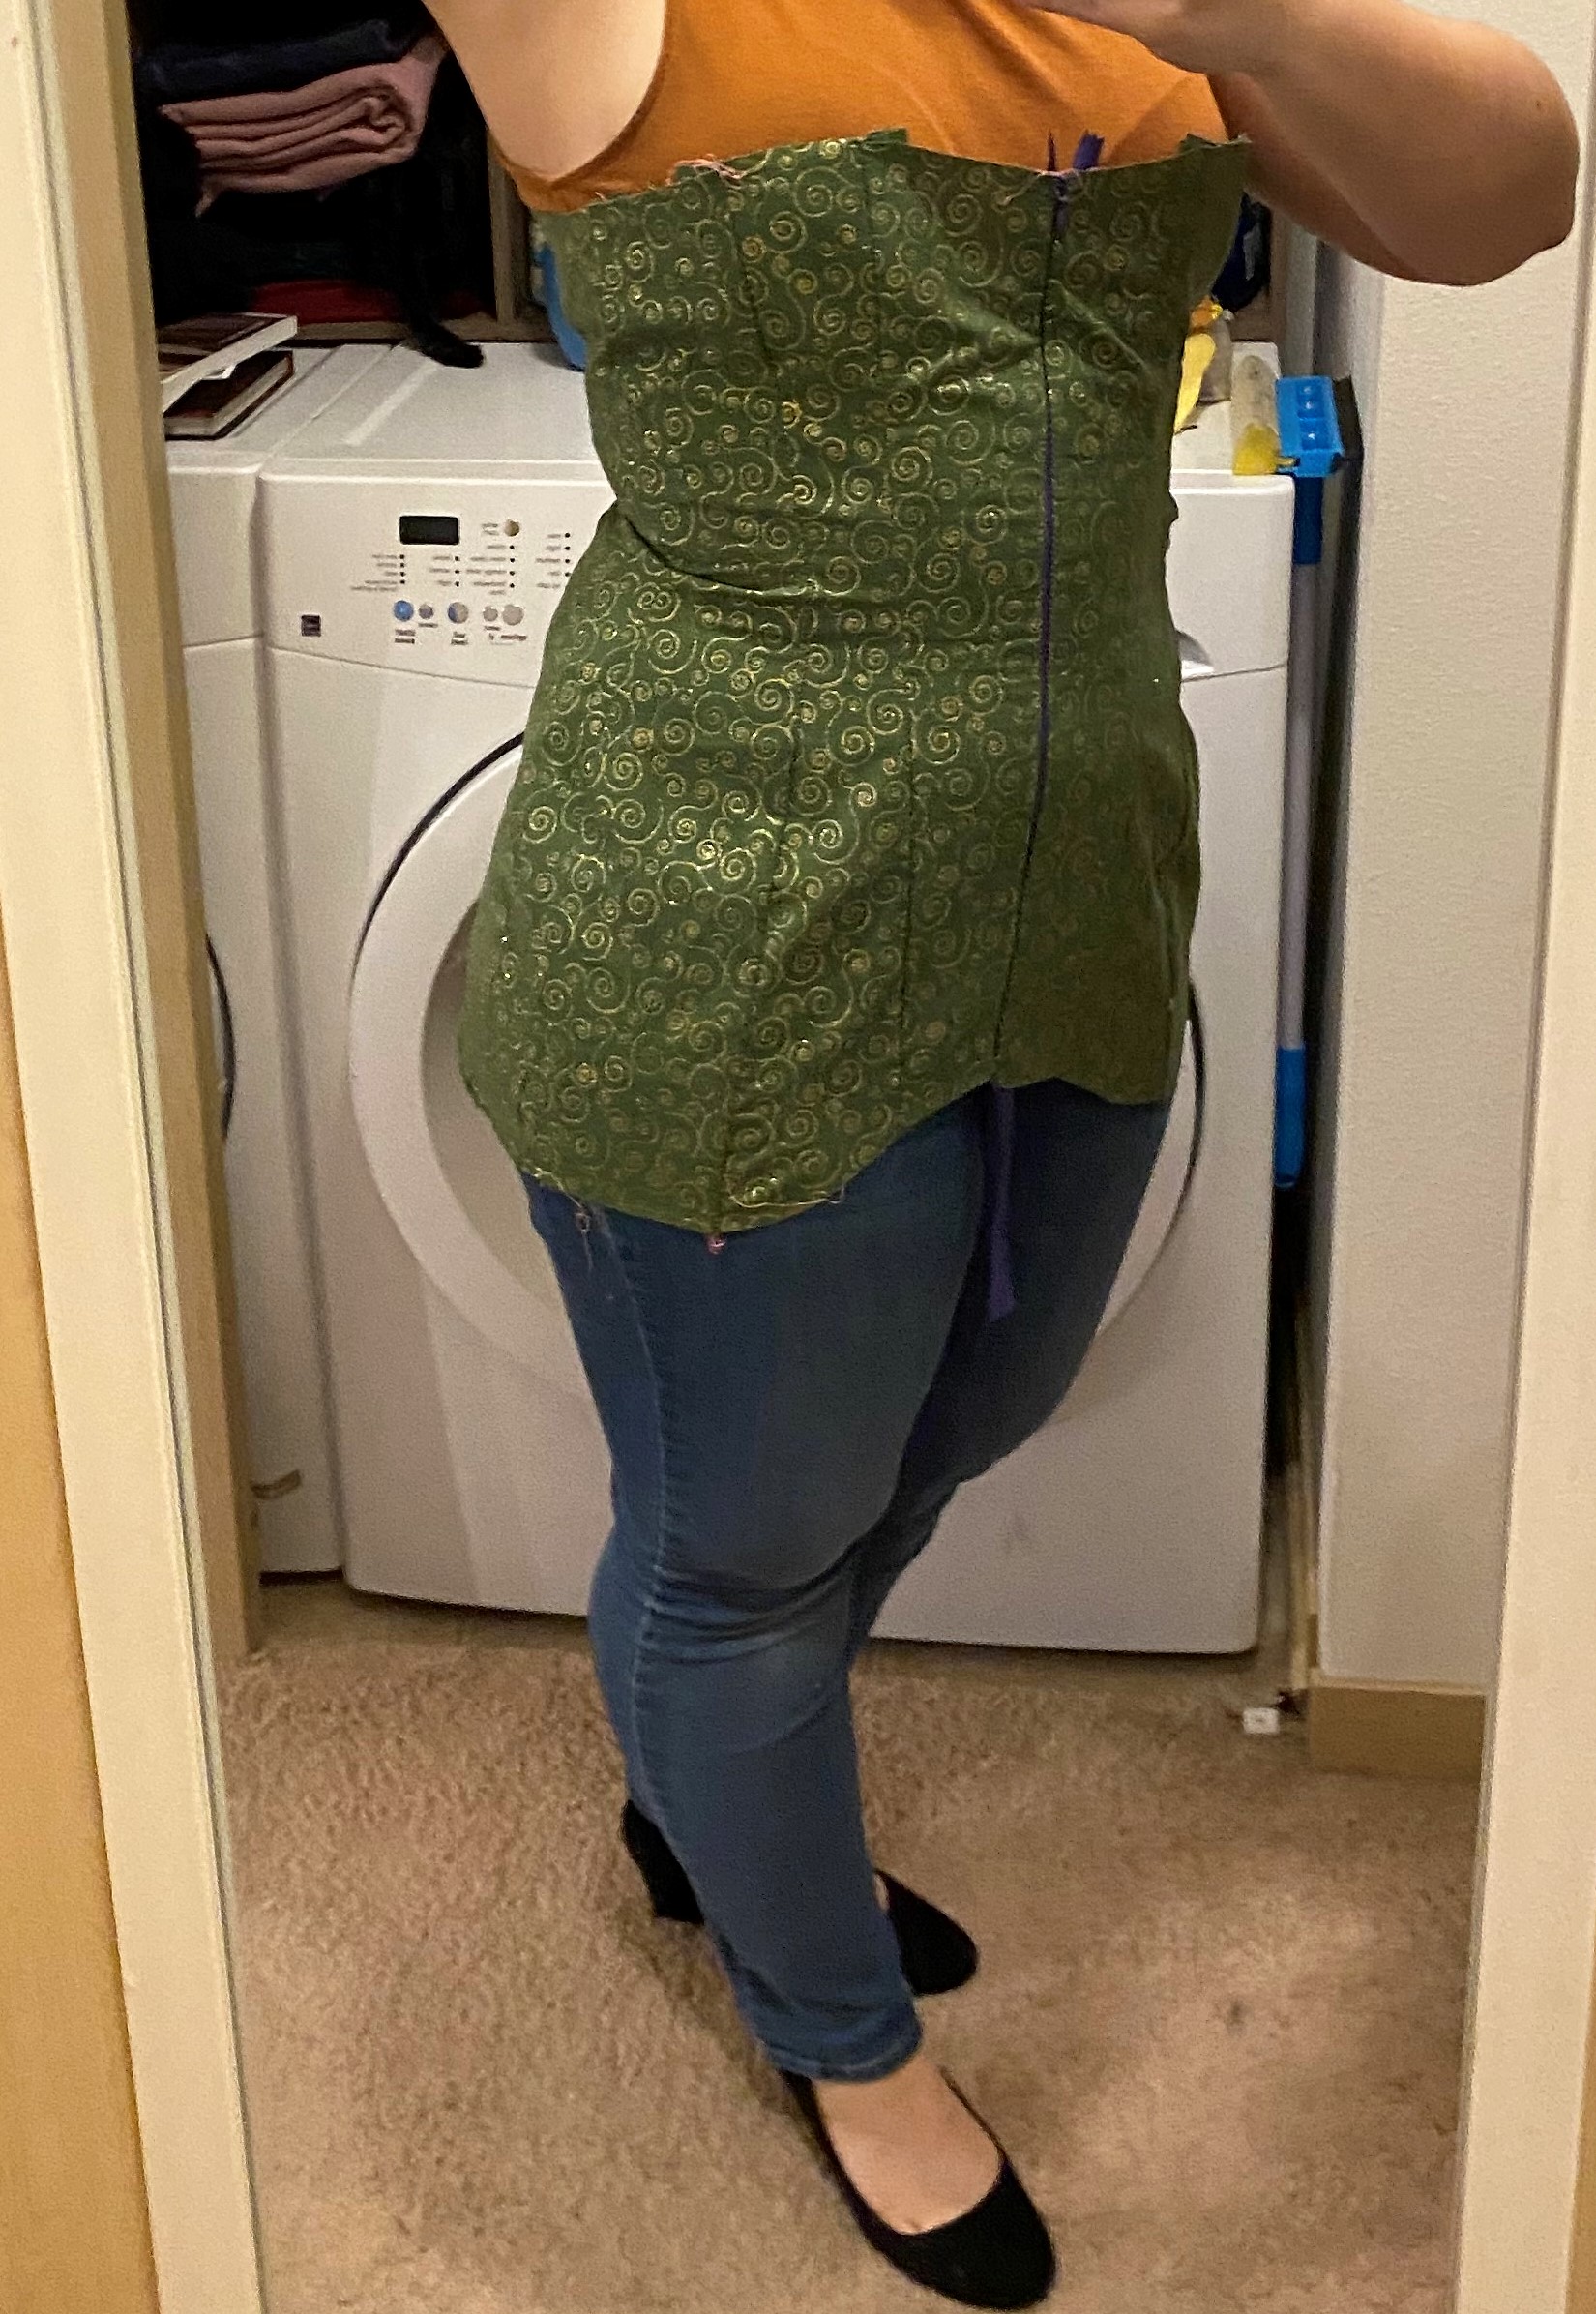
With making the second mockup adjustments, and adding the temporary boning to test the fit, I felt confident to move forward cutting my final garment fabric. Looking back at the final fit, I wish I had spent more time checking the length of the garment. I have a shorter than average torso and assumed the excess at the bottom of the corset was part of the hip cinch that was characteristic of the period. However, it was far TOO much and even the boning channels were too long, which caused the corset to ride up when I sat down during the show. Not comfortable, but forced me to be better about my posture.
For making the final corset, I used the following supplies:
- 1 yard beige coutile
- 1 1/2 yard vintage jacquard
- 1 yard twill tape
- 20 yards 1/4″ synthetic whalebone
- 13″ busk
- vintage lace
- embroidery floss
In constructing the mockups, I followed the pattern instructions as closely as I could. They were fairly straightforward, though a bit over the top in explanation if you’ve made a corset before but likely confusing if this was your first go. In the final garment, I went rouge and followed my own methods, though this essentially matched the steps of the pattern.
The first step was to baste the coutil and jacquard pieces together for all pieces except for the front panels which would be seamed for the busk. After basting, I finished the edges with a serger to prevent any fraying since I would be doing a lot of handling of the pieces. I also serged the jacquard of the front panels.

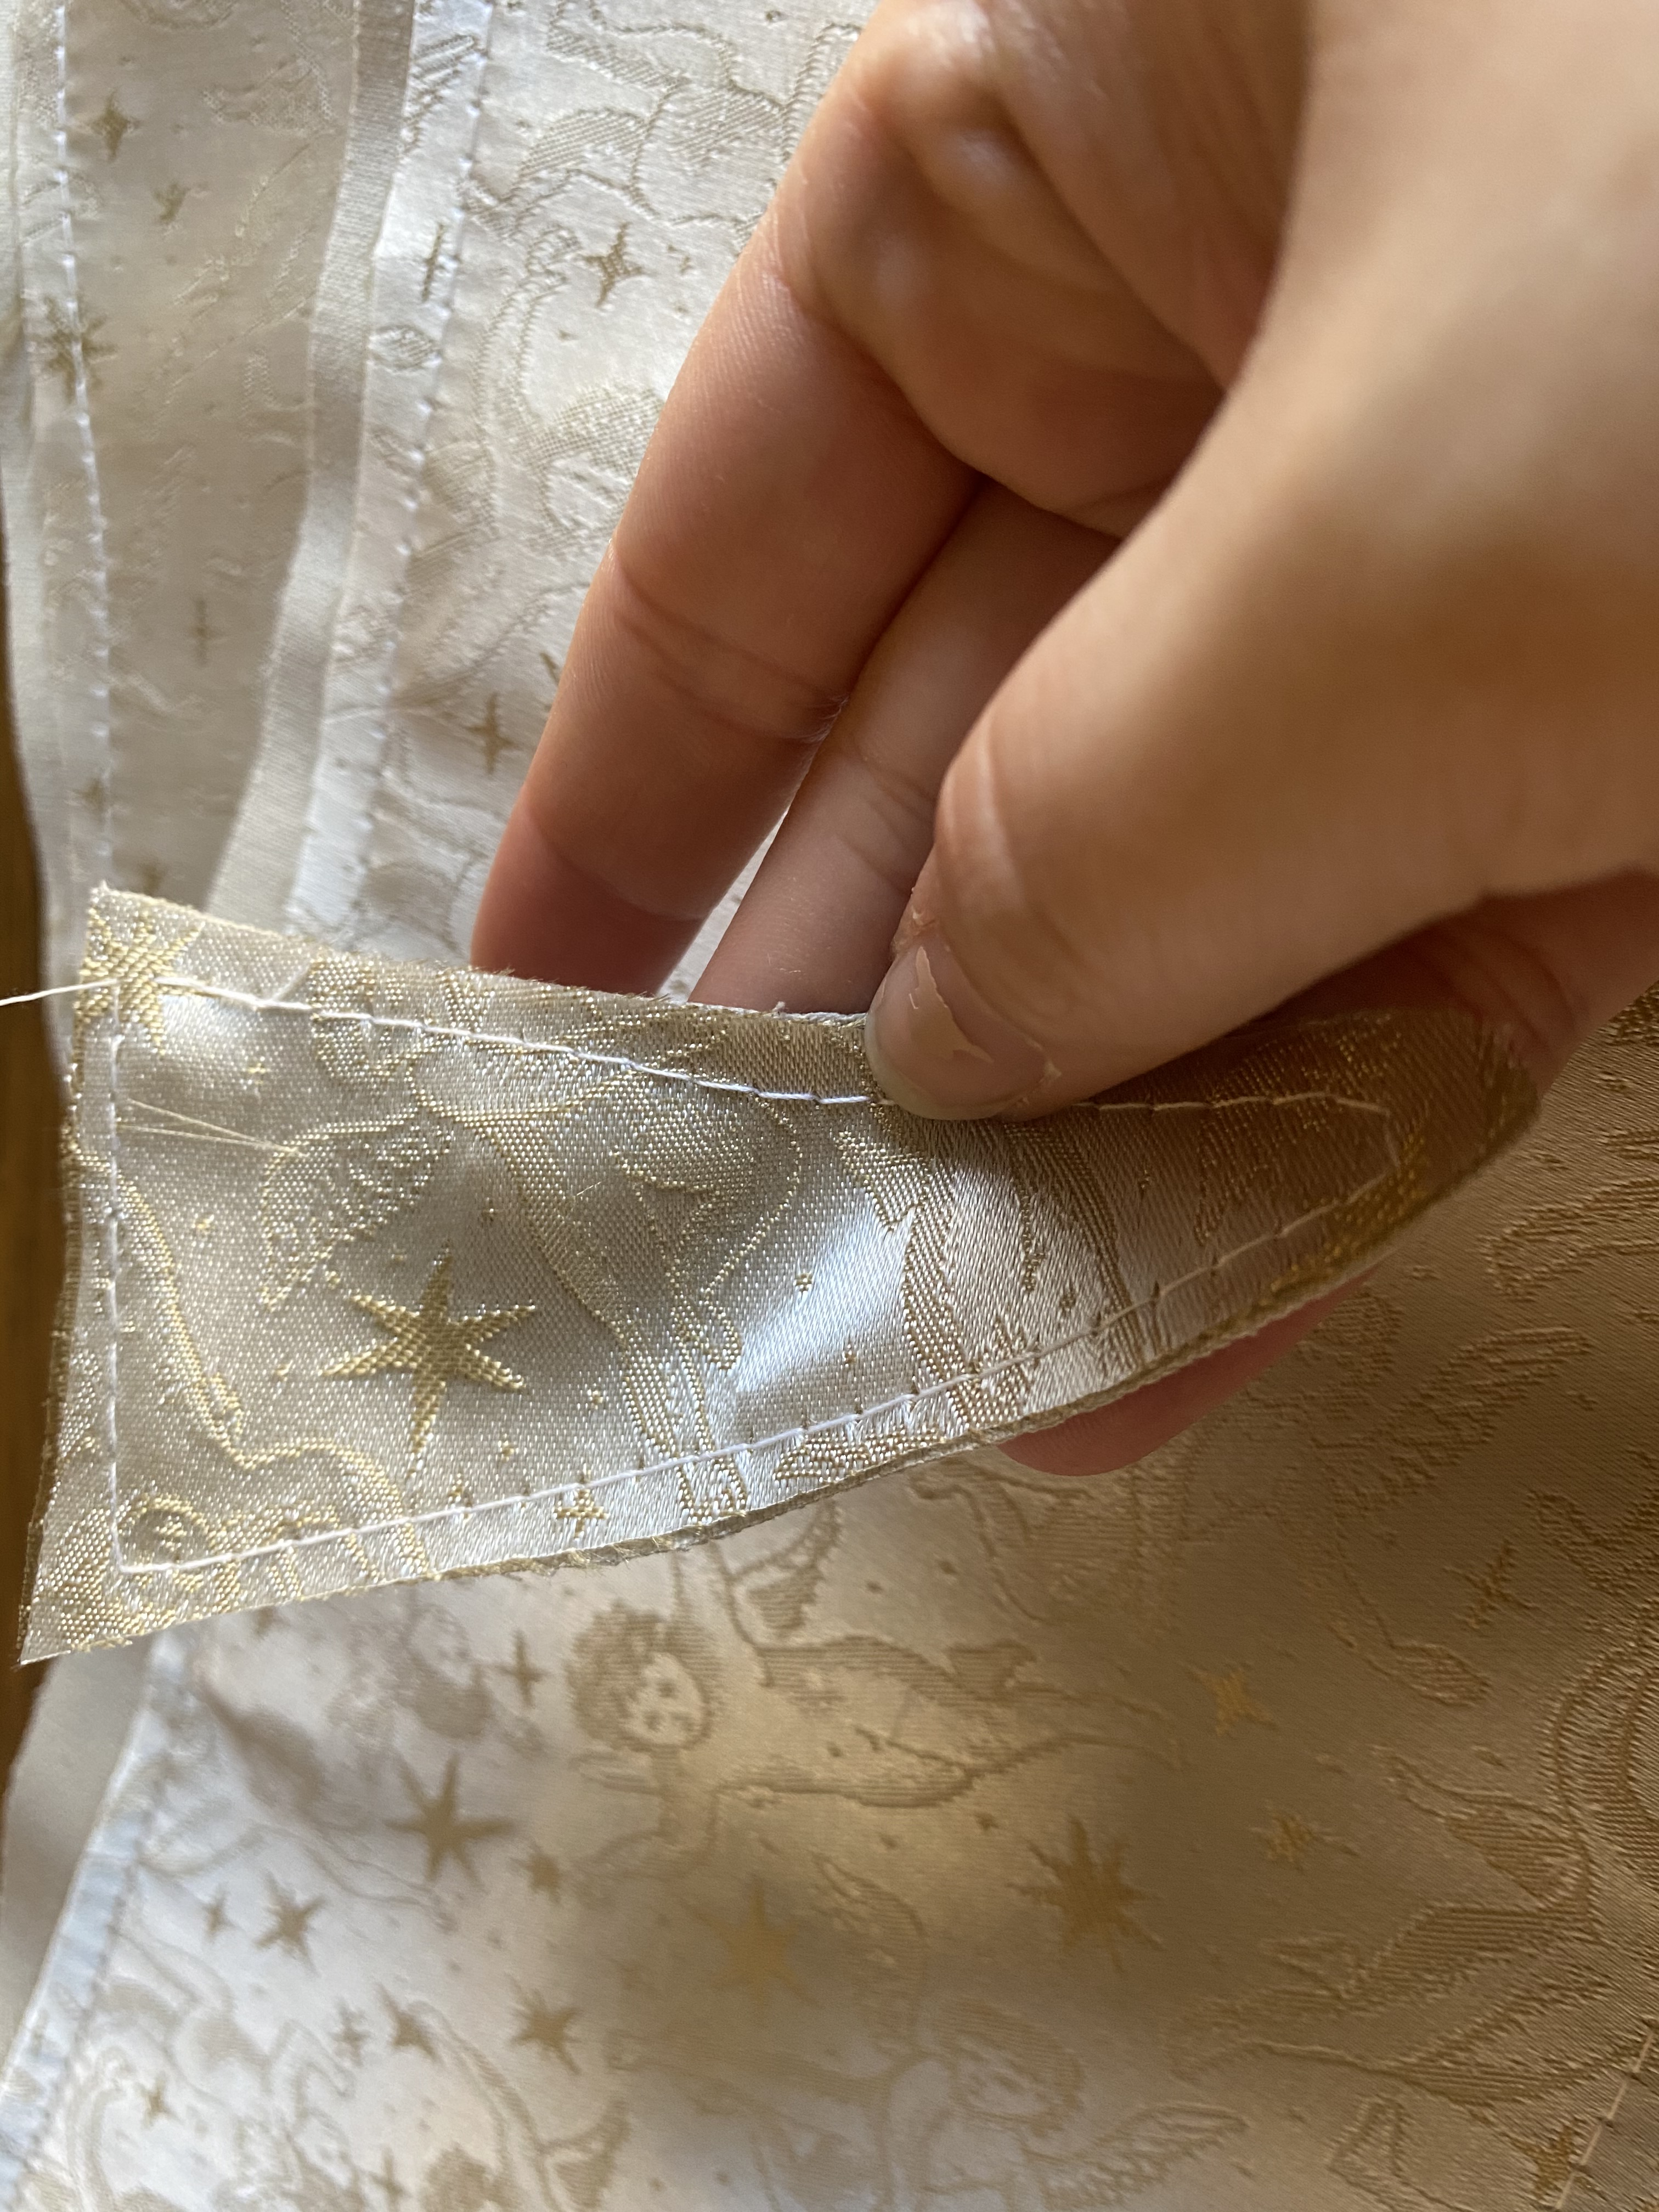
Once fraying had been eliminated, construction began at the front with the busk. This was the point where I followed the pattern instructions to a T: placing the busk on the top/bottom markings and marking the studs and hooks, stitching a standard seam for the coutil and jacquard leaving gaps for the hooks, creating holes at the stud marks with my awl and fray check (smells terrible but works great!), inserting each side, checking alignment, and stitching along the side of each from top to bottom to hold each in place securely.
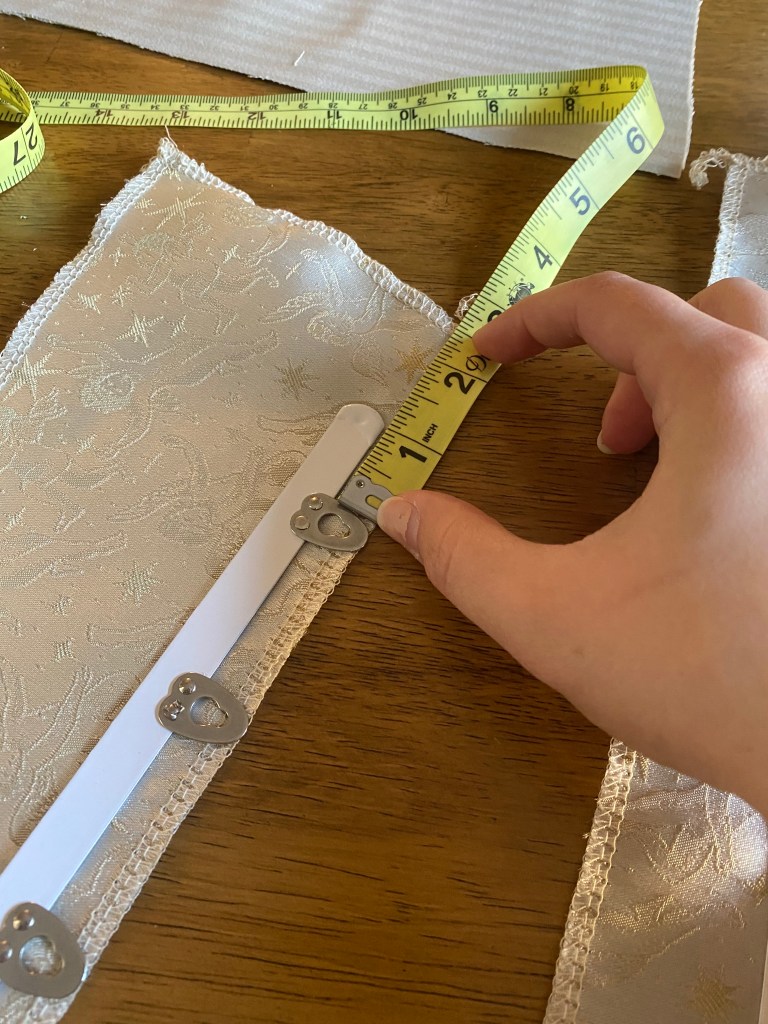
1. Precisely place busks pieces equidistant
from top seam line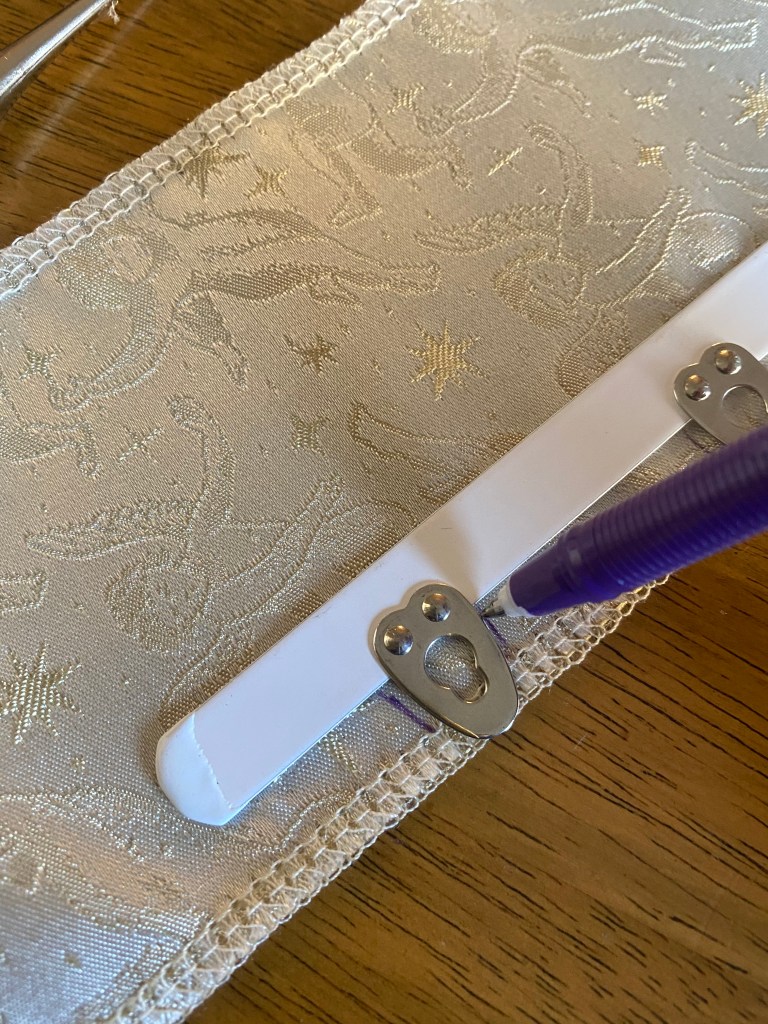
2. Mark location of hooks 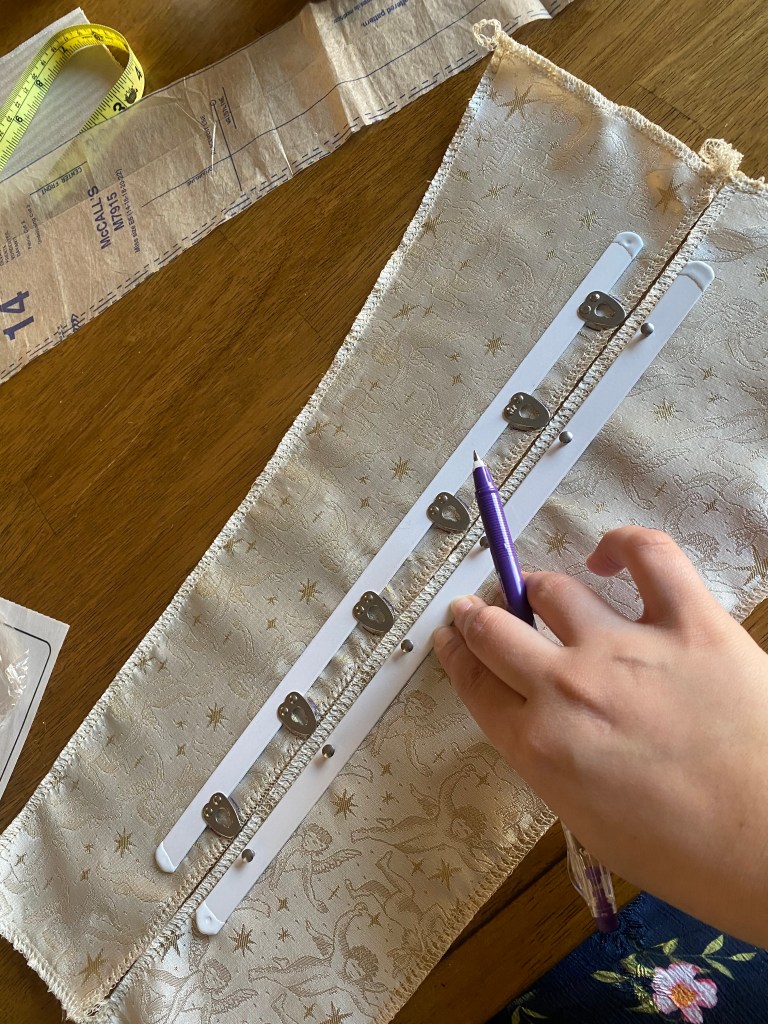
2. Accurately place and mark studs
on opposite panel.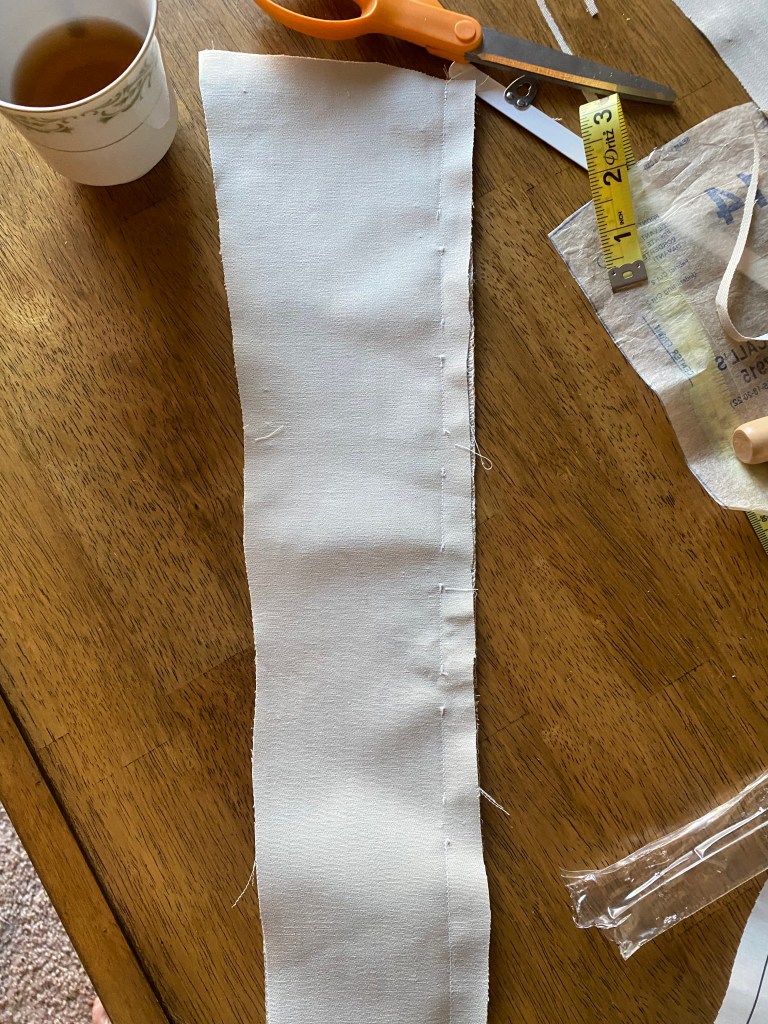
3. Stitch coutil to fashion fabric (right sides together), leaving gaps at the hook locations 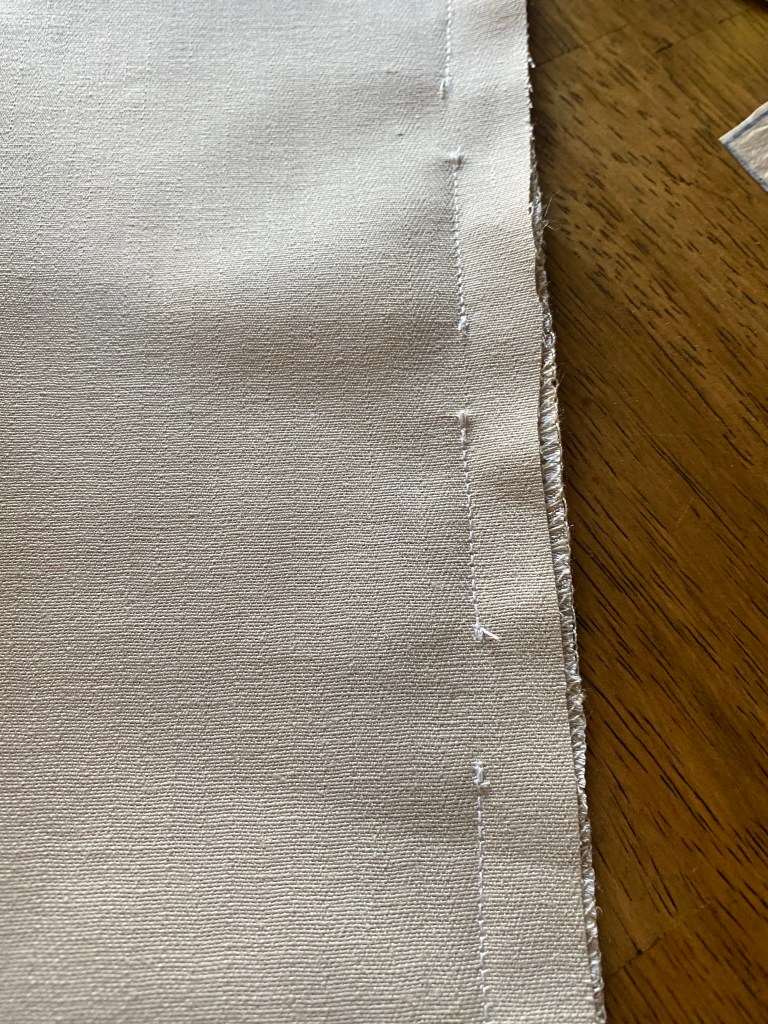
3b. Close up view of hook gaps. 
4. Stitch right side panels (studs) with single continuous seam, press flat. Using the awl, add small holes for the studs at the markings, applying fray check to each after inserting the busk. 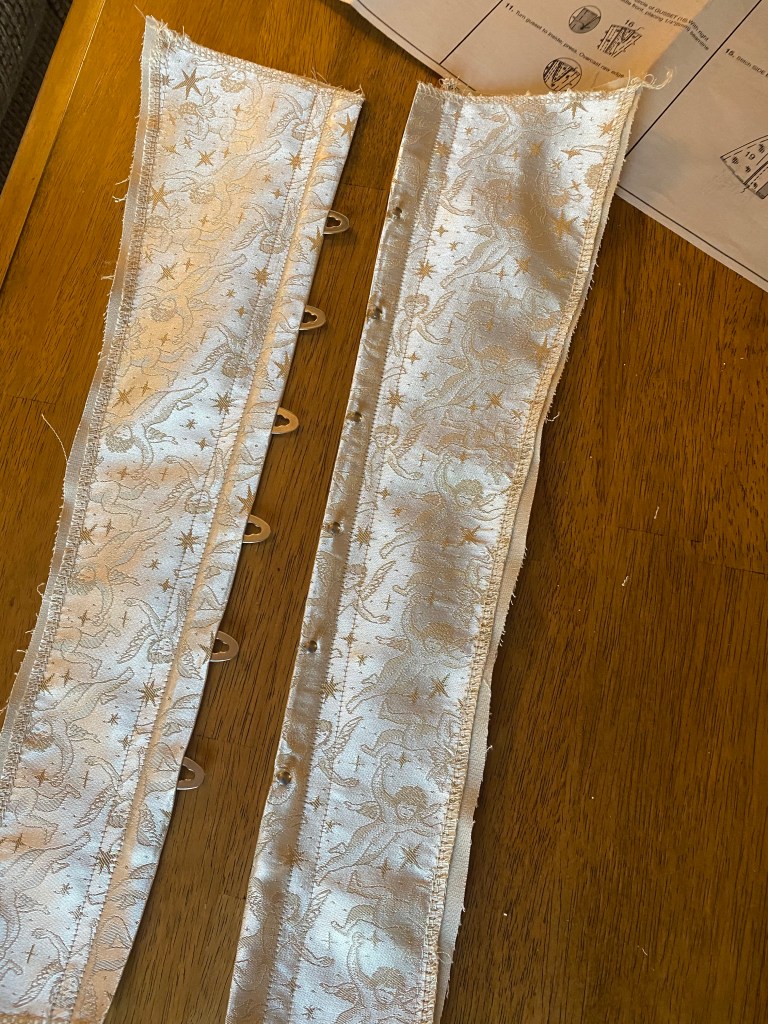
5. Place each busk, press, and stich along the
inner edge with a zipper foot to hold tightly in
place. I’ve also added a boning channel
immediately next to the busks.
With the busk installed, the front panels were pressed again and basted. The panels were sewn together from front to back and the seams were pressed open in preparation for boning channels. With the curves of the seams, my tailor’s ham got quite the work out to nicely press all the seams and later to shape the bones into place.
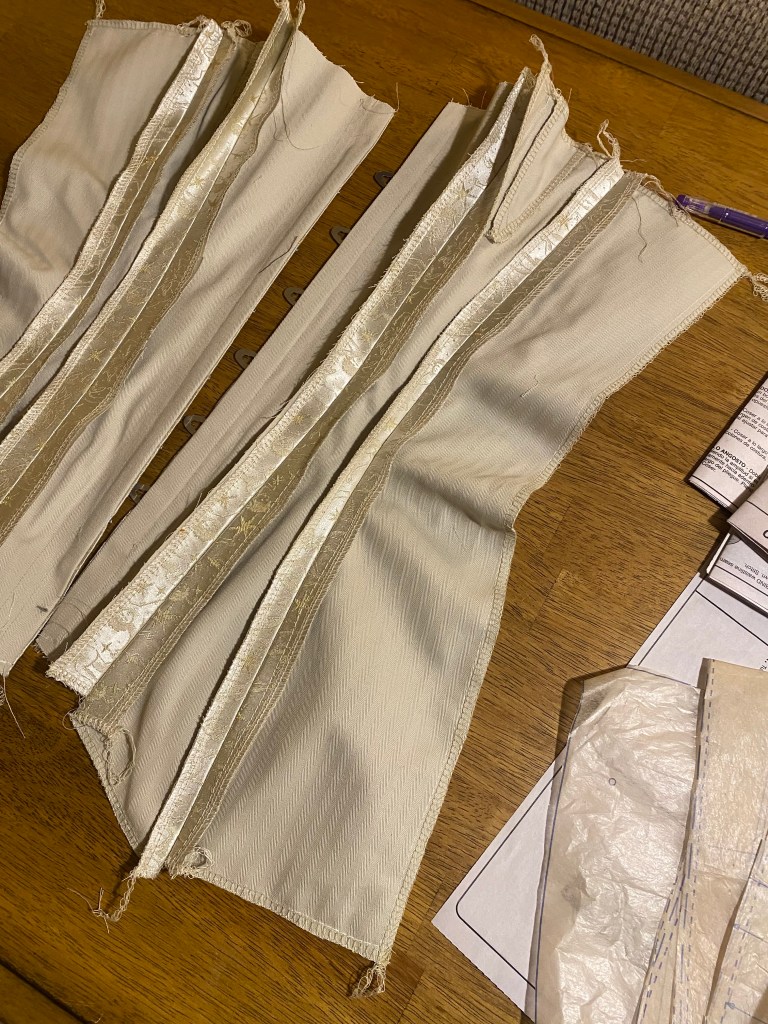
The gusset in the side front (panel 15) was a tad tricky to figure out and I opted for a cheater method:
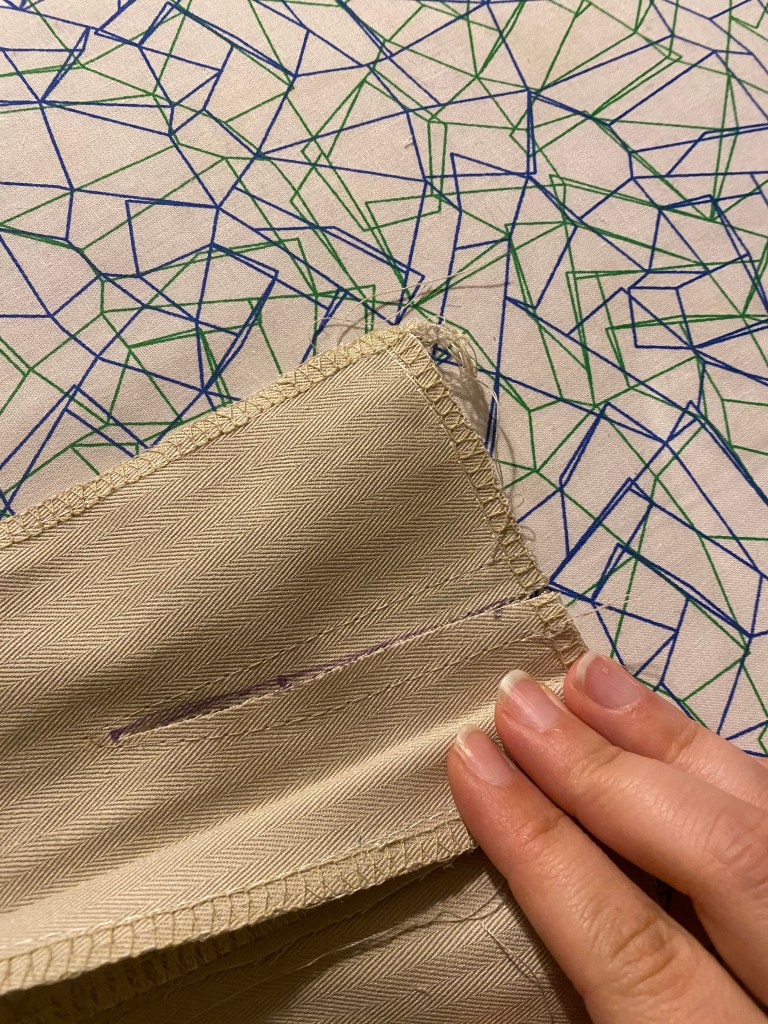
1. The gusset slash is reinforced with machine stitches before
being cut open.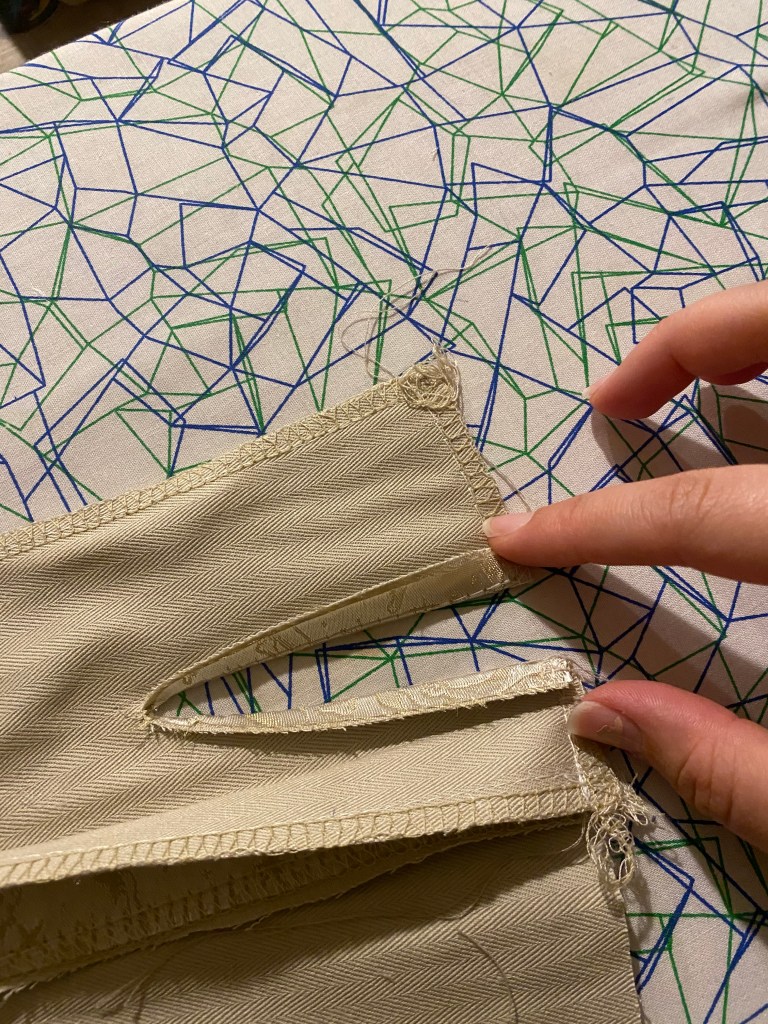
2. The scant seam allowance (following the reinforcement line) is pressed open along the stitching line 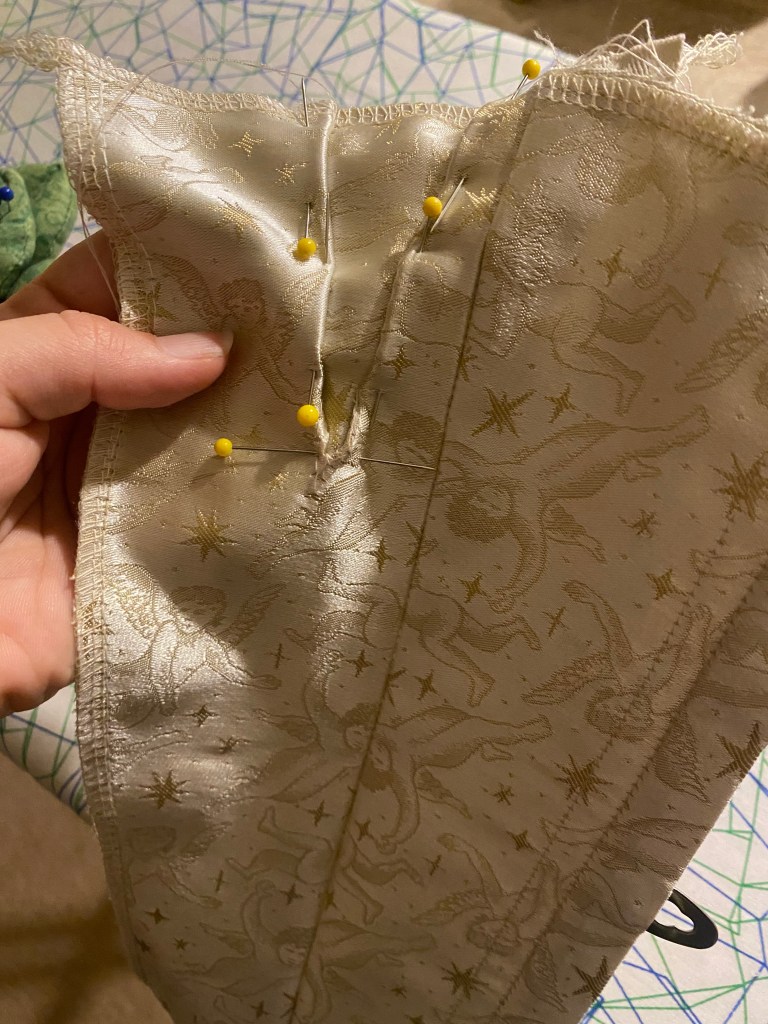
3. The gusset panel is pinned flatly to the inside of the slash 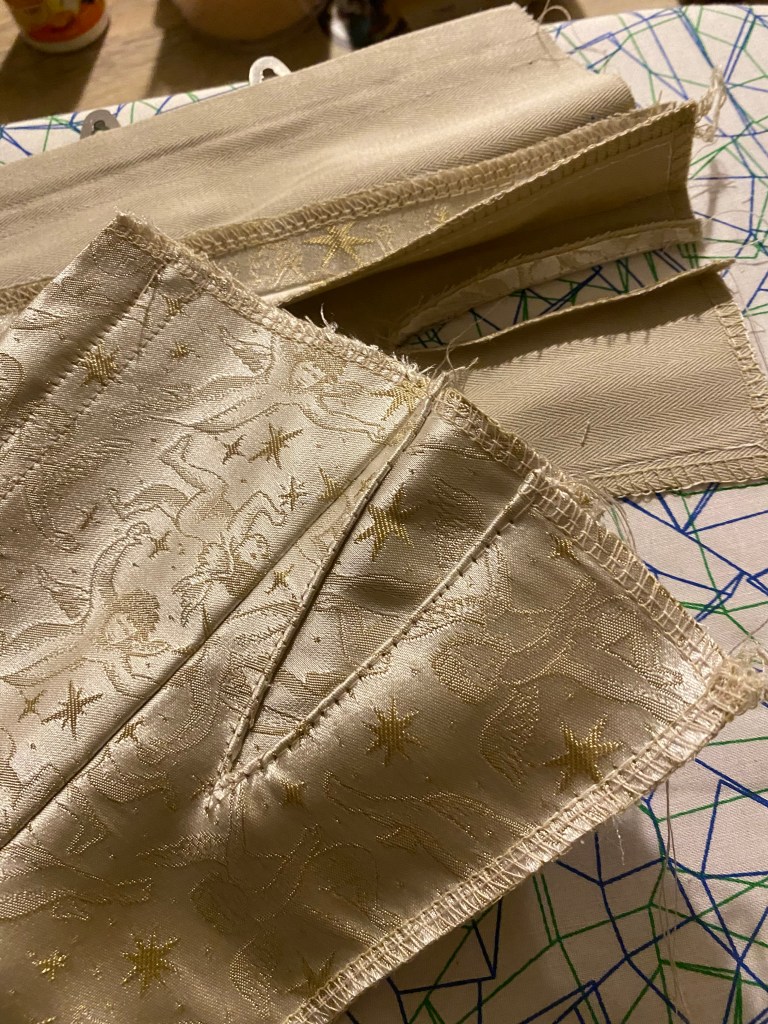
4. The gusset panel is topstitched in place as close to the fold line as possible. A good press after gives a clean finish.
The back panels were finished by folding and pressing 2″ for the finish. I only folded once since the edge of the material was finished by the surging and an additional fold would add excessive bulk I wanted to avoid.
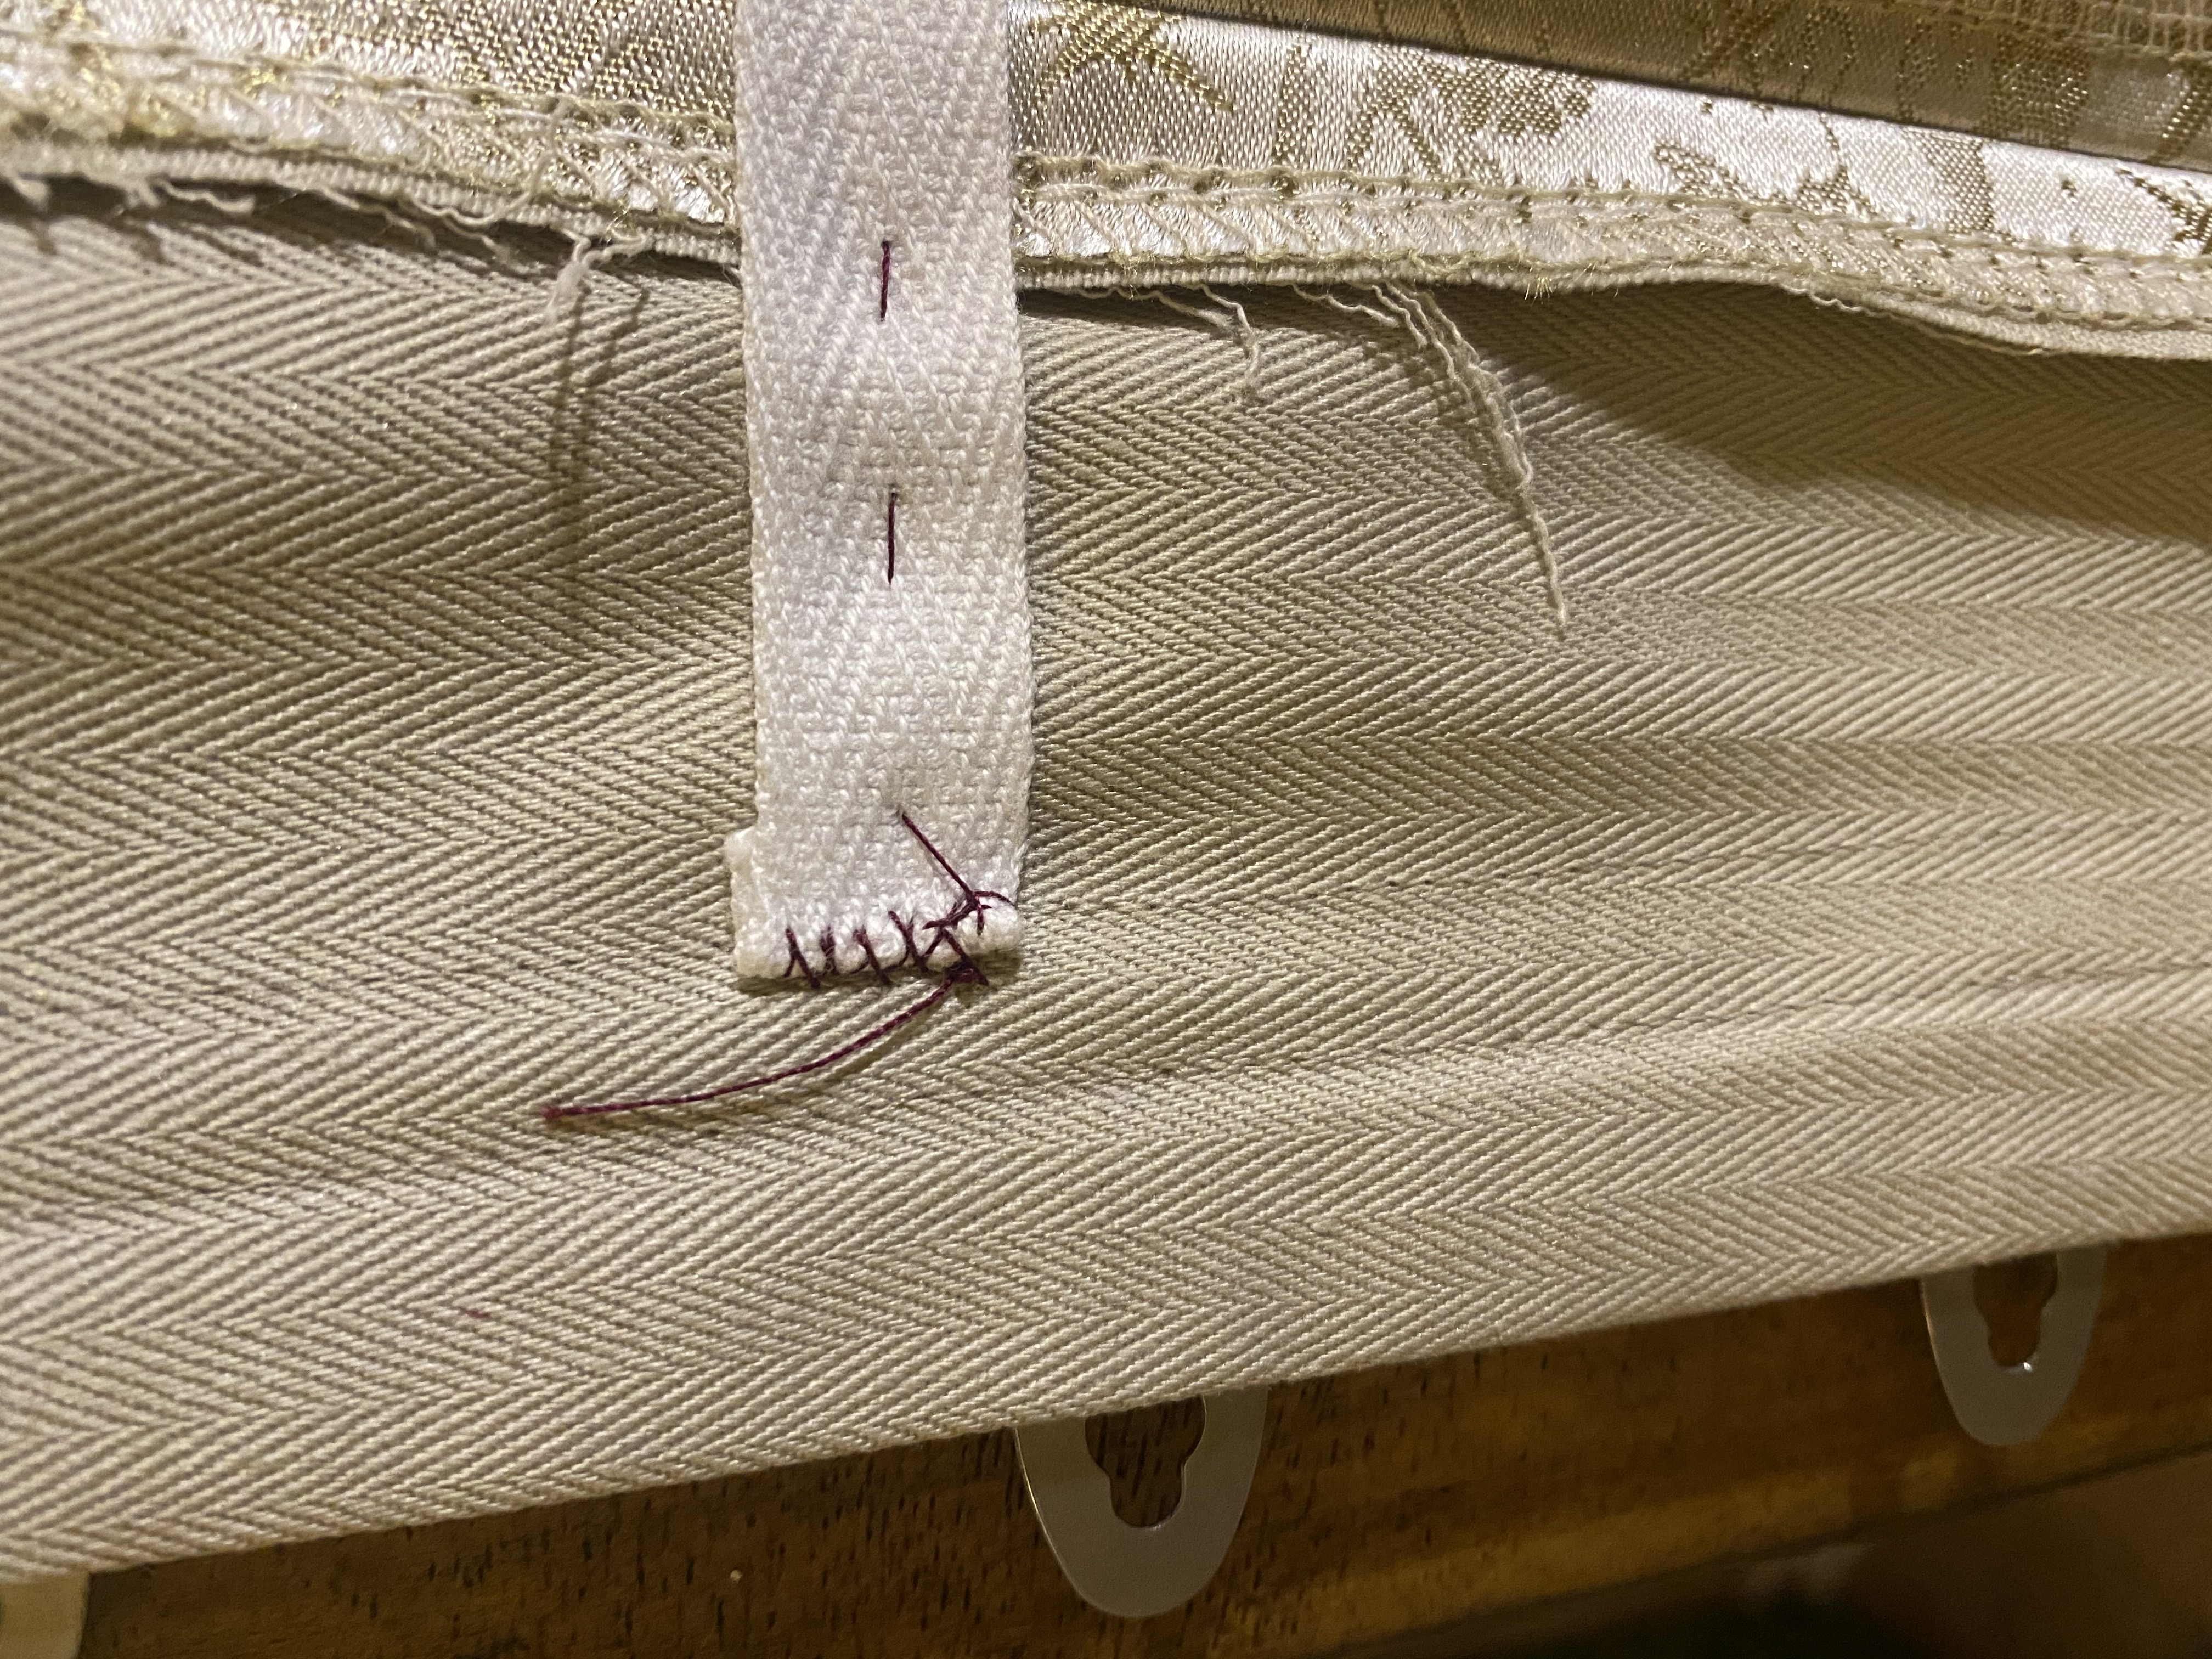
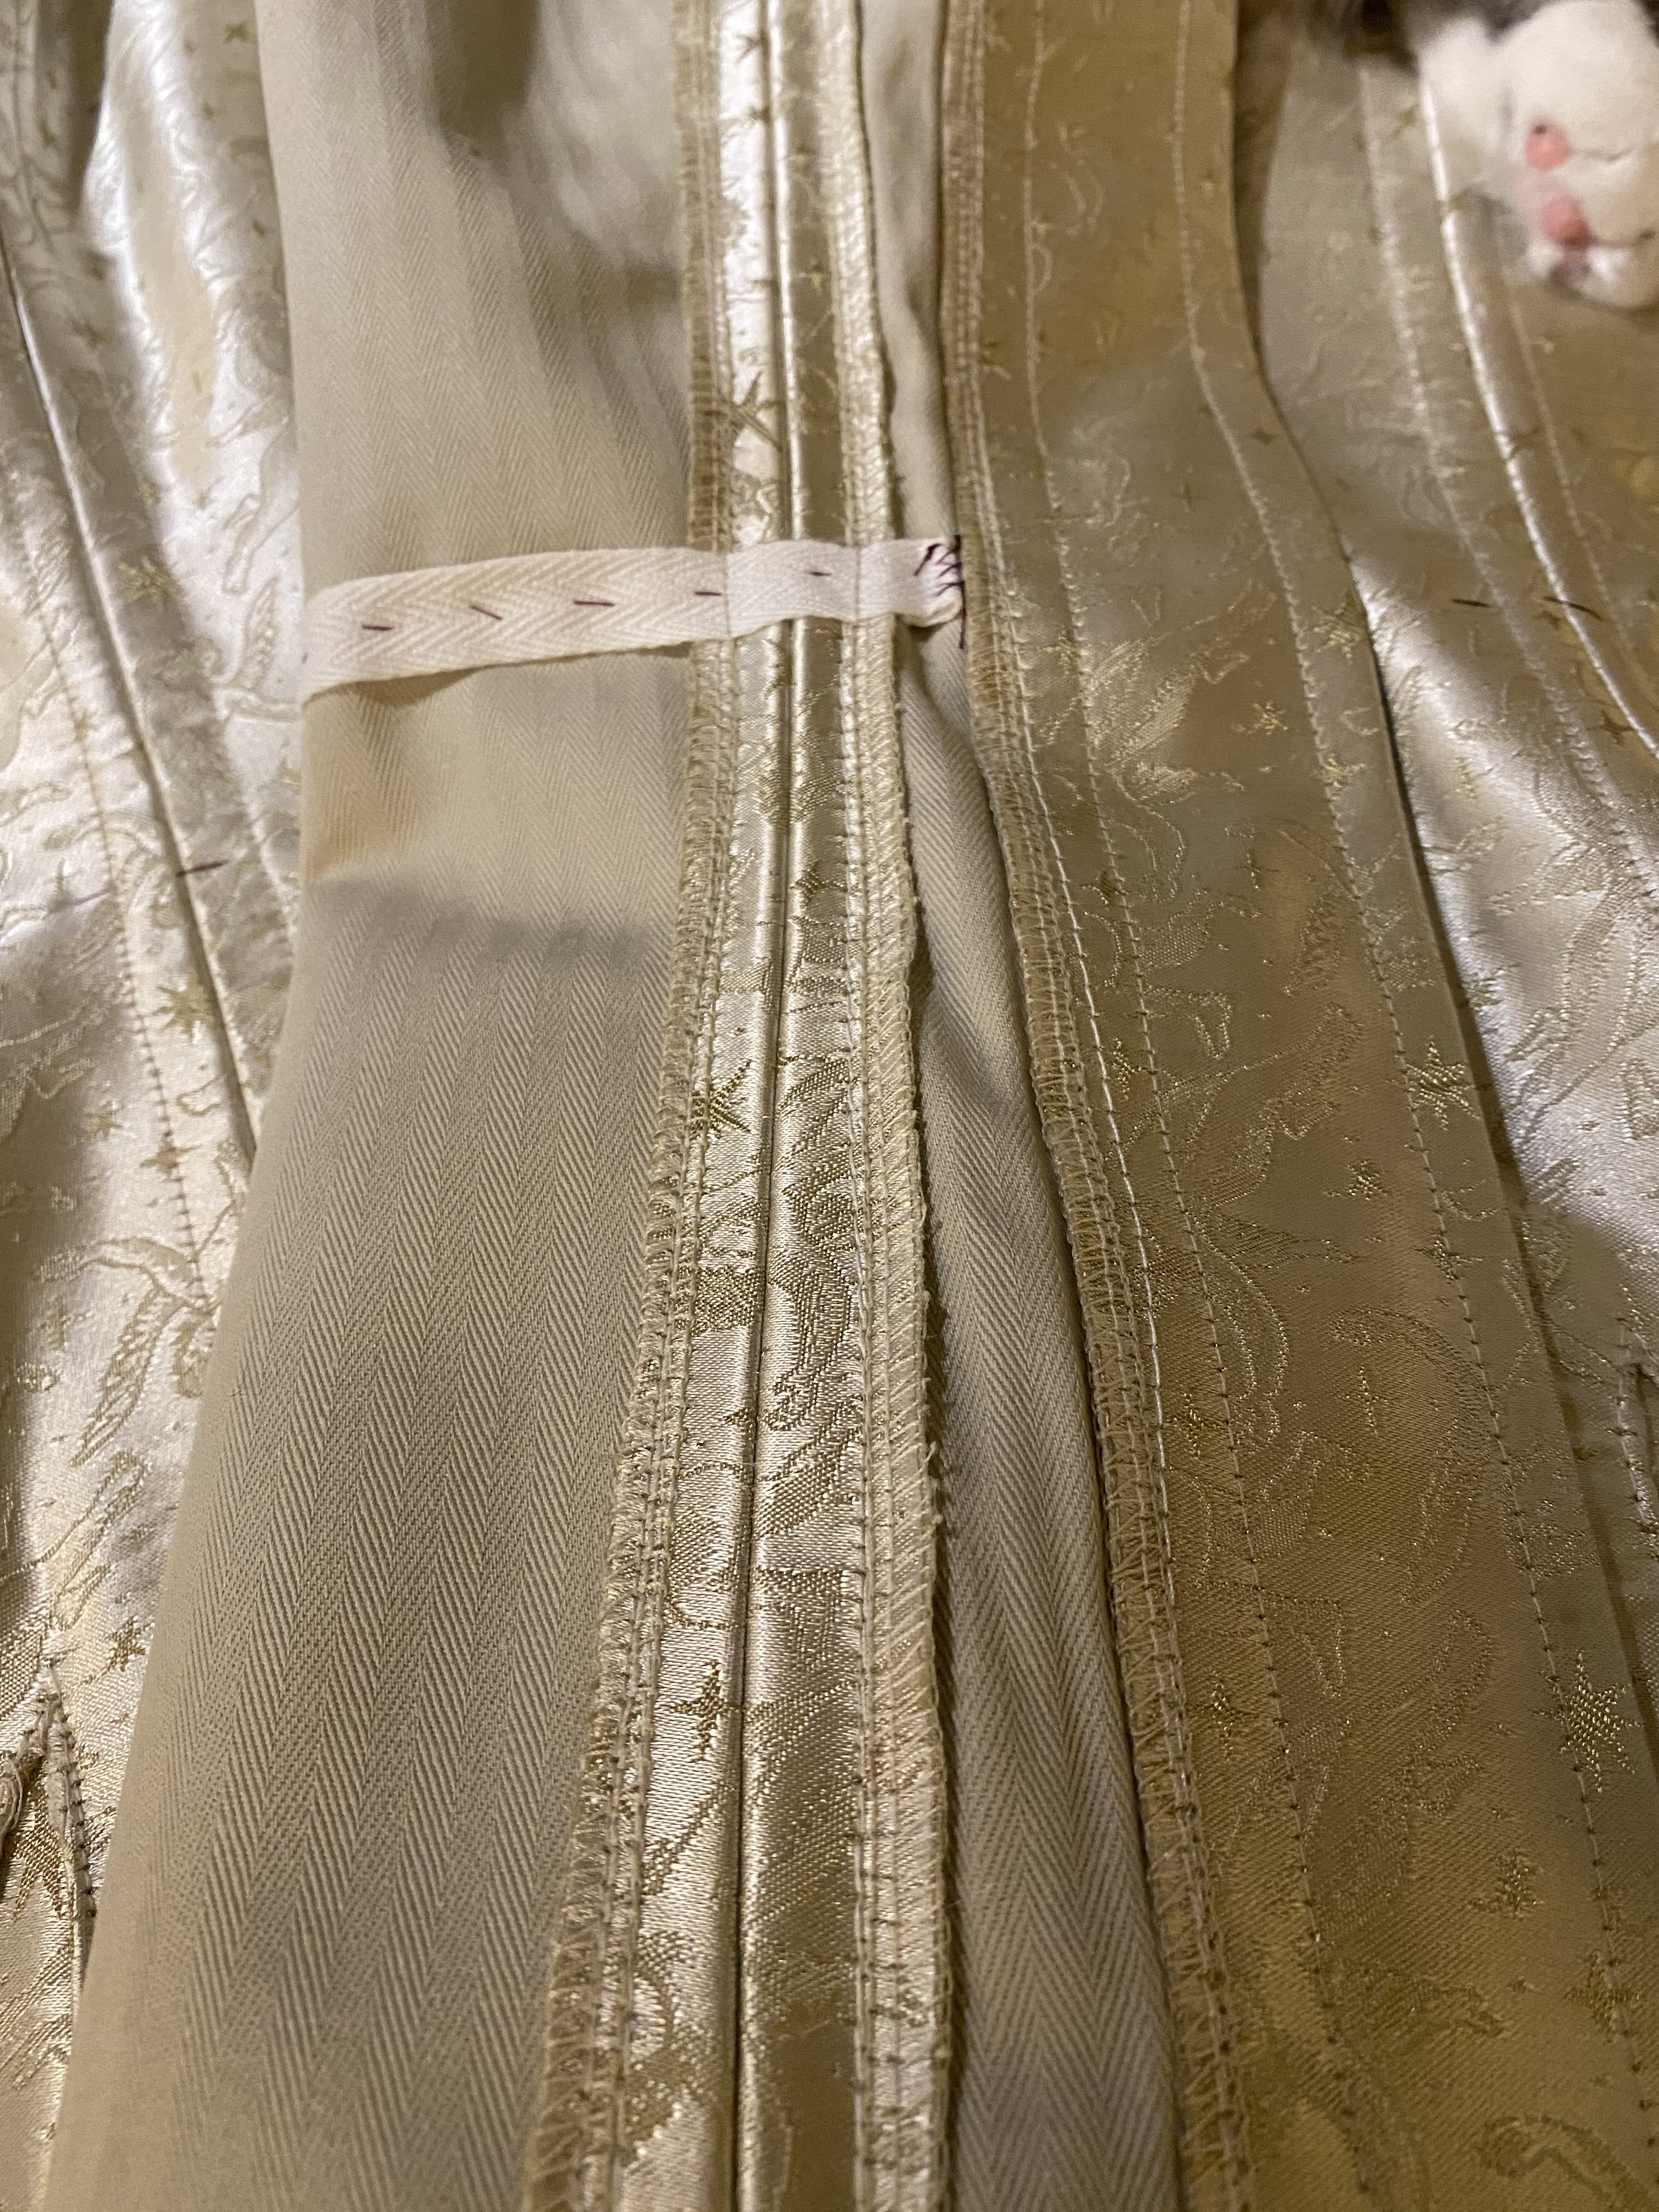
Panels complete, the waist is reinforced by applying twill tape. I basted the twill tape along the waistband and whip stitch the ends in place to finish. The basted stitches are in a bright thread for ease of removal later since the tape will be secured by the boning channel stitches.


Channels are stitched using the seam lines as guidelines for the scant 3/8″ channels. These were done on the machine with the bobbin tension checked to ensure my bobbin thread was neat since this would be shown on the front of the final garment. This could also be done with the fashion side facing up on the machine, but takes a bit of finesse to ensure your seam allowance doesn’t get caught into tucks or puckers underneath. This can also be said about the fashion fabric and bobbin thread of course.


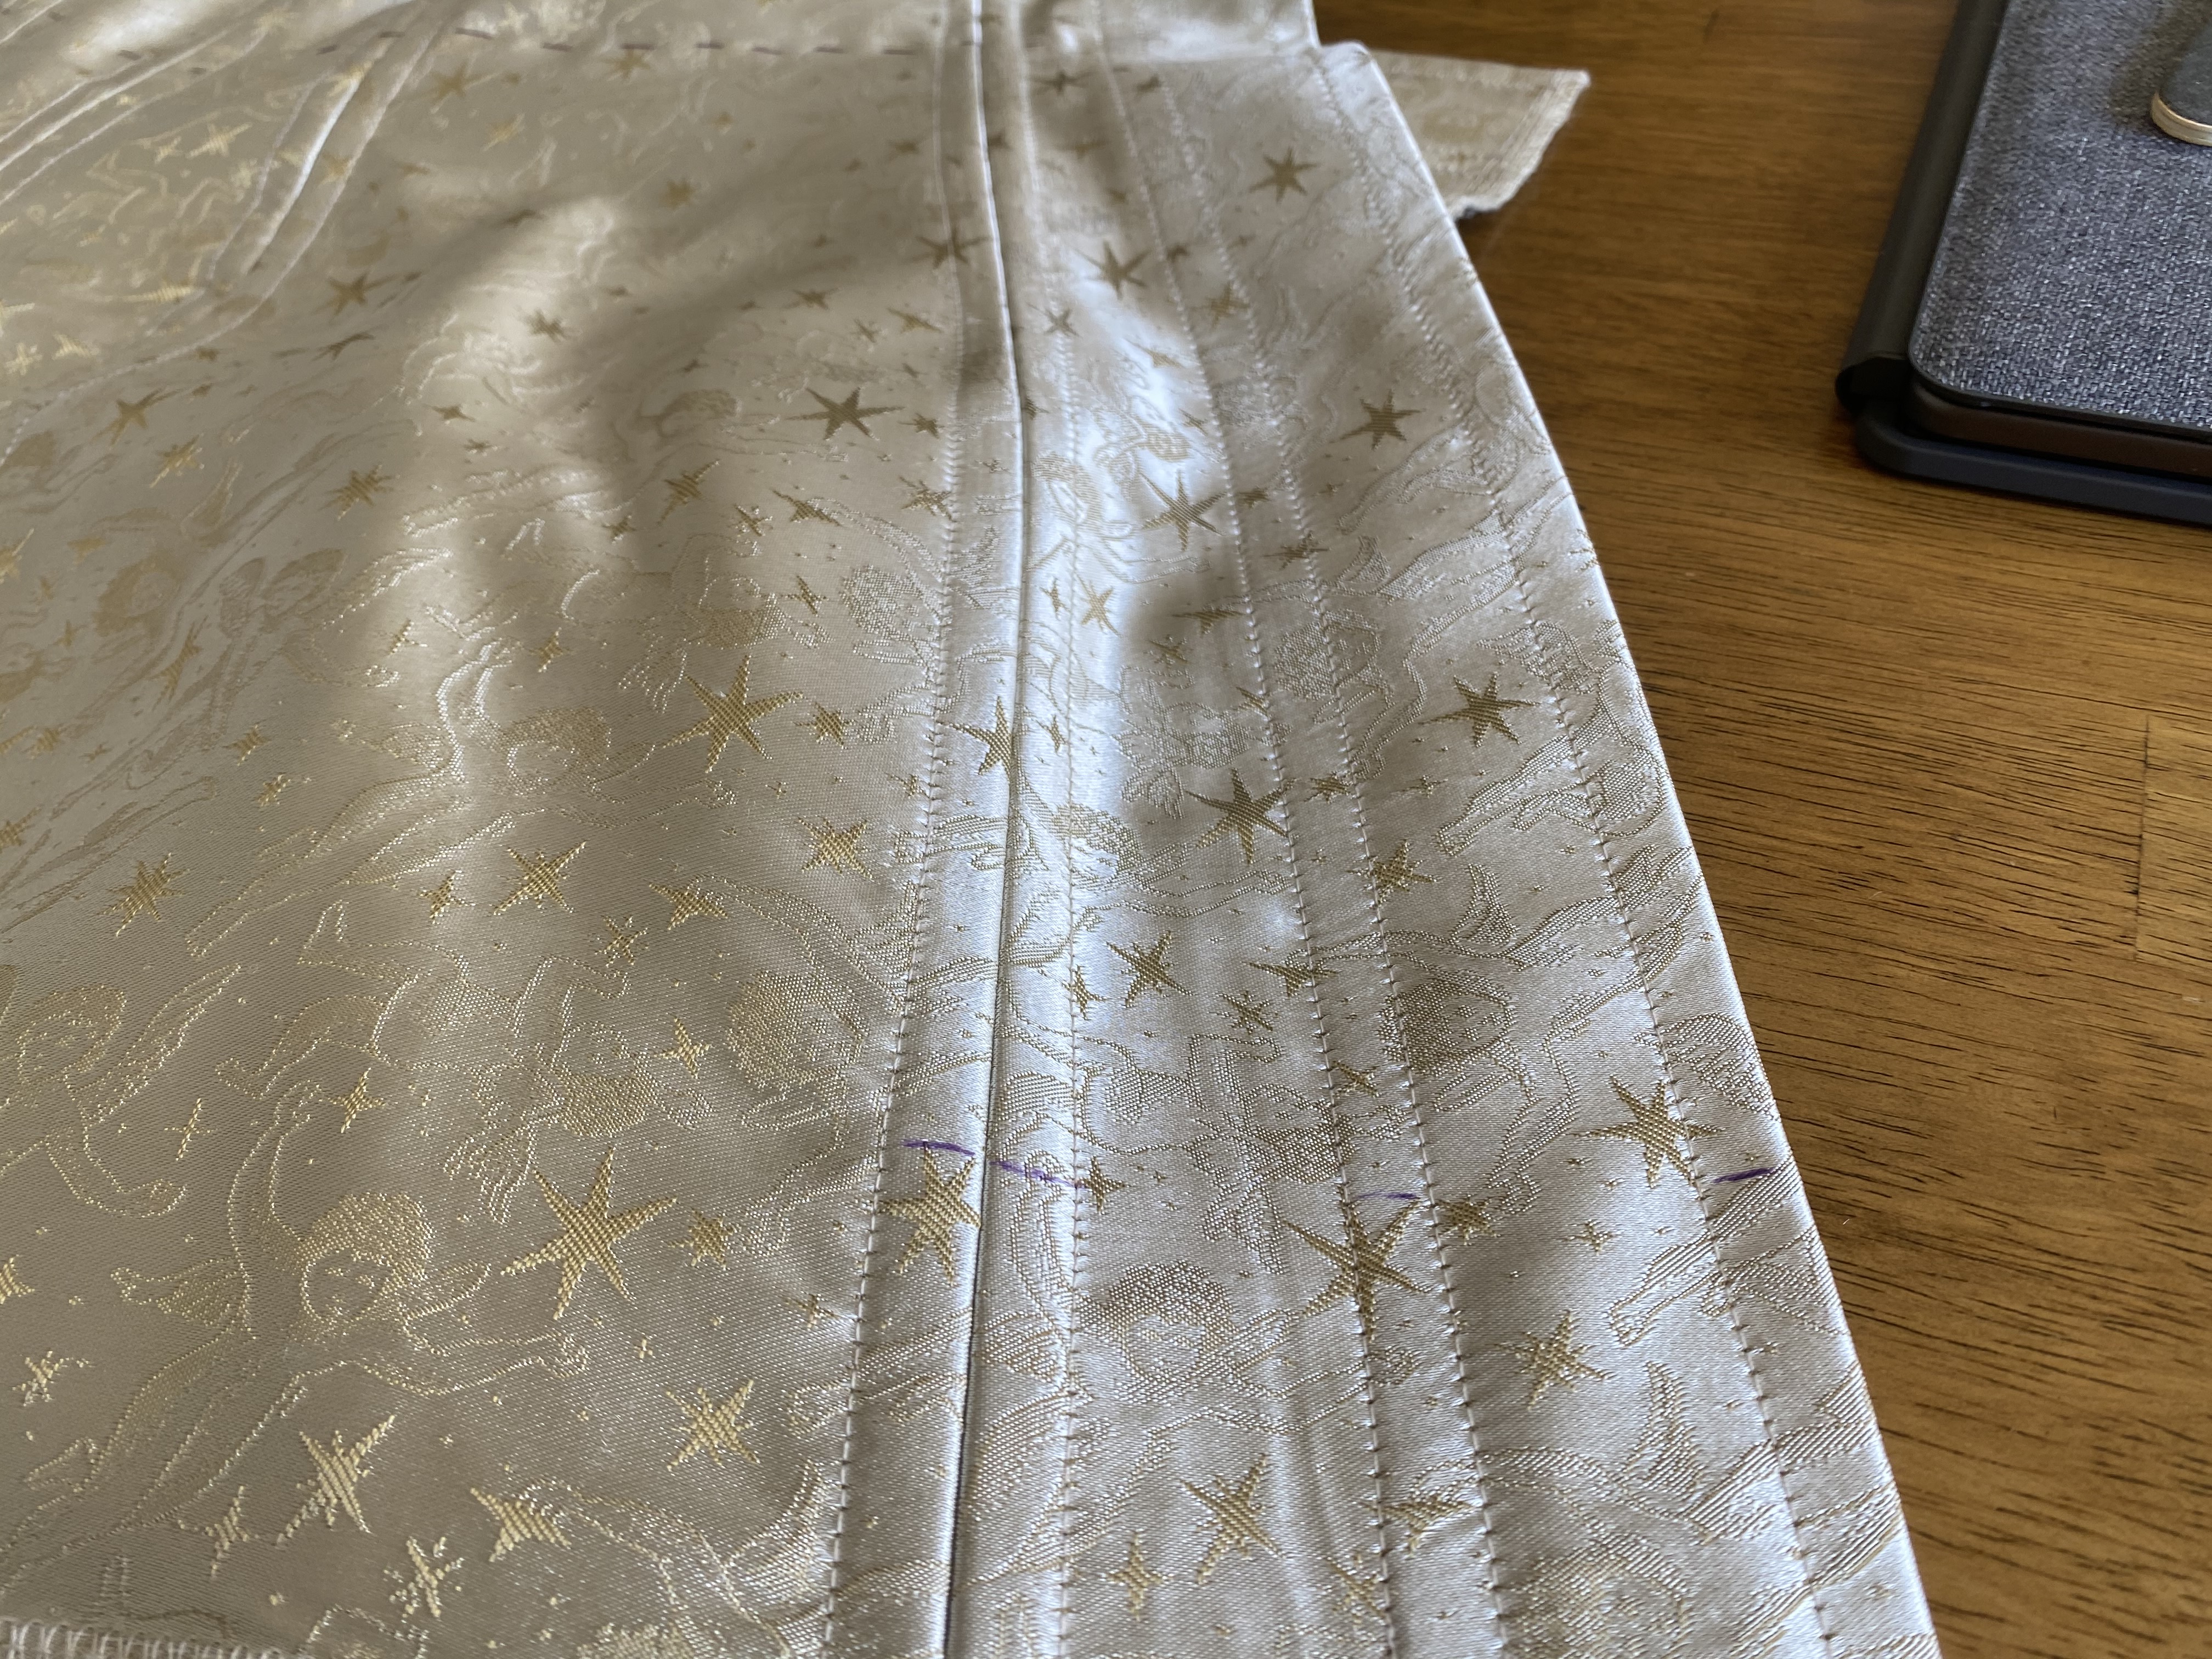
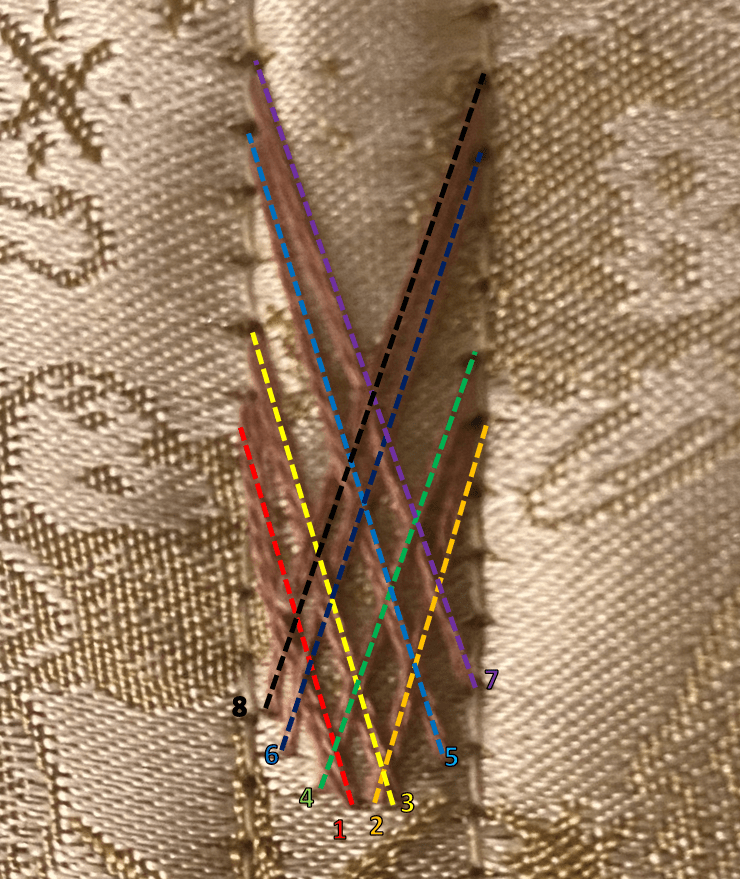
I transferred the boning channel length markings from the pattern tissue to the garment and began the process of flossing. I used a simple pattern of crossing threads to form the weaving pattern. It took a bit of experimenting on scrap fabric to get a spacing that I liked and to realize I’d also need to weave the thread between stitches to create the full effect. Overall, I did not mark any of the stitch distances, but used the channel stitches as a grid to follow.
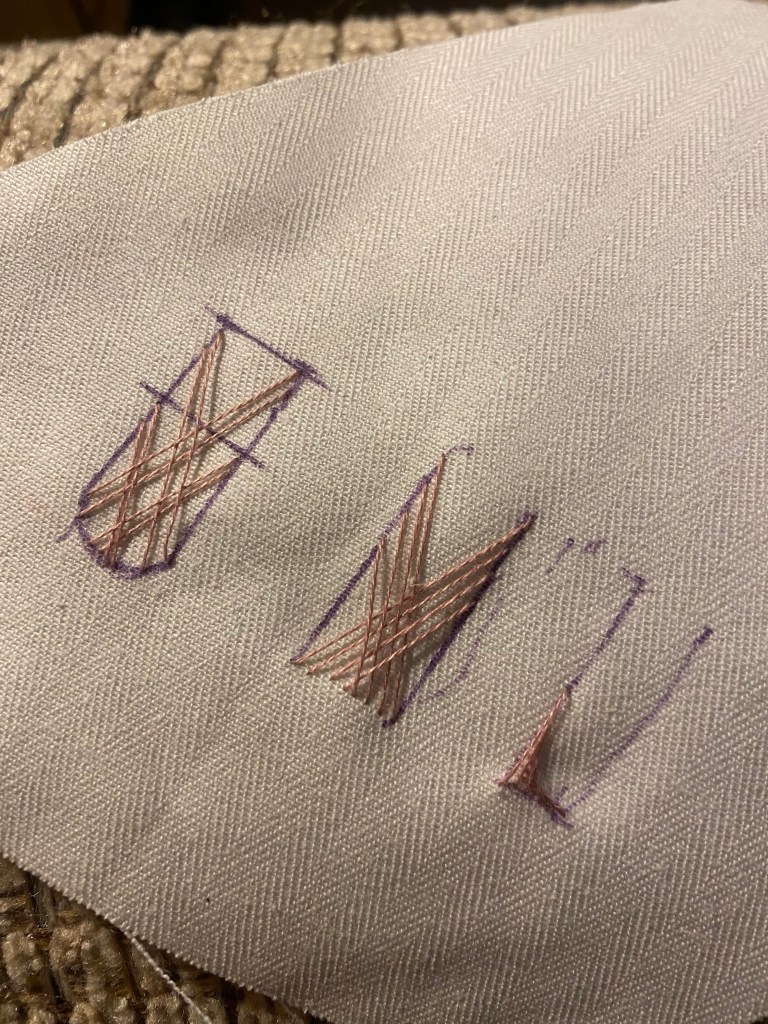
- The first cross would start at the bottom center of the channel and go in 6 stitches above left.
- Next would stitch would be from center to 6 stitches above right. The pattern continues
- Start just right of center to 7 stitches above left
- Start just left of center, weave under thread #1 and over thread #3, end 7 stitches above right.
- Start half way to the right edge of the boning channel and one stitch length up, weave under #2 and over #4, end 10 stitches above and left.
- Start mirror #5 to the left, weave over #1, under #3 and over #5; end 10 stitches above right
- Start just right and above of #5; weave over #2, under #4, and over #6; end 11 stitches above left
- Start just left and above of #6; weave under #1, over #3, under #5 and over #7; end 11 stitches above right.
- Complete the flossing by tying off the thread at the back of the garment

The bones cut the bones to match the length of the channels from the flossed points to the top, subtracting 1/2″ to allow for bias tape to be added. . Since these are synthetic whalebone (plastic), they’re easy to cut to length and then shape the ends with an emery board to keep them from poking through your stitching later. I prefer synthetic whalebone because it is easier to work with, but steel is much stronger and will give a smoother, long-lasting curve, especially for a full torso corset like this that will take a lot of strain from sitting and bending at the hips. I buy boning online in 15 yard rolls and cut as needed.
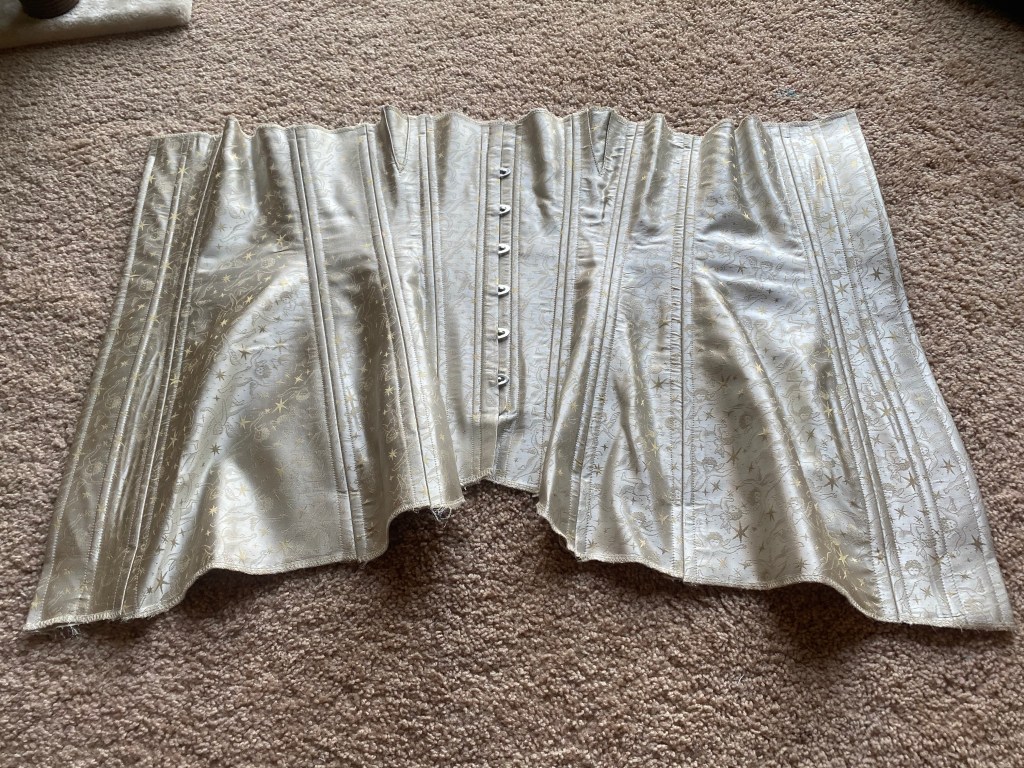
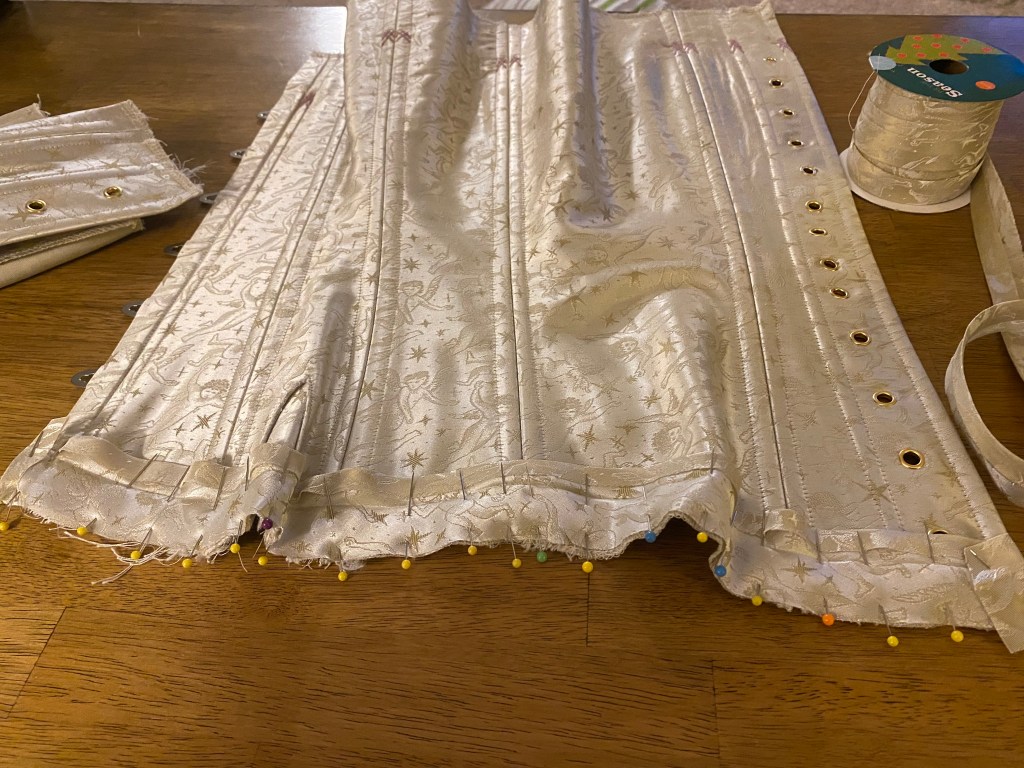
The corset is finished by adding bias tape, grommets, and lace. I used bias tape made from the jacquard but folded so the wrong side faces outwards to give a slight contrast. I applied the tape by hand on top for a smooth finish, but used a machine to stitch the bottom due to timing. Not ideal, but a quick way to finish the bottom edge with a bit of lace tucked in.
1. The top edge bias tape applied by hand by opening and pinning the tape to the top edge and stitching using the fold line as a guide. 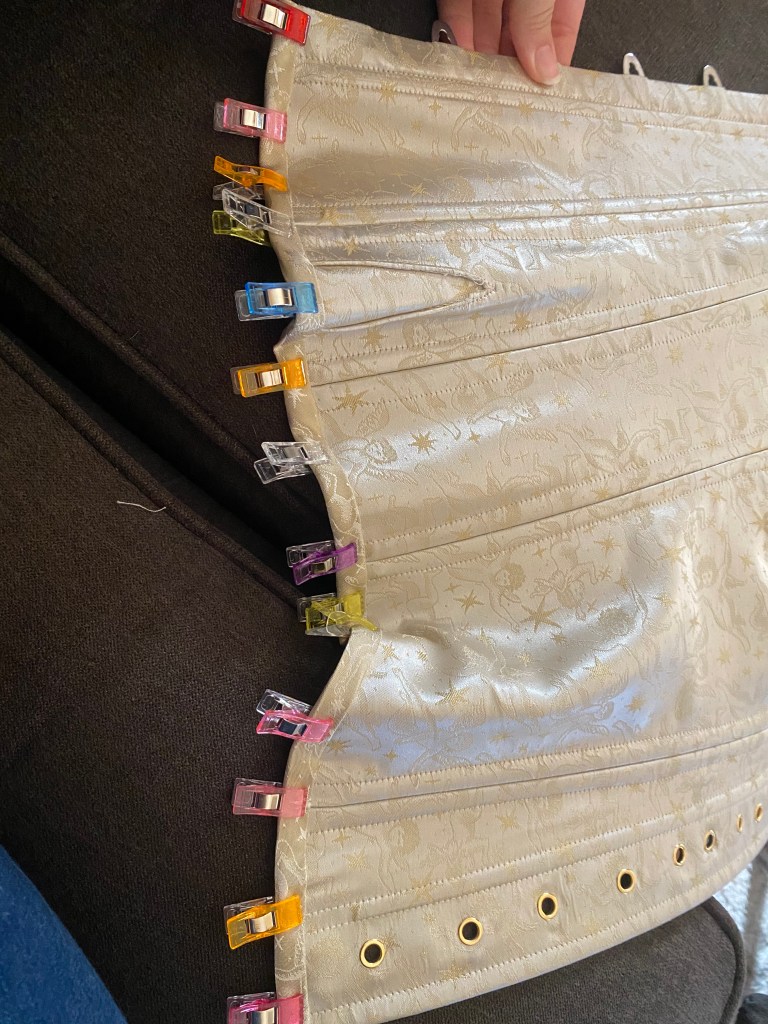
2. The tape is then folded over and clipped in place. 
3. After basting and removing the clips, the tape is whip stitched with tiny stitches to avoid showing on the front. 
4. Last, the top edge is covered with a pre-gathered, layered lace which can be applied with a simple running stitch since it will take no stress. I use thread that matches with the lace and will be relatively invisible. 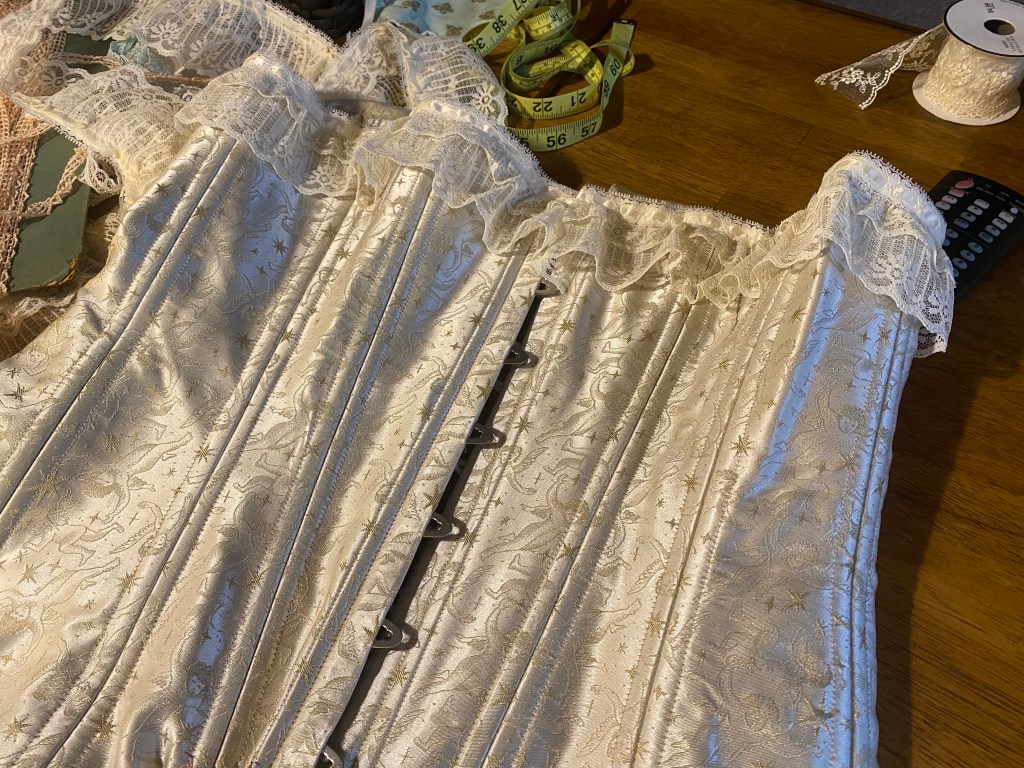
5. The finished top edge wihth lace and bias tape
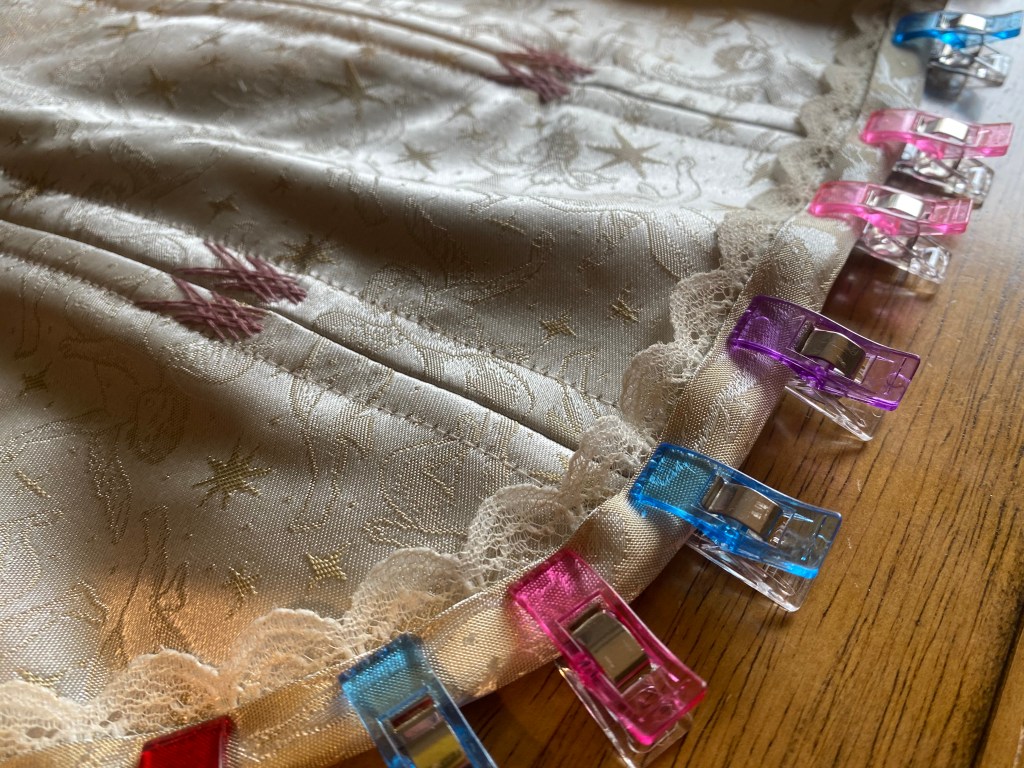
The bottom edge bias tape is simply clipped over the edge with delicate lace inset. 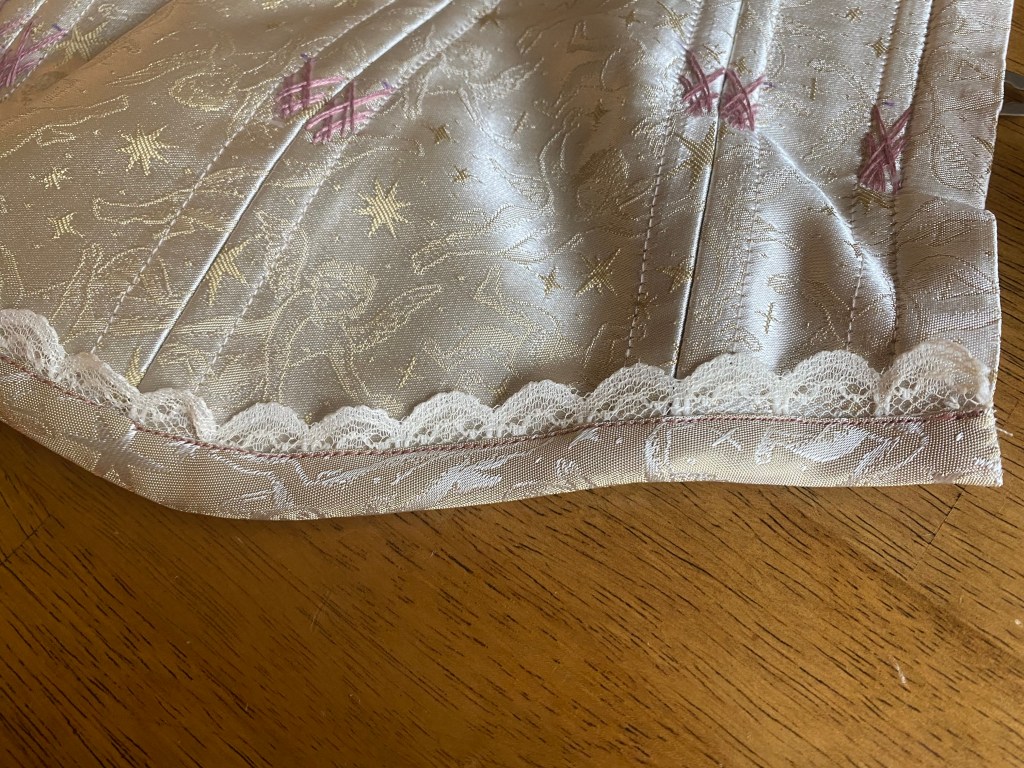
The tape and lace are top stitched in place with contrasting thread (deadline fast approaching, machine was necessary)
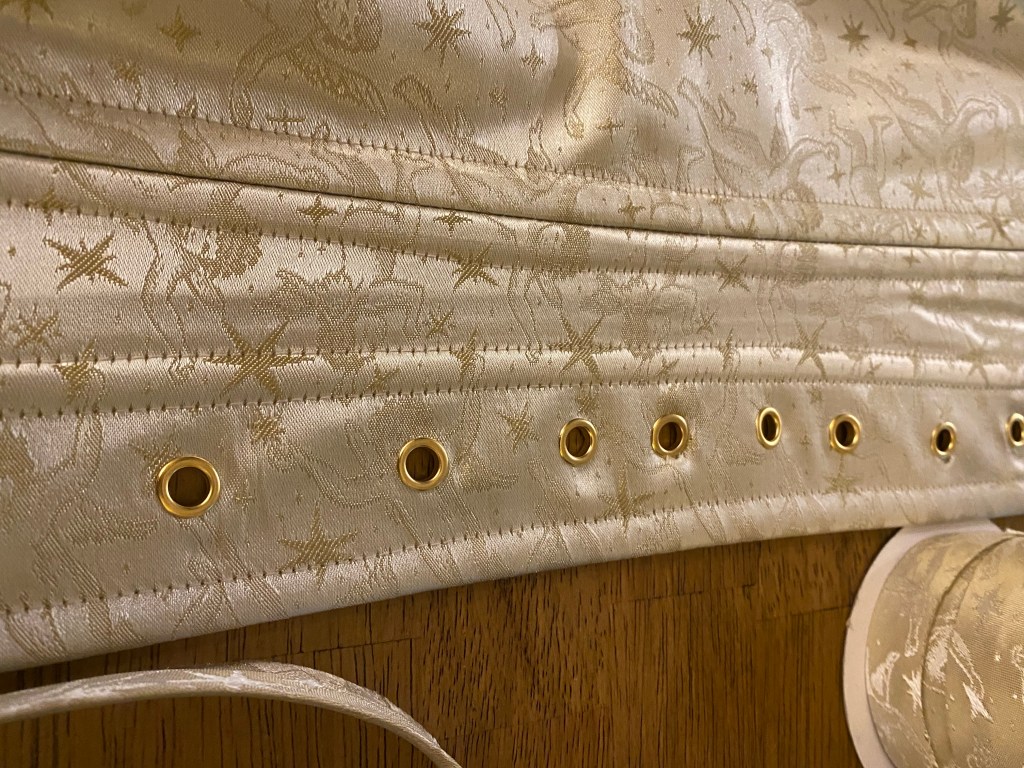
Standard grommets were applied as instructed in the packet and I left them as the bare gold metal since it both complemented the design and would be accurate with the period. Once worn, I am a bit disappointed with the placement of the grommets. There are two close together in the middle of the back (where the waistline should be) over which the lacing creates loops which allow the wearer to self tighten the corset. However, these were a tad high for my waistline, likely due to the corset being overall too long and shifting upward on my torso when worn which in turn would cause the loops to be high. The point where the loops form tends to be the tightest point of the corset since this is where the tightening originates when self lacing.
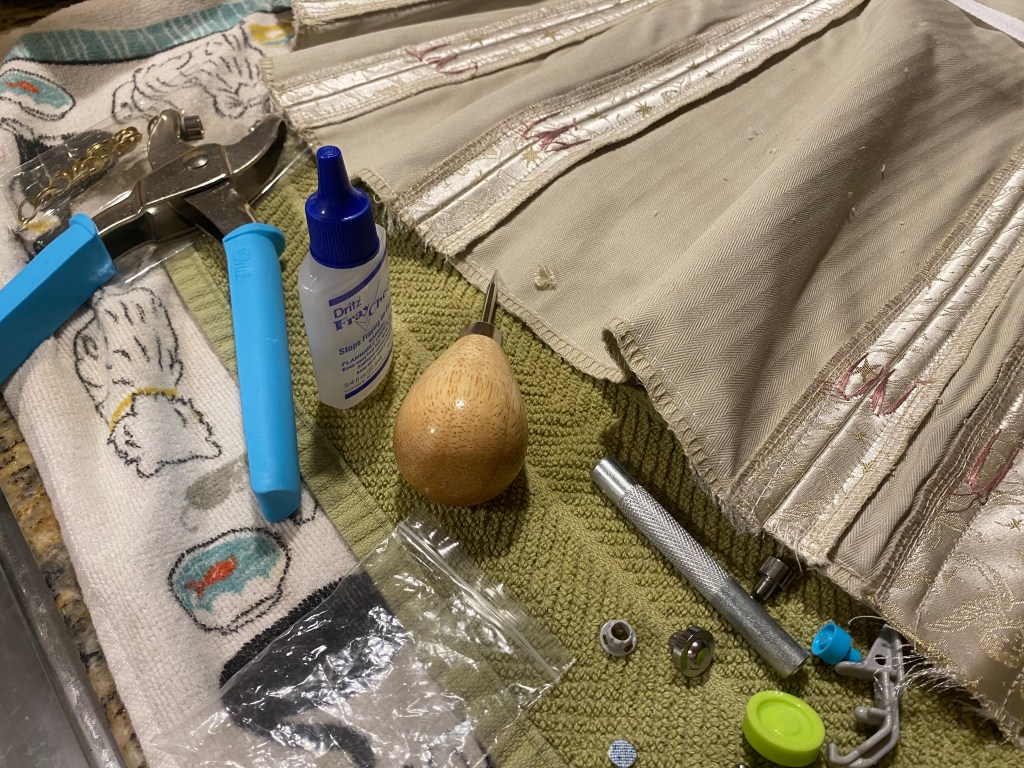
Grommets can be applied either by cutting and sealing with fray check, or using a tailors awl. Because of the thickness of my materials, an awl was not feasible. 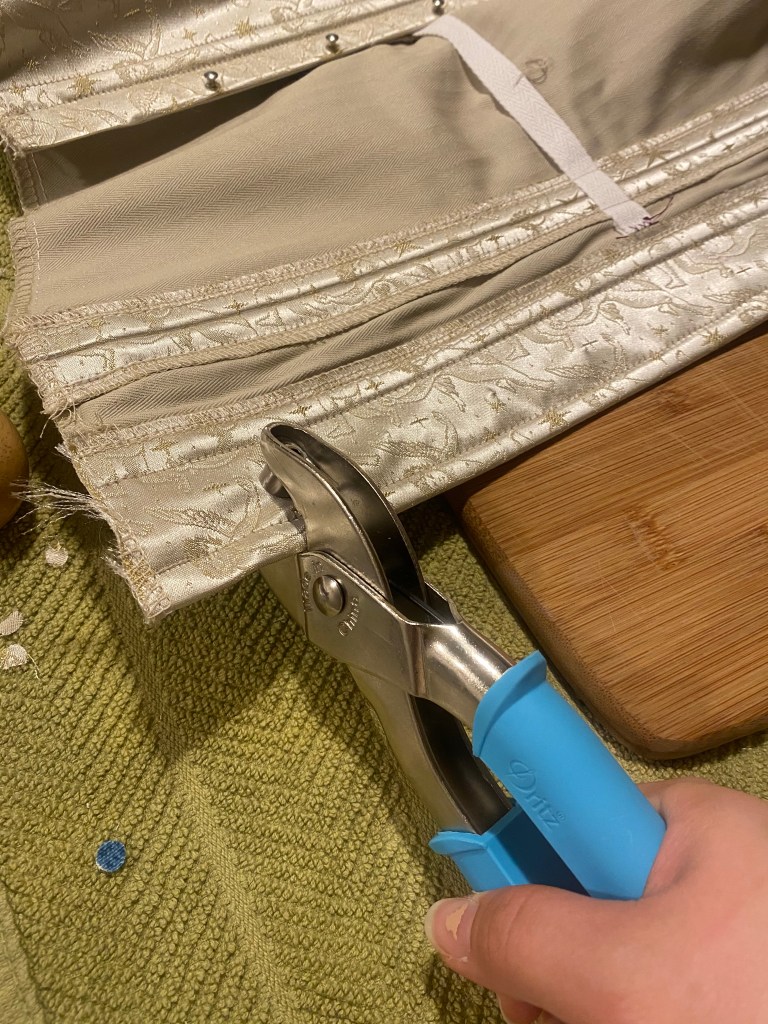
2. Create the holes by using a grommet piers (shown here),
die cut, or rivet press
1. Start by precisely marking the grommet locations. 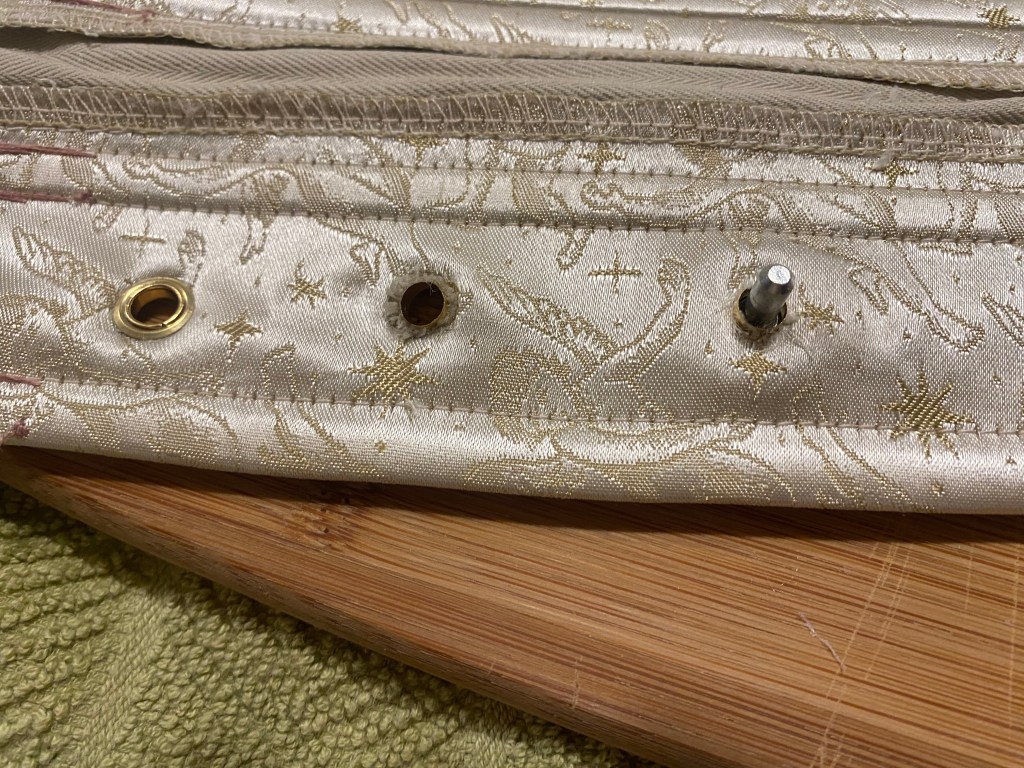
3. After making the holes, apply fray check and allow to dry
4. Apply the metal grommets

As said before, overall it is a very nice, straightforward pattern. It is easy enough to follow for a beginner to corset making, but requires some knowledge of techniques and language from corsetry. To someone unfamiliar with these terms or quick tricks, the language in the instructions could be a bit odd in places.
I found myself going rogue after the first mockup since it is a relatively simple construction to do. The main issue I stumbled on in the instructions were specifics on boning lengths which were not very clear. But I was extremely appreciative of the step by step instructions for installing the busk, a skill that was introduced to me with this project.
Looking back, I would have changed the overall length to match my shorter torso and I would also have added more boning channels, though this might not be necessary with stronger steel bones. After wearing the garment for rehearsals and the show itself, the side panels warped quite a bit while not keeping as nice of a shape as I would’ve liked. Additional boning in the largest side panels would’ve helped with this issue.
Overall, I applaud McCalls and Angela on creating a relatively straightforward historical pattern. I’d love to see more like this in various eras of styles.
