If you’ve followed along on this series, we’ve finished work on the kirtle, outer gown, and foresleeves. Now, it’s time to indulge in all things dramatic and sparkly and wonderful: the plaquette. The plaquette is a stiffened panel that attaches to the front of the gown to hide the center front lacing of the gown while creating the smooth front characteristic of a Henrician gown.
The plaquette has a rounded shape on top and a pointed shape at the bottom and the sides should line up near the side seams of the gown bodice. It requires stiffening lengthwise to hold its general shape but needs to be moldable or soft widthwise to hug around the front body. Ideally, the kirtle and outer gown are providing all of the body shaping. So though the plaquette is stiffened, it’s for decorative purposes in the end.
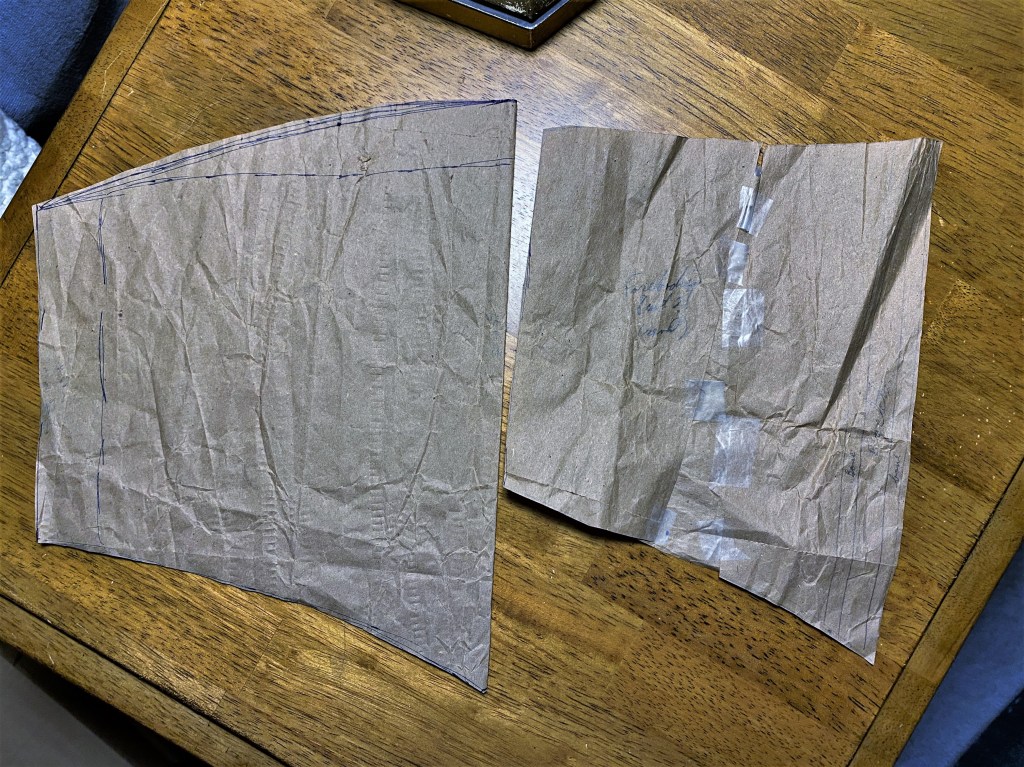
The plaquette pattern is based on the bodice panels with the addition of 1″ at the center front, curved to either side to match the original side lengths. Additionally, the bottom is extended 1″ in order to overlap with the forebodies panels and elongate the torso.
A comparison of the plaquette (left) and forebodies (right) pattern pieces
It can be simple and smooth, elegantly embroidered, or heavy as heck with diamonds and rubies. I opted for a blend of all three. Because why not be extra?
In my mind’s eye of design, I initially wished to create the plaquette with embroidery with details of seed pearls and beading. Yet, the lace and embroidered pieces that were available to me at my local stores were far too modern for the design I wanted. I thought about teaching myself to embroider or commission a panel of embroidered material specifically, but I’d already far and above blown the project budget on the sheer yardage required gown. I couldn’t justify buying MORE material, no matter how much I wanted to indulge the desire for gorgeous fabric. Instead, I would use items I had in my stash for the project already.
You see, when I get an idea for a project, I turn into a crow. If I see something in passing that is even remotely related to the project on sale, clearance, or just THE perfect color, I buy it and stash it away in one of the many many baskets that take residence around my all-in-one living room/dining room/sewing room/guest room (basically the only room in the apartment besides my bedroom). Once the basket contains most or all of the inspirational materials I need, I start. Often this means I have more inspiration items than I need or use, but it leads to a wonderfully sorted creative process.
To build the plaquette from these materials, I start by deciding on the fashion fabric and structural layers. In all, I used four layers: the outer/front layer from blue velvet remaining from the outer gown construction, thin white muslin interlining, coutile, and blue linen for the lining.
The layers used in the plaquette from left to right: blue linen for the lining, coutile interlining, muslin interlining, and blue silk velvet front.
Now, a bit of explaining on the layers. I didn’t come to this arrangement naturally, nor does it seem necessary in hindsight. To start, I actually had a layer of buckram in the middle at one point too. I attempted to use that layer to provide the structure necessary to give the smooth shape and hold up the gems I planned to add. However, on the trial run of the layers (baste stitched together), the buckram buckled and folded weirdly with any movement. It was…too stiff. So I eliminated it and planned to add a few bones to the plaquette to support instead.
Since I planned to add boning to the center (essentially acting as a busk) and following the top curved seam, I added the layer of coutil which would give me a base to add twill tape boning channels while preventing any stretching of the plaquette overall. We’ll come back to this thought.
The muslin layer is added for a lining structure for the thin weave and delicate silk velvet to be mounted on while I added trim, embroidery, beading, or whatever creative embellishments I landed on. I baste these two layers together first and can begin the embellishment process.
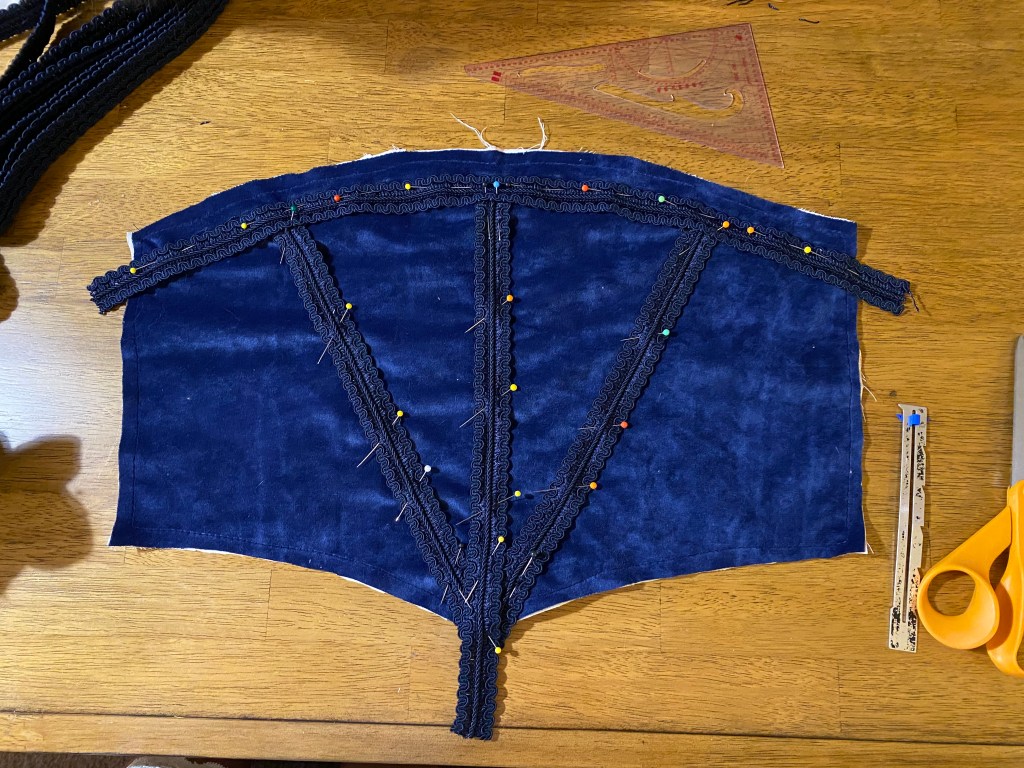
The first item I pull from my stash basket is a navy trim I purchased on clearance from Joann’s. I thought to use it to create geometric style lines to meld with the diamond patterns on the outer gown. I fiddled around with it for a while, pining in places, holing it up to myself in the mirror, and adjusting until I was happy with the effect. In the end, the shape creates a triangle or v-shape mimicking the point on the plaquette as well as the diamond effects.
The final placement of the trim on the blue velvet. It ended up being at a 30-degree angle from the center trim piece and was quite flattering.
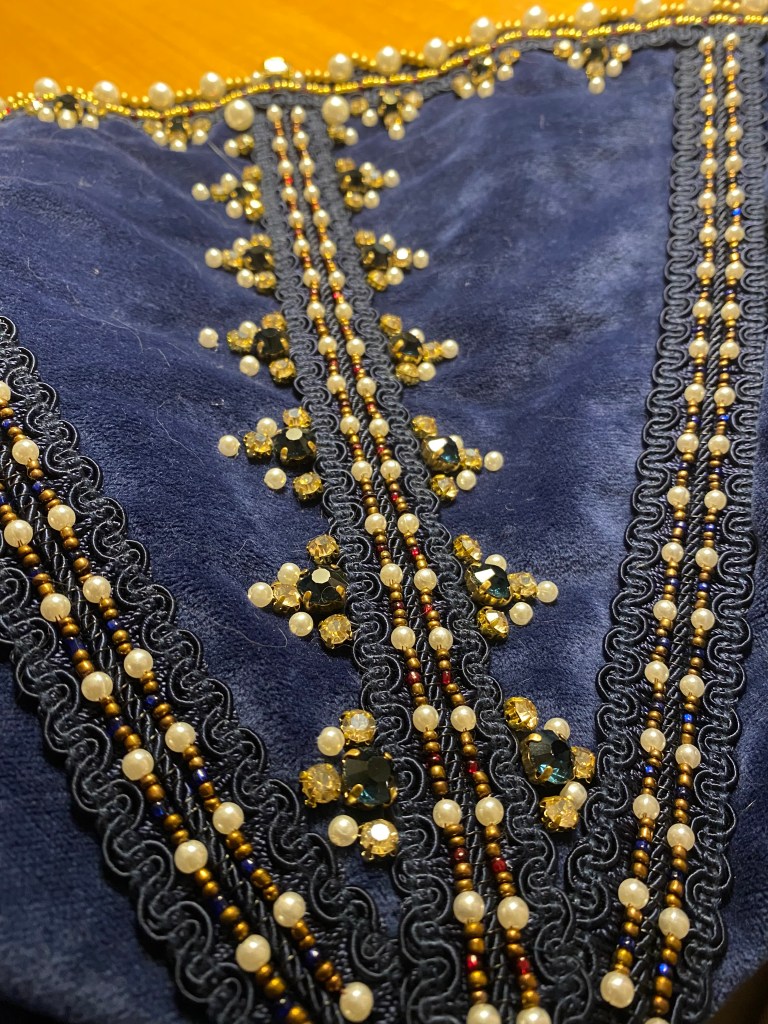
Finally, was the most fun part of adding beads on beads on beads and gems and more gems! Unfortunately, I don’t have a lot of photos of the beading process since I was so excited and playing with it as I went that I just kept stitching and didn’t record any. Looking back though, my process started by sorting through the beads I had available and having any that coordinated nearby, then testing how certain patterns of beads would look in sequence. I took a sequence that I liked from the seed beads and couch stitched them in parallel along the center raised section of the trim.
For this pattern, I used a mirrored pattern of 1 4mm pearl, 2 copper seed beads, and 1 sapphire seed bead at the center
Then because I loved the pattern so much, I used a similar style for the top curved edge with a mirrored effect of 4 gold seed beads and 1 red seed bead. The topmost line of beads then uses 8mm pearls to create a crowning effect that should meld with the gemstones and pearl pattern on the kirtle.
And of course, I want crazy using gems to my heart’s content. Again, this was a process of trying patterns to see what I liked and what I had enough glass gems for to have a cohesive pattern.
The gem pattern I decided on is shown on the left of the panel. Though I did toy with the idea of adding a few red gems, it felt like I was approaching the color scheme of Snow White once the bright red gems were added. Plus they were way too bright in comparison to the more burgundy tones on the outer gown.
Before moving on beyond the beading, I’d like to take a moment to appreciate the backside of the panel because I find it simply fascinating
The backside of the plaquette after finishing all the beads. Large basting stitches are visible in blue from tacking the trim in place, then smaller blue stitches for all the gems which I could use larger silk thread for. You can also see the smaller stitches in brown beading thread that the dead beads were stitched with. Finally, white silk thread was used for the last extra pearls I added.
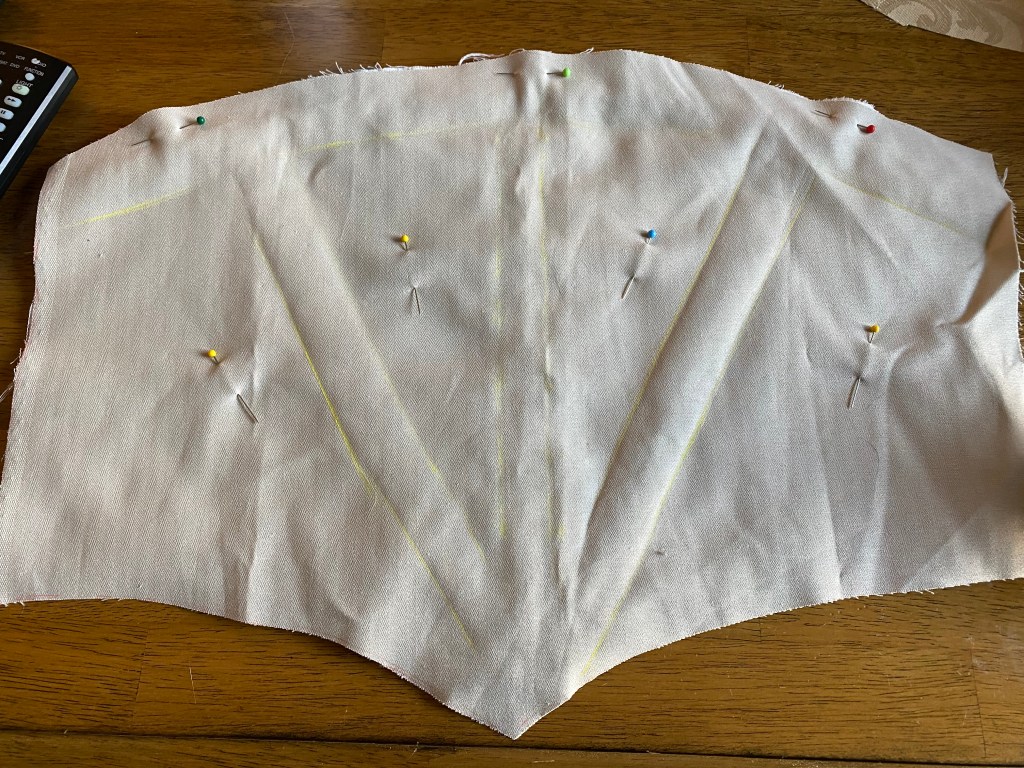
Embellishments aside, it was time to add the structural layers and finish the piece. I placed my coutile on top of the finished beaded panel and traced the lines of the trim/beadwork under which I would add boning channels.
Tracing the trim locations, marked with yellow tailors chalk
3/8″ twill tape is used to create 1/4″ boning channels.
[what boning made it to the final garment]
The lining and coutile layers are basted together for stability. With all layers finished, the lining layer and outer layer are stacked with right sides together and are stitched, turned outward, pressed, and slip-stitched closed for a final finish.
Basting the lining to the coutile
Interior of the basted coutile
all layers stitched with right sides together
After turning the stitched layers and prior to slip stitching the top seam.
The completed bead structure
The last step is to create a way for the plaquette to attach to the gown bodice. Historically, this was achieved with the use of straight pins that a lady’s maid would have used in dressing a noblewoman. But, it’s just me, and I like convenience. So I use a strong home decor thread to whip stitch one side of the plaquette to the gown and add hook and eyes to the other side. This was a tad of a process since my initial placement of the plaquette was not tight enough across the gown front and caused the hooks to, well, unhook when I moved. But the second time was too far apart and forced me to pull the gown front panels together when hooking. Third time was the charm and achieved the right tension. So don’t worry if it takes a bit of finagling to get it right.
Marking the hook locations the back of the plaquette. I placed these about 1″ apart
The hooks in place. Be sure you have hooks at the very top and bottom so there is no gaping. The chalk line for final placement of the eyes is visible on the main gown.
I used pins to mark the locations to place the eyes based on the final hook locations.
There it is, the completed plaquette. And I adore it. Aside from the laughable weight of the outer gown, it’s my favorite part of the gown.
Crazy to believe, but we’re nearly complete with this project. Only one more item to build and she’ll be complete
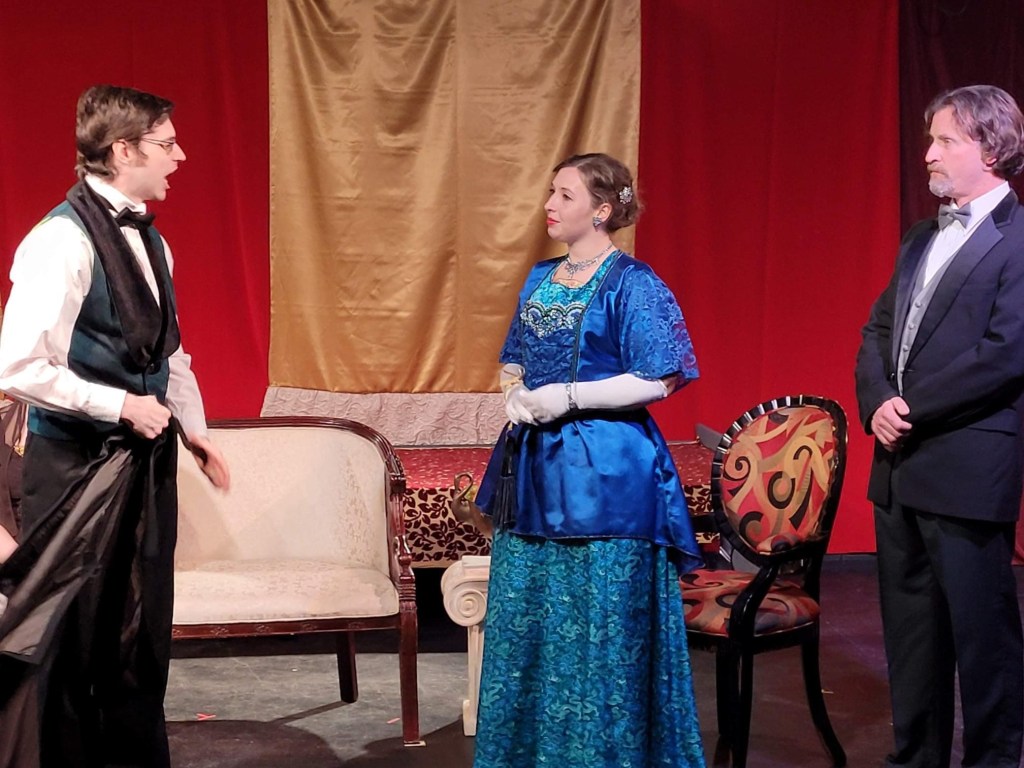
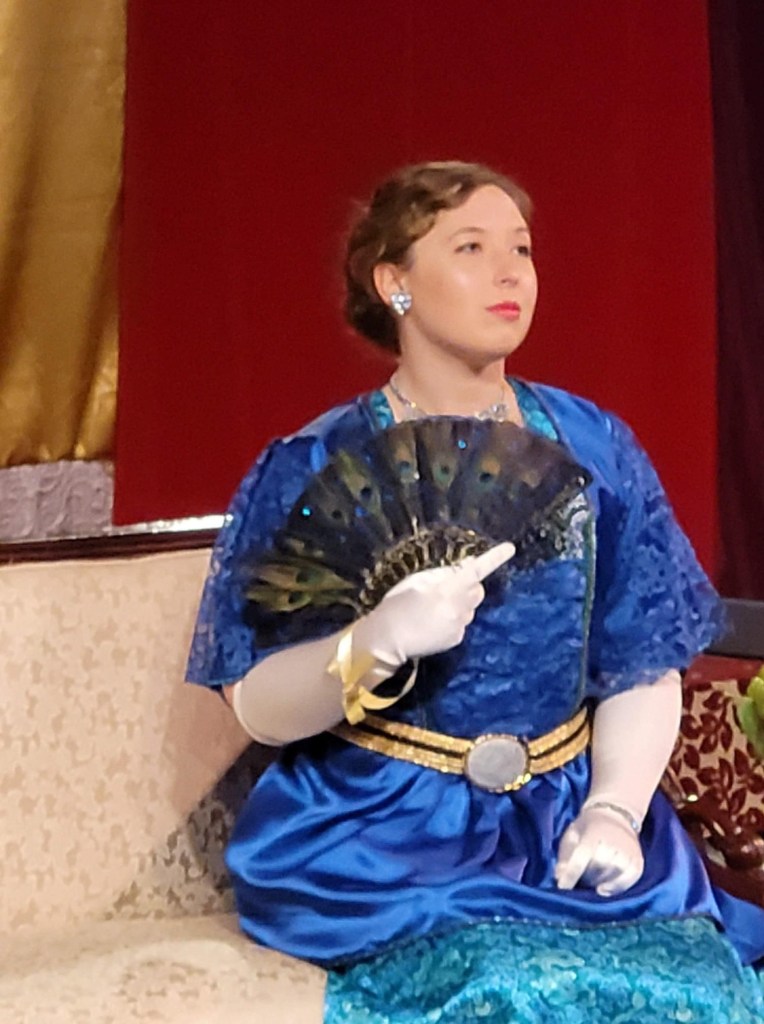
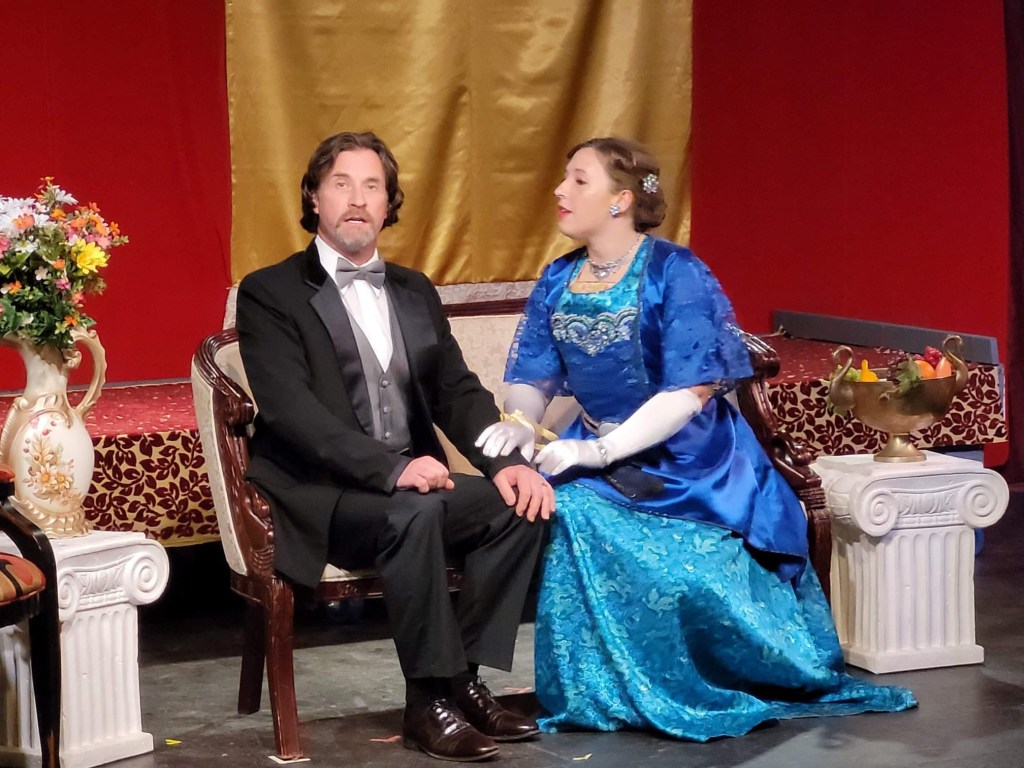
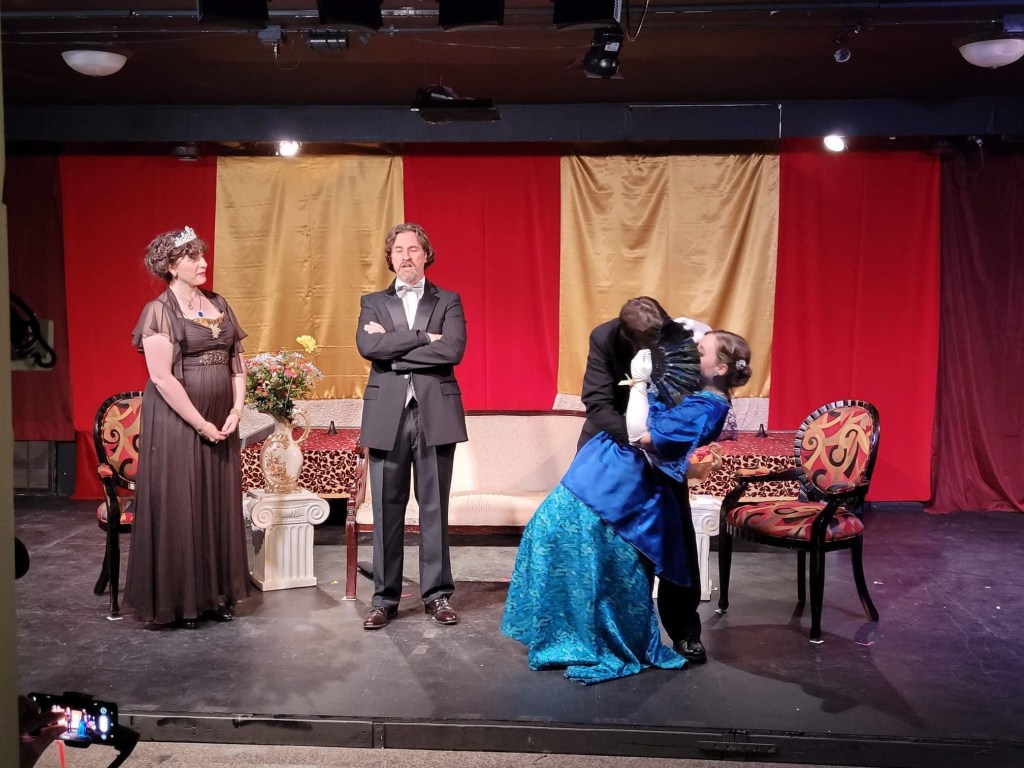
As mentioned in my post on constructing an Edwardian corset and chemise, I had the opportunity to break out of COVID quarantine, post vaccination and under safe conditions, to participate in a bit of community theatre. I would portray Mrs. Juno in Overruled by Bernard Shaw. The play is set in 1911 at a seaside resort where Mrs. Juno and her lover are ending their trip around the world together, little do they know that their spouses are also at the same resort and are having an affair together also. It is a fun little farce poking fun at the constructs of marriage in proper society and the need for passion and danger for true enjoyment of what society expects.
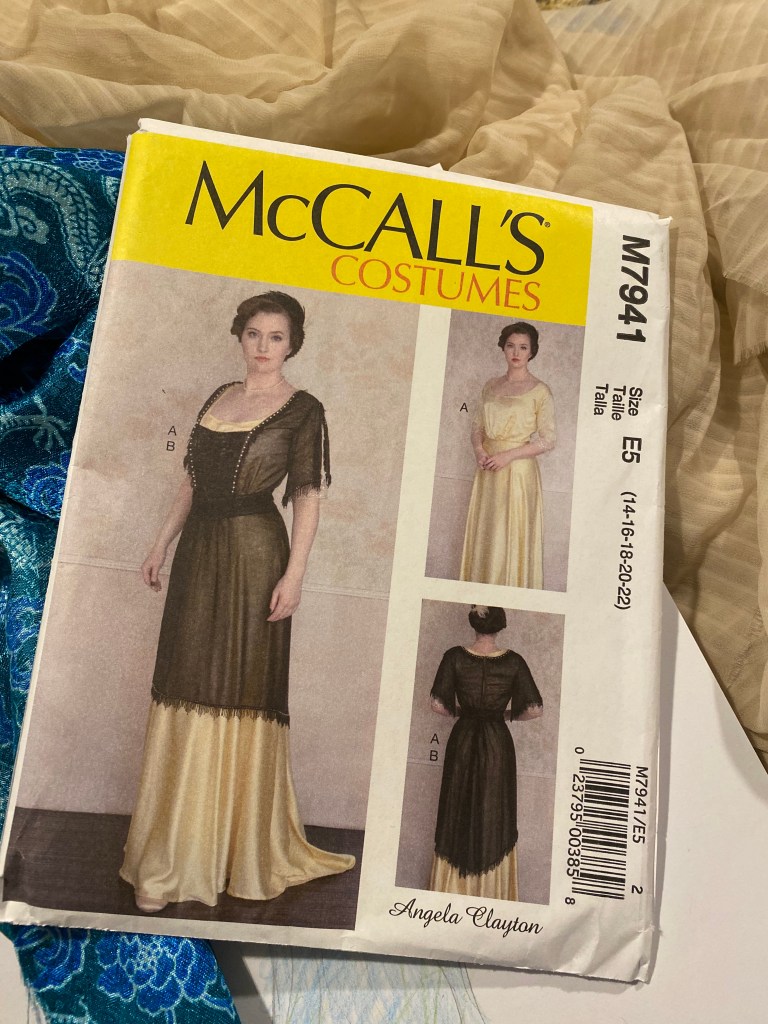
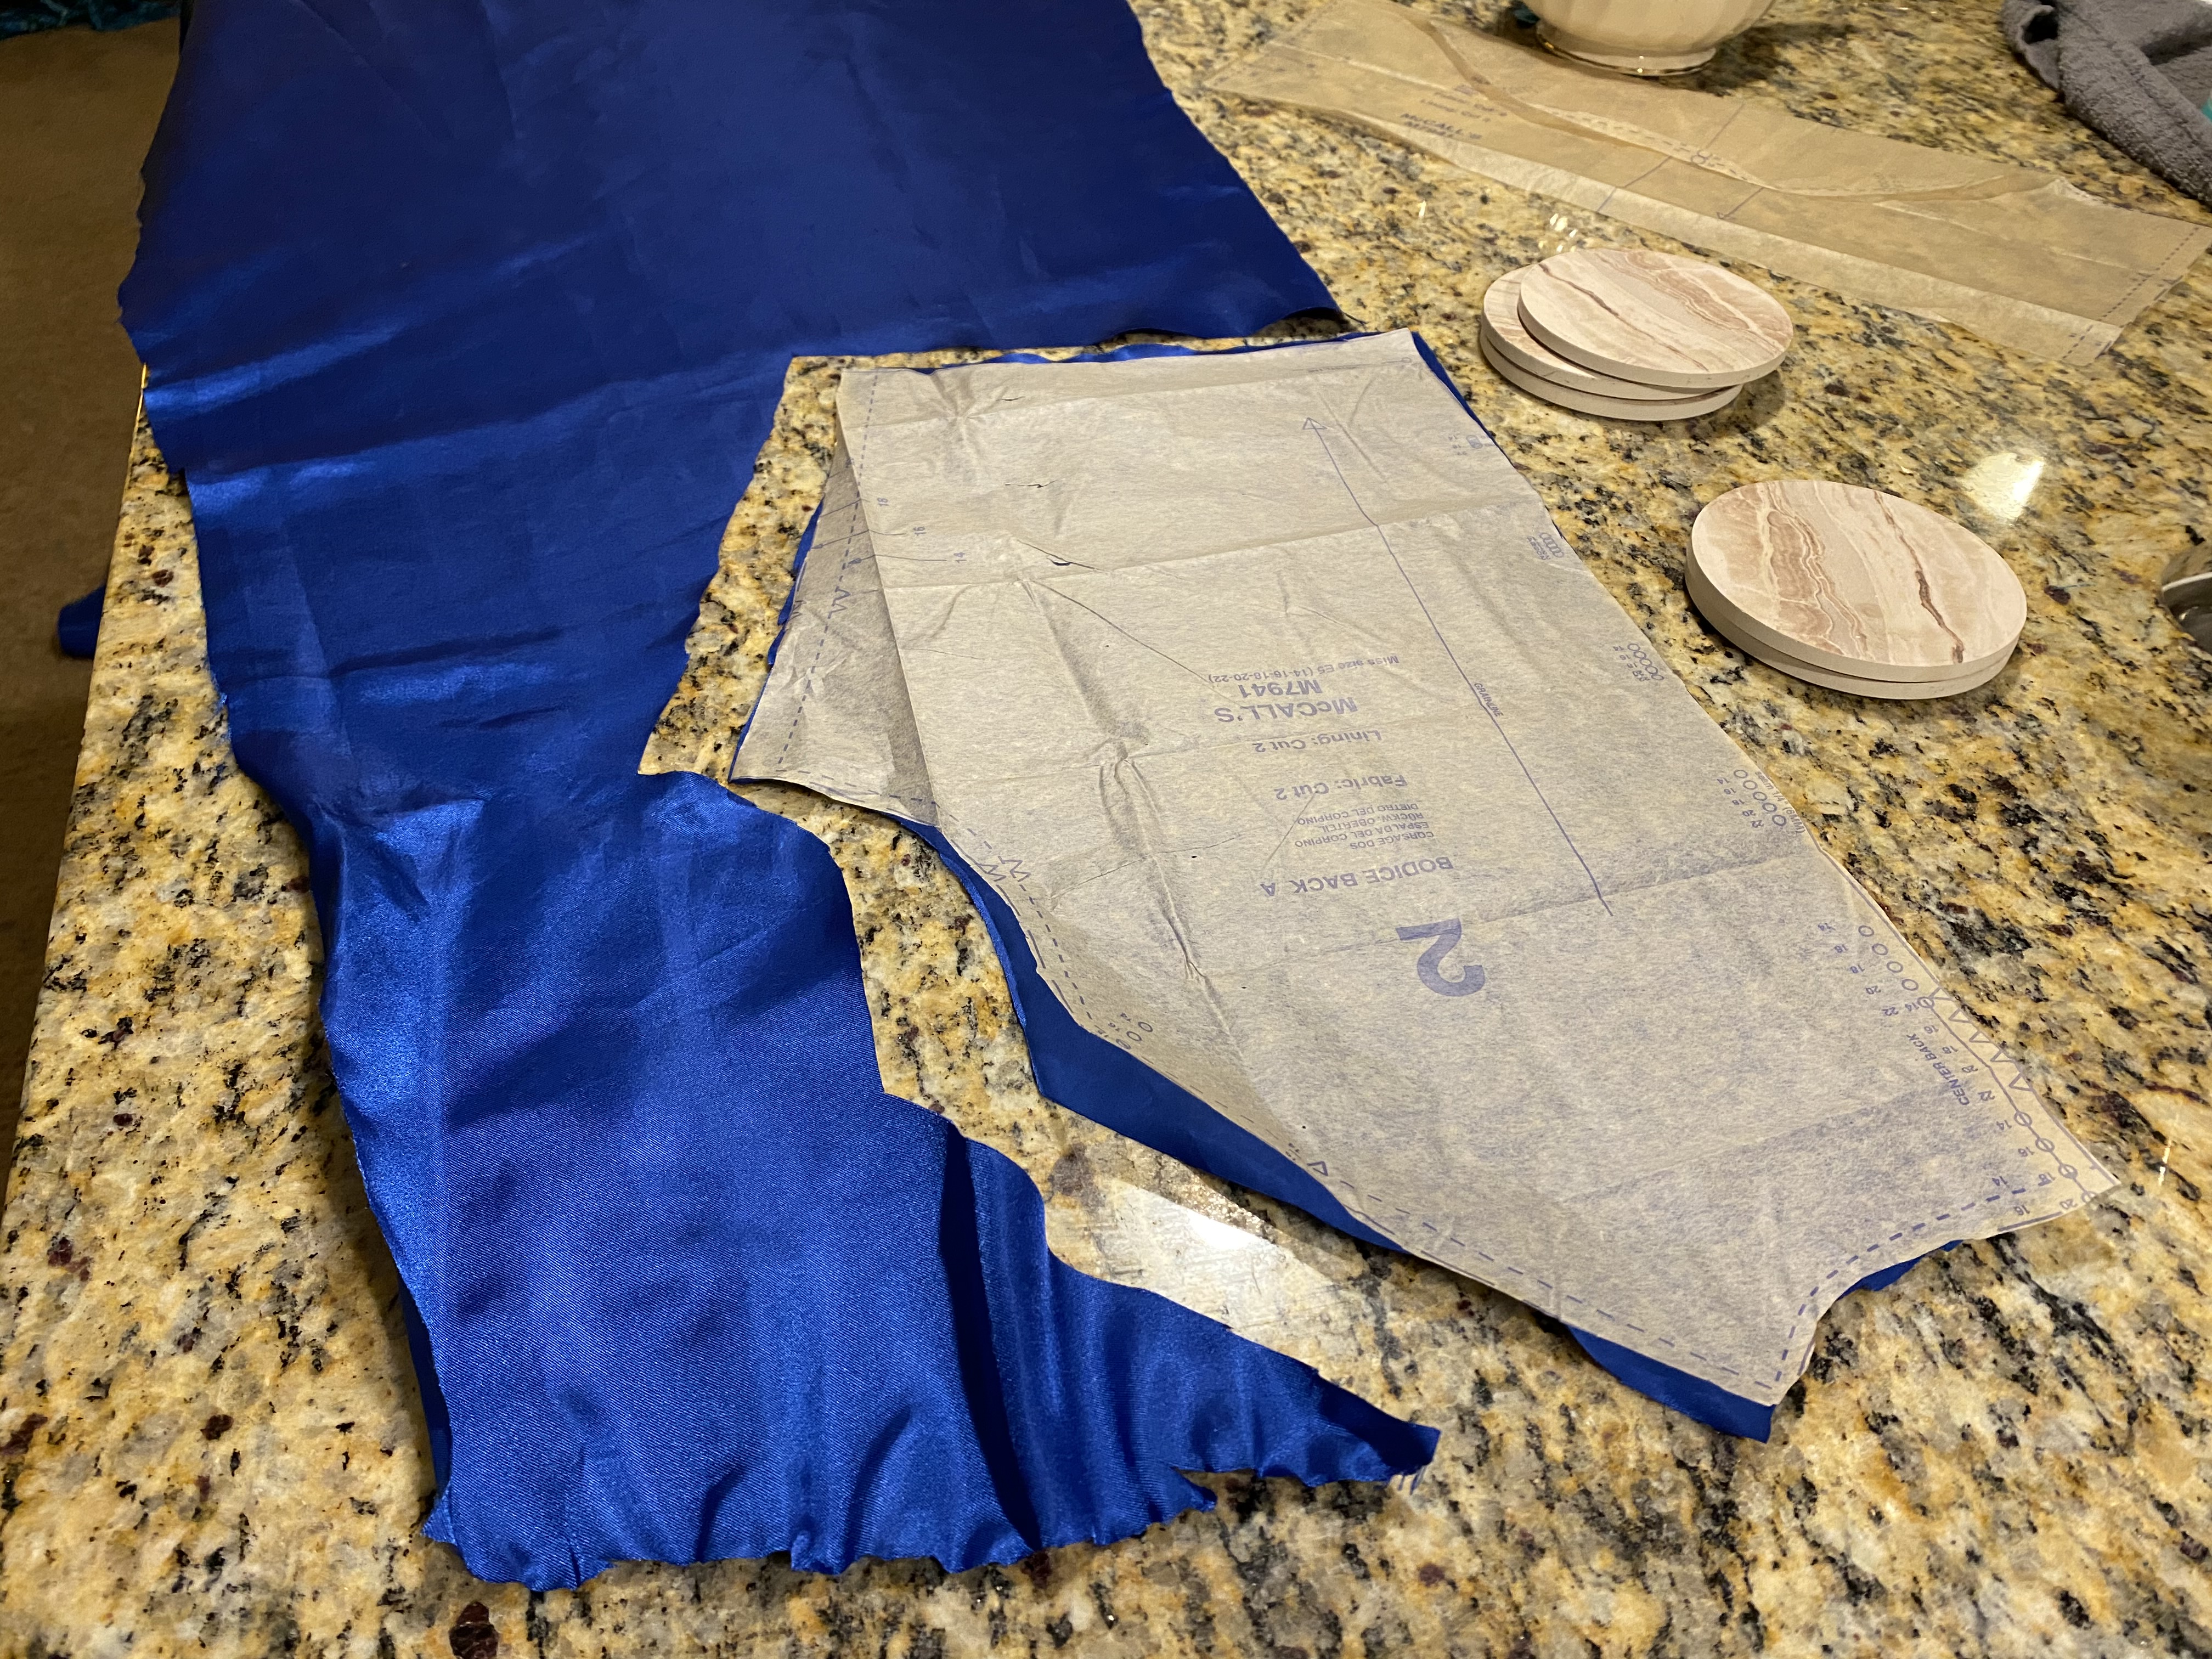
The costume designer for the show graciously let me take on the challenge of constructing my own gown for the production. She supplied the initial materials and recommended to use McCall’s pattern M7941 from Angela Clayton’s collection. The provided materials threw me for a loop at the start, but became a good exercise in using every inch to its full potential. Reduce, reuse, recycle was the motto for this production costume design and boy did they make it lovely.
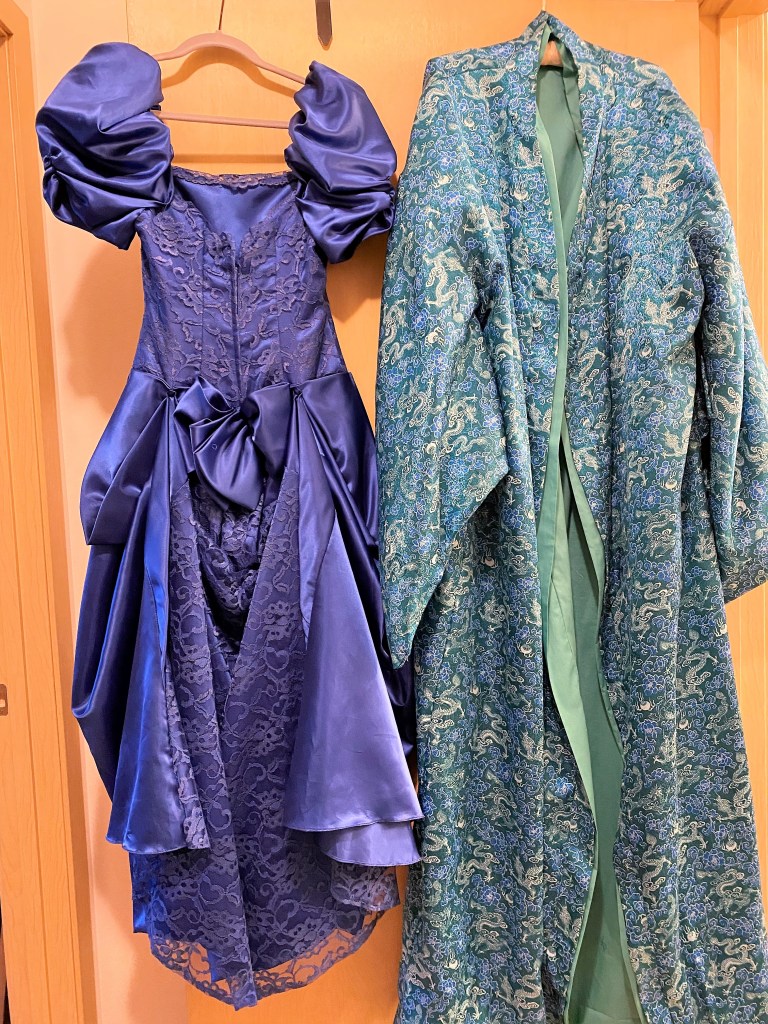
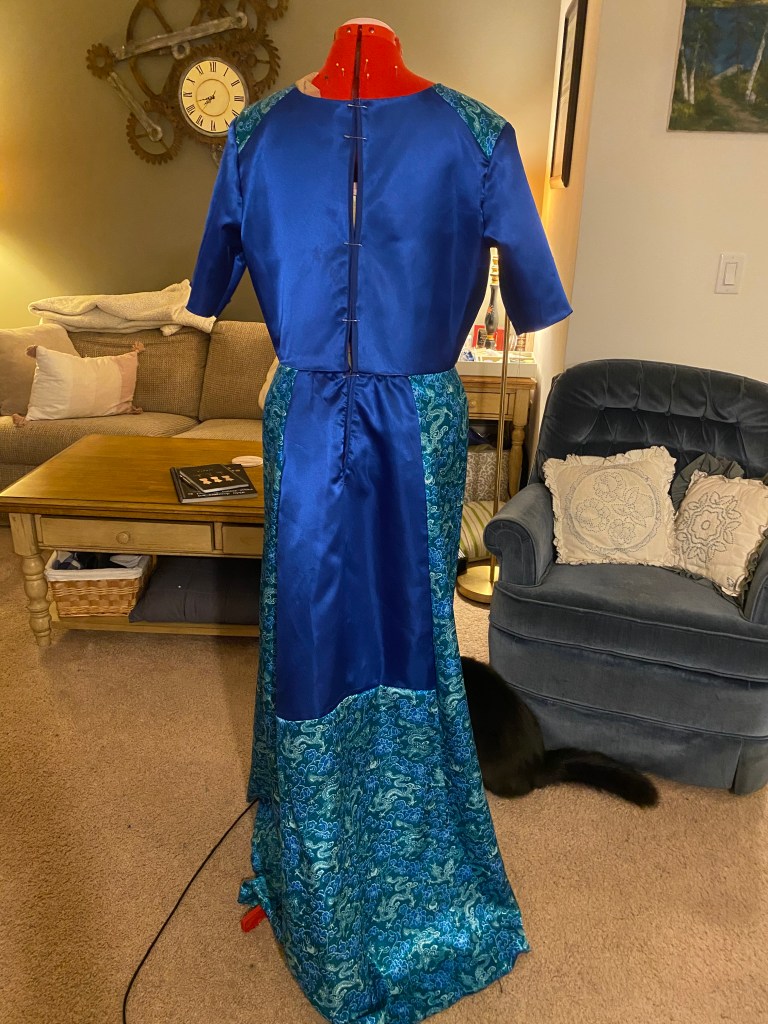
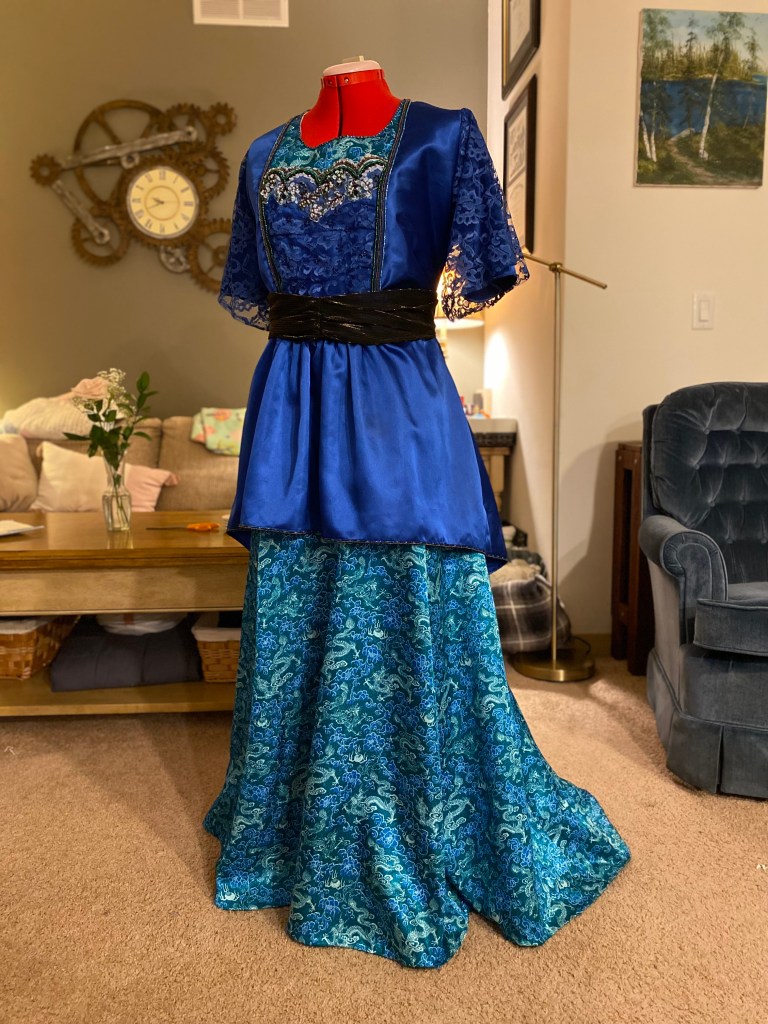
To start with, I had at my disposal a teal kimono and sapphire blue 80’s style dress. The designer suggested the kimono be used for the main dress and the sapphire for the overdress, focusing on the lace panels over the satin. Overall, the motif for the design was the peacock. This was apparent in the jewel tones of the color palette and would come back again as we added glitz and baubles to the final product.
The original tea-length prom dress had lace overlay on the bodice and high-low lace skirt panel at the back. I hoped to be able to salvage the lace for the overdress, but upon further inspection, there appeared to be very little usable yardage with how many panels are in the bodice and how quickly the lace shredded when I attempted to seam rip. There ended up being more blue satin than I expected once I removed the tacks creating the bustle effect. I’d use this for the overdress.
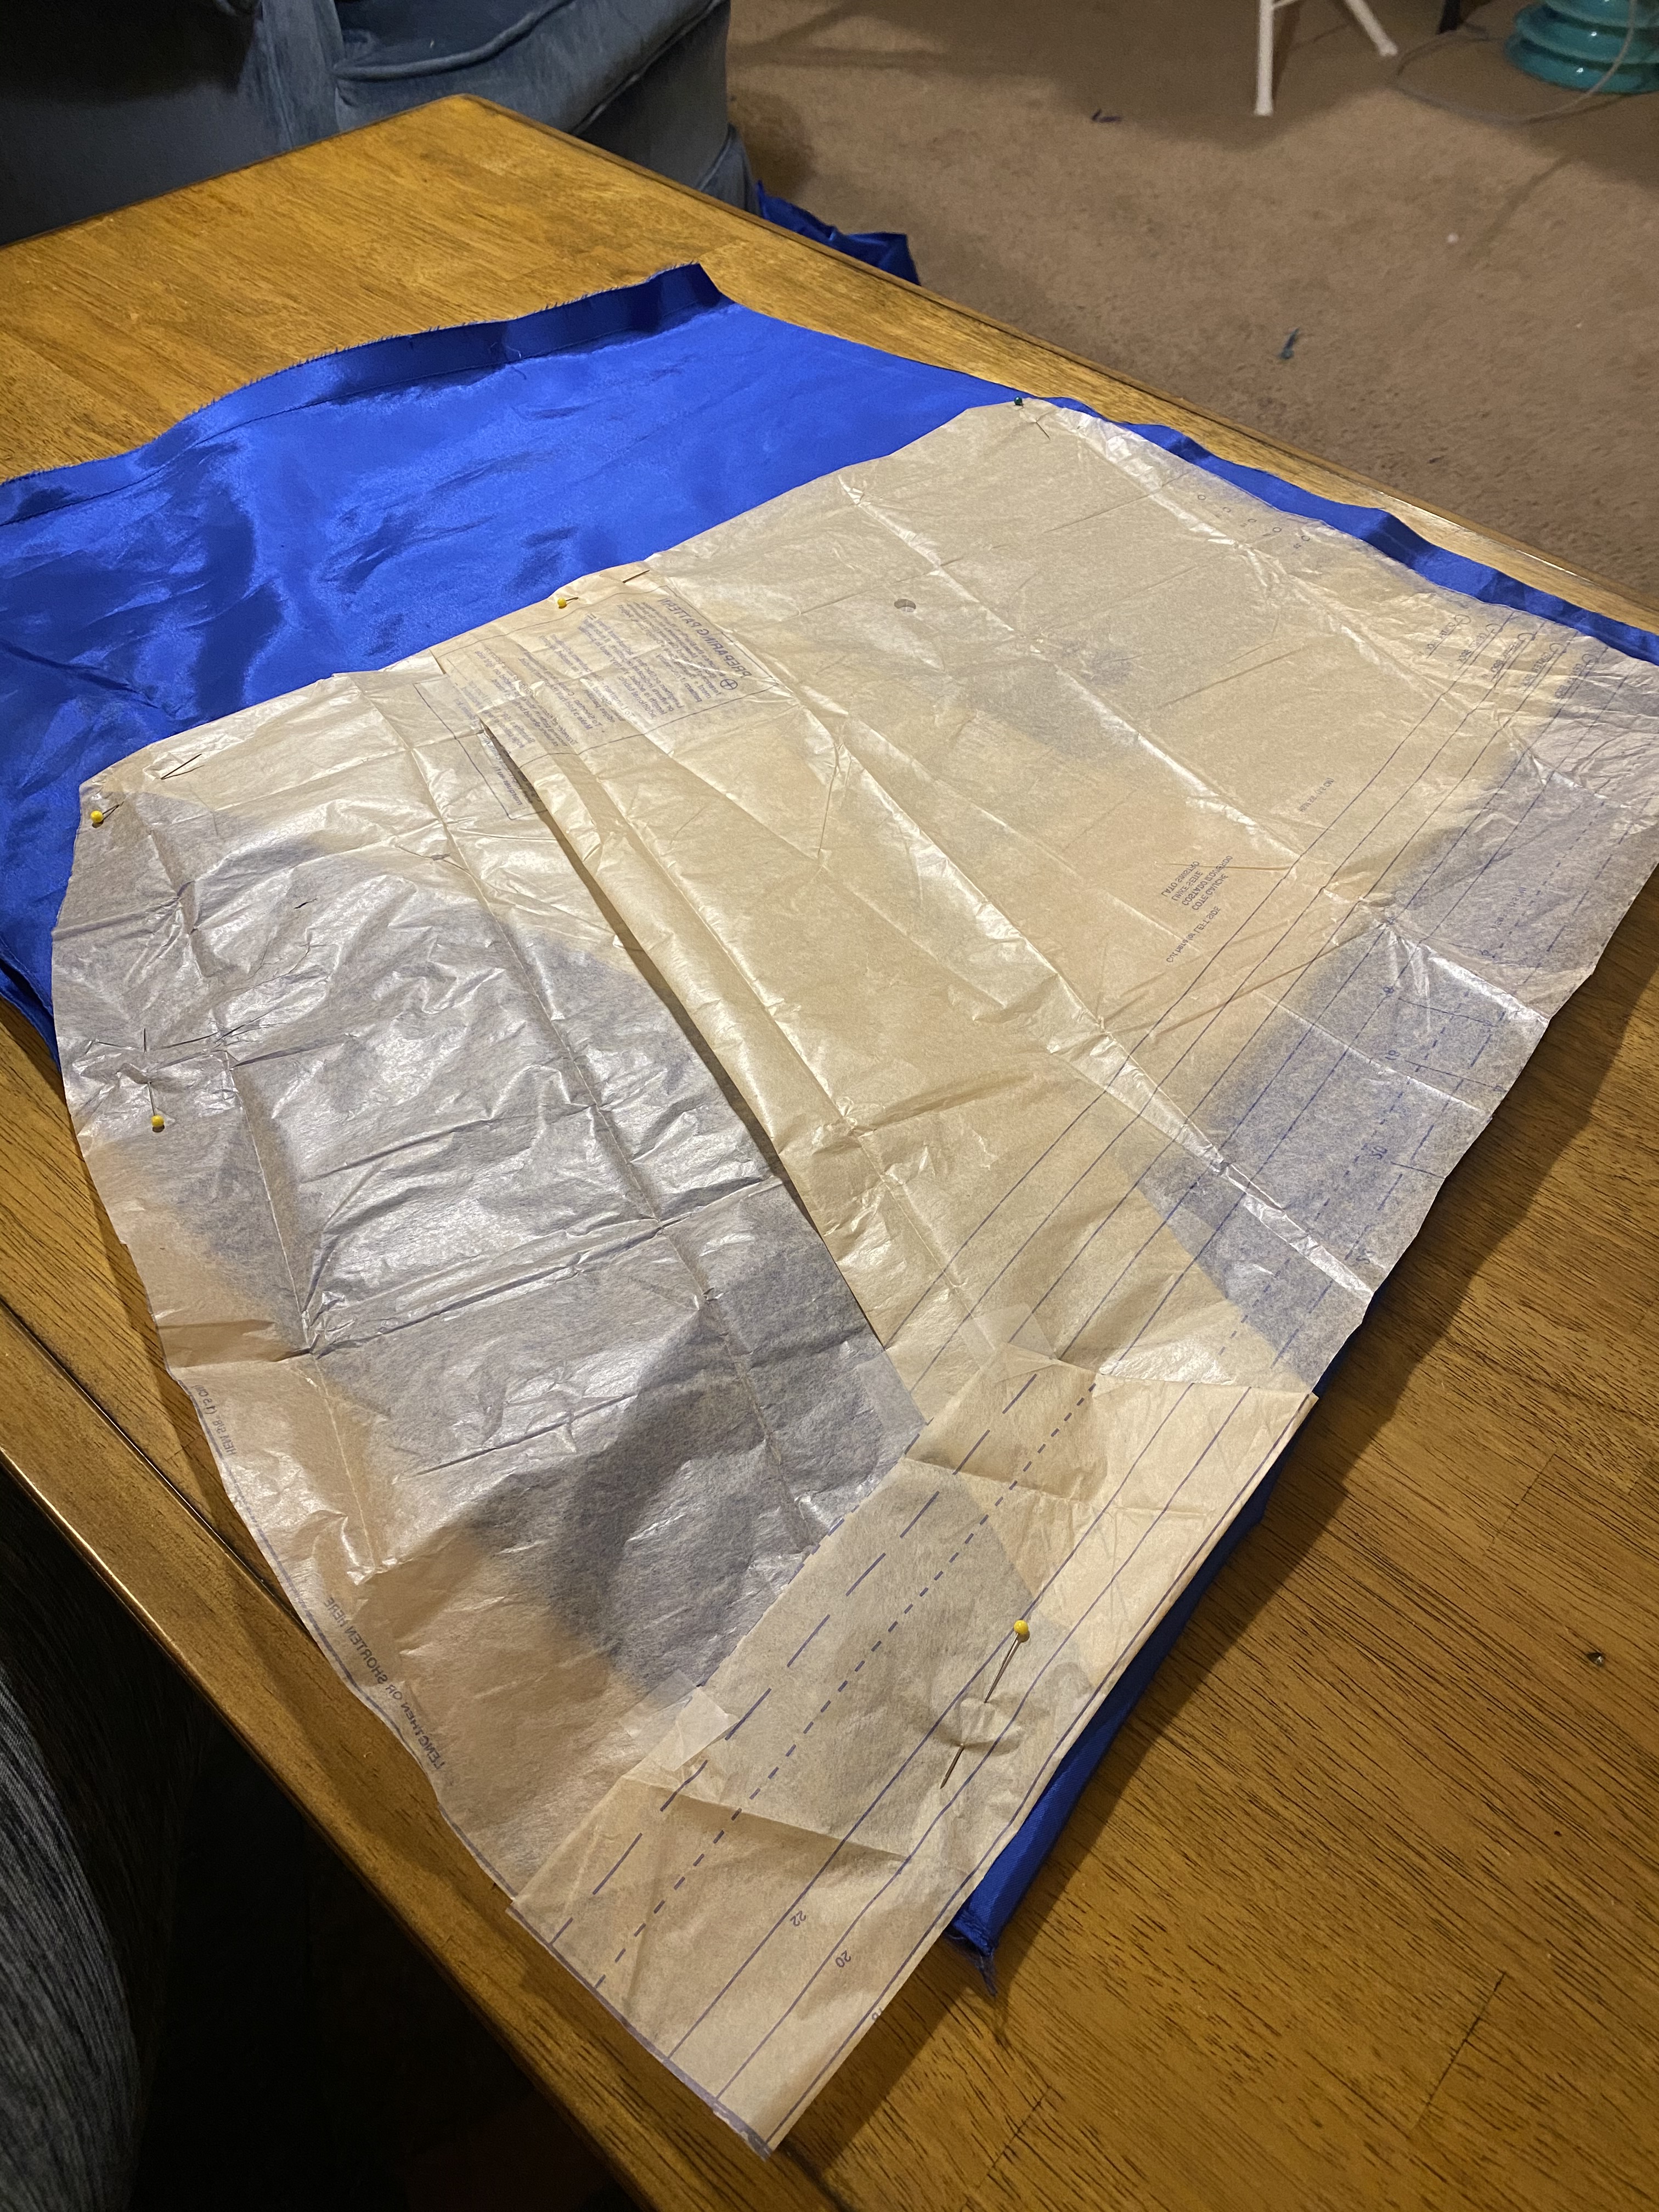
I began by taking apart the kimono to assess the amount of fabric I had on hand for the main gown. I was a bit worried it wouldn’t drape as nicely as a silk or charmeuse typical of period designs, but was hopeful. Thankfully, once the lining was removed, the material had a nice drape and was able to be worked. But there wasn’t nearly enough. The pattern called for 10 yards of material, and I had maybe 4.
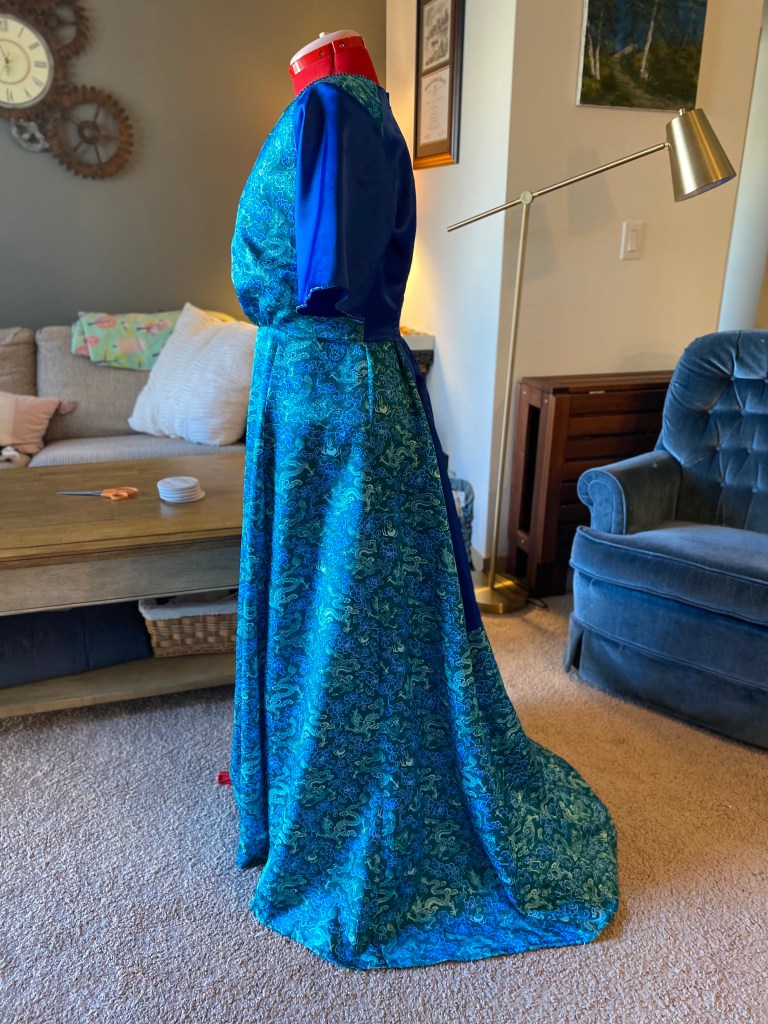
The Main Gown
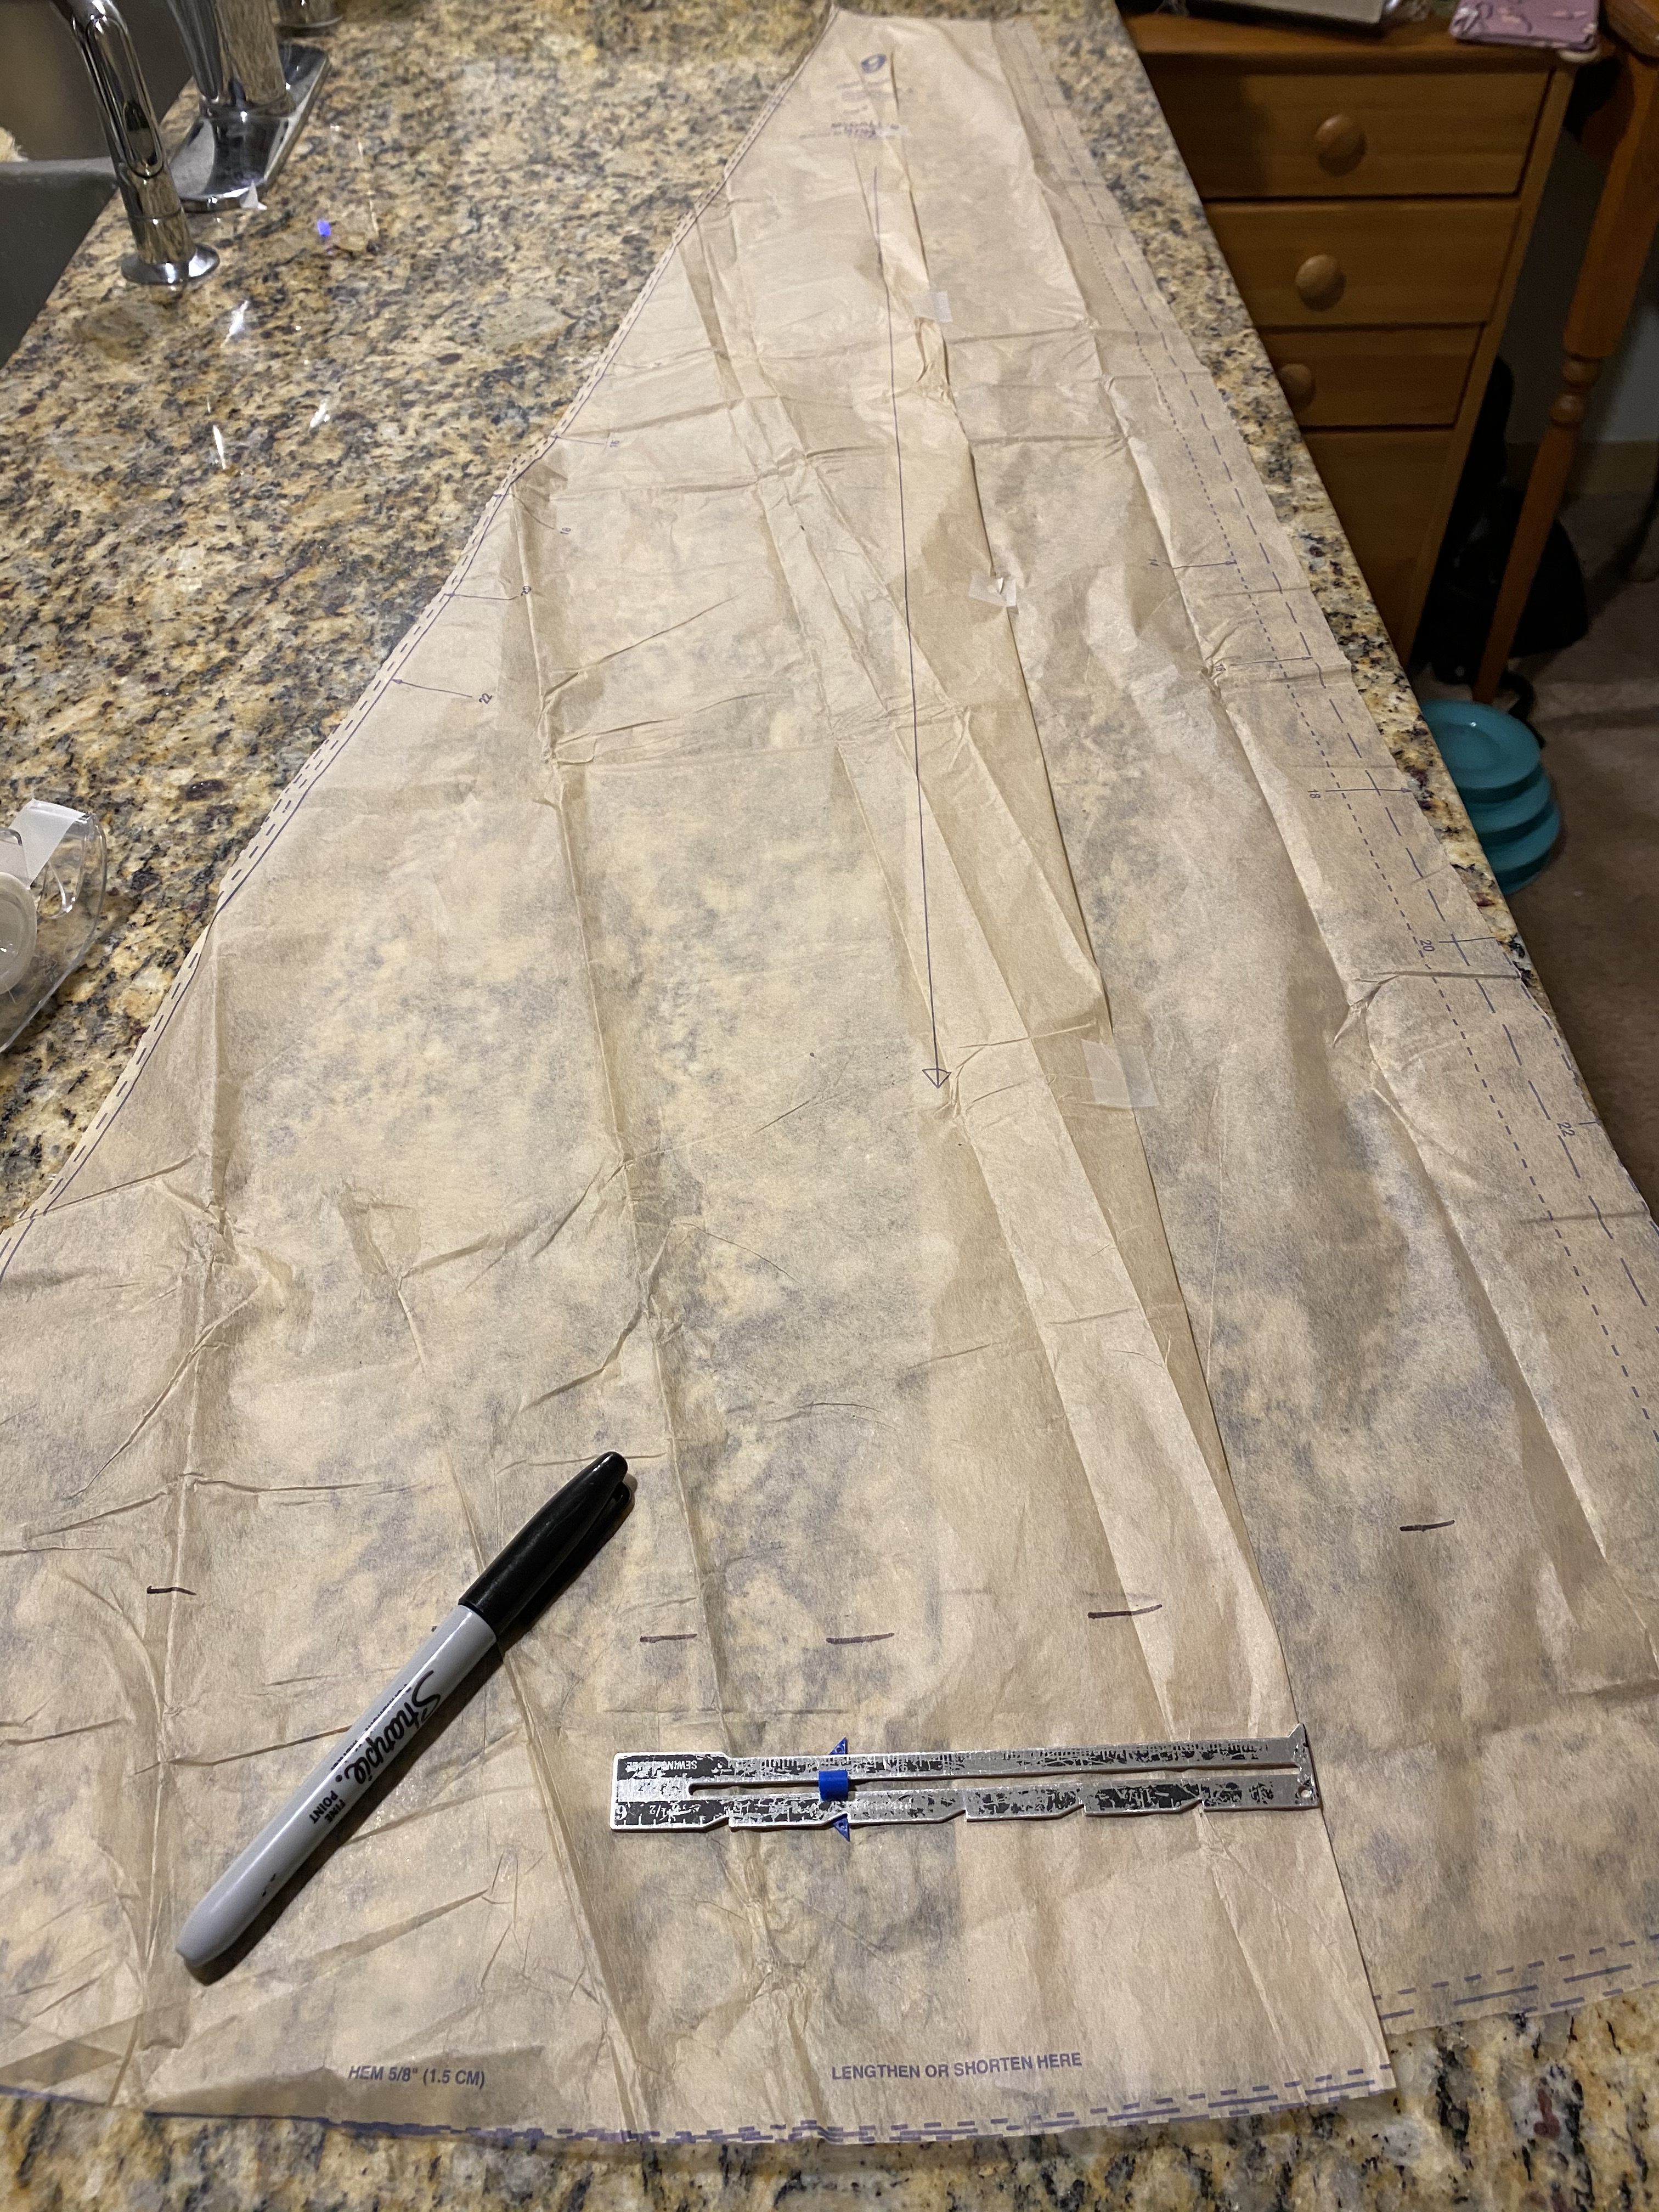
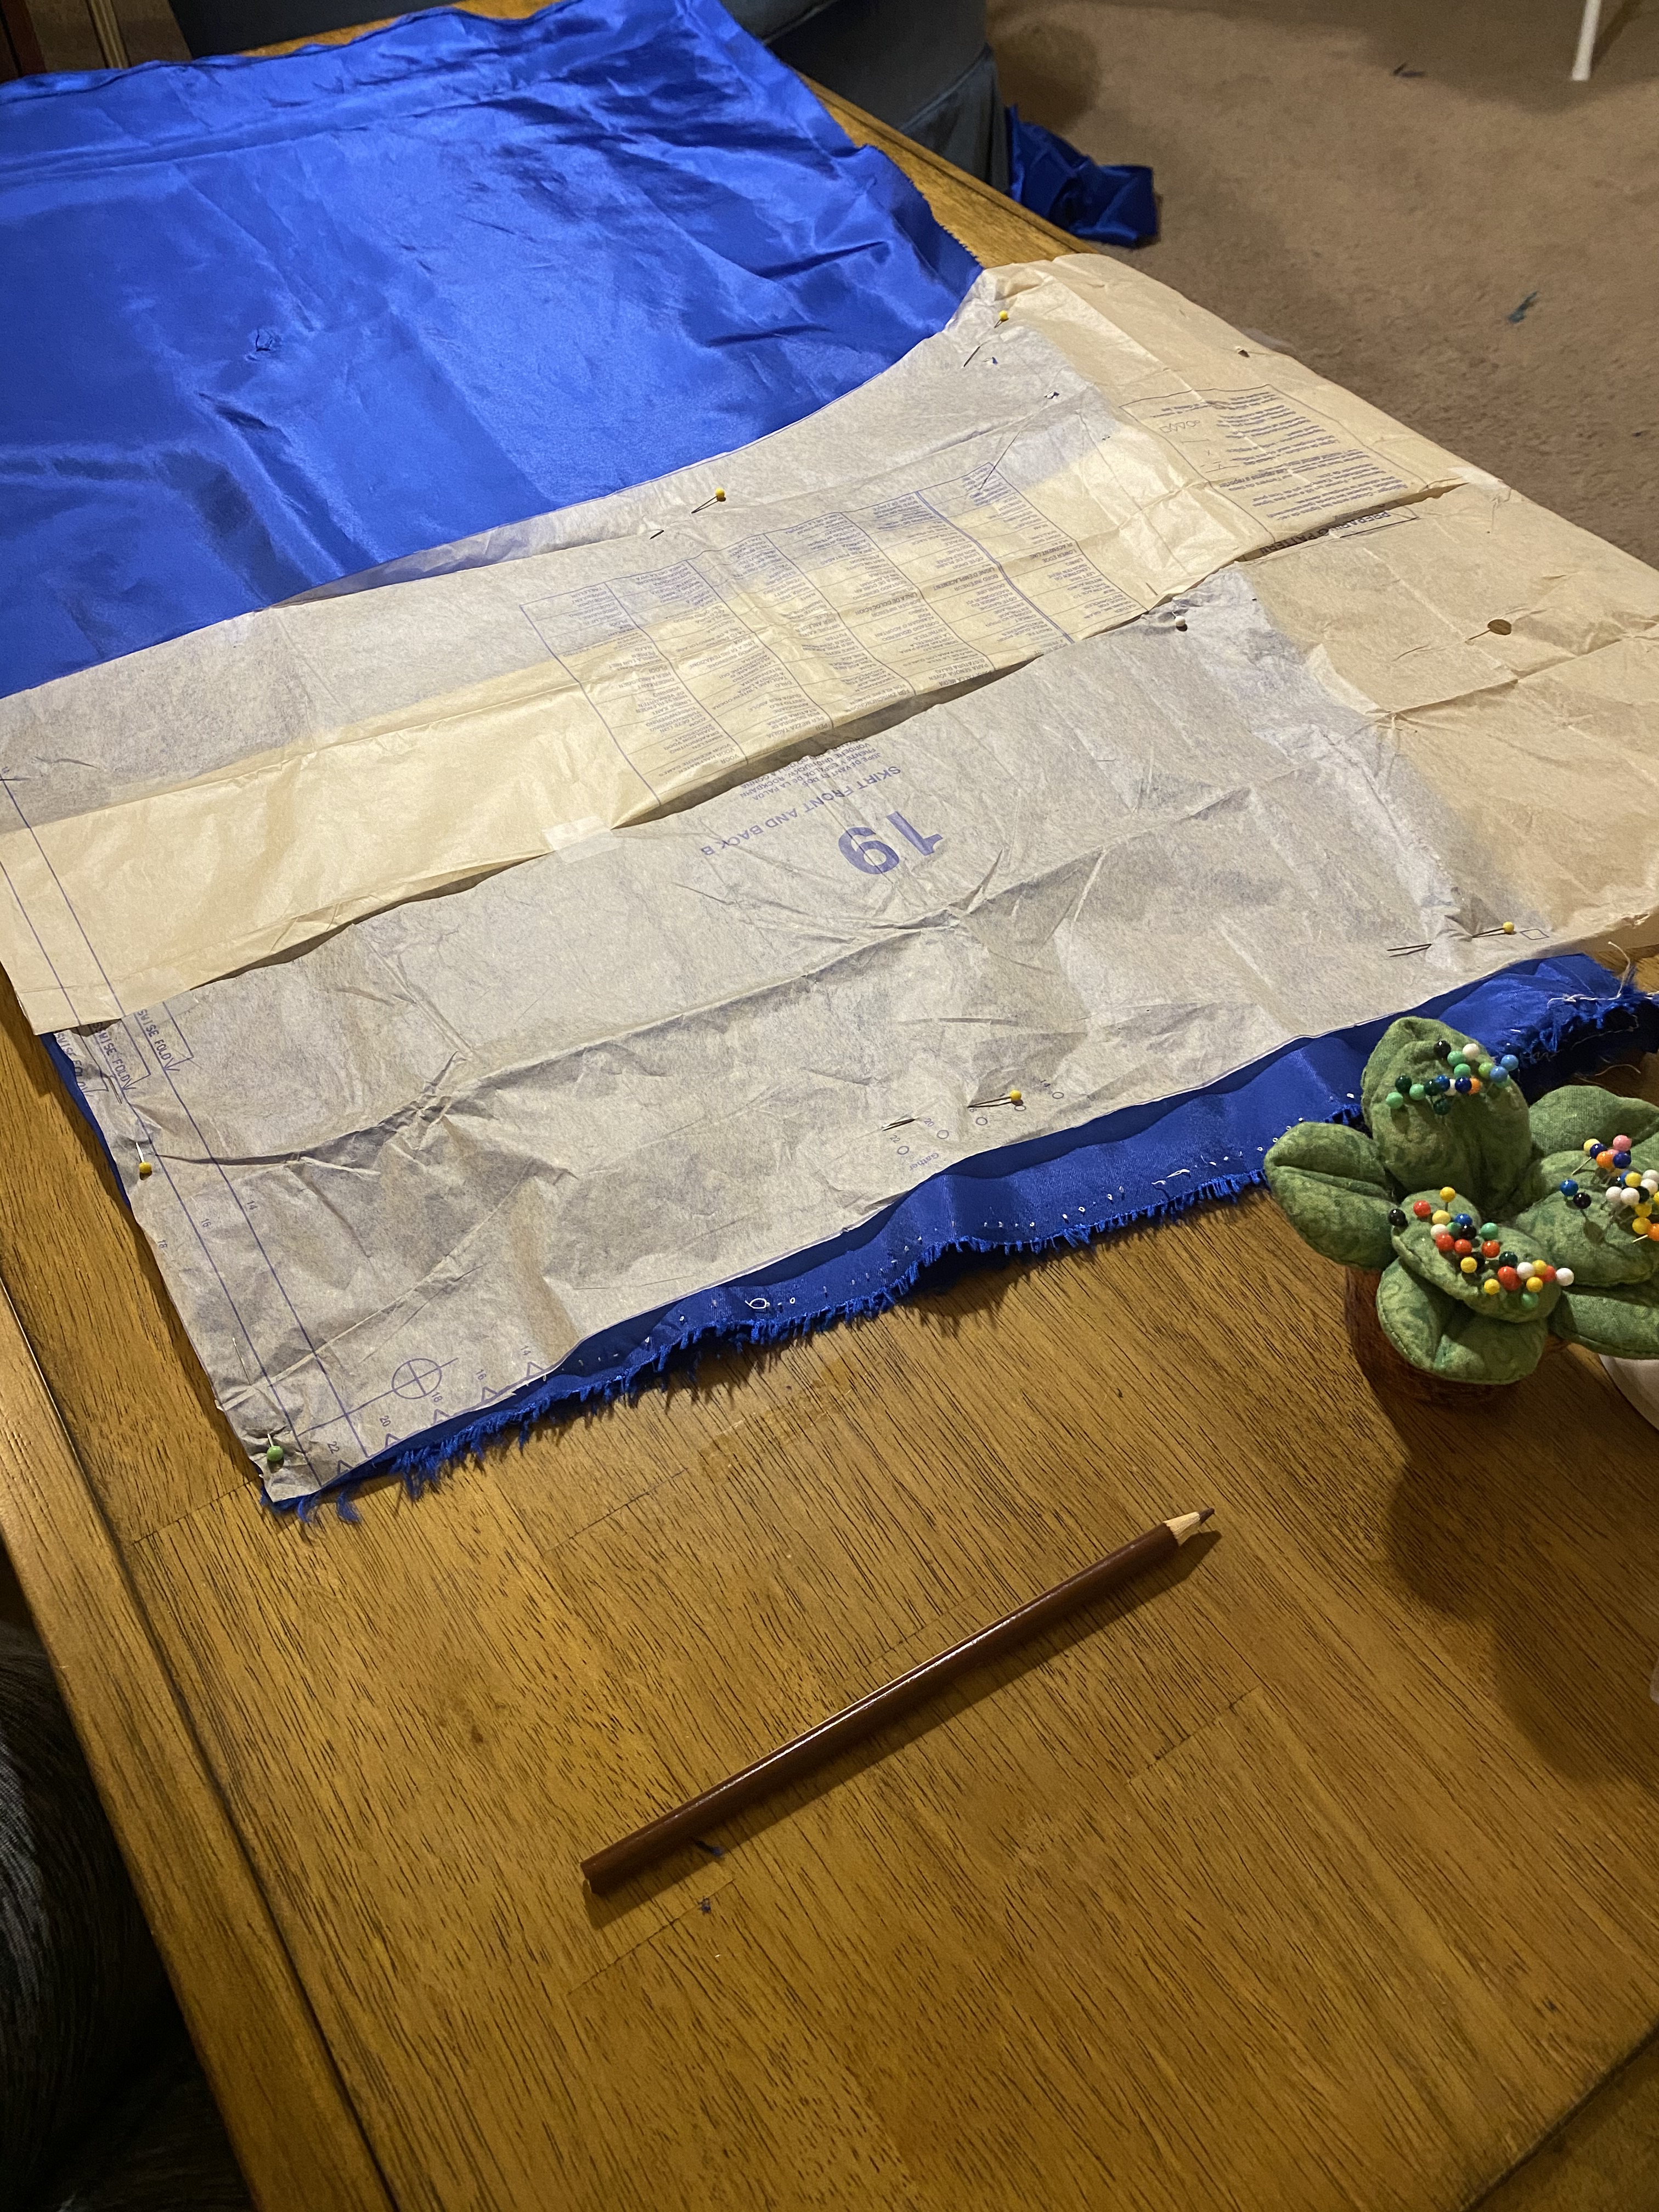
The skirt was the most essential portion to be cut from the kimono material, so I focused in on modifications to the fullness and train to reduce the necessary yardage. To start, I am about 6″ shorter than Angela (and the standard pattern finished length) and could reduce the length of all the skirt pieces as such. This reduction in length allowed for the pieces to fit lengthwise with the body of the kimono.
I then reduced the fullness of the skirt by pleating the pattern tissue along the grain line marker from about the hip line down. This would ensure a reduction of the excess volume without limiting the movement on the hips for final wear. I reduced the side front by 6″, side back by 4″, and back by 8″.
Spoiler alert: the changes were actually pretty perfect for the final garment proportions. It would’ve been so wonderful and extra to have the fullness and long train of the original design, but it would have been incredibly cumbersome on stage with our blocking. This is a trick I will remember in the future for theatrical costumes, sometimes less volume is more.
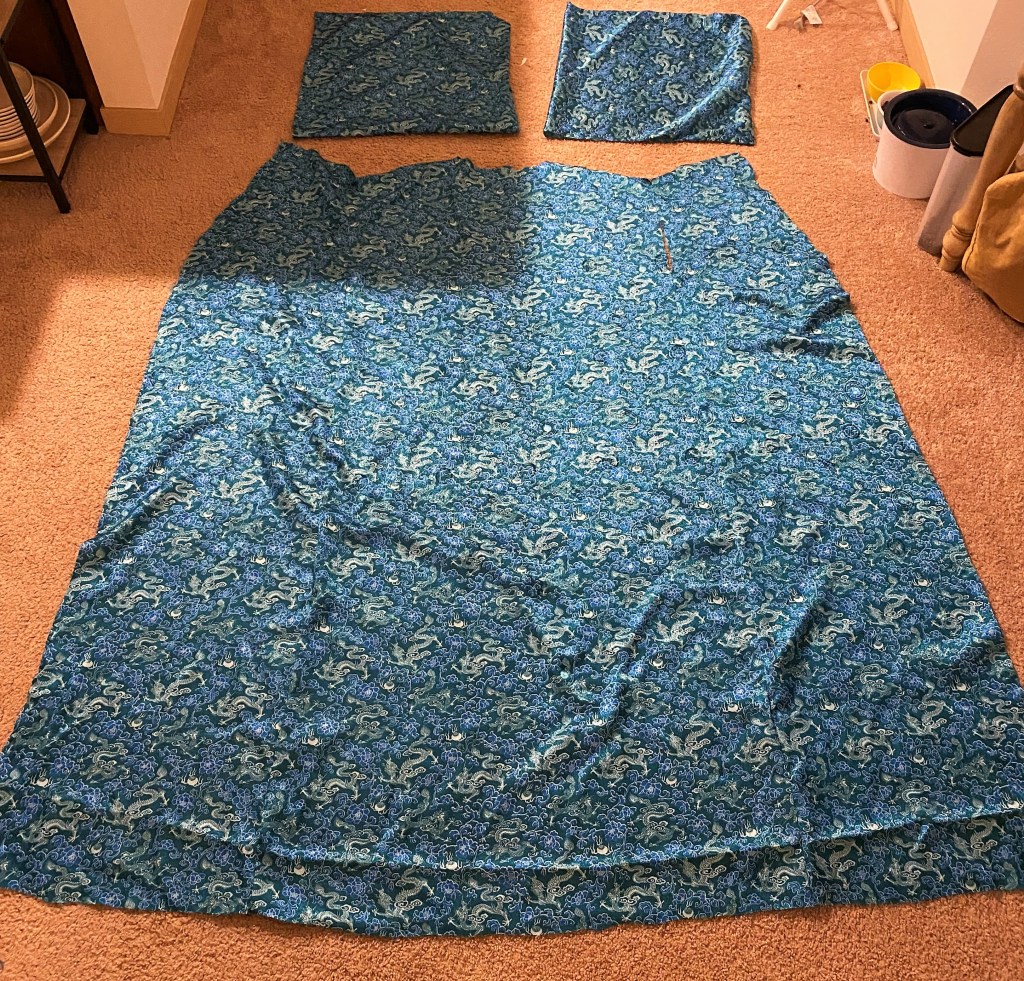
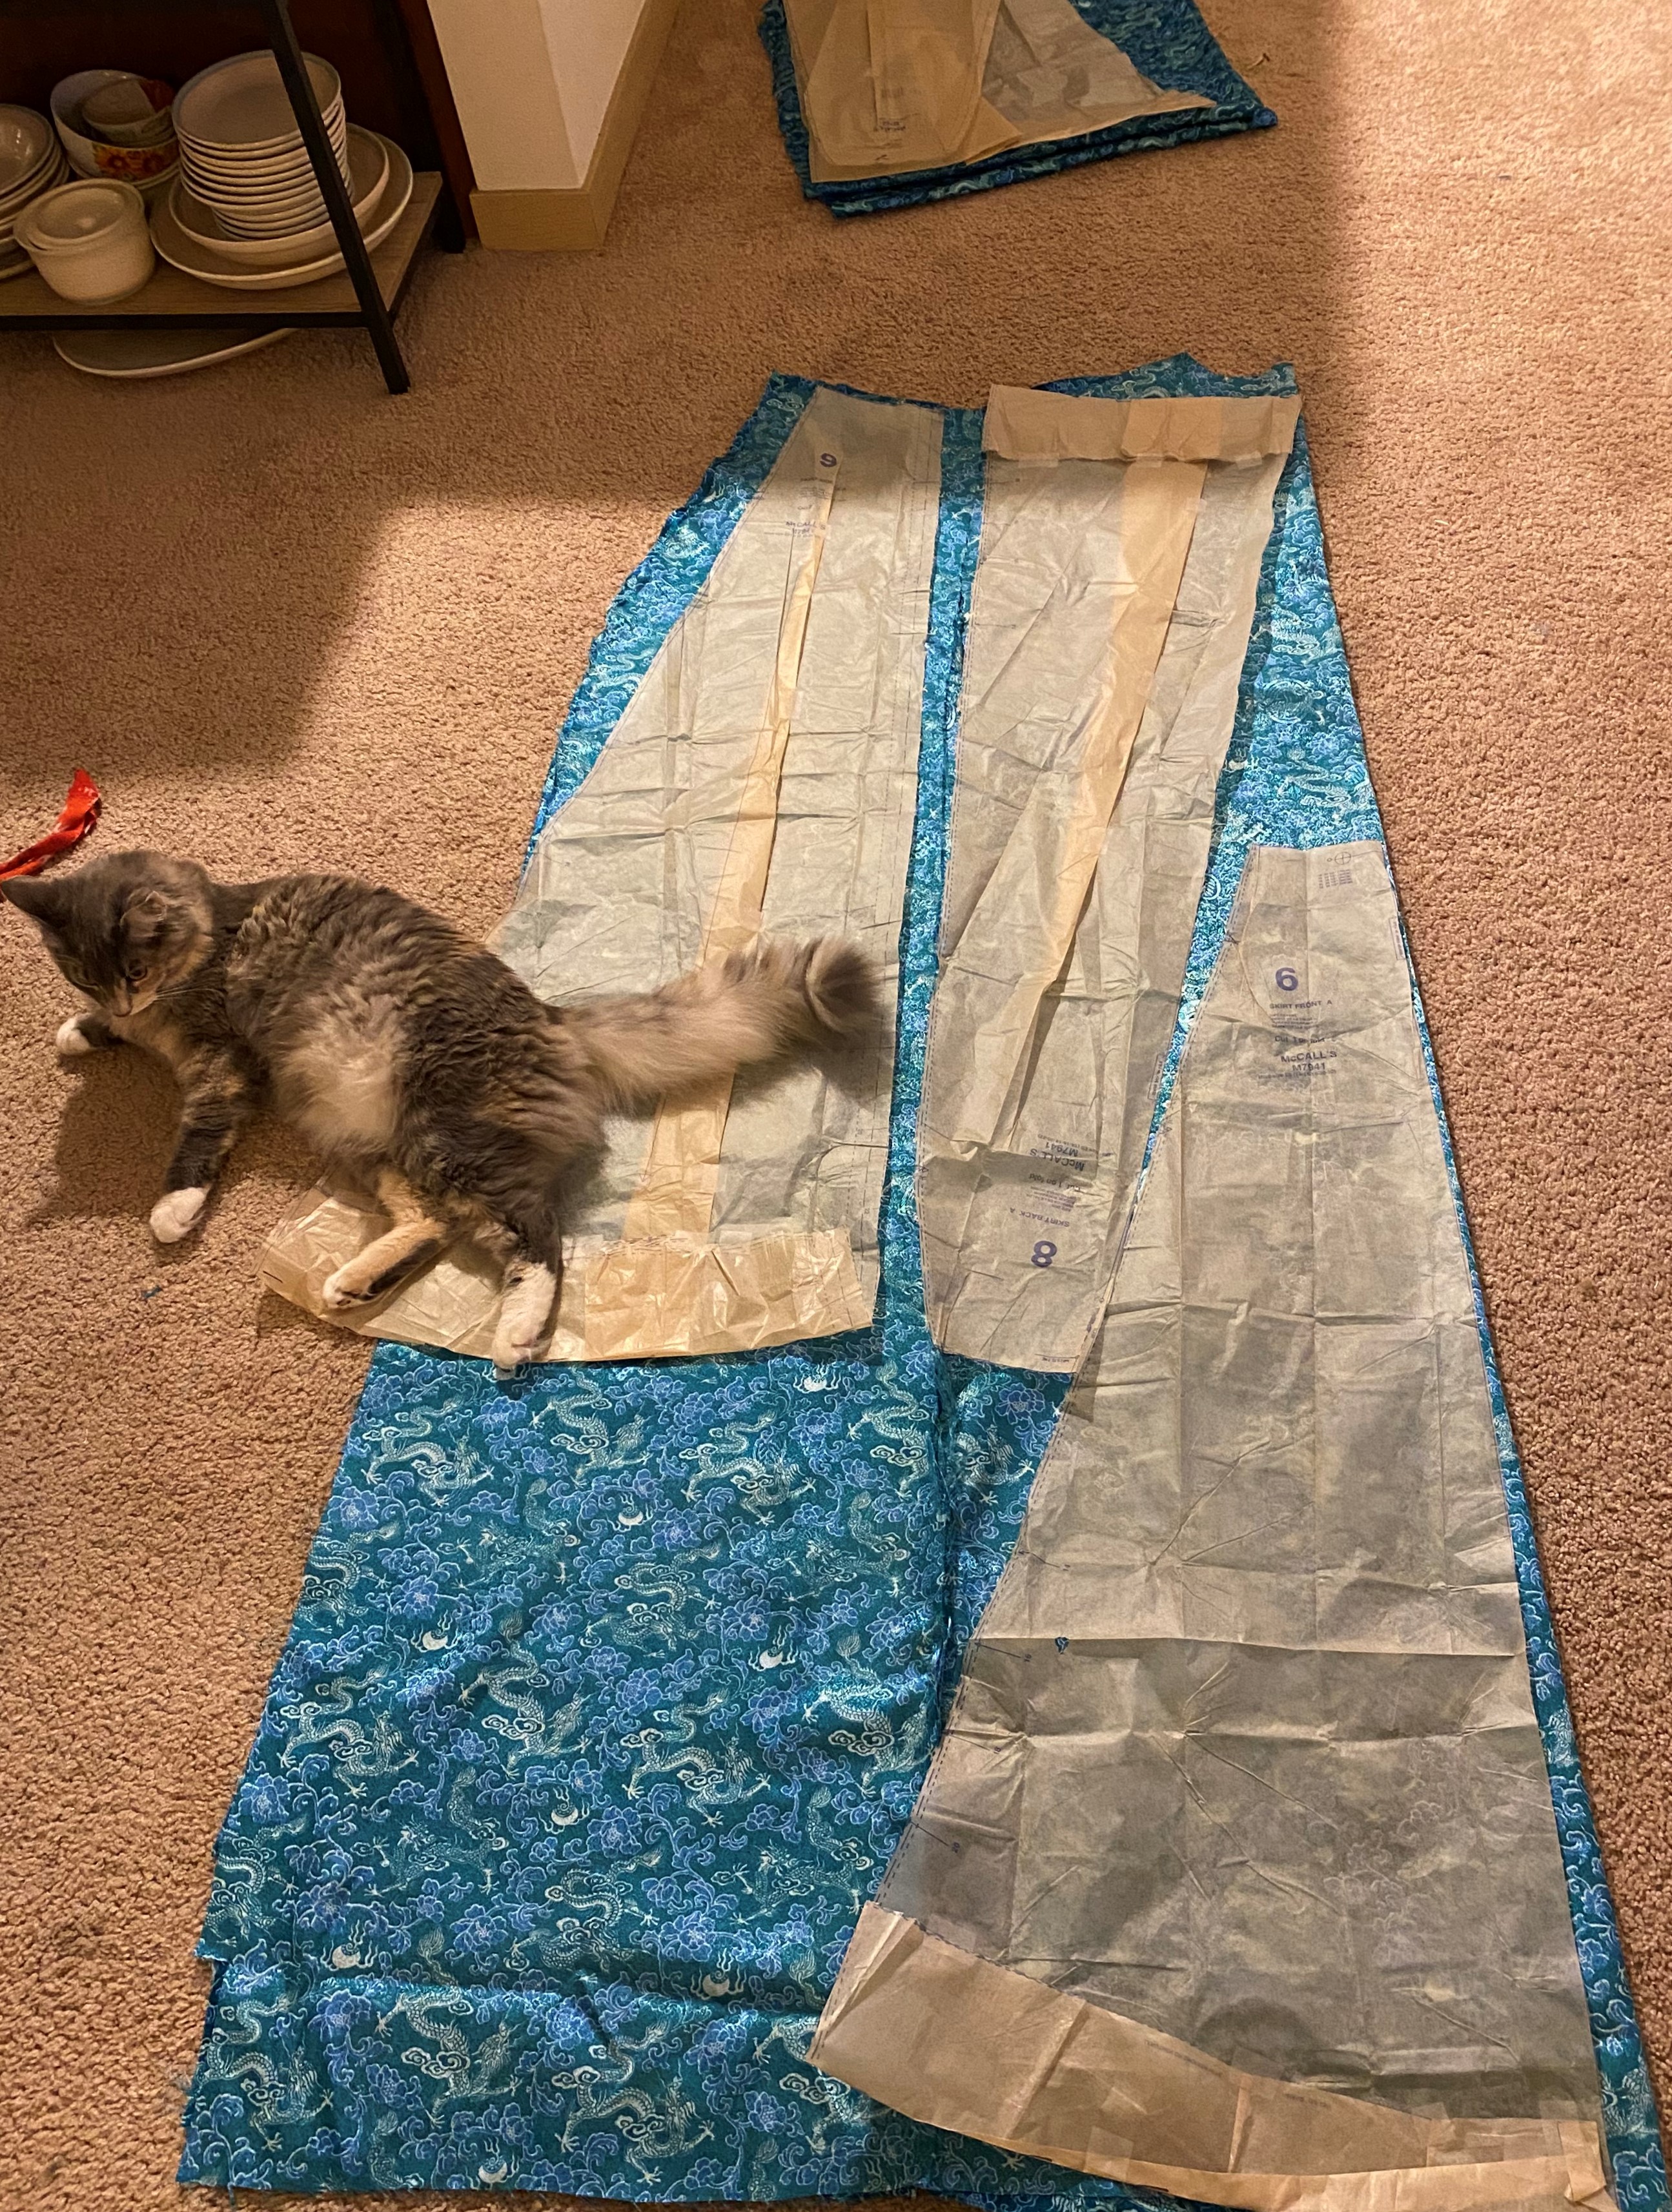
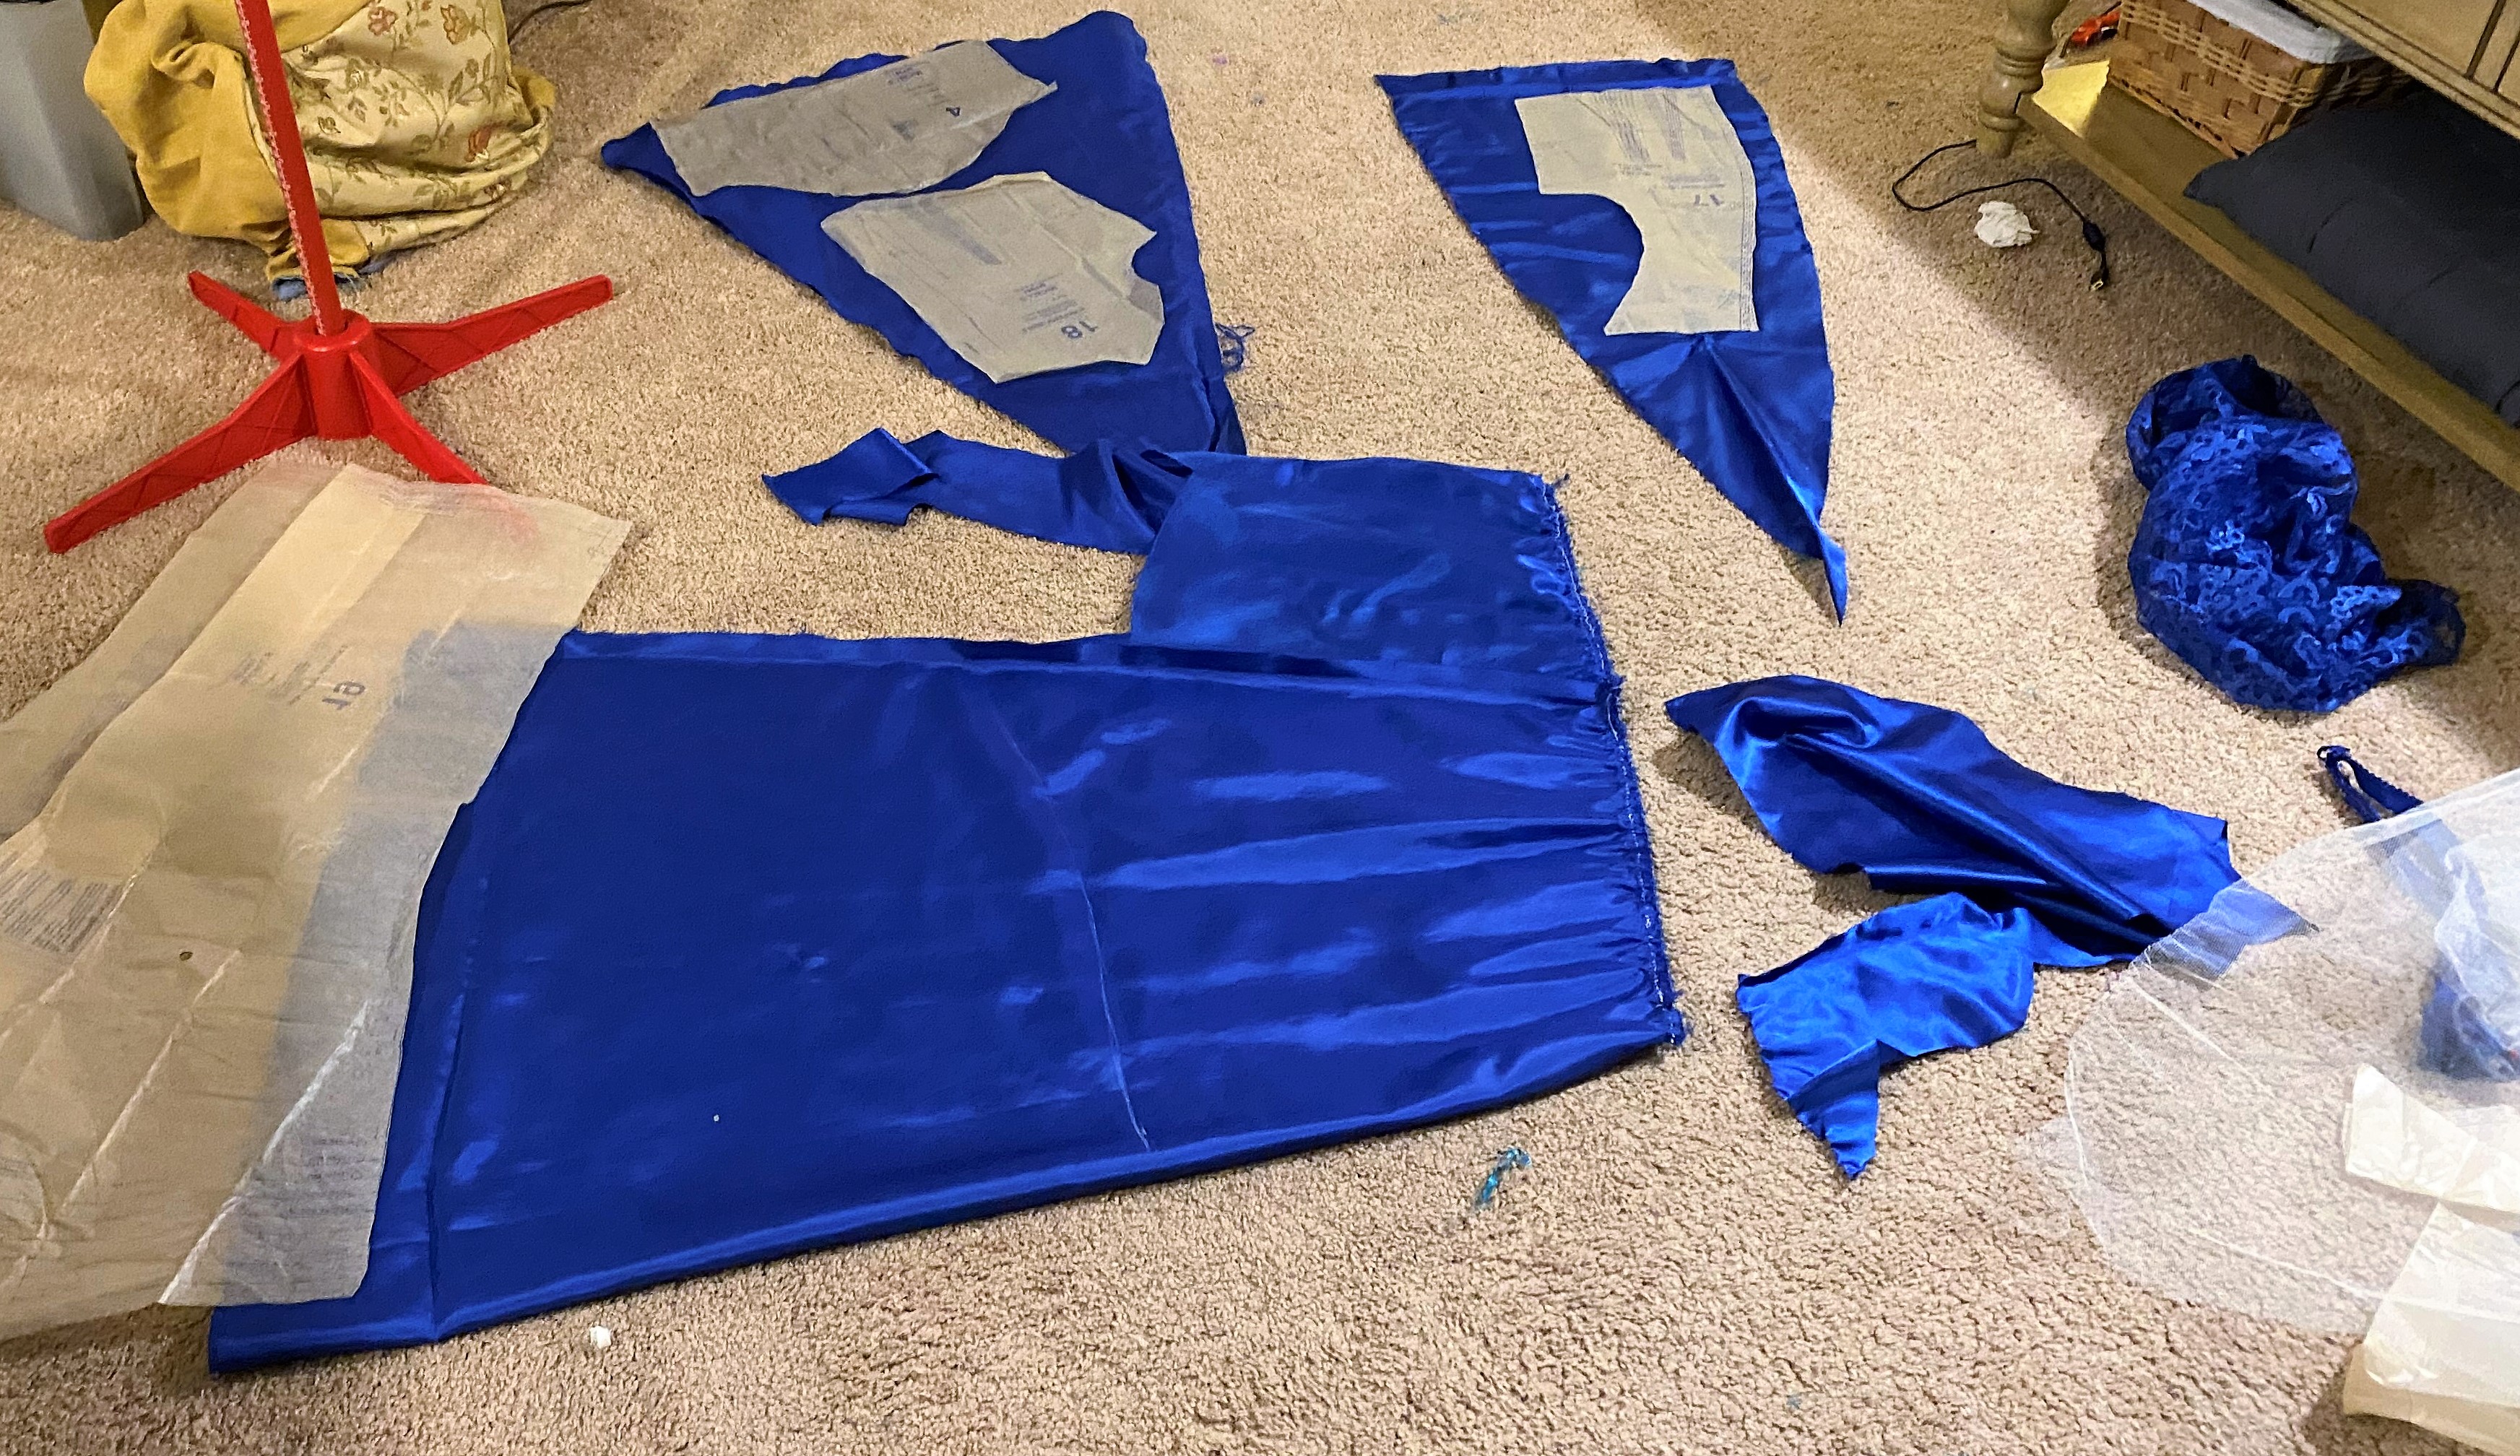
Laying out the modified pattern pieces, there still would not be quite enough material for the full skirt, though it would be close. To make it work, I took a full cut for the front panel since this would be most visible to the audience and pieced the other sections in various ways.
The side front panels were cut from the kimono sleeves since they were the best fit and the side back panels were cut to include a small section at the bottom with the seam of the original kimono. However, with the fullness of the skirt at the bottom, this would never be noticed.
In the end, the side back panels are cut upside down to allow for the most material when the back sections were to be cut (which would also be upside down and off grain). Everything seemed to be right.
So I cut.
And it was not.
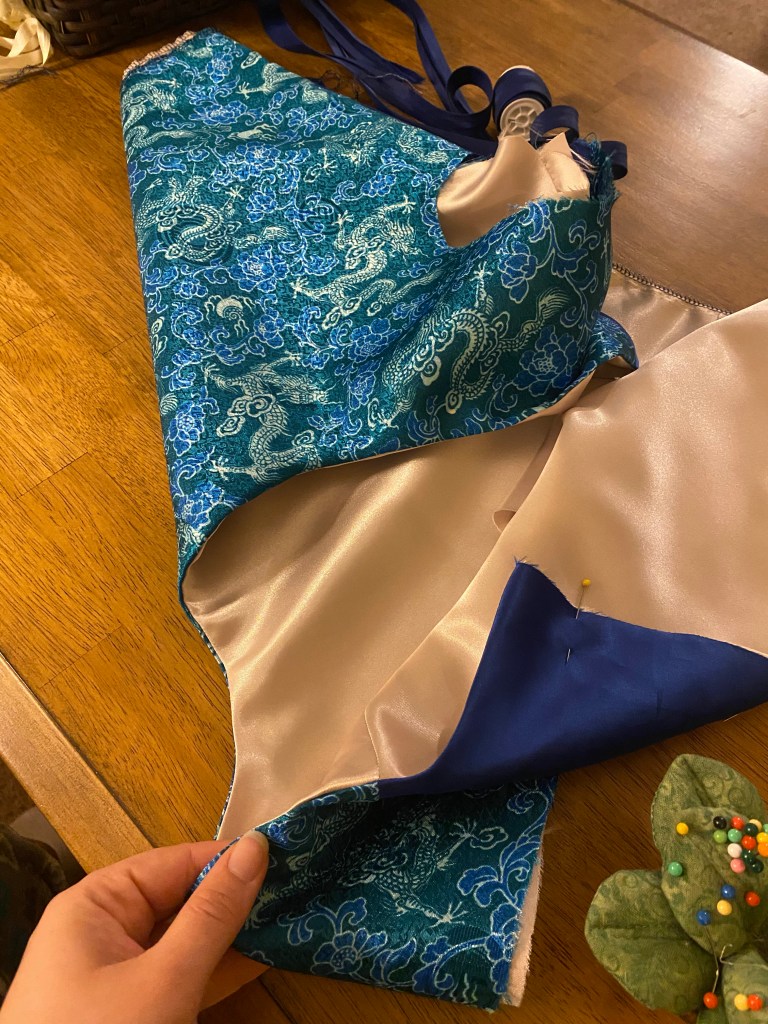
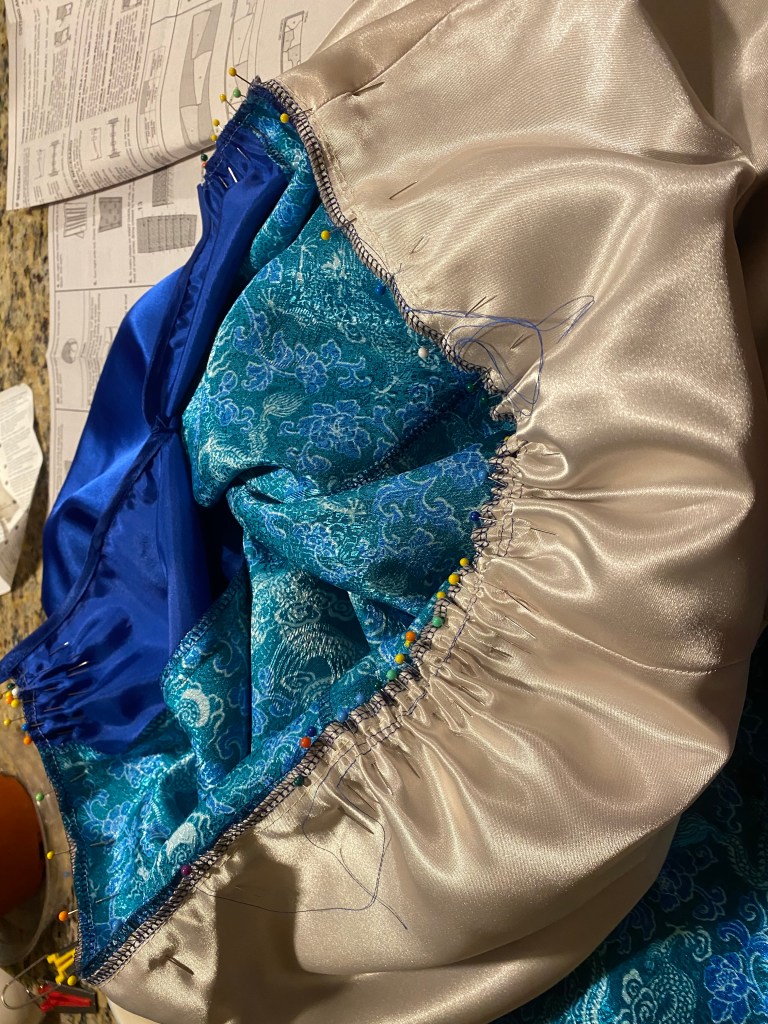
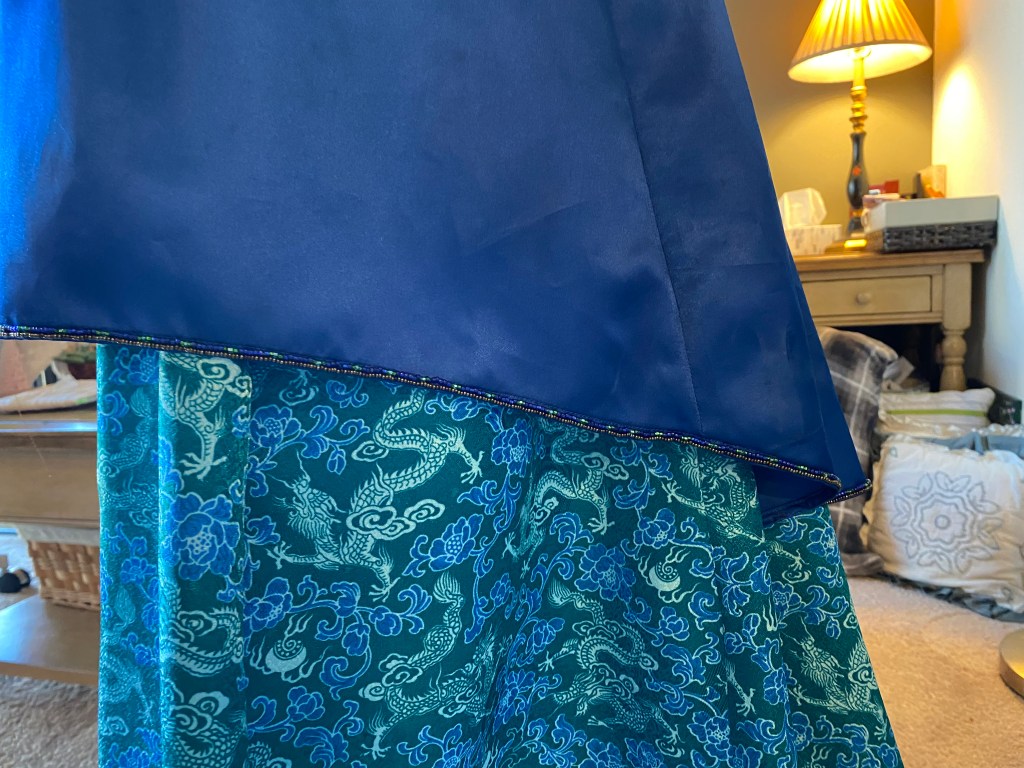
I was unable to fully fit the back panels on the kimono material no matter how I laid them out. Instead of resorting to multiple piecing at odd angles, I opted to piece the top of the back panels from the blue satin of the 80’s dress. This area *should* be covered by the overgown which was to be made of the same blue satin, so I was not overly concerned about the piecing.
Since this piecing allowed for some kimono material to remain, I cut the front bodice pieces from the last bits of scrap. The back bodice and sleeves were salvaged from the 80’s dress to help with blending with the piecing on the skirt panels. I would later come to regret this decision.
With the main dress cut, I began to fret about the overdress. This was supposed to be made from the 80’s dress satin, but as I began to seam rip, it became apparent that there was not nearly enough material with the cuts taken for the main dress. There was certainly not enough to do so from the small panels of lace on the dress. After laying everything out, I made the overall decision to not do layering as the pattern instructs and would instead do single layers. This was except for the center panel and sleeves which I was able to fit on to the lace pieces.
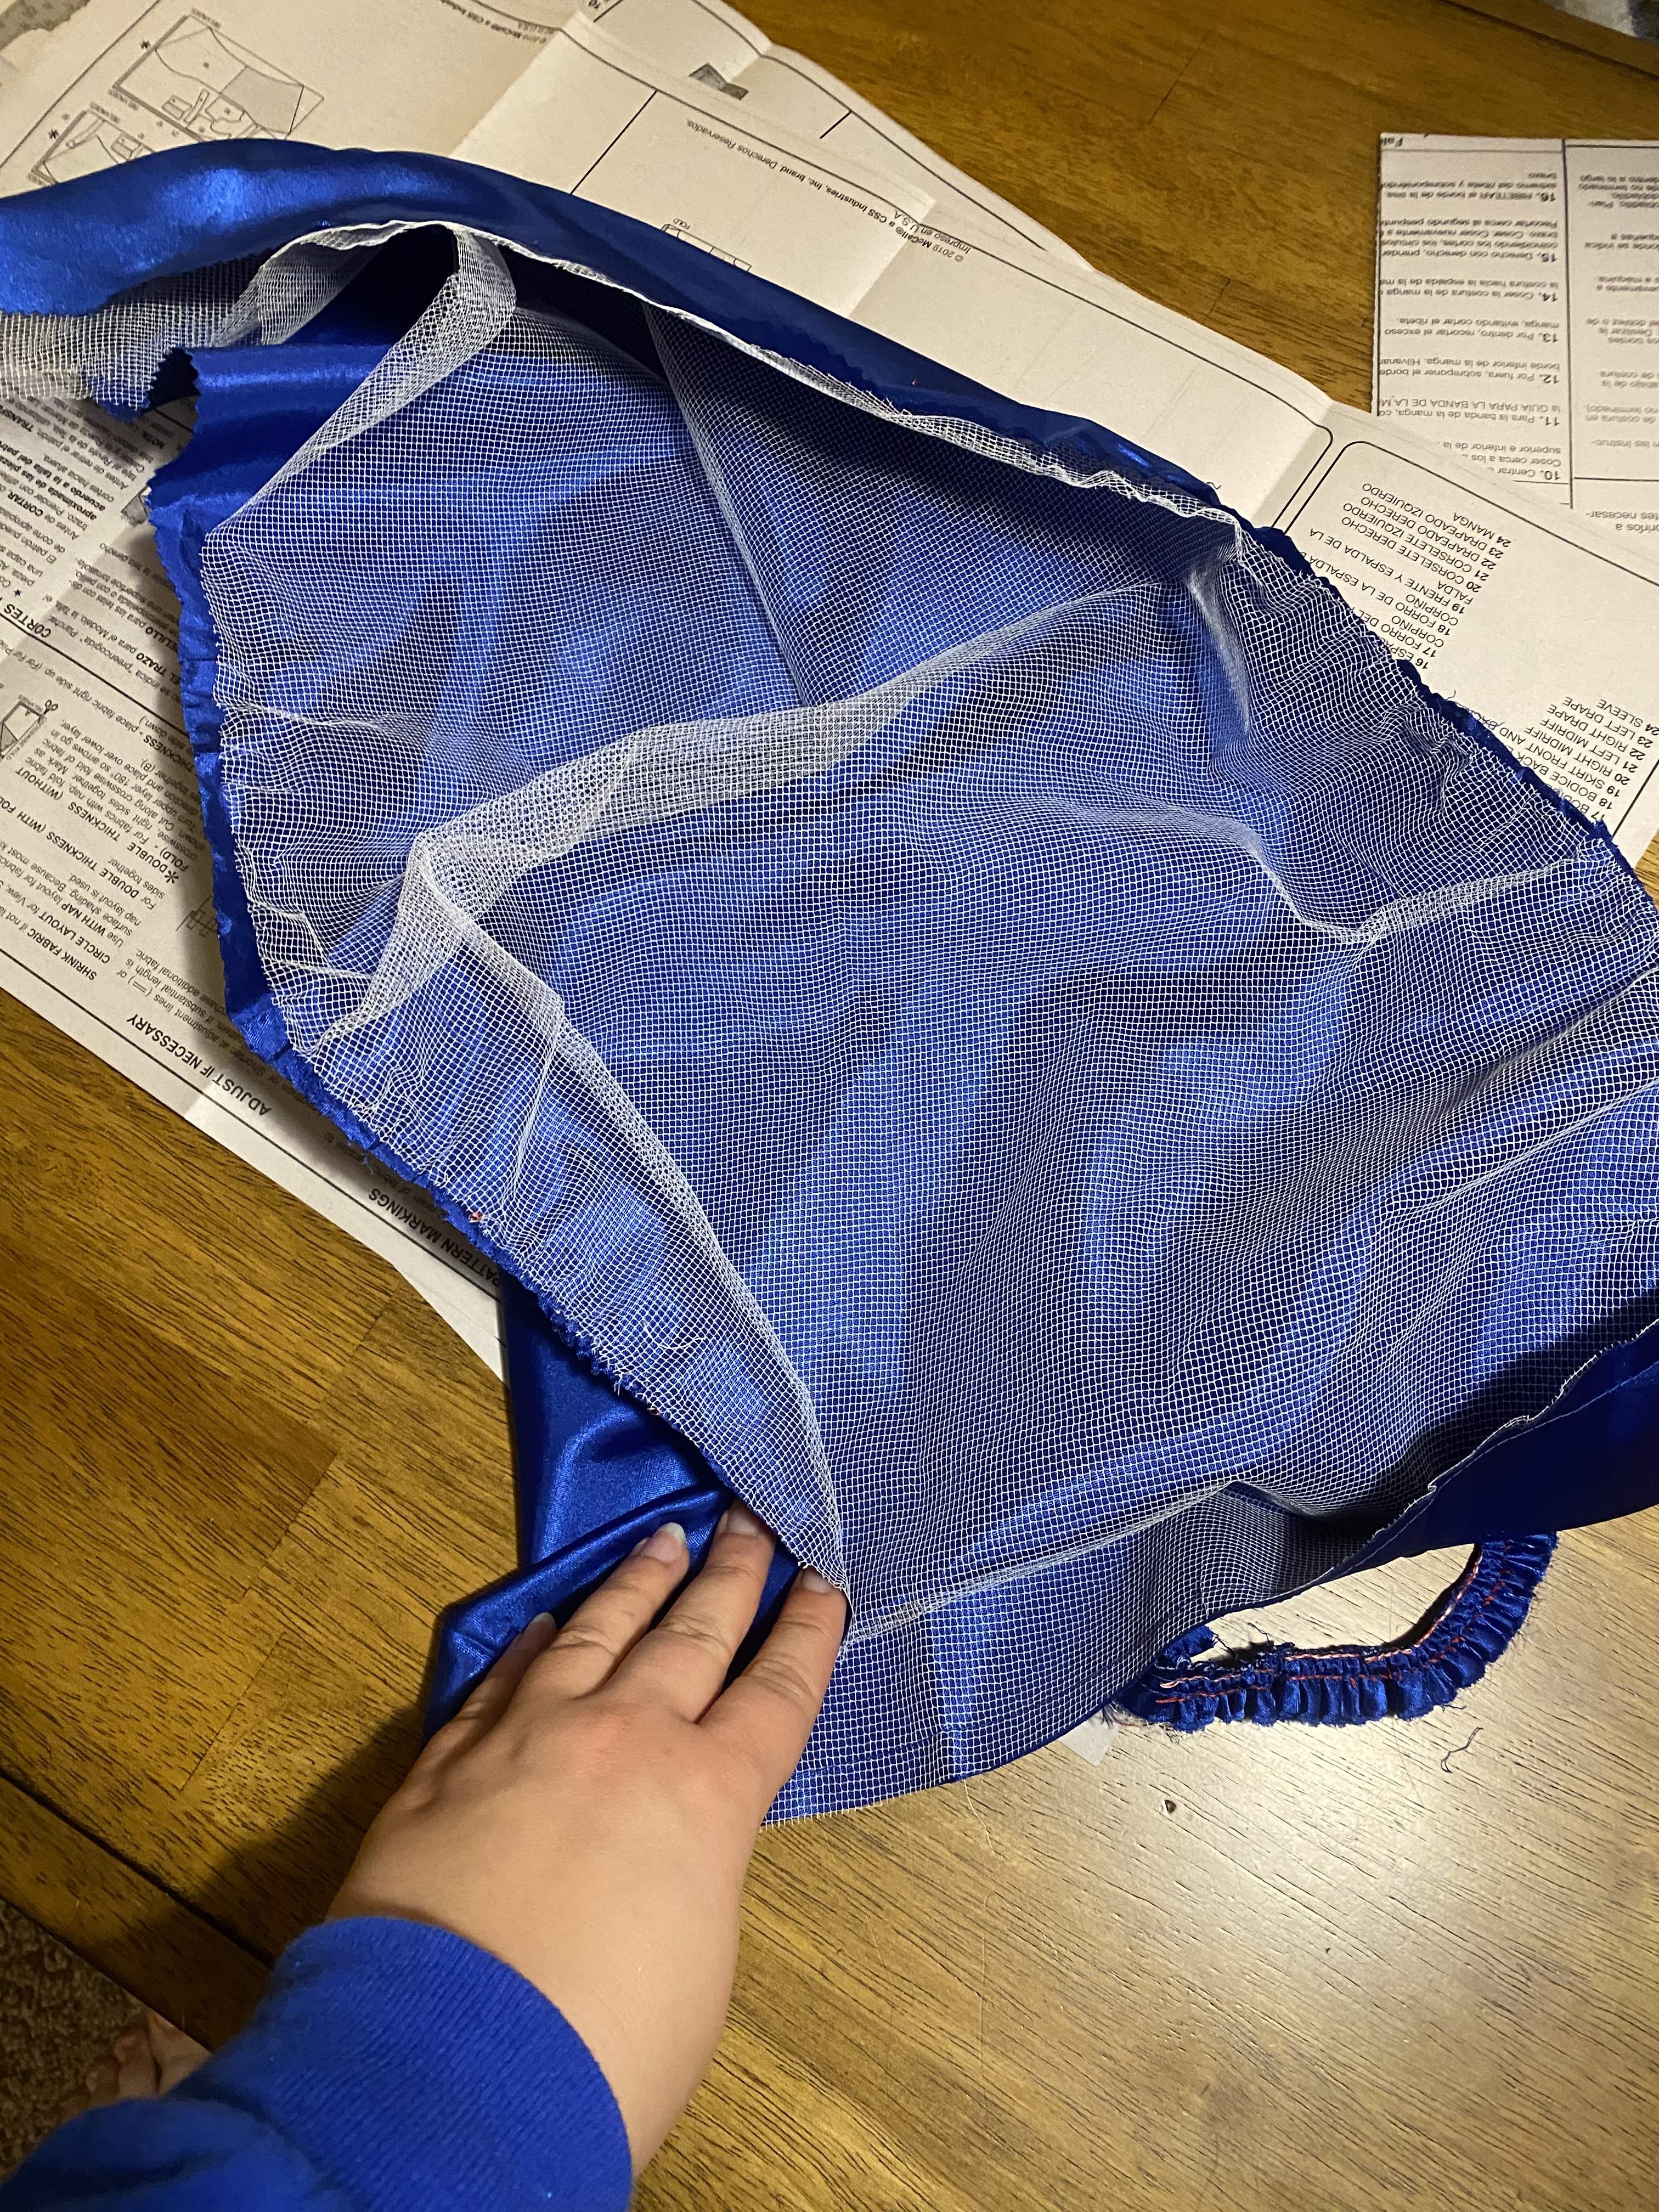
Every scrap of this dress would need to be put to use including two gathered “wings” that were attached at the back of the dress to give the bustle added volume. In taking these apart, they were reinforced with crumbling mesh crinoline that had to be cut away at the stitching rather than seam ripped .
To make it work, I had to do significant reductions to the skirt length, beyond the 6″ reduction as made on the main dress. I worried that this would cause a bit of proportion issues since the hem line of the overdress would be higher than the design. I initially thought this could be solved with a bit of cream lace I had on hand to be added as a third, middle layer, but eventually nixed this (but only after cutting the pieces, hand gathering, and whip stitching to the skirt waistband….then did I realize it was far too busy with the extra layer and had to seam rip it back off).
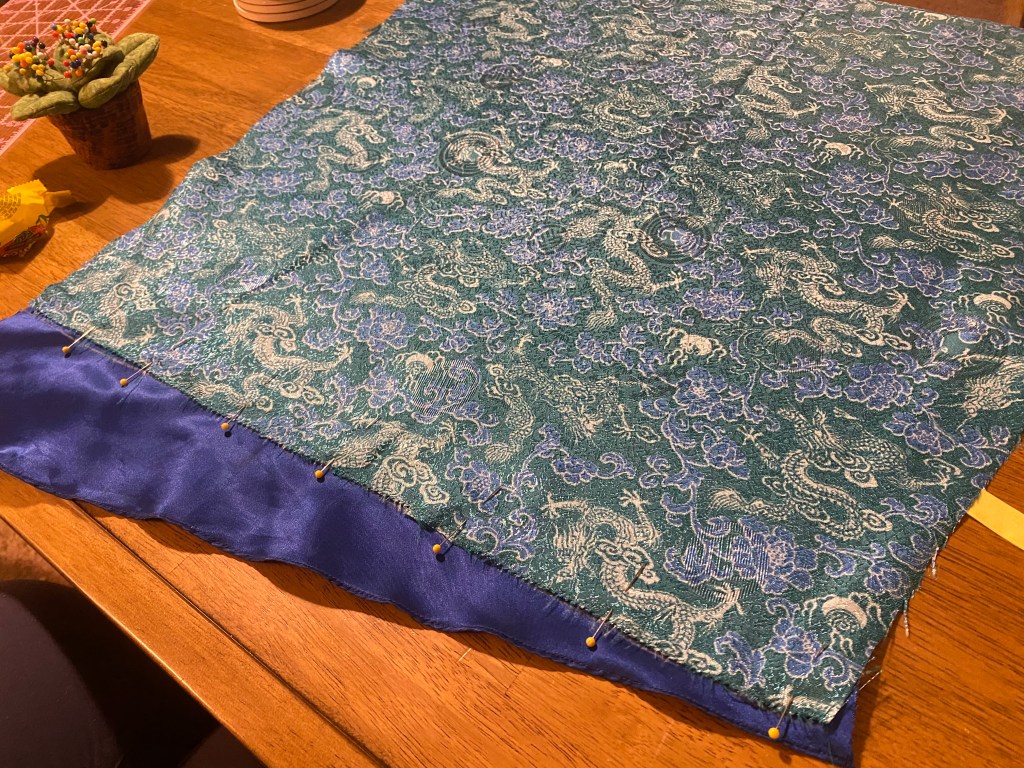
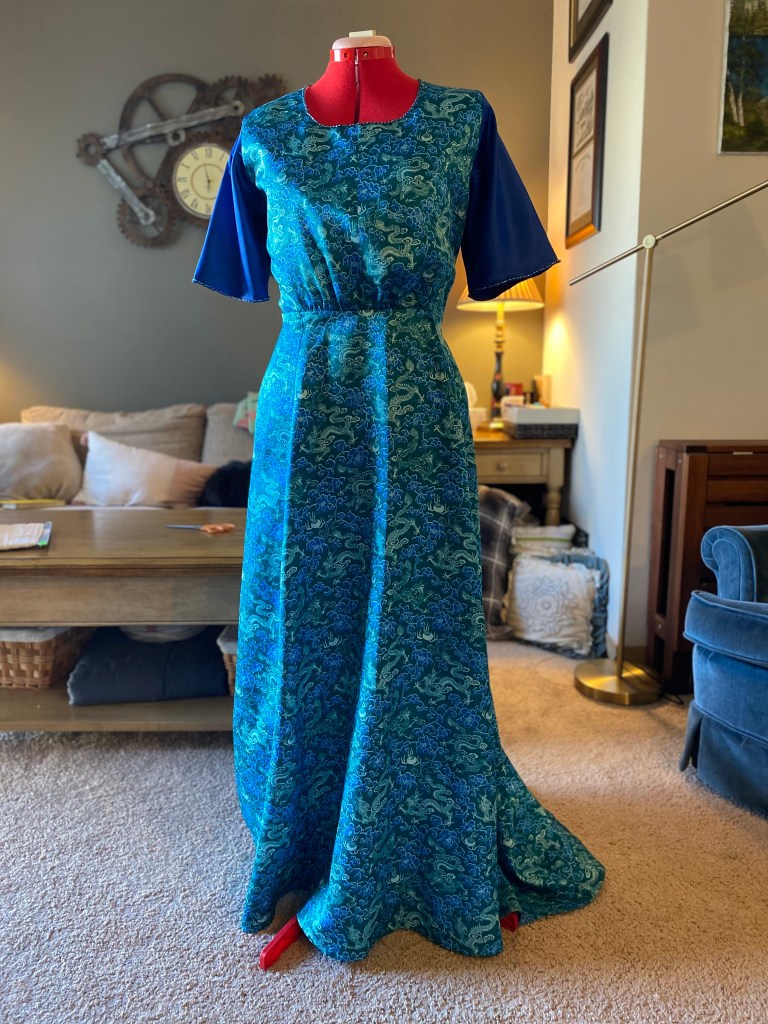
With everything cut and organized, I began stitching. First was to stitch and finish all of my piecing work on the skirt. The kimono material also frayed almost instantly after being touched, so I surged all the skirt seams after stitching. With this discovery, I also surged all the bodice panels right away to make for quicker stitching later. The bodice was lined with a cream poly satin I had on hand and pressed for a clean finished neckline. This lined bodice is hand gathered at the front before stitching the waist seam to give the period appropriate pigeon breast style.
Sewing the pieced sections of the back skirt panel (blue satin on top half, turquois at bottom). The blue satin was not cut precisely to allow for errors in the seam. It was trimmed to size and excess seam cut away after stitching the pieces together.
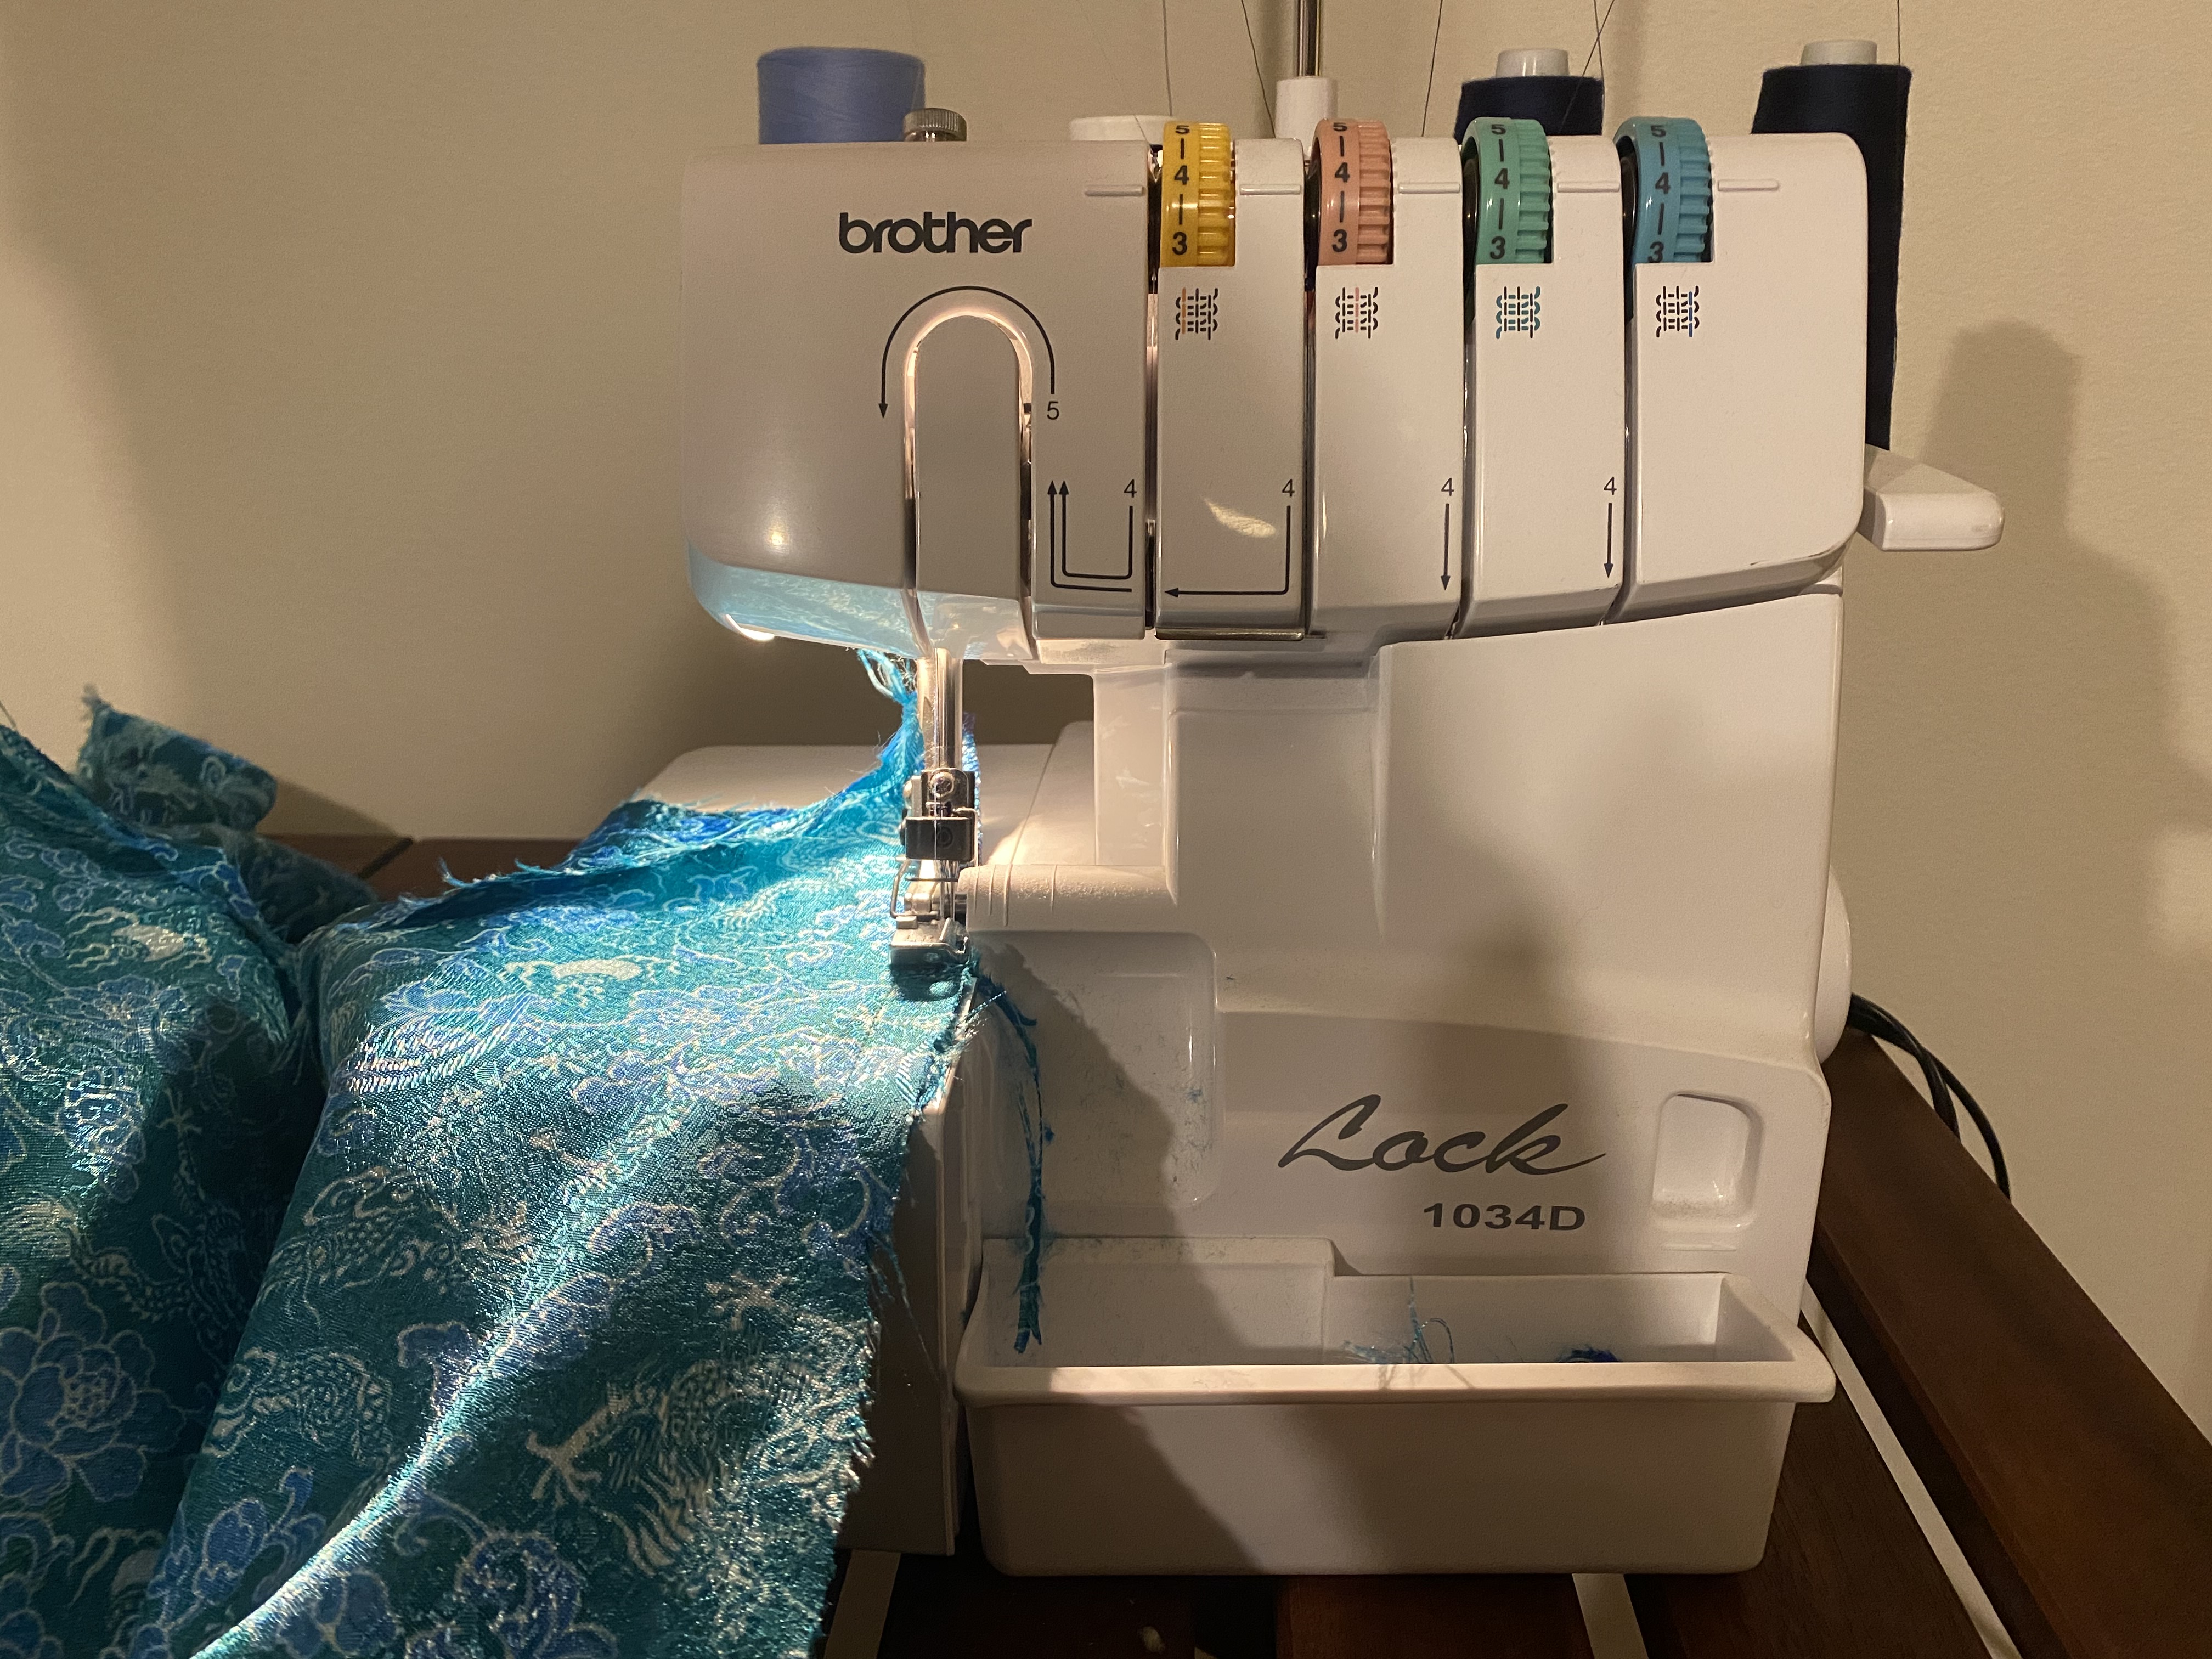
Serging ALL my seams
The stitched bodice and skirt sections. I placed them on the dress form to ensure the color blocking created by the piecing wasn’t terrible.
The interior of the bodice with cream polysatin lining
Dual purpose basting stitches for the bodice outer layer and lining as well as acting as gathering stitches.
The basting stitches are used to gather the bodice front and then pinned to the skirt to finish the waistband.
The instructions for constructing the main dress were easy enough to follow and I had no issues with construction. The most troublesome part was binding the back seam of the skirt and bodice separately which I understand, but also don’t. The troubles began with finding a binding material that was suitable. The pattern instructs to cut binding from the fashion material to make bias strips; however, this would have caused two issues for me: 1. There was no chance in HELL I would have enough material to cut anything on bias or grain, 2. The poly satin melted if I so much as wafted steam from the iron at it. I would never achieve decent bias tape without being able to press it. Luckily, I had some scrap blue taffeta from another project that I was able to scavenge into bias tape. The taffeta was much stiffer than the poly satin which lead to my main issue with binding the skirt and bodice separately. In doing this, the point where the center back seam is stitched together at the waistline is extremely bulky and has an odd lump. In hindsight, I should have bound the entire center back as one section.
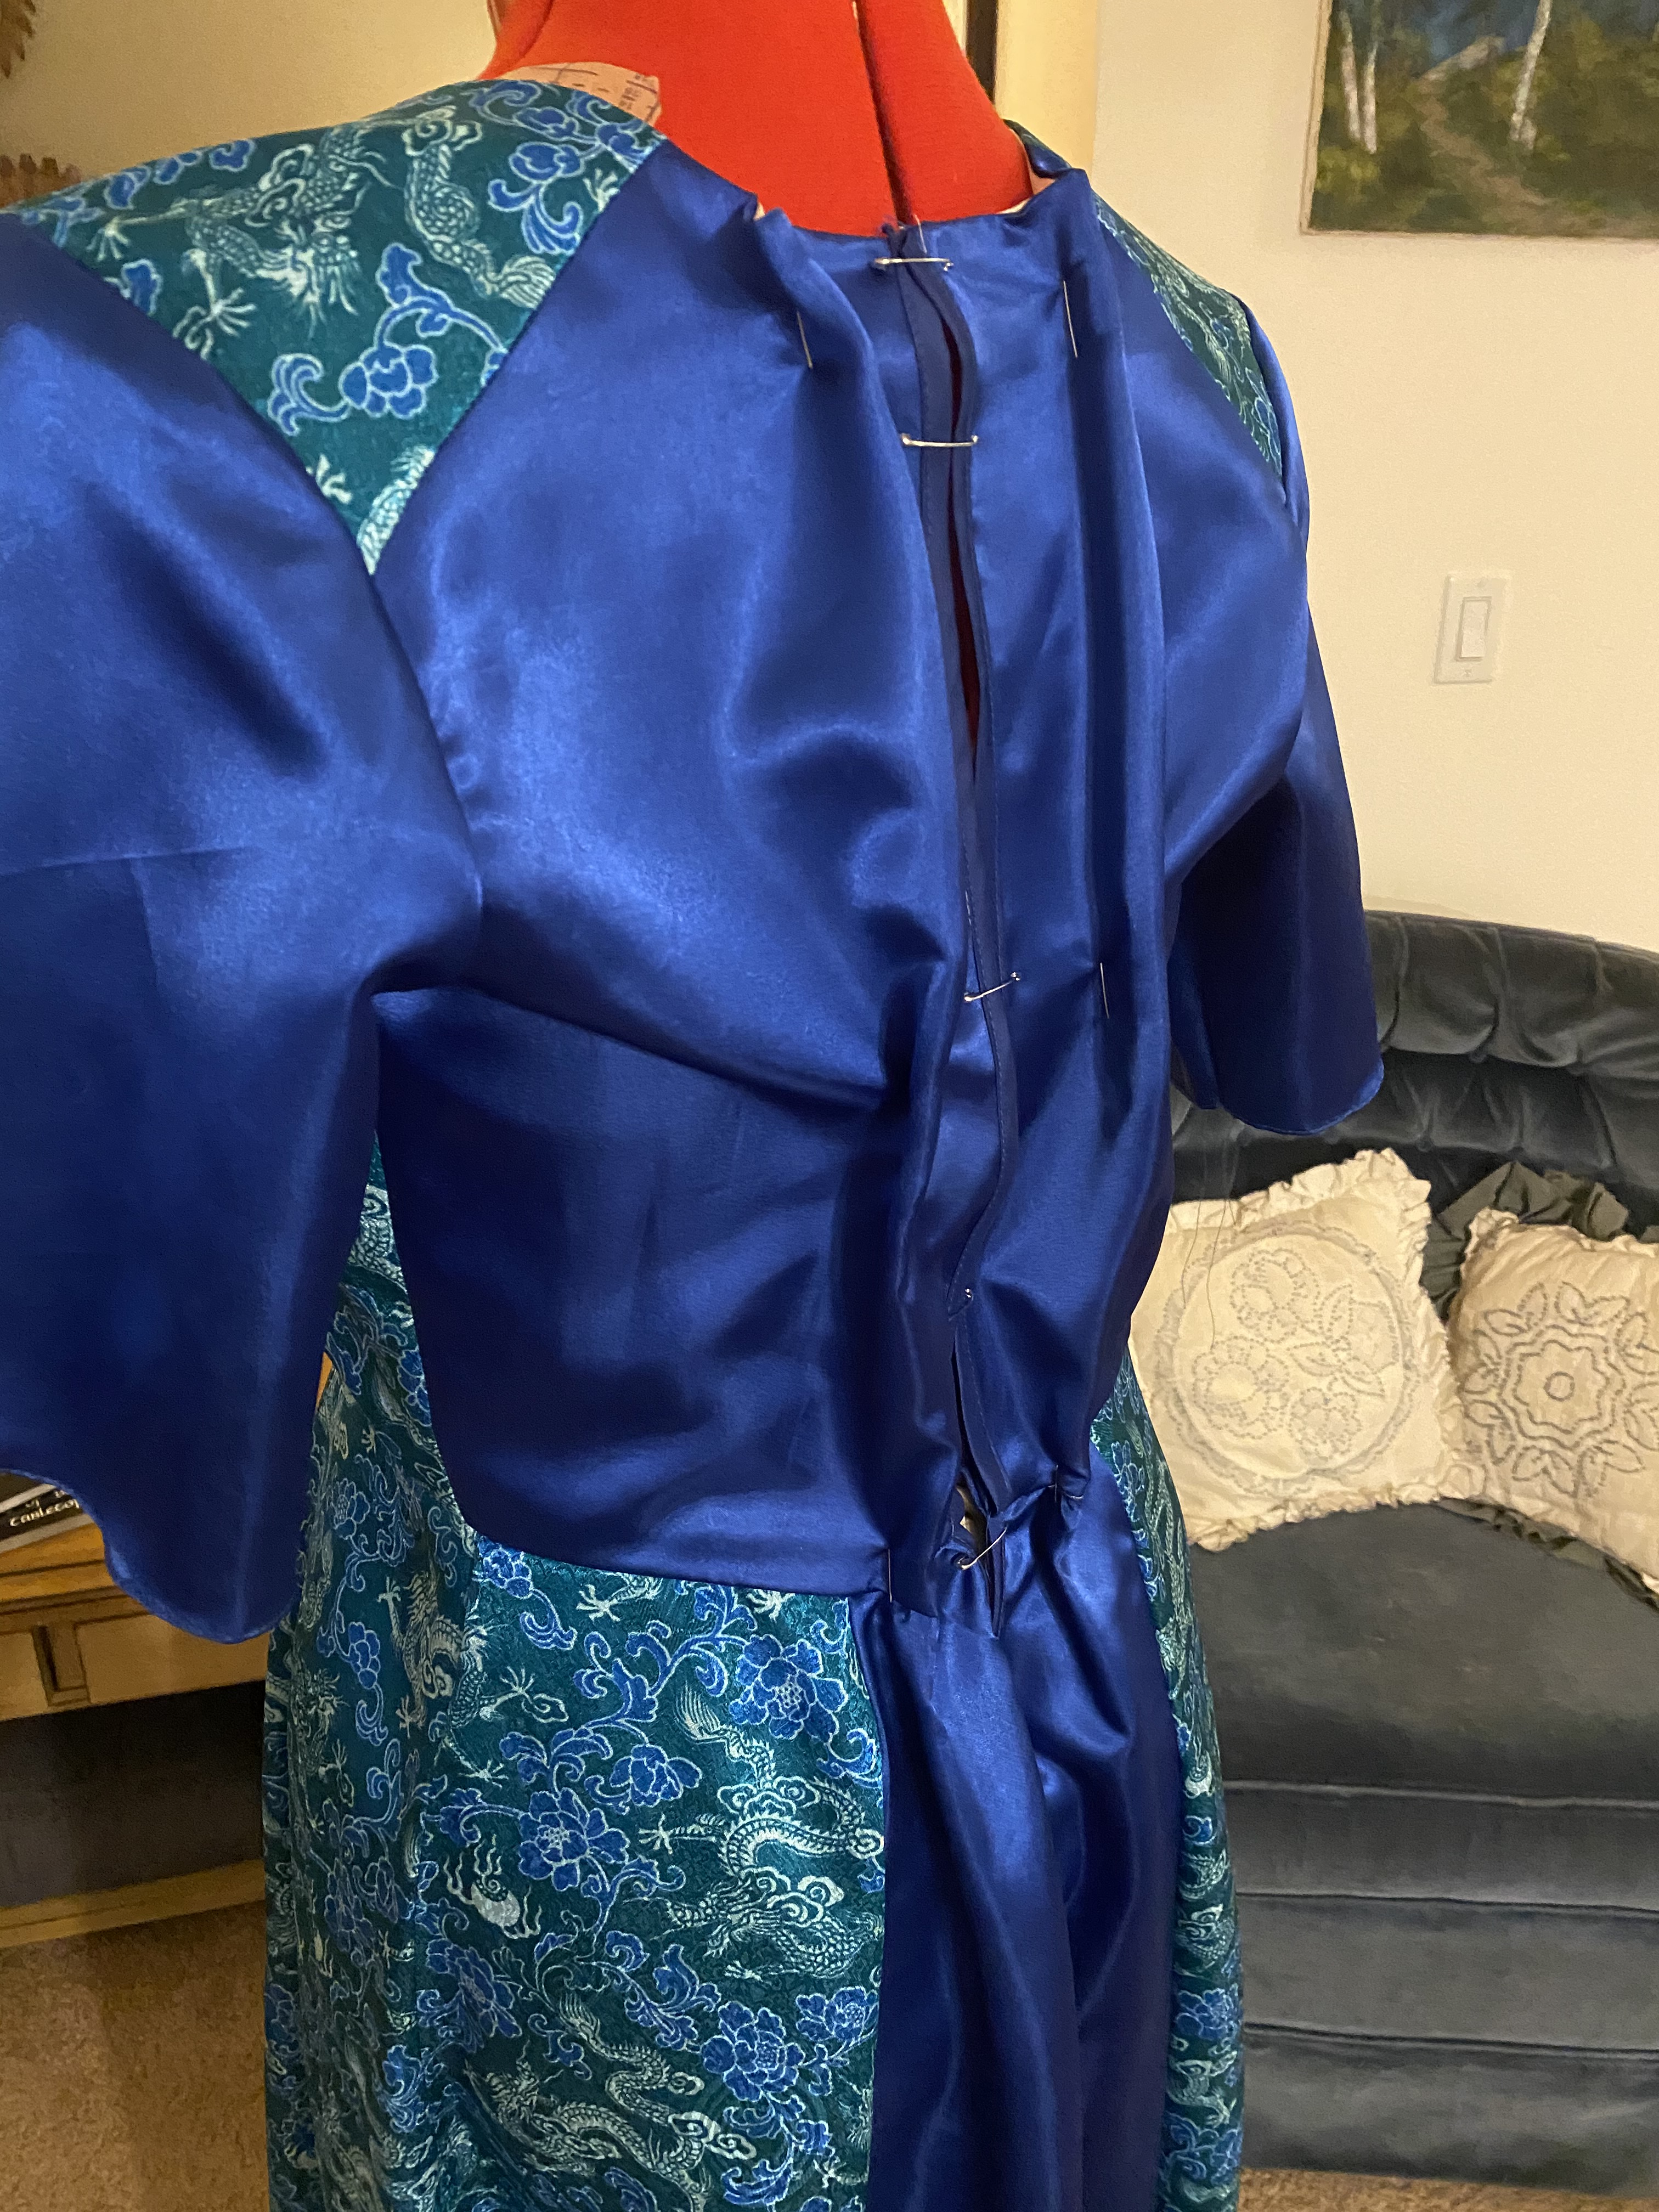
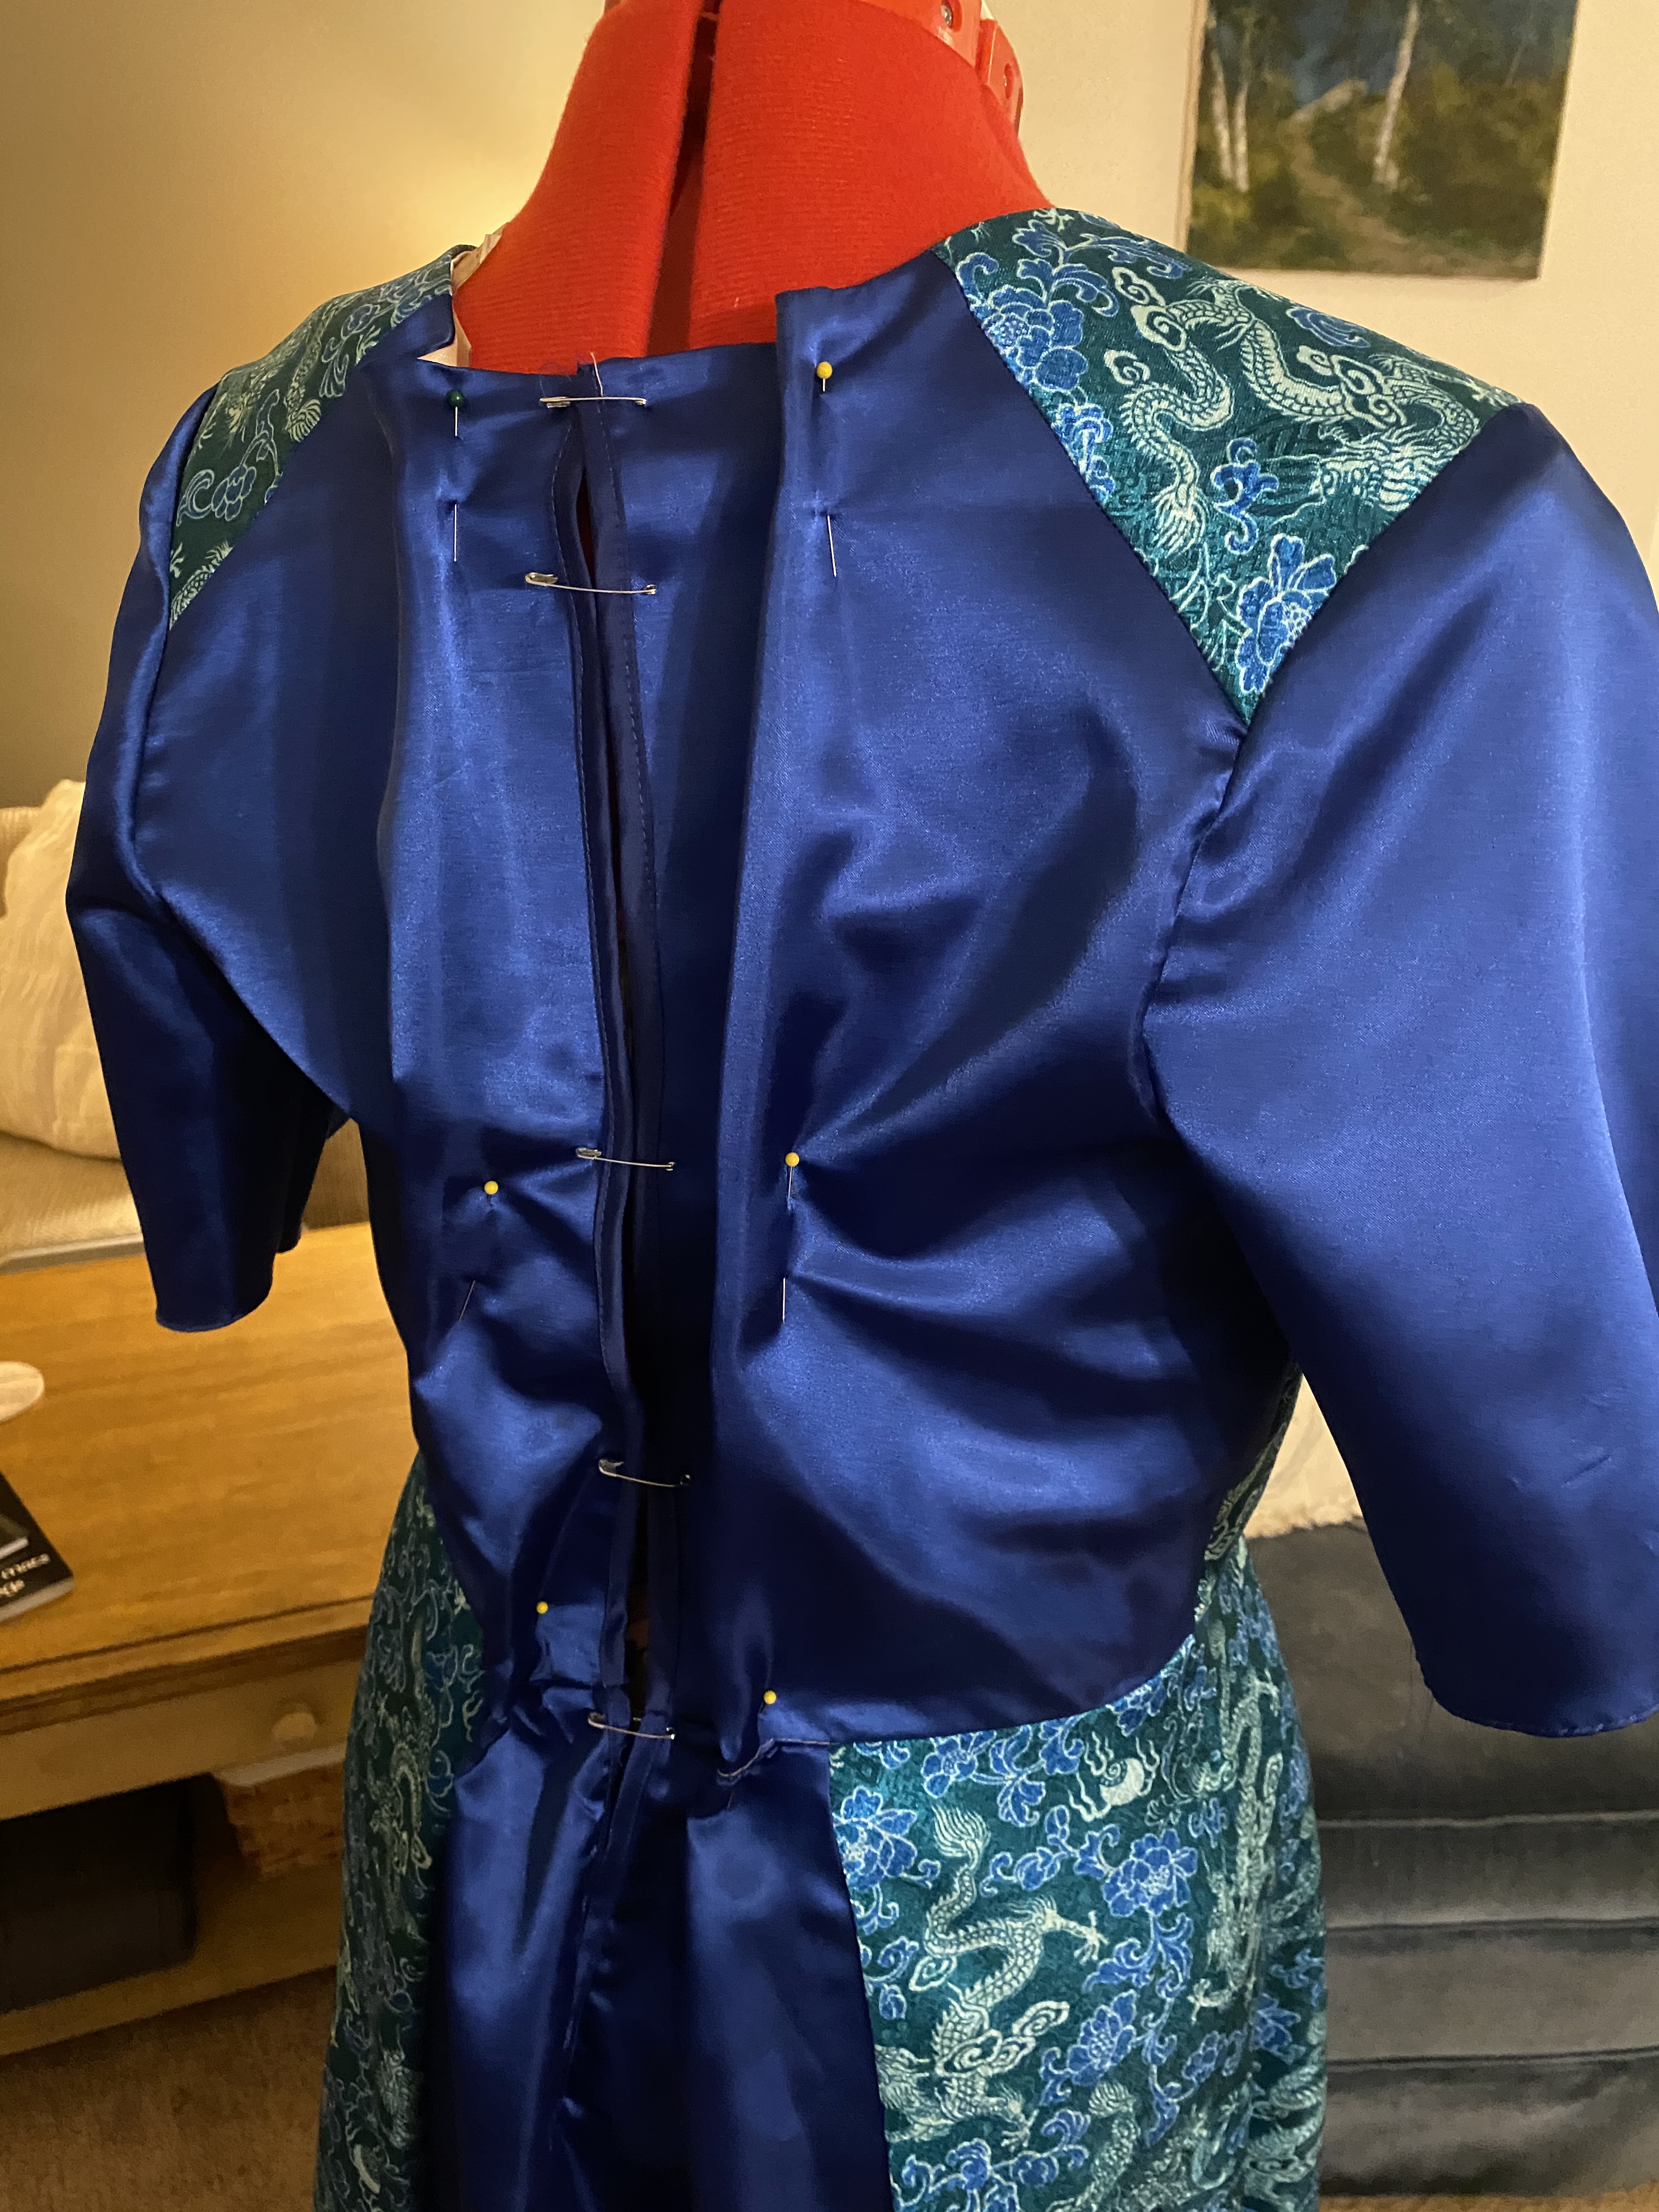
Again in hindsight though, I didn’t even need to bind the center back. The pattern calls for hook and eye closures at the center back, which I knew I would struggle with to dress myself. I instead finished the back closure with a 22″ zipper.
Before I could apply the zipper, I had to work out a number of fit issues. The bodice was far too large for me, as always seems to happen to me with big four patterns. I had to get quite creative with darts at the back to help fix the excess at the waist, but also needed to remove the sleeves and take in the garment at the shoulders significantly, which of course caused major issues with the armholes that needed adjusting.
I am a small busted but average waist woman, which makes standard pattern sizes difficult and mock-ups essential. A step I skipped due to the timeline. Thankfully, the costume designer was able to help me fit the garment and find the precise locations to place darts to make it fit beautifully in the end.
After finishing the adjustments to the bodice, the faux pigeon breast style of the bodice is more visible. For more period accuracy, this fullness should have been greater and if I had more fabric and done a mockup, I would have done so.
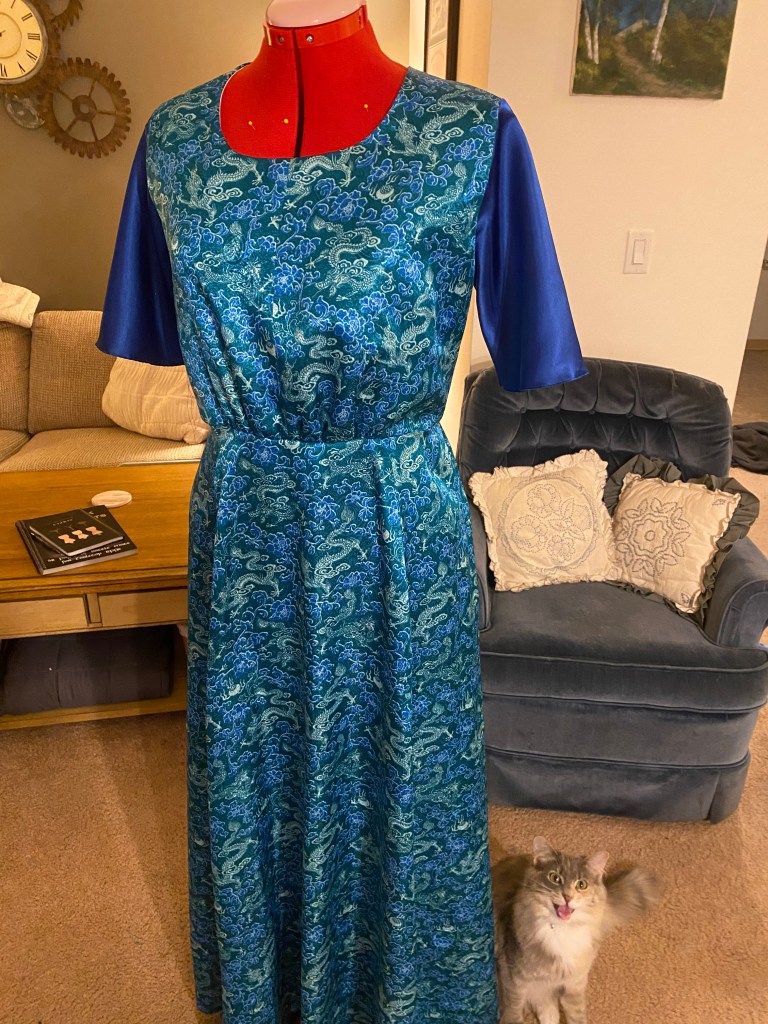
The front of the finished gown, featuring a cranky Kiara demanding her dinner.
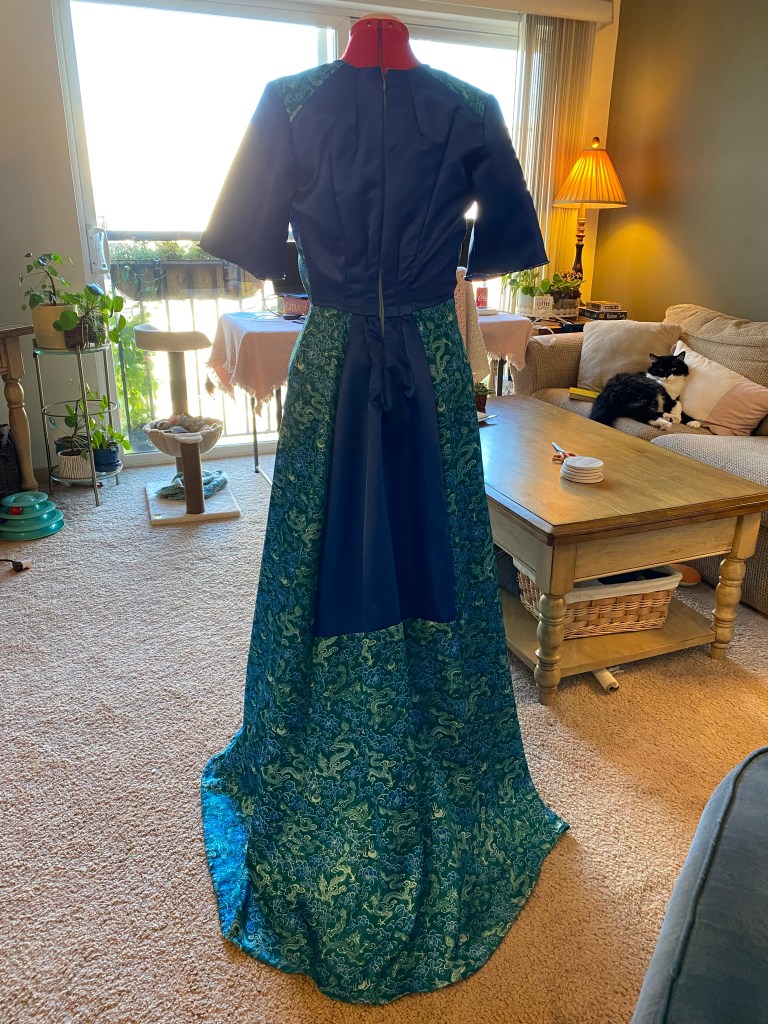
The back of the gown with bias tape finishing, before the zipper was applied.
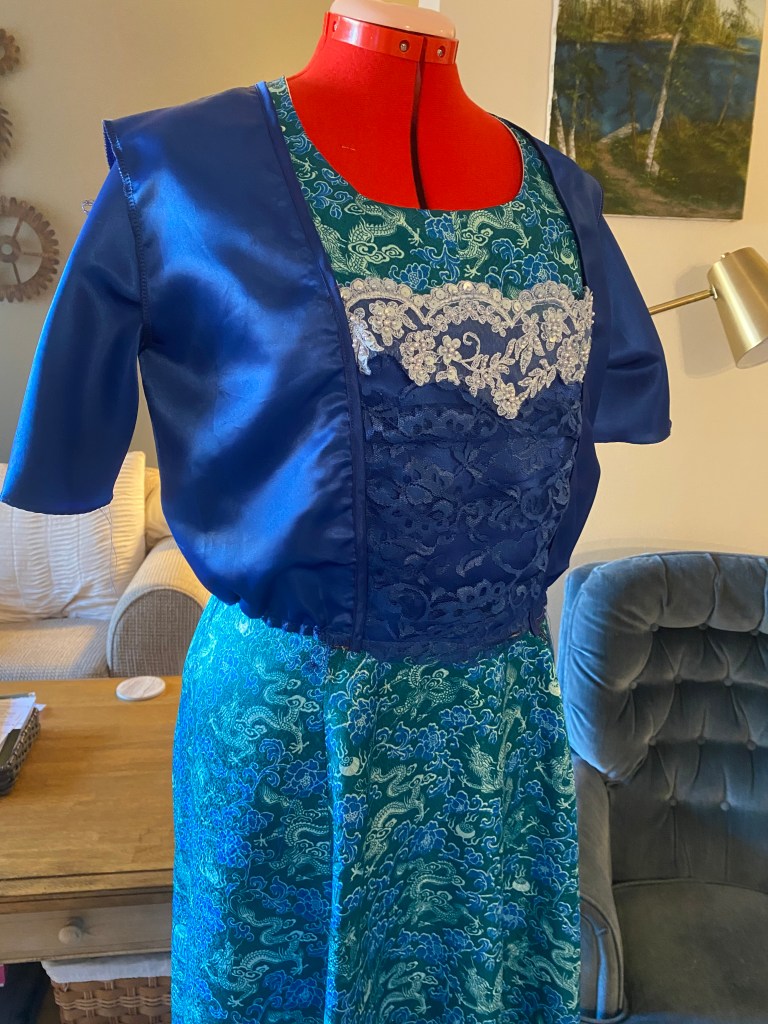
However, this lovely fit would soon be covered by the disaster that is the overdress.
The Overdress
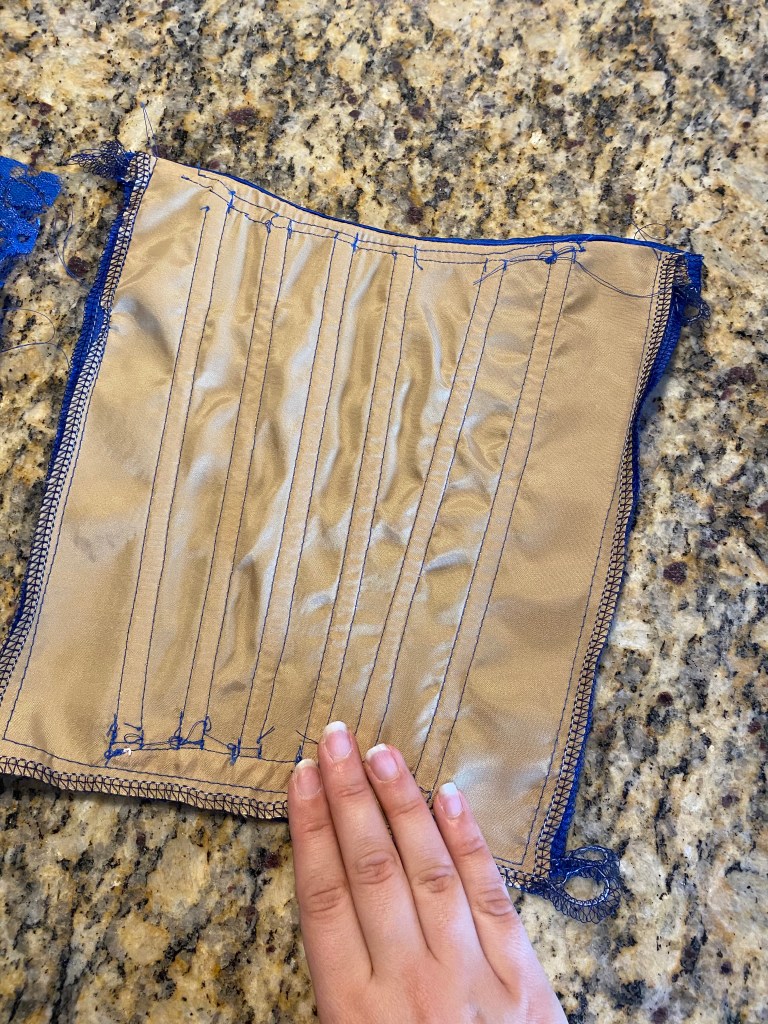
To start, the pattern instructs that the center panel of the overdress was to have boning applied which I cannot for the life of me understand why and regretted doing every second of this project. DO NOT APPLY BONING TO THIS GARMENT AS INSTRUCTED.
The VERY messy interior of the center panel of the overdress with six boning channels. Please ignore the terrible backstitches, I was rushing.
It makes absolutely no sense to add boning to an overwise unstructured garment which is to be worn over another dress with period appropriate gathering at the front. The boning made the fit beyond odd and I cannot fathom why this was added. If you know why this was added, please drop me a comment because I would love to understand.
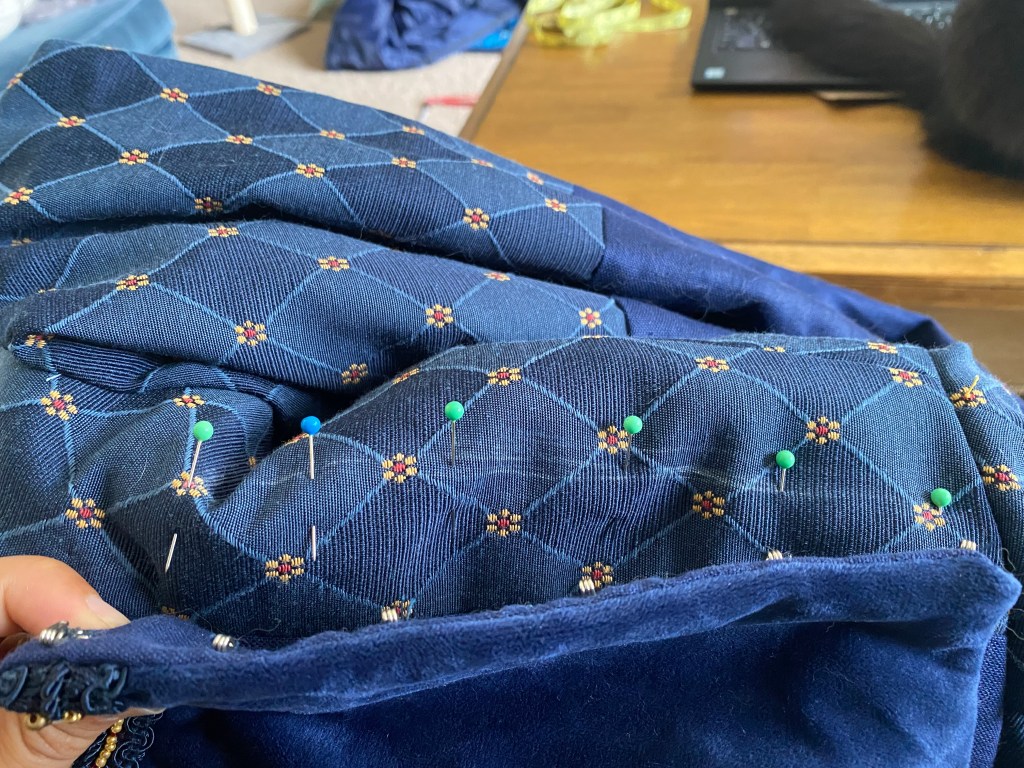
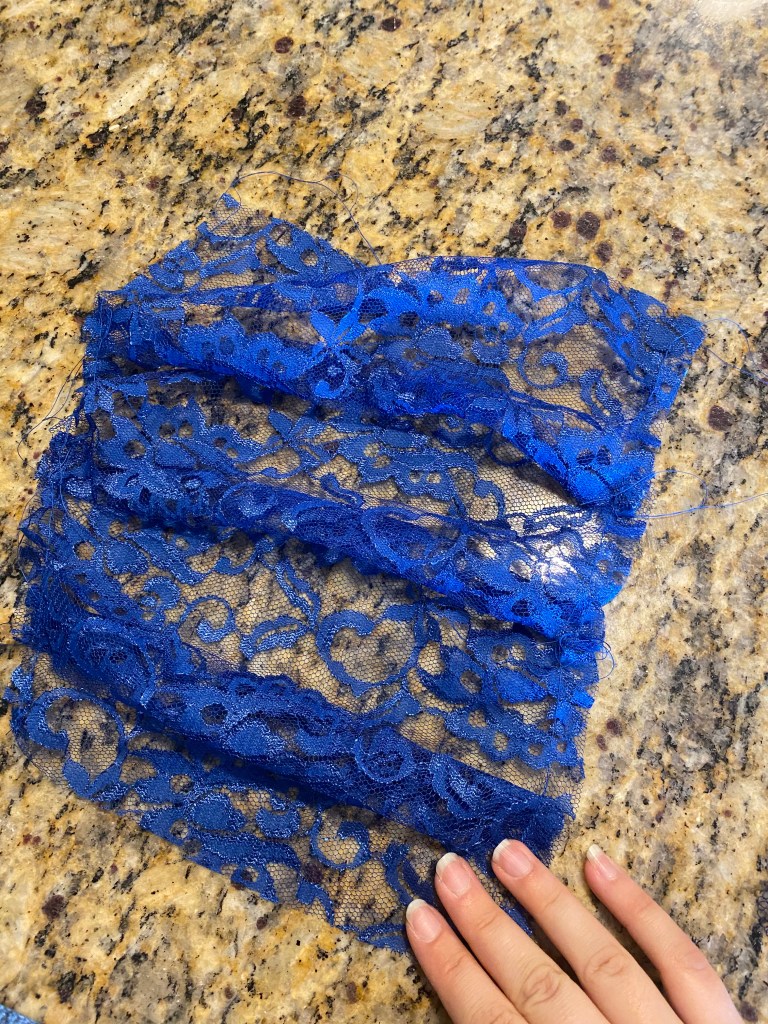
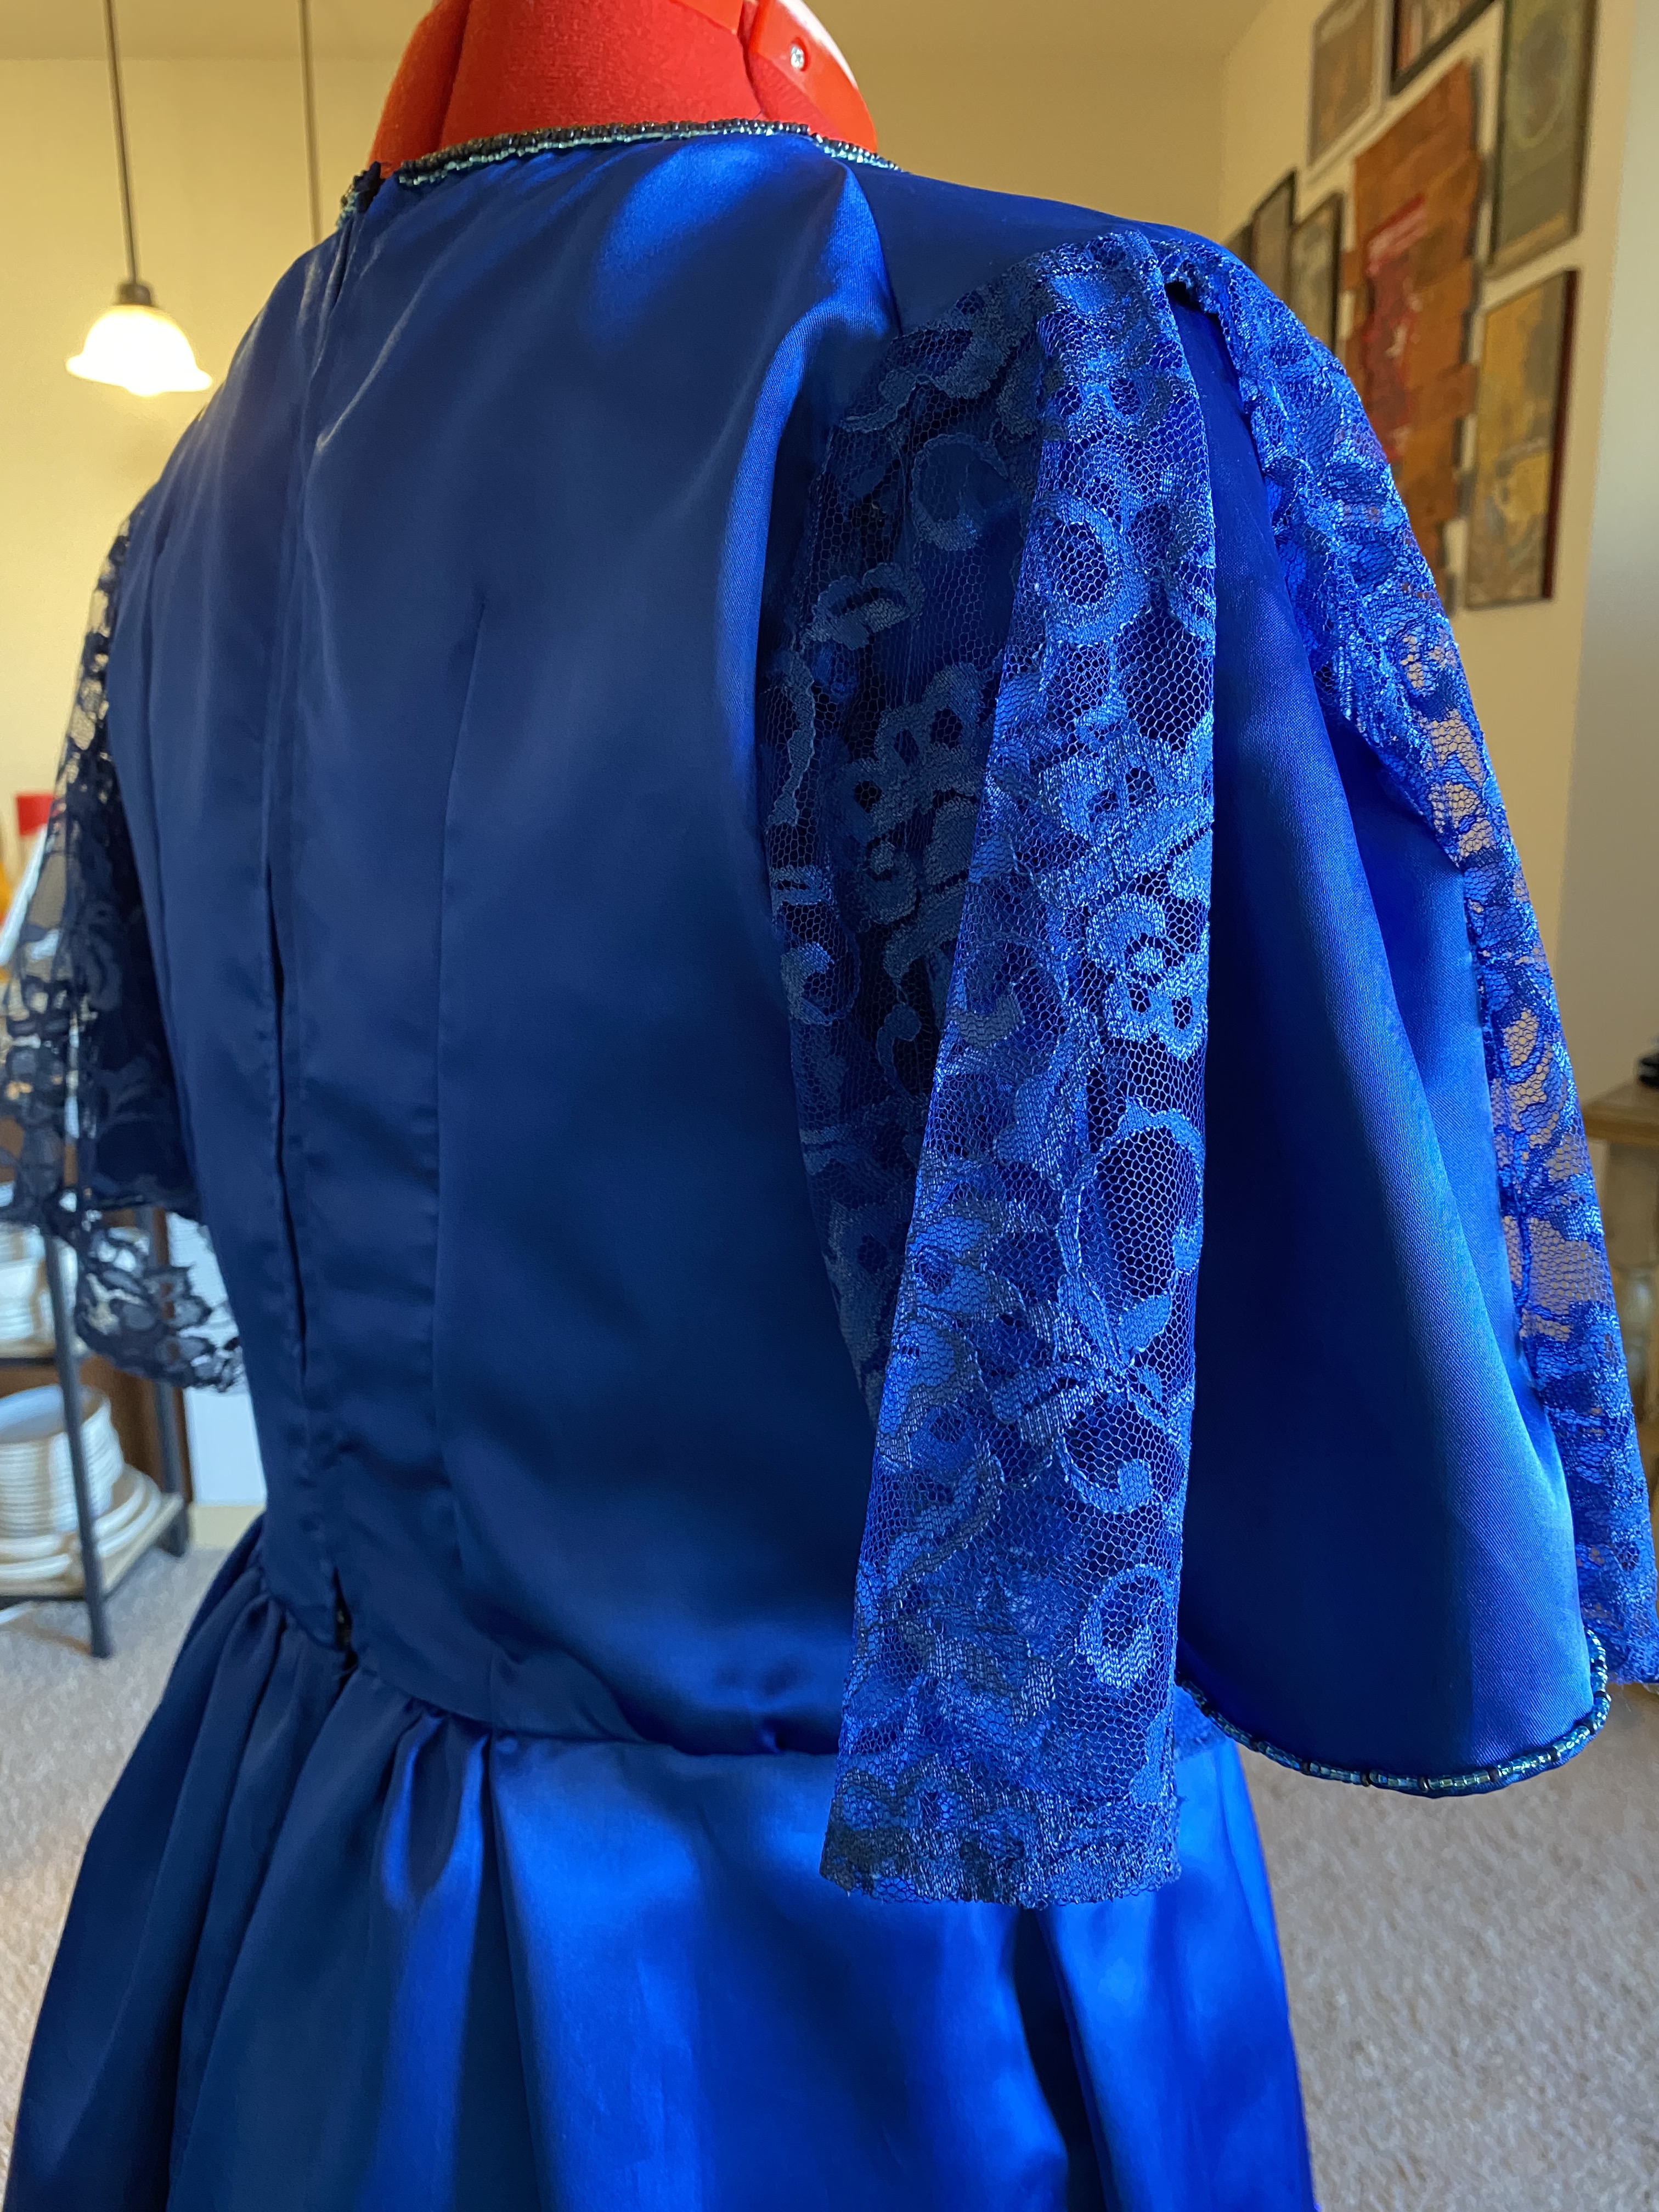
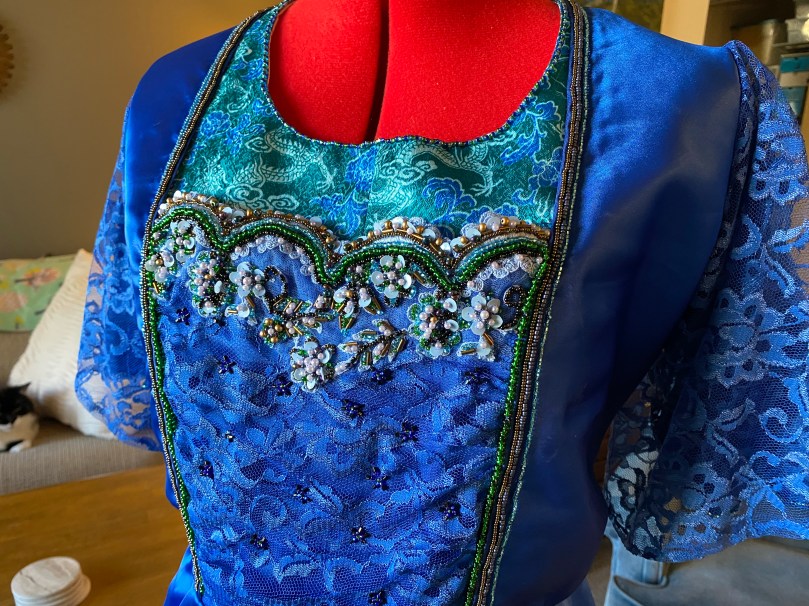
Beyond the boning, the garment construction was very straightforward. I applied both the blue lace from the 80’s dress and a piece of beaded lace from a salvaged wedding gown to the front panel before stitching to the front side pieces which were finished with the same blue taffeta bias tape rather than a tiny hem. I felt the bias tape would add a clean finish line that I could quickly stitch on the machine. Again, this choice would come to haunt me.
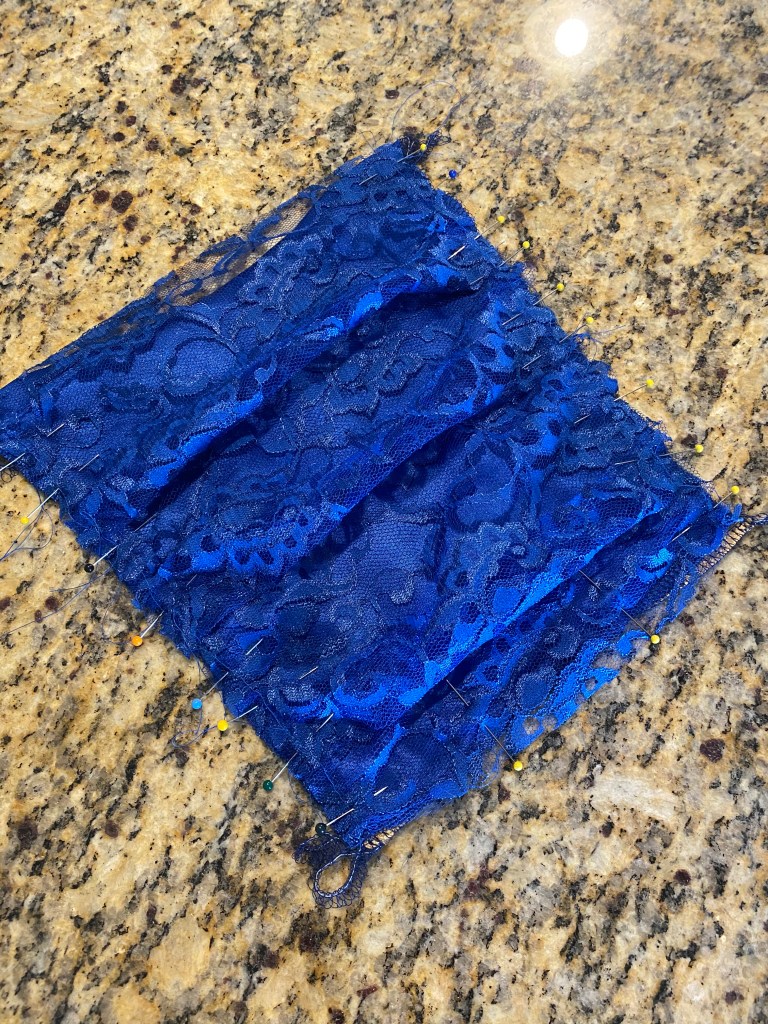
The lace from the 80’s dress was not sufficient for the full pattern pleat and gathering, but I was able to baste three pleats to give sufficient volume and texture.
The pleated lace is basted to the center, boned panel.
The front bodice with lace overlay and bias bound side front panels to be stitched. Keeping the 20′ rule of theatre in mind and knowing I would be applying beading, I opted to top stitch the panels together along the bias tape for speed.
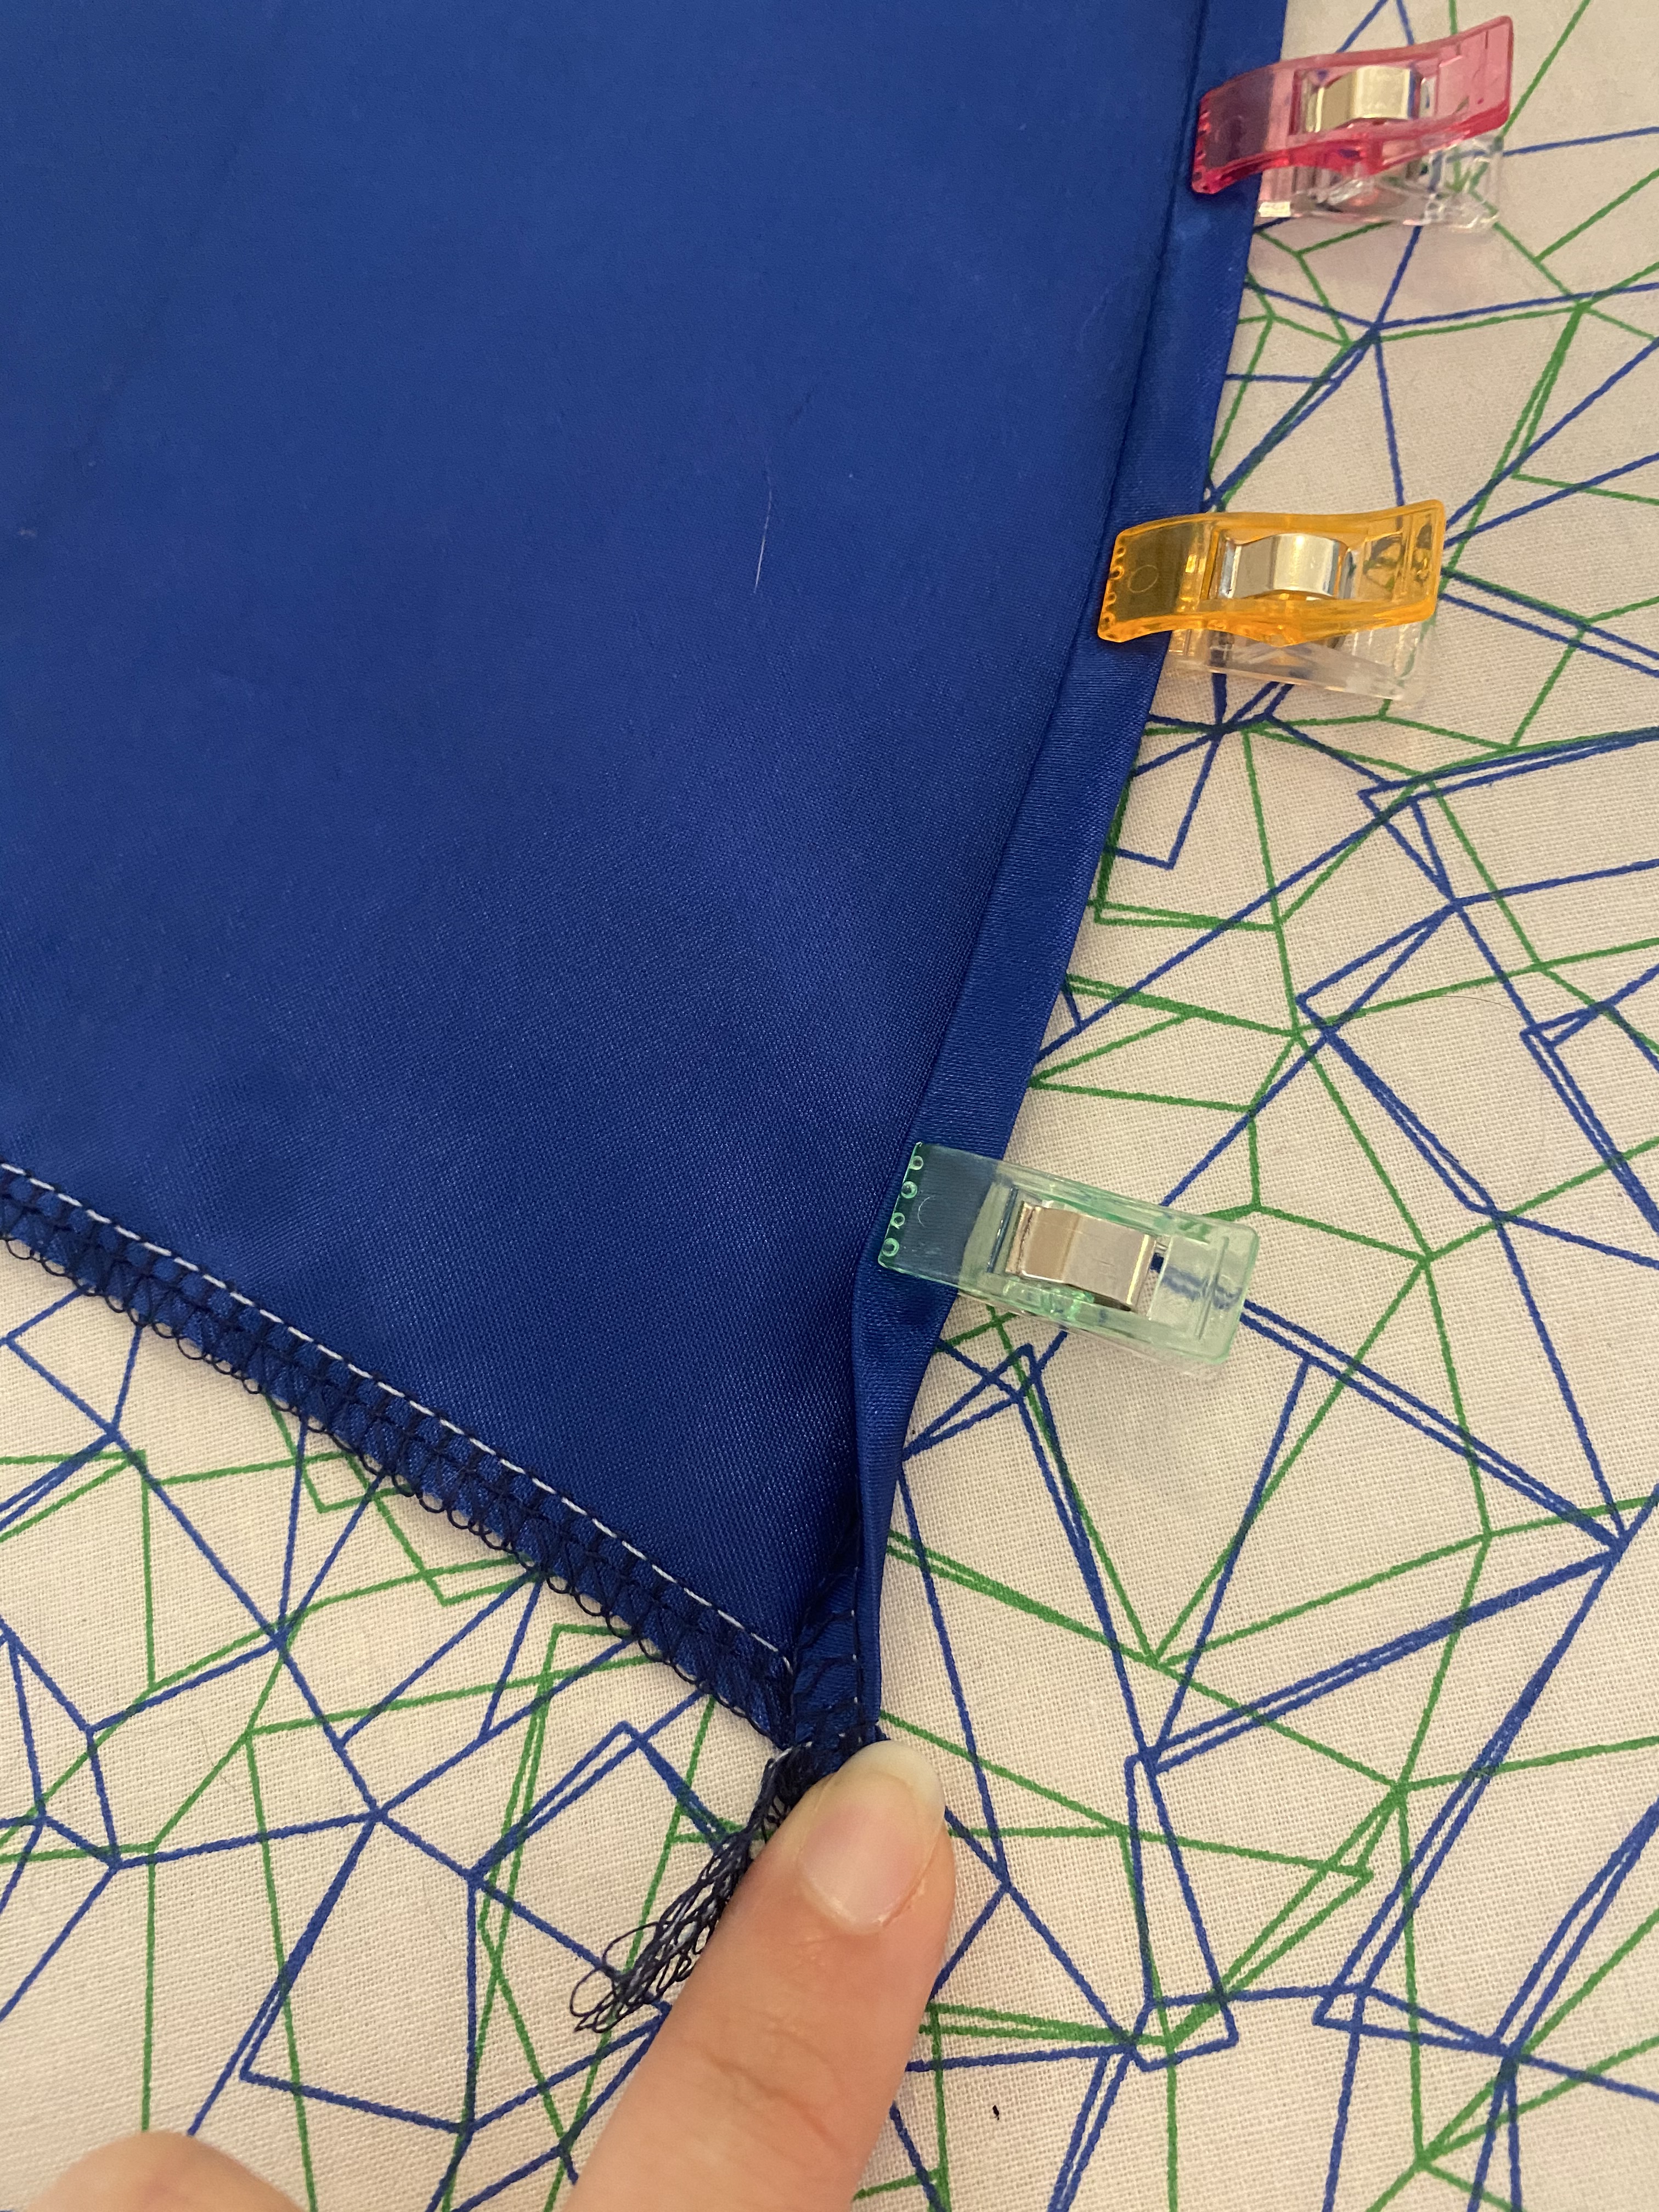
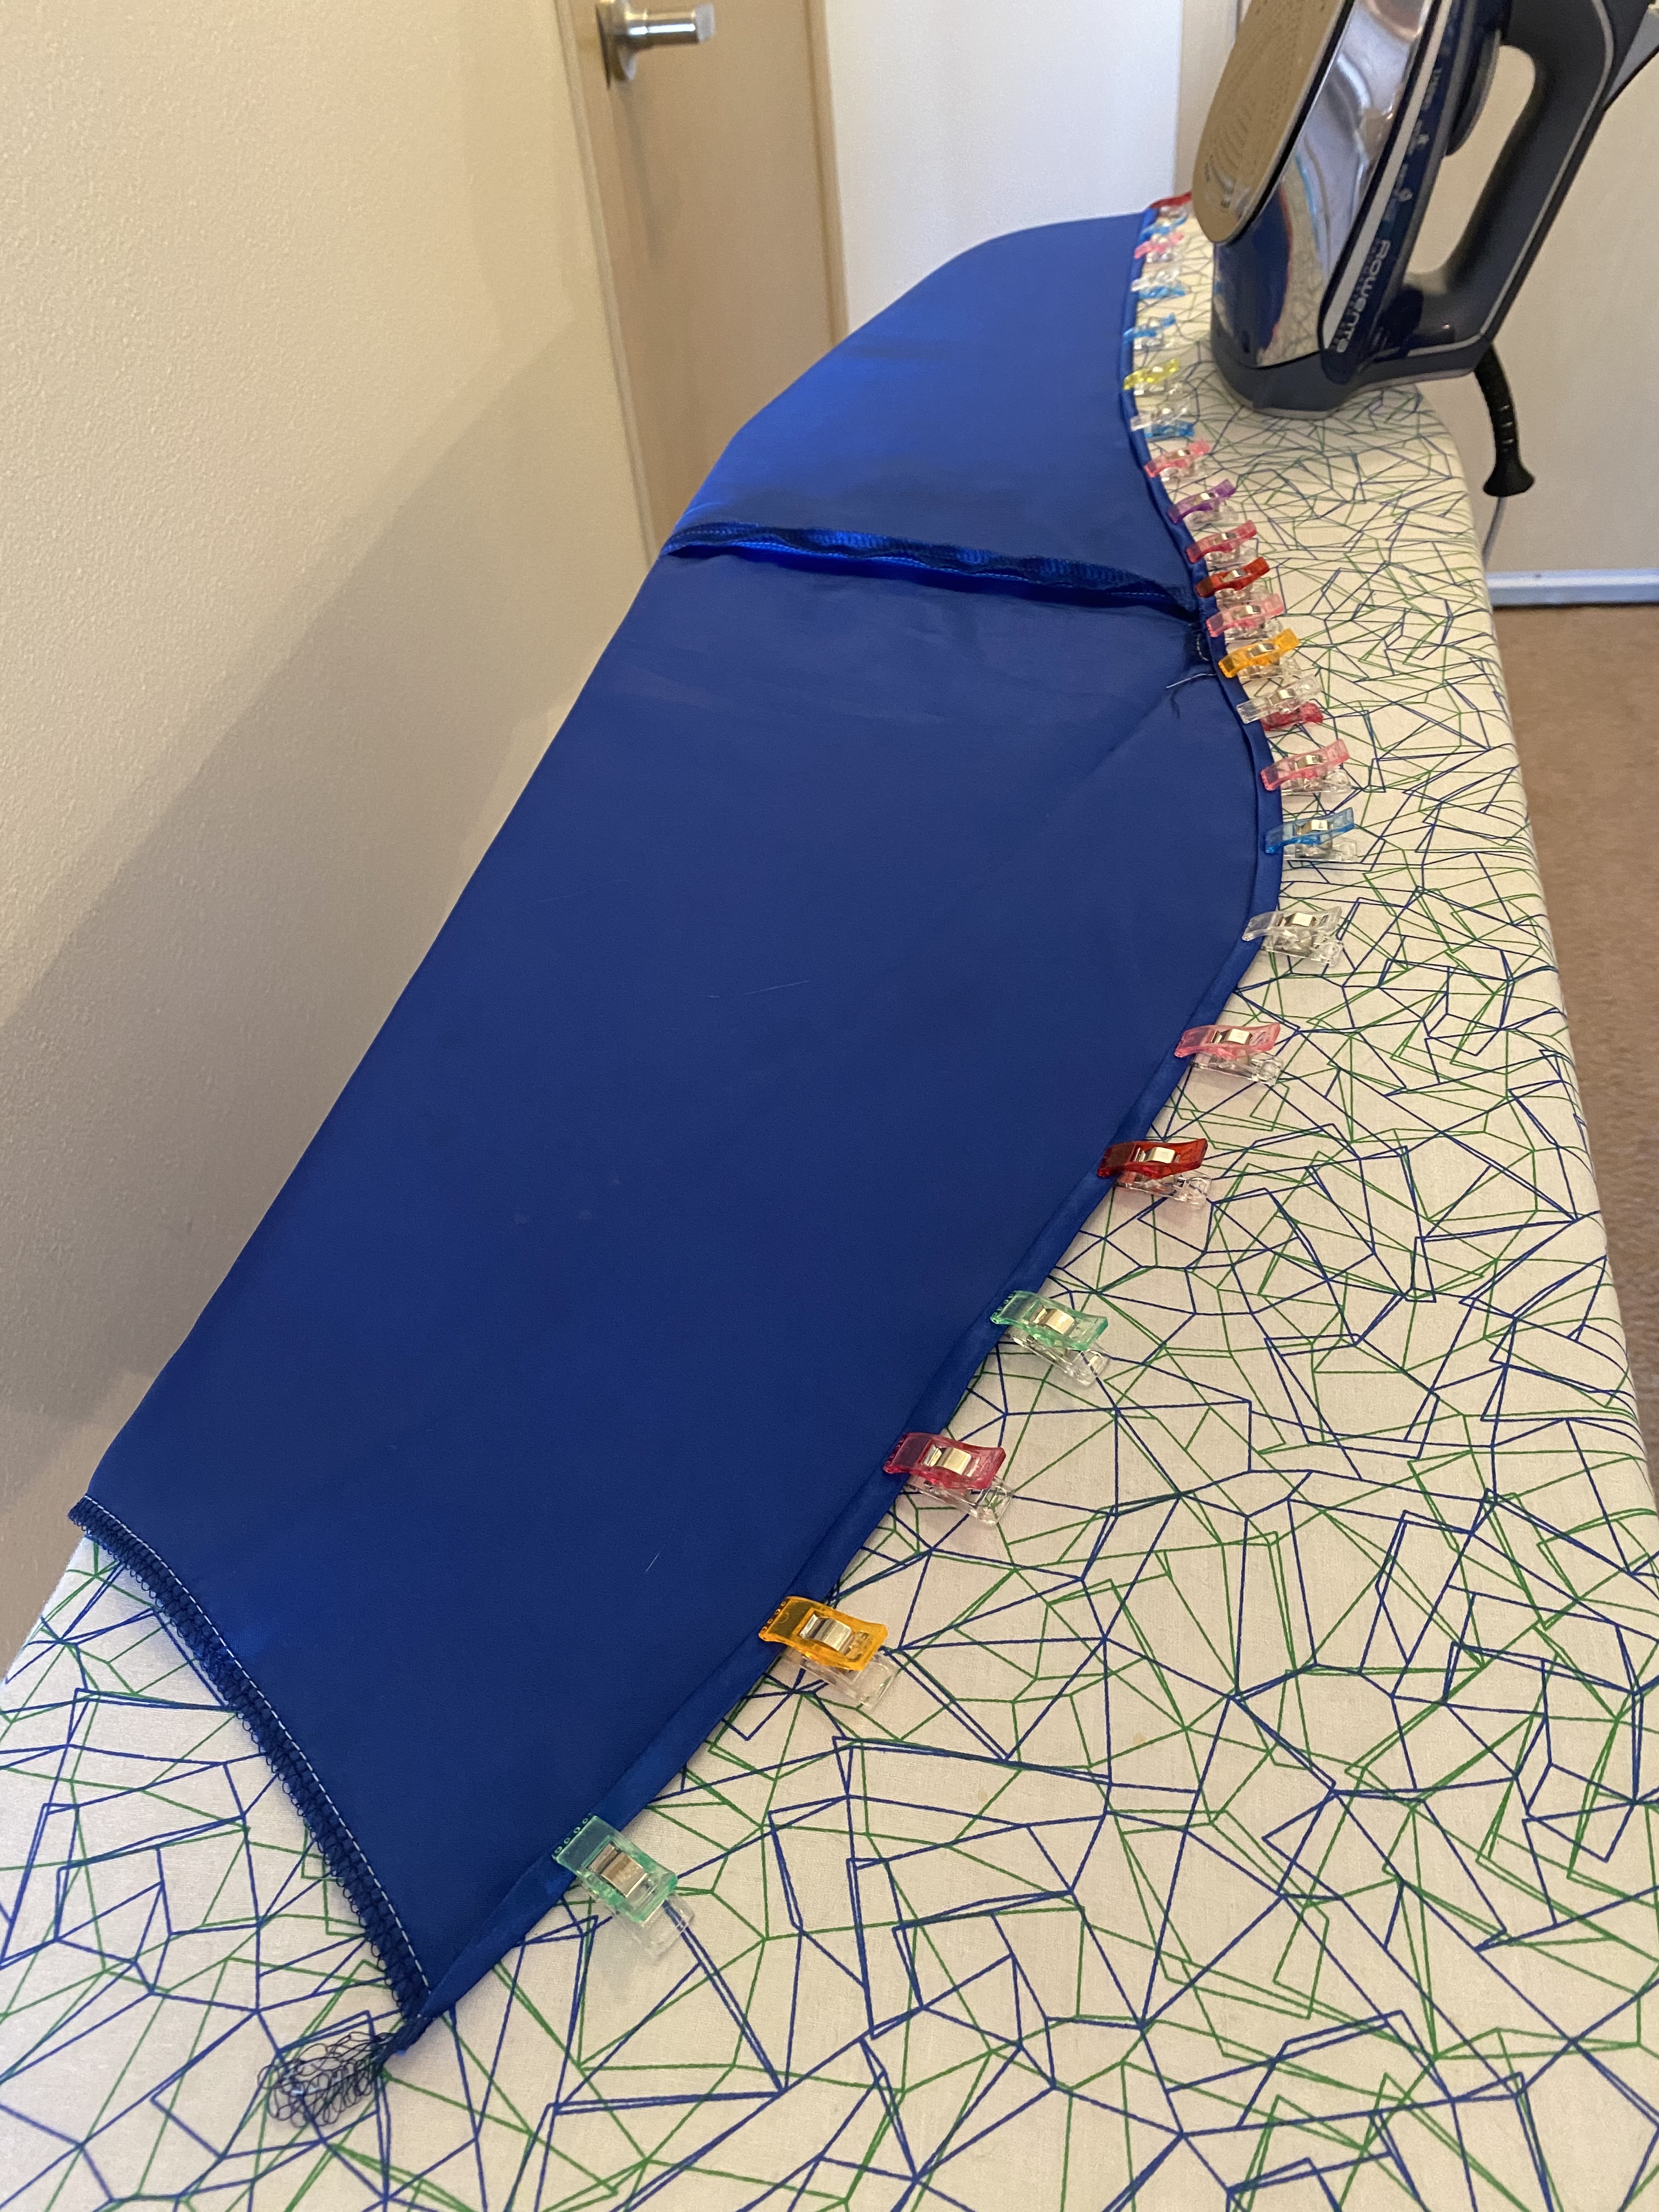
Between the layers of the center panel and bias tape, even stitching on my heavy duty machine was very difficult. The bias tape was simply too stiff. Luckily this helped to structure the neckline, but would not due for the hem. I very carefully hemmed the skirt edge with a narrow rolled hem using the lowest setting on my iron so as to not melt the fabric. Quilting clips were essential for this process.
With the overdress stitched, the fit issues returned, similar as was apparent with the main dress. Here, the costume designer again helped me with some creative dart applications in addition to another major alteration at the shoulder to compensate for the gapping at the front from the weight of the boning with no gathered pigeon breast style.
The overdress bodice with excessive bulk before alteration.
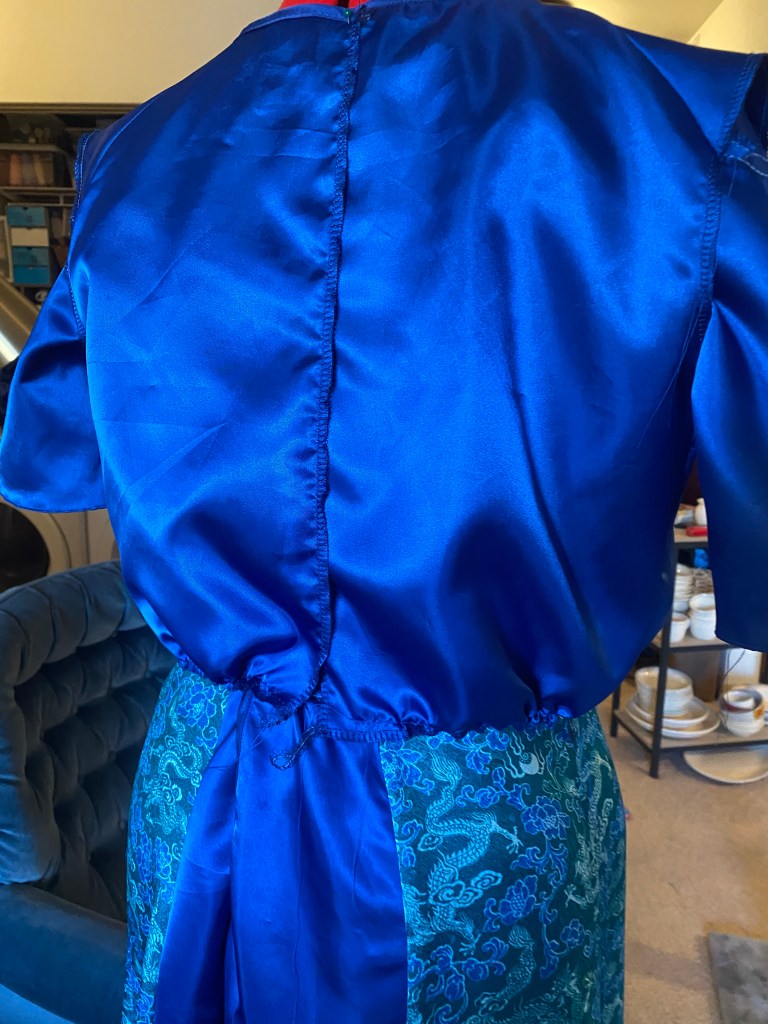
Again, the excess bulk of the bodice is visible from the back. Though, this bulk would have draped in a more pleasant, period appropriate way with a lighter weight material.
Fit issues aside, the skirt is slightly gathered since I removed volume in the cutting process and stitched to the bodice. The overdress was finished at the back with the bias tape and hook and eye closures from neck to waist line. The skirt portion is left open at the center back and finished with a tiny rolled hem.
With the garment constructed, I could begin the fun part of adding beading to hide the many, many mistakes and oddities of the overdress. I’ll admit, I went a bit overboard with beading, but had so much dang fun with it!
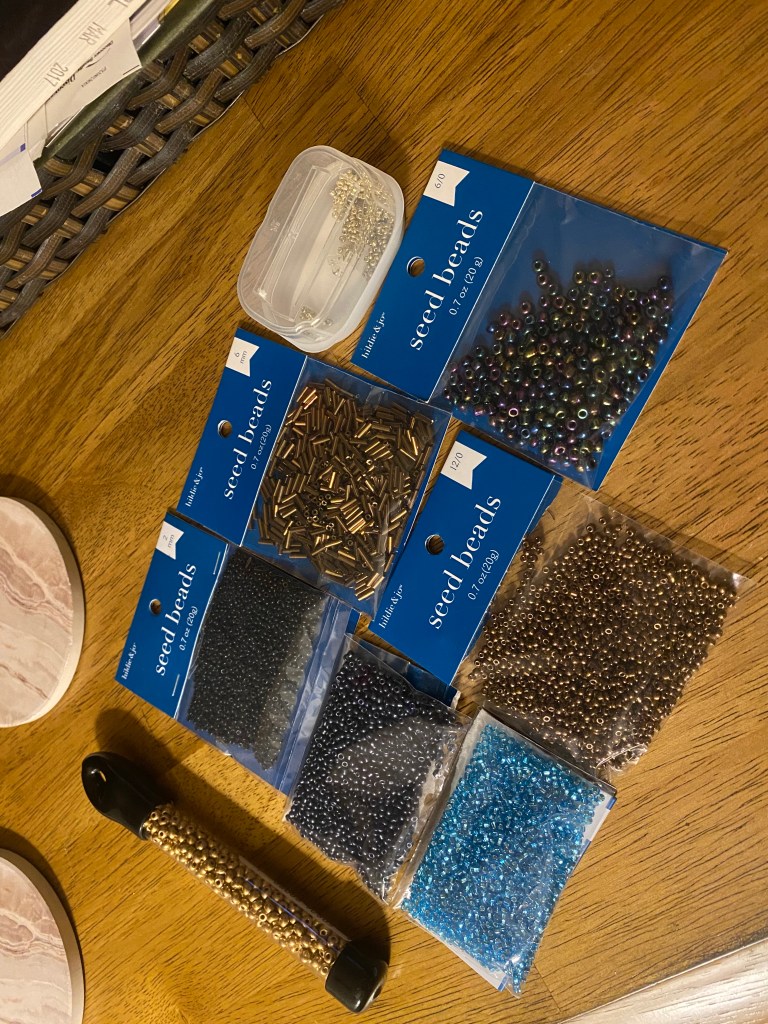
Just a few of the beads I started embellishing with
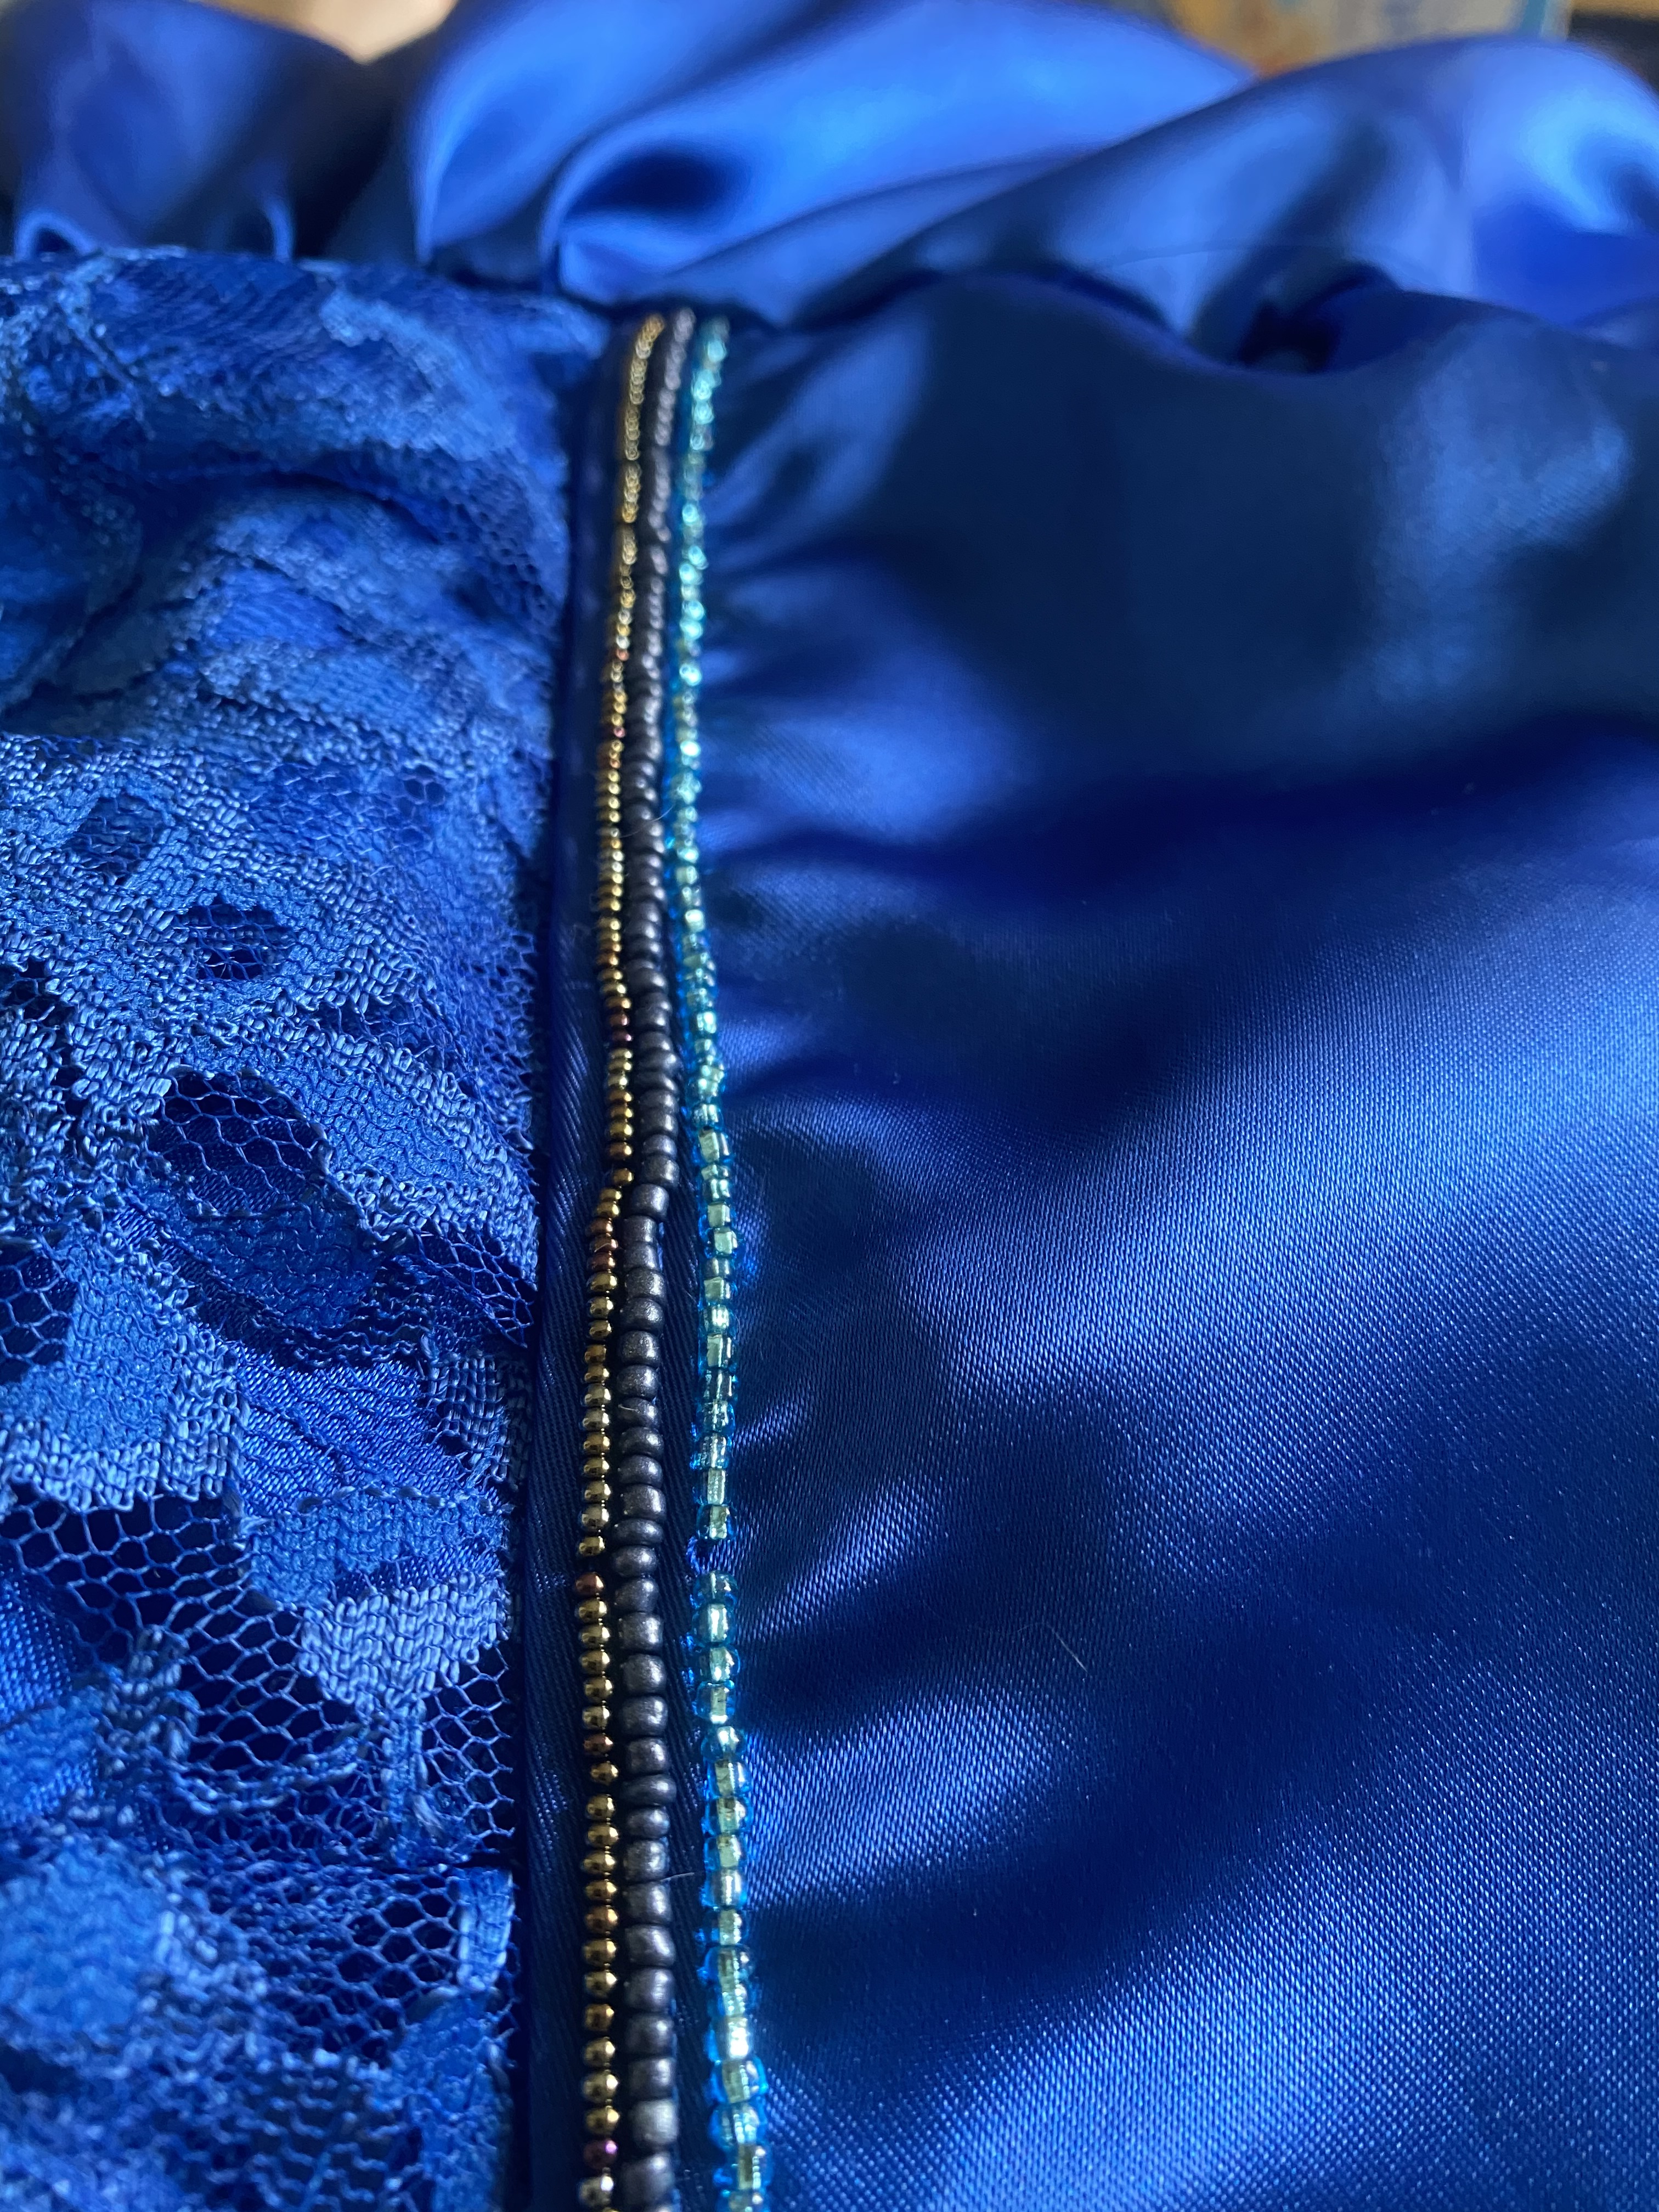
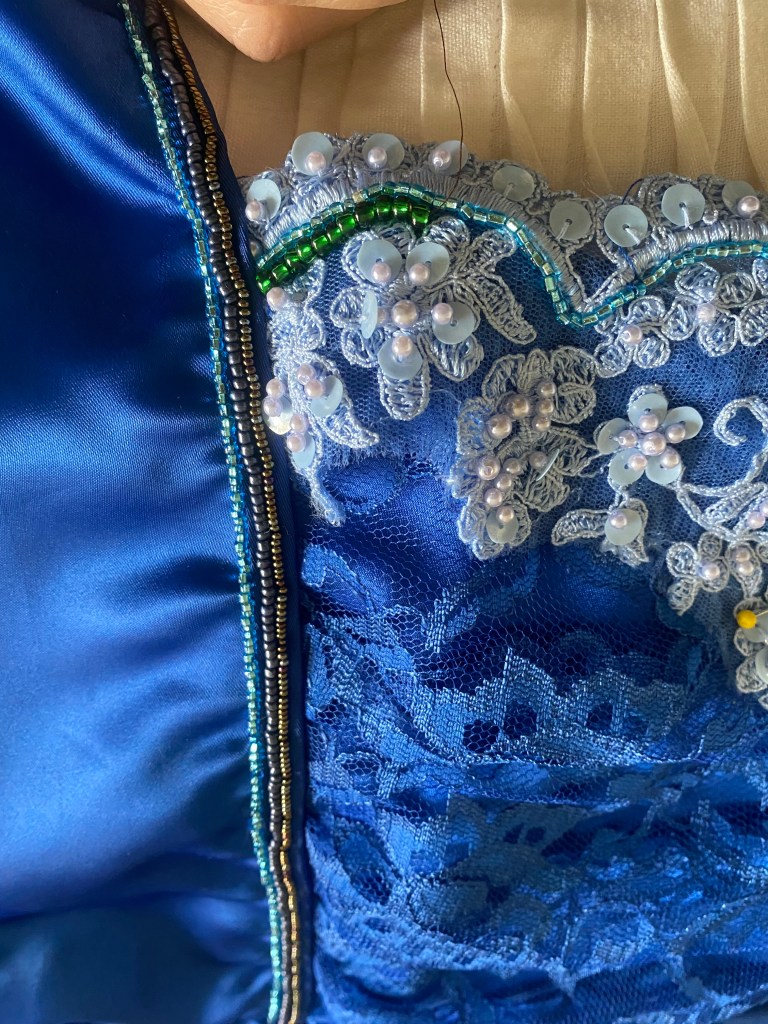
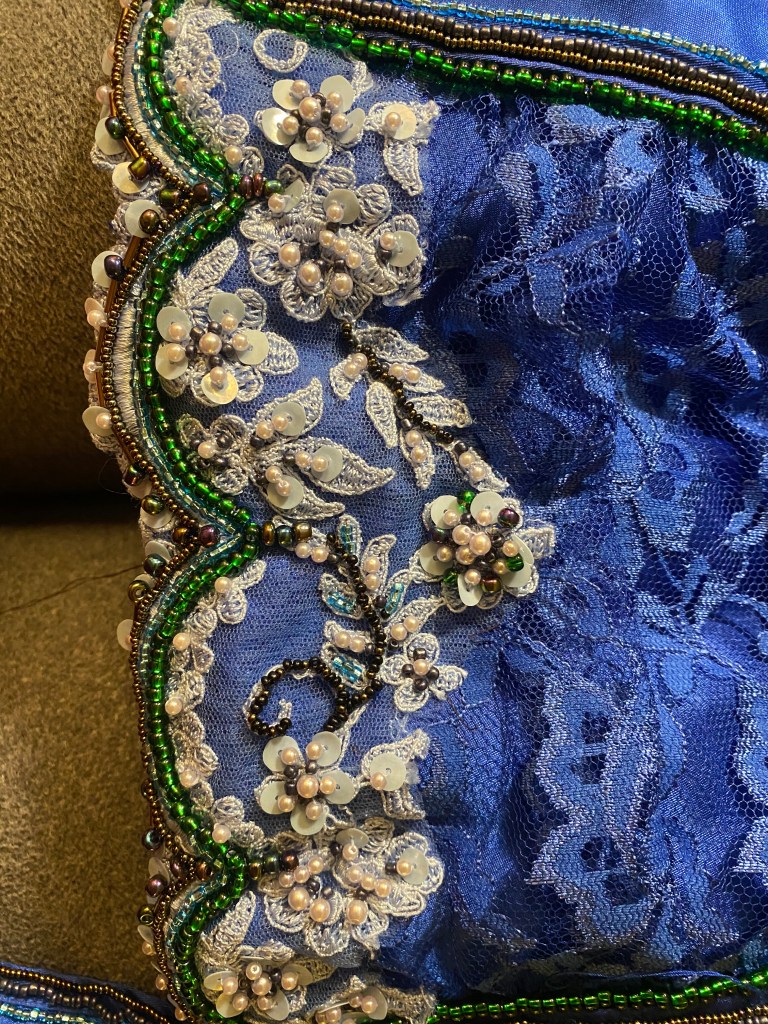
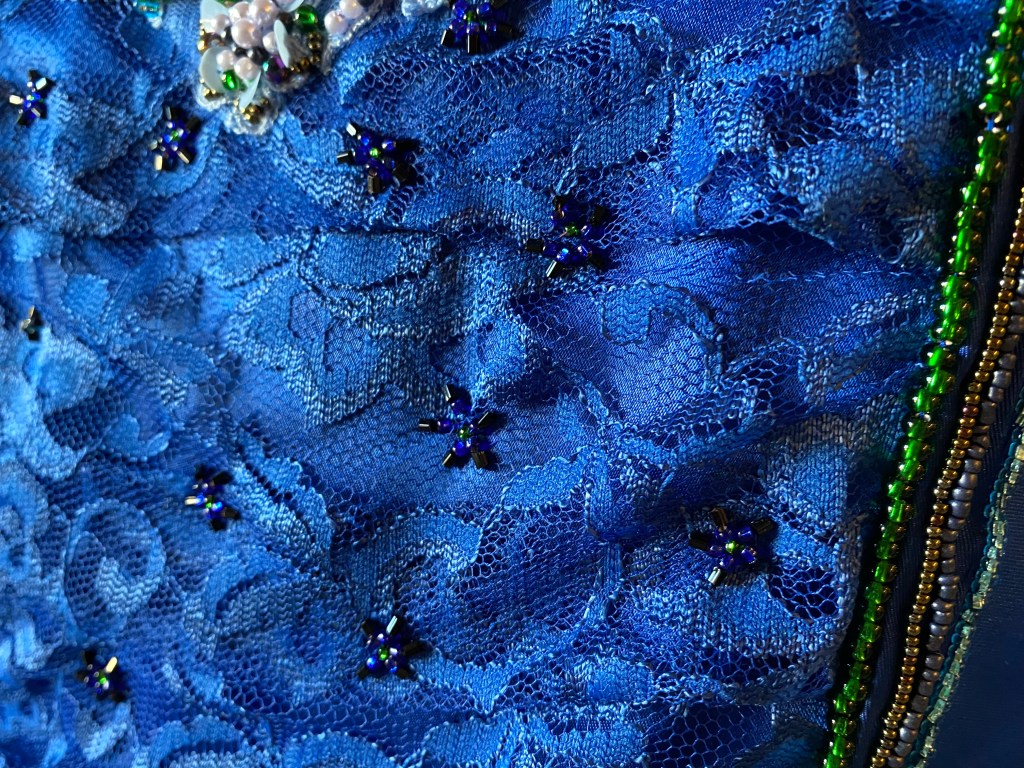
My beads consisted of a selection of copper, navy, turquoise, gold, green, black, and iridescent (in peacock jewel tones of course). I began by adding symmetrical lines of beads along the bias tape finish of the front side panels to hid the top stitching. I also added beaded lines to the light blue applique to mimic the curve of peacock feathers.
This then grew to include beading within the applique to give definition to the pattern and help with blending the bright, light blue with the sapphire of the bodice. I also added beads to the sapphire blue lace portion to give it just a bit more sparkle under the lights.
The one benefit of the added boning was that the beading got quite heavy and the boning kept it from falling forward. I guess I’ll give it the benefit of the doubt there…
Little star beading applied to the lower section of the front panel wasn’t visible to the audience, but caught the stage lights beautifully and helped to tack the lace in place so it wouldn’t bunch funny.
Since I still had a couple days until the show with all hems and closures finished, I also added two rows of beading to the hem of the overdress to hid the top stitching of the hemline (again). I almost ran out of the multicolored copper beads I began this work with, and had to use a mixture of the black, navy, and larger dark gold beads mixed with the copper to make it around the much larger hem than I anticipated. The lesson I learned here was to always have extra beads on hand. In all, the beading took about a week to complete and consisted of 14 different types of beads sourced from my stash, Joann’s, thrift stores, and Hobby Lobby. I kinda went overboard, but absolutely adored the glitter.
Because I was on a roll, I also added a row of blue, turquoise, and green beads to the neckline and sleeve hems of the main dress. All the sparkle!
The gown was complete and Mrs. Juno could come to life on stage. In total, the outfit consisted of the chemise, corset, gown, and overdress, trimmed with a belt, evening gloves, and more jewels than I care to count. It was absolutely exquisite and a good learning experience in using available materials on a tight timeline. I would never have been able to put that much time or effort into an entire production worth of costumes, but am more than pleased to have been able to do the single outfit for myself.
In the end, there are many things I love and many things I’d like another go at. Looking at the productions photos, the fit still wasn’t quite right in the bodice and proportions of the shortened overskirt weren’t quite right as I suspected they would be. The sleeves were too long and don’t drape as well as they should. But these are all lessons learned for the next project and mistakes I hope others can adjust for in their work. It’s a great pattern for a quick build, but in doing it quick I didn’t take the time to think through issues and period accuracy. I’d love to give this pattern another go and think I will in the future. Just have to finish a few other projects first!
And at the end of the day, a project that would have required at least 15 yards of raw materials was completed from a repurposed dress and theatrical kimono that otherwise would’ve never seen the light of day again. All that was left at when the dress was complete amounted to maybe a half yard of material in strips of remnants. A sustainable upcycling job done well!